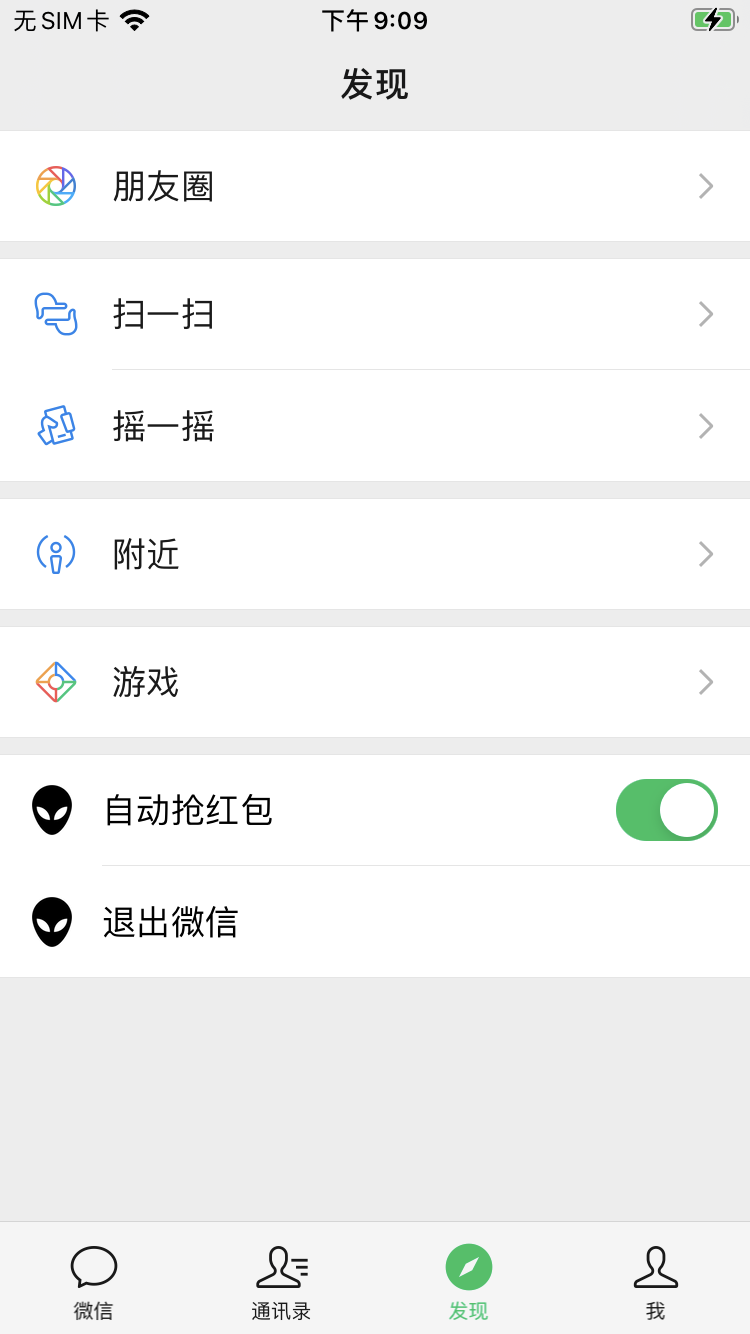
1、明确需求
在发现页添加两行信息,自动抢红包和退出微信,且开关状态需要重启App后也能保存,实现退出微信功能。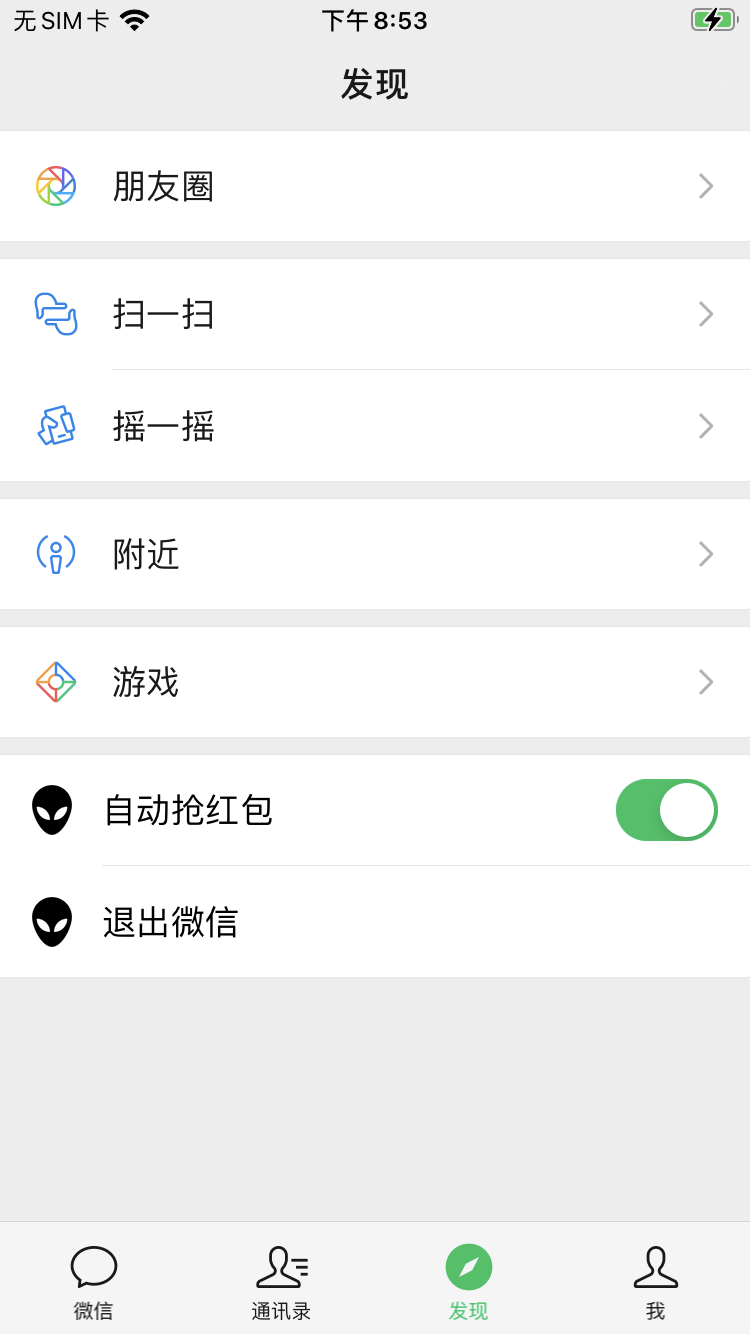
2、思路整理
第一步:找到需要hook的类
通过Reveal查看微信发现页的布局,是一个TableView,类名为MMMainTableView: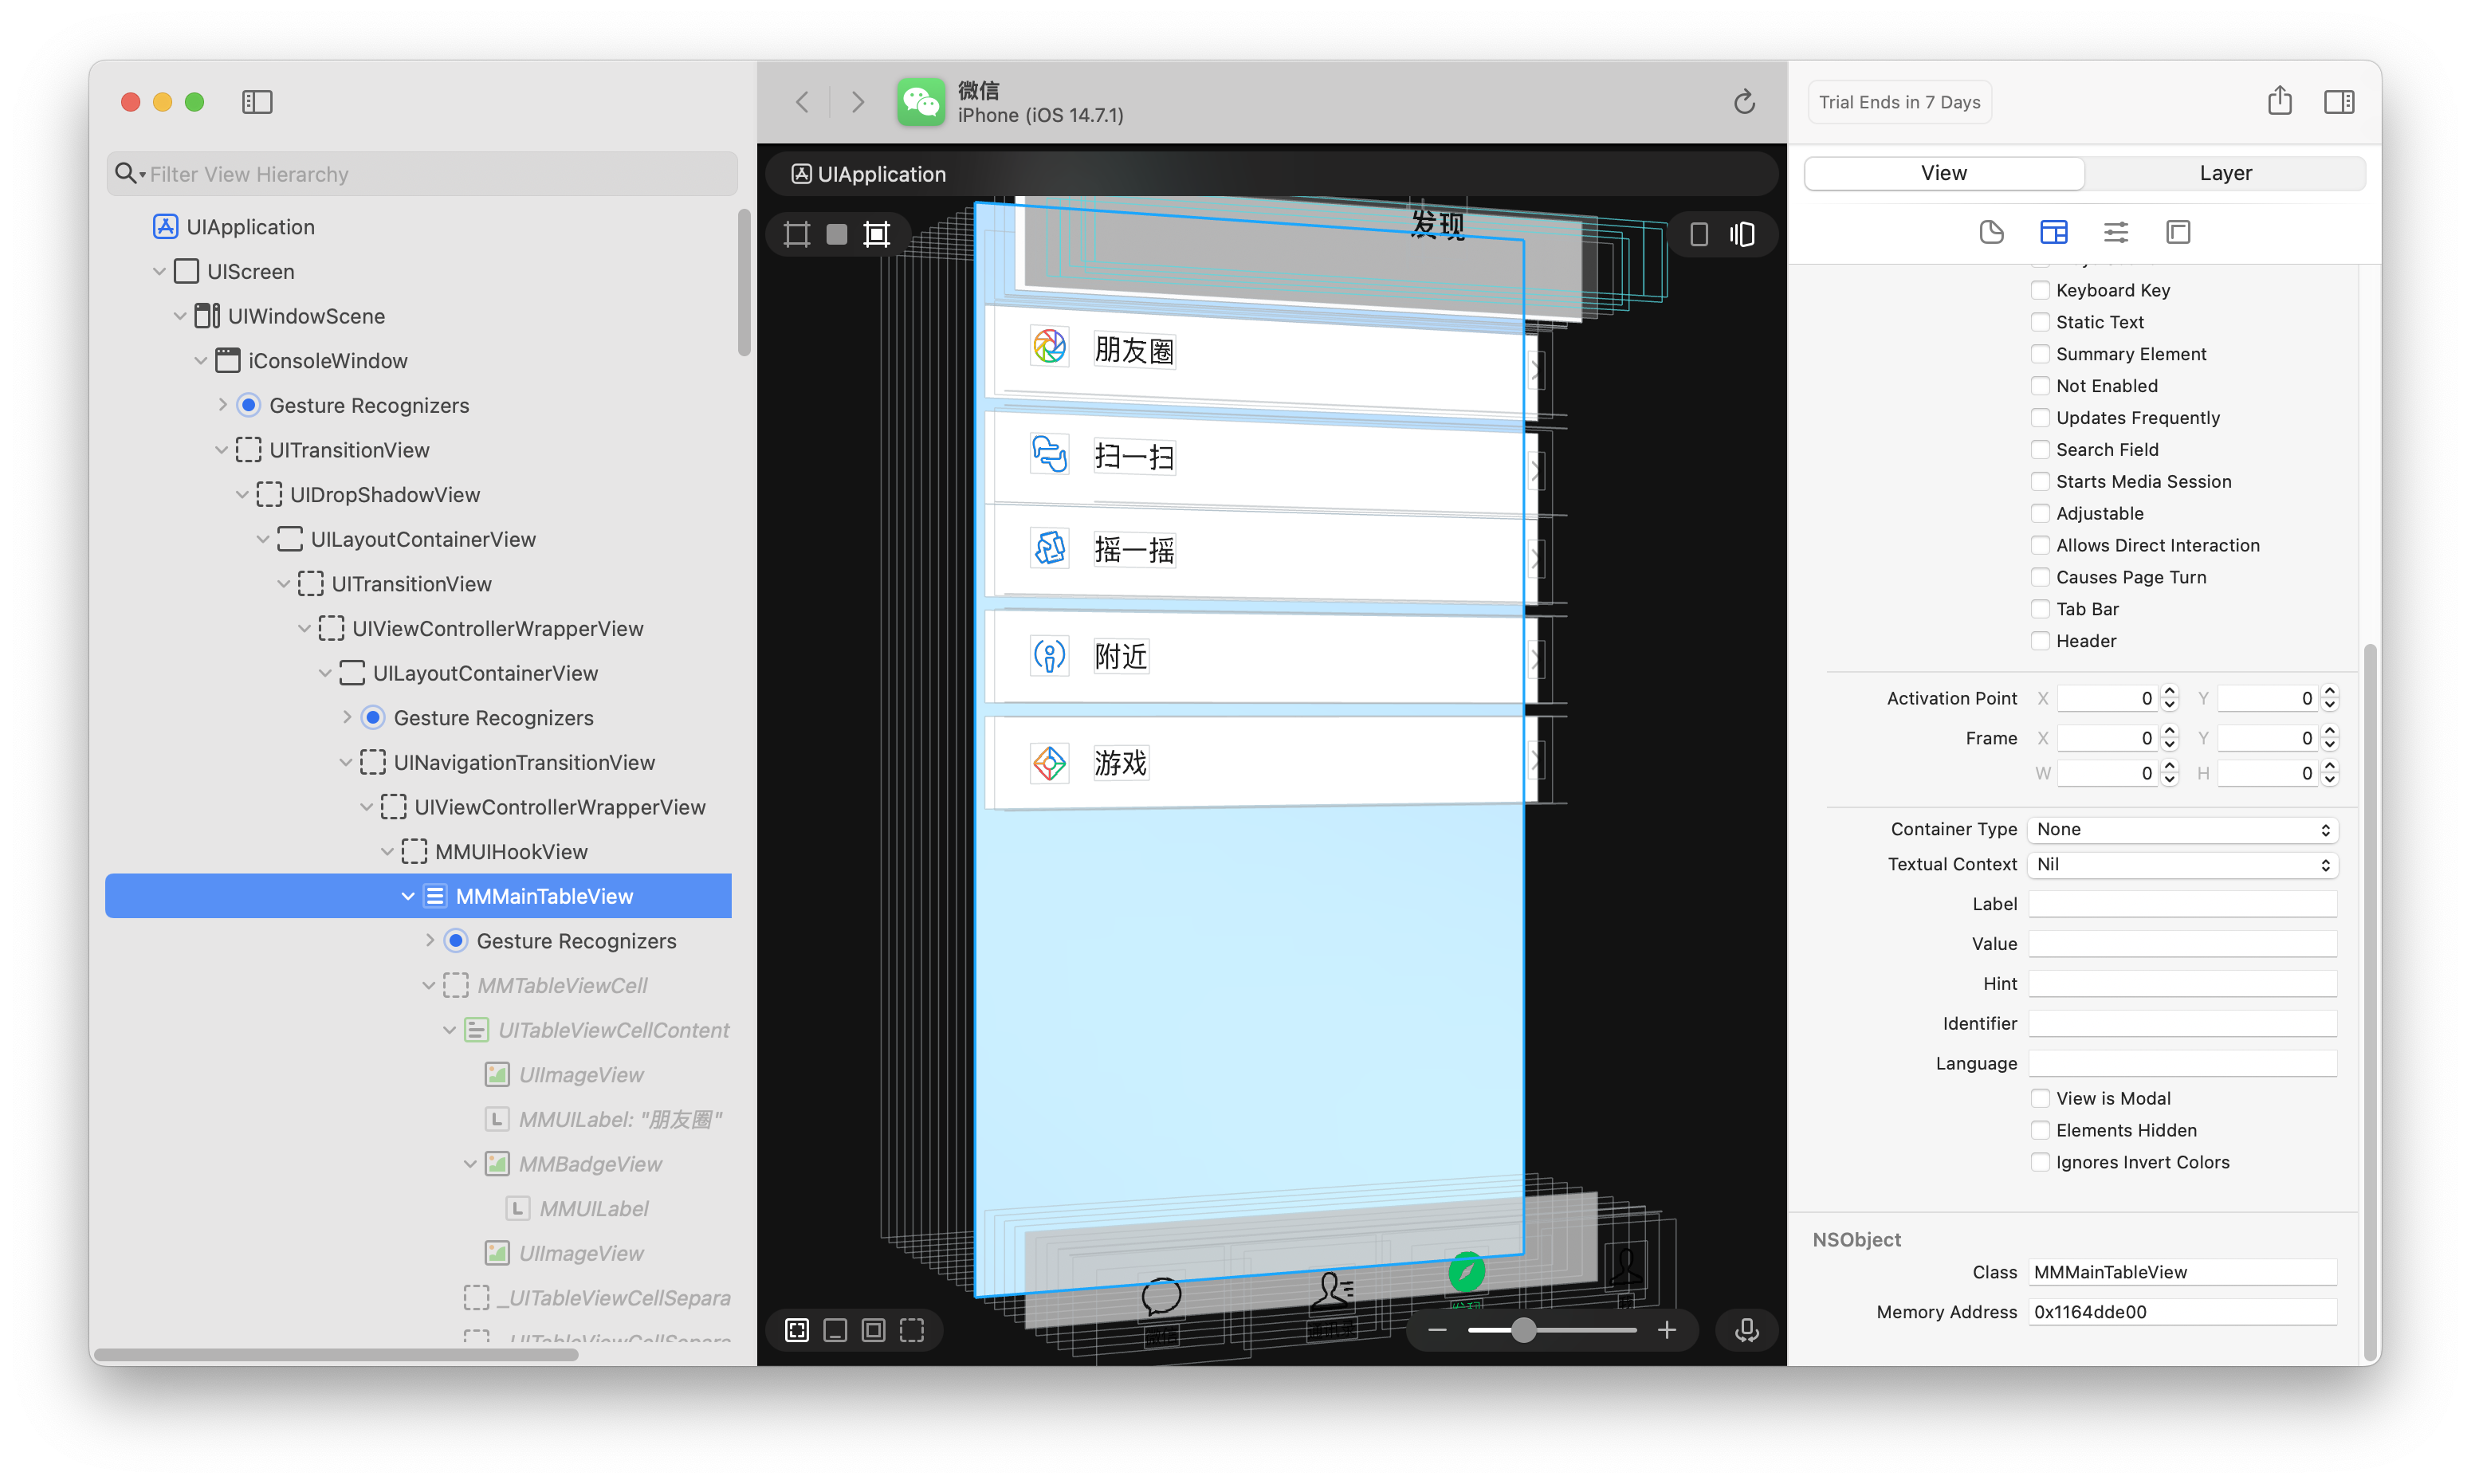
如果想修改TableView的显示内容就需要修改其dataSource中的方法,利用Cycript查看MMMainTableView的dataSource:
cy# #0x1164dde00.dataSource
#"<FindFriendEntryViewController: 0x115ba8c00>"
通过打印可以看到是一个类名为FindFriendEntryViewController的控制器,再获取正在显示的视图控制器验证一下:
cy# MJFrontVc()
#"<FindFriendEntryViewController: 0x115ba8c00>"
这样就可以确定了MMMainTableView的dataSource就是FindFriendEntryViewController,也就是“发现页”。
第二步:分析头文件
脱壳后通过class-dump导出微信可执行文件的头文件,找到FindFriendEntryViewController.h: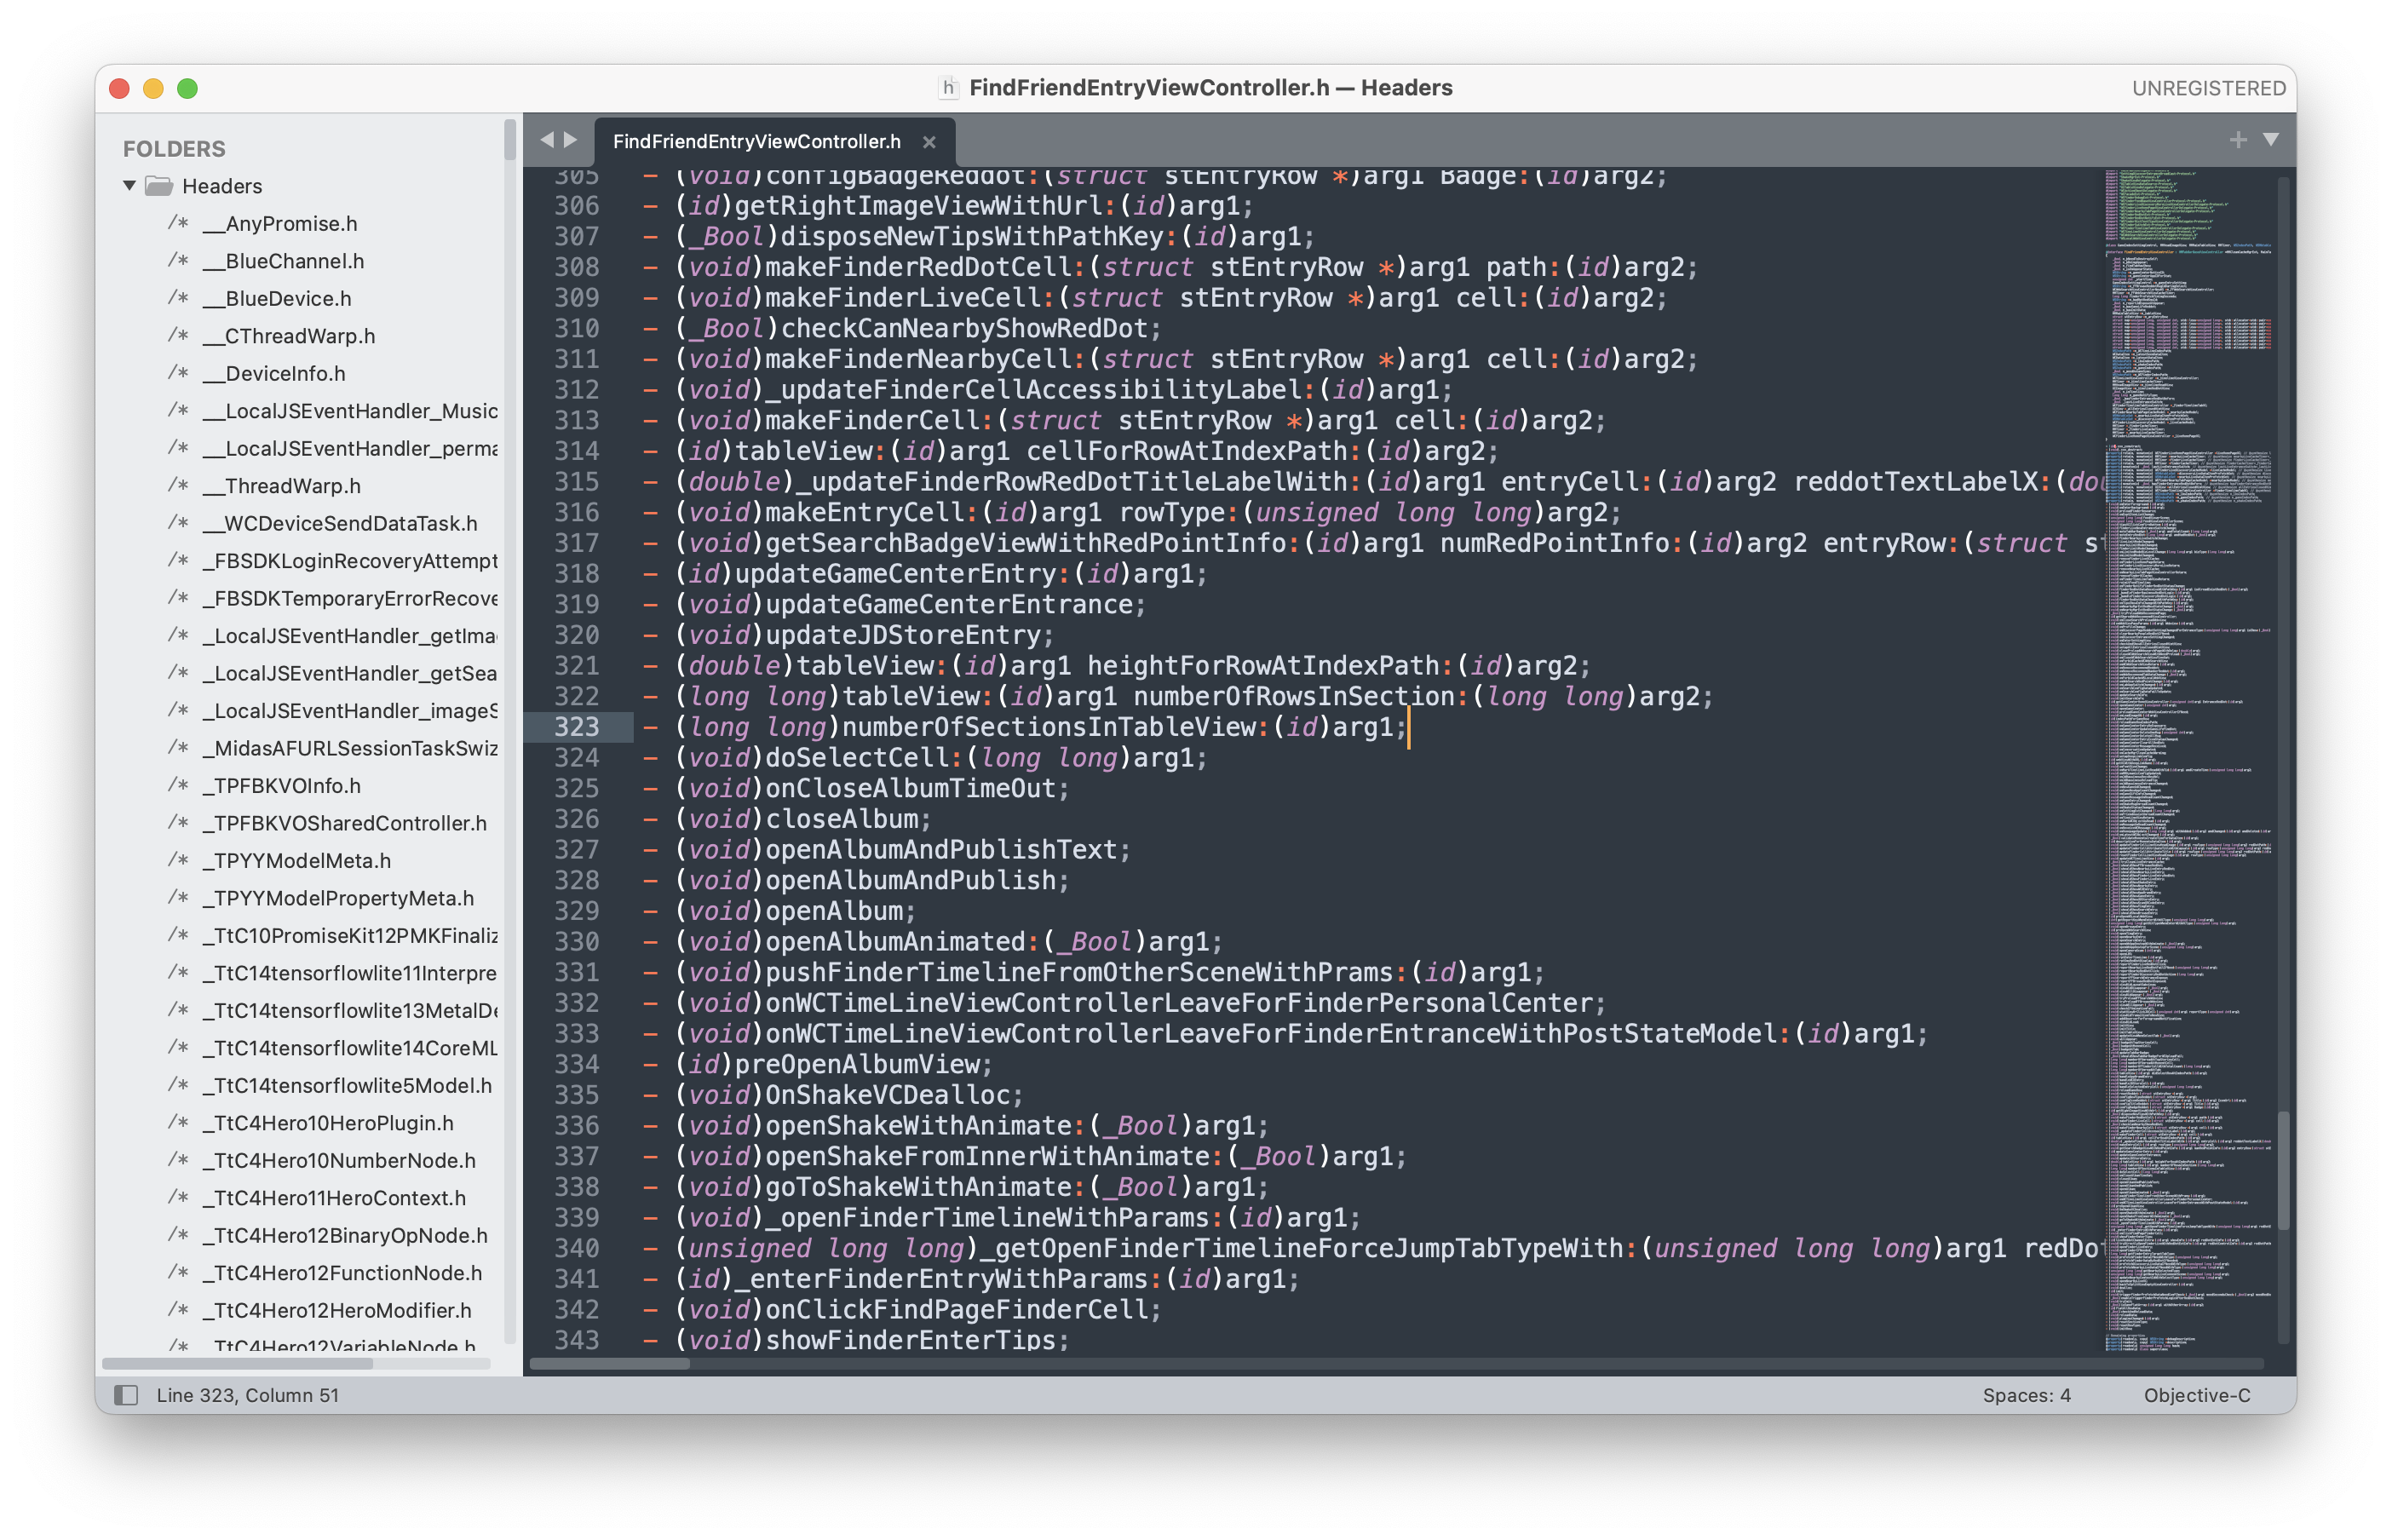
可以在头文件中看到numberOfSectionsInTableView等TableView的dataSource方法,下面就可以通过hook这些方法来修改发现页的显示了。
3、编写代码
3.1、添加两行自定义Cell
hook了UITableViewDataSource的几个方法,添加了两个Cell:
#import "FindFriendEntryViewController.h"%hook FindFriendEntryViewController// 一共有多少组 %orig代表调用原始方法,参数可以传也可以不传- (long long)numberOfSectionsInTableView:(id)arg1 {// 返回原始个数 + 1return %orig + 1;}// 每组有多少行- (long long)tableView:(id)arg1 numberOfRowsInSection:(long long)arg2 {[self numberOfSectionsInTableView:arg1];// 不是最后一组,返回原始行数if (arg2 != [self numberOfSectionsInTableView:arg1] - 1) {return %orig;}// 最后一组,返回2行return 2;}// 设置行高,通过Reveal查看原始行高- (double)tableView:(id)arg1 heightForRowAtIndexPath:(id)arg2 {// 不是最后一组,返回原始高度if ([arg2 section] != [self numberOfSectionsInTableView:arg1] - 1) {return %orig;}// 最后一组,返回自定义高度return 56;}// 每一行的cell- (id)tableView:(id)arg1 cellForRowAtIndexPath:(id)arg2 {// 不是最后一组,返回原始cellif ([arg2 section] != [self numberOfSectionsInTableView:arg1] - 1) {return %orig;}// 最后一组返回自定义cellUITableViewCell *cell = [[UITableViewCell alloc] initWithStyle:UITableViewCellStyleDefault reuseIdentifier:@"XLCellID"];cell.backgroundColor = [UIColor whiteColor];cell.textLabel.text = @"New cell";return cell;}%end
知识点:
%orig:调用hook的原始方法,参数可以传也可以不传
[arg2 section]:class-dump导出的头文件参数都是id类型,所以调用属性时不能使用点语法,只能通过方法调用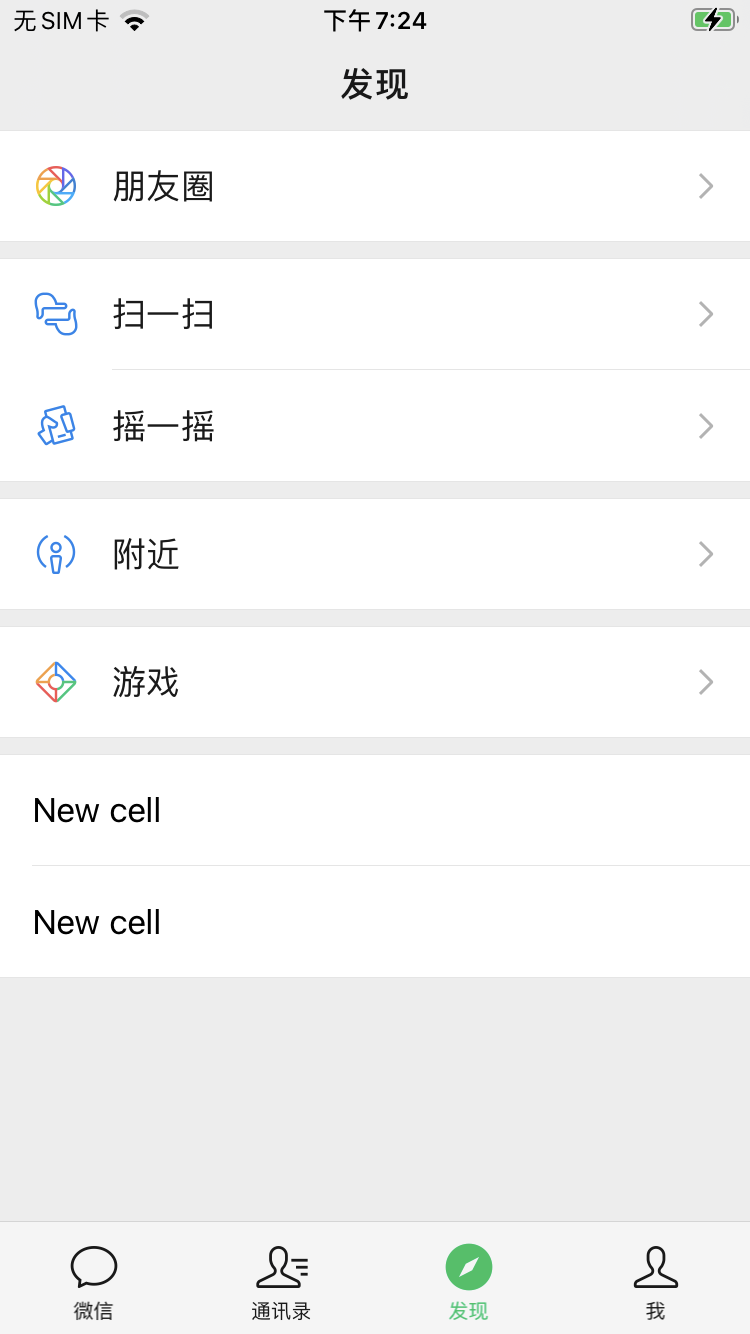
3.2、添加开关、退出功能
添加了UISwitch开关和方法,添加了退出微信的功能:
#define XLDefaults [NSUserDefaults standardUserDefaults]#define XLAutoSwitchKey @"XLAutoSwitchKey"#import "FindFriendEntryViewController.h"%hook FindFriendEntryViewController// 一共有多少组 %orig代表调用原始方法,参数可以传也可以不传- (long long)numberOfSectionsInTableView:(id)arg1 {// 返回原始个数 + 1return %orig + 1;}// 每组有多少行- (long long)tableView:(id)arg1 numberOfRowsInSection:(long long)arg2 {[self numberOfSectionsInTableView:arg1];// 不是最后一组,返回原始行数if (arg2 != [self numberOfSectionsInTableView:arg1] - 1) {return %orig;}// 最后一组,返回2行return 2;}// 设置行高- (double)tableView:(id)arg1 heightForRowAtIndexPath:(id)arg2 {// 不是最后一组,返回原始高度if ([arg2 section] != [self numberOfSectionsInTableView:arg1] - 1) {return %orig;}// 最后一组,返回自定义高度return 56;}// 每一行的cell- (id)tableView:(id)arg1 cellForRowAtIndexPath:(id)arg2 {// 不是最后一组,返回原始cellif ([arg2 section] != [self numberOfSectionsInTableView:arg1] - 1) {return %orig;}UITableViewCell *cell = nil;if ([arg2 row] == 0) {static NSString* cellId = @"xl_cellID_Auto";cell = [arg1 dequeueReusableCellWithIdentifier:cellId];if (cell == nil) {cell = [[UITableViewCell alloc] initWithStyle:UITableViewCellStyleDefault reuseIdentifier:cellId];cell.backgroundColor = [UIColor whiteColor];}cell.textLabel.text = @"自动抢红包";UISwitch *switchView = [[UISwitch alloc] init];switchView.on = [XLDefaults boolForKey:XLAutoSwitchKey];[switchView addTarget:self action:@selector(xl_autoChange:) forControlEvents:UIControlEventValueChanged];cell.accessoryView = switchView;}if ([arg2 row] == 1) {static NSString* cellId = @"xl_cellID_Auto";cell = [arg1 dequeueReusableCellWithIdentifier:cellId];if (cell == nil) {cell = [[UITableViewCell alloc] initWithStyle:UITableViewCellStyleDefault reuseIdentifier:cellId];cell.backgroundColor = [UIColor whiteColor];}cell.textLabel.text = @"退出微信";}return cell;}// 点击监听- (void)tableView:(id)arg1 didSelectRowAtIndexPath:(id)arg2 {// 不是最后一组,实现原始点击方法if ([arg2 section] != [self numberOfSectionsInTableView:arg1] - 1) {return %orig;}// 取消选中[arg1 deselectRowAtIndexPath:arg2 animated:YES];// 退出程序if ([arg2 row] == 1) {abort();}}// 开关方法,新增方法需要添加%new,并且添加前缀,避免重复%new- (void)xl_autoChange:(UISwitch *)switchView {[XLDefaults setBool:switchView.isOn forKey:XLAutoSwitchKey];[XLDefaults synchronize];}%end
知识点:
abort():abort()退出程序的方法会比exit(0)时间短
%new:在%hook中的方法默认都会被认为是需要hook的方法,也就是原类已经存在的方法。所以如果添加新的方法时,需要在方法前添加%new标明这是新的方法。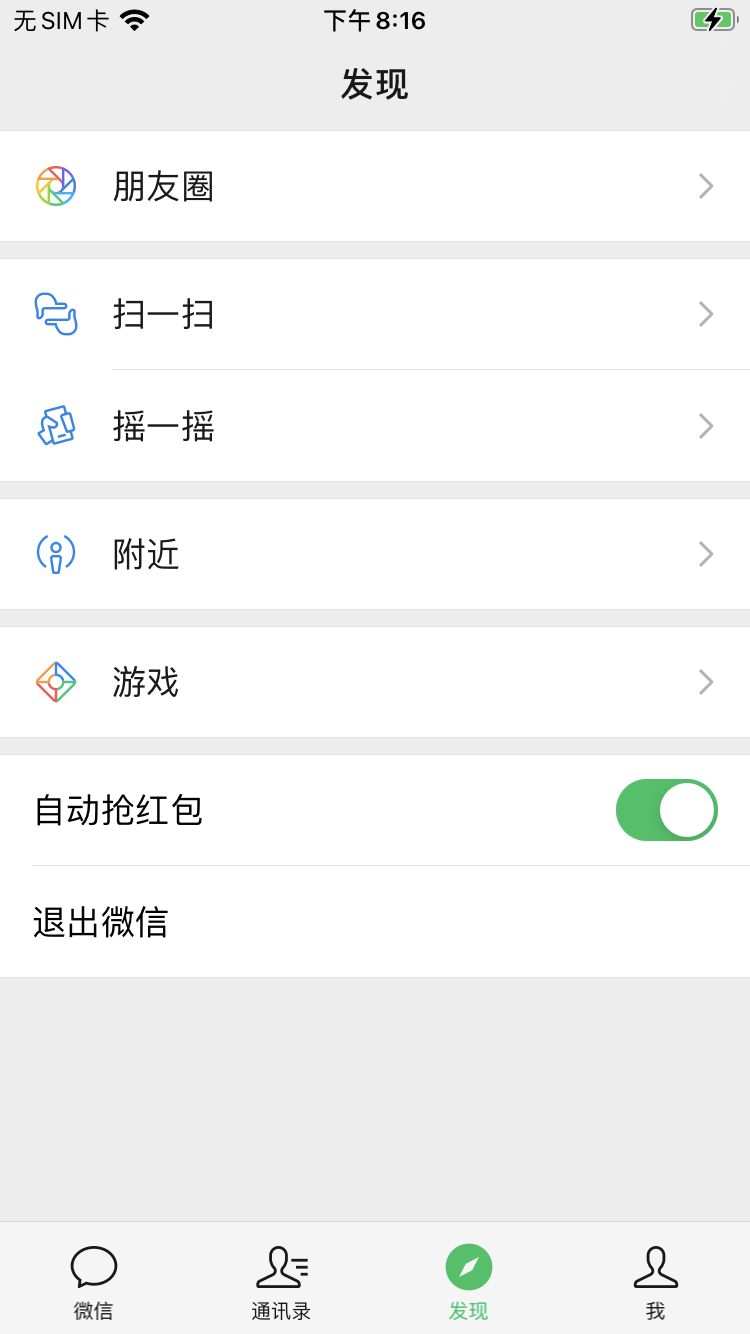
3.3、添加图标
添加了图片资源:
#define XLDefaults [NSUserDefaults standardUserDefaults]#define XLAutoSwitchKey @"XLAutoSwitchKey"#define XLFile(path) @"/Library/Caches/XLWeChat/" #path#import "FindFriendEntryViewController.h"%hook FindFriendEntryViewController// 一共有多少组 %orig代表调用原始方法,参数可以传也可以不传- (long long)numberOfSectionsInTableView:(id)arg1 {// 返回原始个数 + 1return %orig + 1;}// 每组有多少行- (long long)tableView:(id)arg1 numberOfRowsInSection:(long long)arg2 {[self numberOfSectionsInTableView:arg1];// 不是最后一组,返回原始行数if (arg2 != [self numberOfSectionsInTableView:arg1] - 1) {return %orig;}// 最后一组,返回2行return 2;}// 设置行高- (double)tableView:(id)arg1 heightForRowAtIndexPath:(id)arg2 {// 不是最后一组,返回原始高度if ([arg2 section] != [self numberOfSectionsInTableView:arg1] - 1) {return %orig;}// 最后一组,返回自定义高度return 56;}// 每一行的cell- (id)tableView:(id)arg1 cellForRowAtIndexPath:(id)arg2 {// 不是最后一组,返回原始cellif ([arg2 section] != [self numberOfSectionsInTableView:arg1] - 1) {return %orig;}// 自定义cellUITableViewCell *cell = nil;NSString* cellId = [arg2 row] == 0 ? @"xl_cellID_Auto" : @"xl_cellID_Auto";cell = [arg1 dequeueReusableCellWithIdentifier:cellId];if (cell == nil) {cell = [[UITableViewCell alloc] initWithStyle:UITableViewCellStyleDefault reuseIdentifier:cellId];cell.backgroundColor = [UIColor whiteColor];// 图片cell.imageView.image = [UIImage imageWithContentsOfFile:XLFile(Alien.png)];}if ([arg2 row] == 0) {cell.textLabel.text = @"自动抢红包";//开关UISwitch *switchView = [[UISwitch alloc] init];switchView.on = [XLDefaults boolForKey:XLAutoSwitchKey];[switchView addTarget:self action:@selector(autoChange:) forControlEvents:UIControlEventValueChanged];cell.accessoryView = switchView;}if ([arg2 row] == 1) {cell.textLabel.text = @"退出微信";}return cell;}// 点击监听- (void)tableView:(id)arg1 didSelectRowAtIndexPath:(id)arg2 {// 不是最后一组,实现原始点击方法if ([arg2 section] != [self numberOfSectionsInTableView:arg1] - 1) {return %orig;}// 取消选中[arg1 deselectRowAtIndexPath:arg2 animated:YES];// 退出程序if ([arg2 row] == 1) {abort();}}// 开关方法,新增方法需要添加%new,并且添加前缀,避免重复%new- (void)xl_autoChange:(UISwitch *)switchView {[XLDefaults setBool:switchView.isOn forKey:XLAutoSwitchKey];[XLDefaults synchronize];}%end
知识点:
layout:theos有规定,打包资源需要在项目的跟路径新建一个layout文件夹,并把资源添加到layout文件夹内,资源在layout文件夹中的路径也就对应着在iPhone上存储的路径(Layout/xxx/xxx/1.png -> Device/xxx/xxx/1.png)。资源最好保存在/Library/Caches/
宏定义资源路径:根据OC语法,下面两行代码是等价的:
@"abcdef"@"abc" "def"
所以资源路径可以定义为:
#define XLFile(path) @"/Library/Caches/XLWeChat/" #path
path 是宏定义语法:# + 参数 会自动给参数添加双引号
4、最终效果
5、错误处理
5.1、self报错
使用self调用方法时,会报下面错误:
Tweak.x:14:3: error: receiver type 'FindFriendEntryViewController' for instance message is a forward declaration[self numberOfSectionsInTableView:arg1];^~~~Tweak.x:25:8: note: forward declaration of class here@class FindFriendEntryViewController;^
需要在Tweak.x同级目录下新建一个hook类的同名头文件,并在Tweak.x中引用这个头文件:
@interface FindFriendEntryViewController@end
#import "FindFriendEntryViewController.h"
或者直接在Tweak.x中声明:
@interface FindFriendEntryViewController@end
5.2、找不到方法
make时会报错没有声明方法:
Tweak.x:14:8: error: no visible @interface for 'FindFriendEntryViewController' declares the selector 'numberOfSectionsInTableView:'[self numberOfSectionsInTableView:arg1];~~~~ ^~~~~~~~~~~~~~~~~~~~~~~~~~~
self调用的方法需要在头文件里进行声明,但是由于现在hook的方法都是UITableViewDataSource中的方法,所以让FindFriendEntryViewController遵守UITableViewDataSource即可,并且导入UIKit头文件:
#import <UIKit/UIKit.h>@interface FindFriendEntryViewController<UITableViewDataSource>@end
如果不是协议中的方法,可以直接添加方法:
#import <UIKit/UIKit.h>@interface FindFriendEntryViewController<UITableViewDataSource>- (void)function(id)arg;@end
