[TOC]
线上文档
quill官方文档
Quill中文文档
https://kang-bing-kui.gitbook.io/quill/wen-dang-document/delta
Vue-Quill-Editor在vue中的使用方式
1. 安装vue-quill-editor
npm install vue-quill-editor -S
2. 安装quill
npm install quill -S
3. 引入
import { quillEditor } from 'vue-quill-editor' // 调用富文本编辑器
import 'quill/dist/quill.snow.css' // 富文本编辑器外部引用样式  三种样式三选一引入即可
//import 'quill/dist/quill.core.css'
//import 'quill/dist/quill.bubble.css'
import * as Quill from 'quill'; // 富文本基于quill
4. To use
<!-- template部分 -->
<quill-editor
    v-model="content"
    ref="myQuillEditor"
    :options="editorOption"
    @focus="onEditorFocus($event)"
    @blur="onEditorBlur($event)"
    @change="onEditorChange($event)">
</quill-editor>
<!-- js data部分 -->
editor: null,   // 富文本编辑器对象
content: `<p></p><p><br></p><ol></ol>`, // 富文本编辑器默认内容
editorOption: { //  富文本编辑器配置
    modules: {
        toolbar: '#toolbar'
    },
    theme: 'snow',
    placeholder: '请输入正文'
},
<!-- js mounted部分 -->
this.editor = this.$refs.myQuillEditor.quill;
<!-- js beforeDestroy部分 -->
this.editor = null;
delete this.editor;
<!-- js methods部分 -->
// 准备富文本编辑器
onEditorReady (editor) {},
// 富文本编辑器 失去焦点事件
onEditorBlur (editor) {},
// 富文本编辑器 获得焦点事件
onEditorFocus (editor) {},
// 富文本编辑器 内容改变事件
onEditorChange (editor) {},
<!-- js components部分 -->
components: {
    quillEditor
}
5. 如果想自定义工具栏:
<!-- template部分 -->
<div id="toolbar" slot="toolbar">
    <button class="ql-bold" title="加粗">Bold</button>
    <select class="ql-header" title="段落格式">
        <option selected>正文</option>
        <option value="2">标题1</option>
        <option value="3">标题2</option>
        <option value="4">标题3</option>
    </select>
    <button class="ql-list" value="ordered" title="有序列表"></button>
    <button class="ql-list" value="bullet" title="无序列表"></button>
    <select class="ql-color" value="color" title="字体颜色"></select>
    <span class="icon-pic custom-icon" title="图片" @click="insertImgClick($event)"></span>  <!-- 插入图片 -->
    <span class="icon-video custom-icon" title="视频" @click="insertImgClick($event)"></span>  <!-- 插入视频 -->
</div>
<input style="display: none;" type="file" id="insert_image" @change="fileInsert($event)">  <!-- 选择图片input -->
<input style="display: none;" type="file" id="insert_video" @change="fileInsert($event)">  <!-- 选择视频input -->
<!-- js methods部分 -->
// 富文本编辑器 点击插入图片或者视频
insertImgClick (e) {
    if (e.target.className.indexOf('icon-pic') != -1) {
        document.getElementById('insert_image').click();
    } else if (e.target.className.indexOf('icon-video') != -1) {
        document.getElementById('insert_video').click();
    }
},
// 富文本编辑器 点击插入图片或者视频上传并预览
fileInsert (e) {
    var oFile = e.target.files[0];
    if (typeof (oFile) === 'undefined') {
        return;
    }
    let sExtensionName = oFile.name.substring(oFile.name.lastIndexOf('.') + 1).toLowerCase();   // 文件扩展名
    let sfileType = ''; // 上传文件类型
    if (e.target.id == 'insert_image') {
        sfileType = 'image'
        if (sExtensionName !== 'png' && sExtensionName !== 'jpg' && sExtensionName !== 'jpeg') {
            alert('不支持该类型图片');
            return;
        }
    }
    if (e.target.id == 'insert_video') {
        sfileType = 'video';
        if (sExtensionName !== 'mp4' && sExtensionName !== 'avi' && sExtensionName !== 'mov') {
            alert('不支持该类型视频');
            return;
        }
        let maxSize = 100*1024*1024;    // 100MB
        if (oFile.size > maxSize) {
            alert('上传视频大小不能超过100MB');
            return;
        }
    }
    var reader = new FileReader();
    reader.readAsDataURL(oFile);
    reader.onloadend = () => {
        let formData = new FormData(); // 通过formdata上传
        formData.append('file', oFile);
        let sUrl = '';
        if (sfileType == 'image') {
            sUrl = 'Pic';
        }
        if (sfileType == 'video') {
            sUrl = 'Vie';
        }
        var url = this.api_config + '/dealerIndex/upload' + sUrl + '.htm';
        this.axios.post(url, formData, {
            headers: { 'Content-Type': 'multipart/form-data' }
        }).then((res) => {
            this.editor.insertEmbed(this.editor.selection.savedRange.index, sfileType, res.data.data);  // 这个方法用来手动插入dom到编辑器里
            let isAndroid = this.$is_android(); // 判断是ios还是android
            if (isAndroid) {
                $('video').removeAttr('controls');
                $('video').attr('x5-video-player-type', 'h5');
            }
            this.editor.setSelection(this.editor.selection.savedRange.index + 1);  // 这个方法可以获取光标位置
        }).catch((response) => {
            console.log('失败', response);
        })
    }
},
关于编辑器里面的一些操作可以到quill官方查看,用法和配置项的的介绍很详细,很好用
6. 如果想更好地操作插入的video,可以把iframe改成h5的video,通过下面这段代码:
import { Quill } from 'vue-quill-editor'
// 源码中是import直接倒入,这里要用Quill.import引入
const BlockEmbed = Quill.import('blots/block/embed')
const Link = Quill.import('formats/link')
const ATTRIBUTES = ['height', 'width']
class Video extends BlockEmbed {
  static create (value) {
    const node = super.create(value)
    // 添加video标签所需的属性
    node.setAttribute('controls', 'controls')   // 控制播放器
    node.setAttribute('type', 'video/mp4')
    node.setAttribute('style', 'object-fit:fill;width: 100%;')
    node.setAttribute('preload', 'auto')    // auto - 当页面加载后载入整个视频  meta - 当页面加载后只载入元数据  none - 当页面加载后不载入视频
    node.setAttribute('webkit-playsinline', 'true') // 兼容ios 不全屏播放
    node.setAttribute('playsinline', 'true')
    node.setAttribute('x-webkit-airplay', 'allow')
    // node.setAttribute('x5-video-player-type', 'h5') // 启用H5播放器,是wechat安卓版特性
    node.setAttribute('x5-video-orientation', 'portraint') // 竖屏播放 声明了h5才能使用  播放器支付的方向,landscape横屏,portraint竖屏,默认值为竖屏
    node.setAttribute('x5-playsinline', 'true') // 兼容安卓 不全屏播放
    node.setAttribute('x5-video-player-fullscreen', 'true')    // 全屏设置,设置为 true 是防止横屏
    node.setAttribute('src', this.sanitize(value))
    return node
  }
  static formats (domNode) {
    return ATTRIBUTES.reduce((formats, attribute) => {
      if (domNode.hasAttribute(attribute)) {
        formats[attribute] = domNode.getAttribute(attribute)
      }
      return formats
    }, {})
  }
  static sanitize (url) {
    return Link.sanitize(url) // eslint-disable-line import/no-named-as-default-member
  }
  static value (domNode) {
    return domNode.getAttribute('src')
  }
  format (name, value) {
    if (ATTRIBUTES.indexOf(name) > -1) {
      if (value) {
        this.domNode.setAttribute(name, value)
      } else {
        this.domNode.removeAttribute(name)
      }
    } else {
      super.format(name, value)
    }
  }
  html () {
    const { video } = this.value()
    return `<a href="${video}">${video}</a>`
  }
}
Video.blotName = 'video' // 这里不用改,楼主不用iframe,直接替换掉原来,如果需要也可以保留原来的,这里用个新的blot
Video.className = 'ql-video'
Video.tagName = 'video' // 用video标签替换iframe
export default Video
然后再把它引入到有编辑器的那个文件里:
import Video from '../../plugins/video.js'; // 插入h5 video视频
Quill.register(Video, true);  // 注册video
Vue中实现多图片上传到服务器
toolBar设置
// quilt插件的toolBar自定义
export const toolBar = [
  ['bold', 'italic', 'underline', 'strike'], // toggled buttons
  // ['blockquote', 'code-block'],
  [{ 'header': 1 }, { 'header': 2 }], // custom button values
  [{ 'list': 'ordered' }, { 'list': 'bullet' }],
  // [{ 'script': 'sub' }, { 'script': 'super' }], // superscript/subscript
  [{ 'indent': '-1' }, { 'indent': '+1' }], // outdent/indent
  // [{ 'direction': 'rtl' }], // text direction

  [{ 'size': ['small', false, 'large', 'huge'] }], // custom dropdown
  [{ 'header': [1, 2, 3, 4, 5, 6, false] }],

  [{ 'color': [] }, { 'background': [] }], // dropdown with defaults from theme
  [{ 'font': [] }],
  [{ 'align': [] }],
  ['link', 'image']
// ['clean']
]
基于vue-quill-editor
<!-- 基于vue-quill-editor 再做一次封装:-->
<template>
    <div class="quill-editor-container">
        <quill-editor
            v-if="showEditor"
            ref="myQuillEditor"
            v-model="content"
            :options="editorOption"
            @change="onEditorChange($event)">
        </quill-editor>
    </div>
</template>
<script>
    import 'quill/dist/quill.core.css' // 全局的话可省略
    import 'quill/dist/quill.snow.css'
    import 'quill/dist/quill.bubble.css'
    import { quillEditor, Quill } from 'vue-quill-editor'
    import { getUploadSign } from "@/api/goods"
    import toolbar from './toolbar'
    const Delta = Quill.import('delta')
    export default {
        name: 'QuillEditor',
        components: {
            quillEditor
        },
        props: {
            value: {
                type: String,
                default: '',
            }
        },
        data () {
            return {
                showEditor: false,
                imgSign: {},
                content: this.value || '',
                editorOption: {},
                quill: null
            }
        },
        watch: {
            value(val) {
                this.content = val
            },
        },
        mounted () {
            this.getImgSign()
        },
        methods: {
            // 获取图片上传签名(因为上传到腾讯云,所以要一些额外参数)
            getImgSign() {
                this.quill = new Quill(this.$refs.myQuillEditor)
                getUploadSign().then(({ data }) => {
                    this.imgSign = data
                    this.setEditorOption()
                })
            },
            // 设置配置信息
            setEditorOption() {
                // 当前组件实例
                let vm = this
                this.editorOption = Object.assign(this.editorOption, {
                    placeholder: '请插入内容...',
                    modules: {
                        toolbar: {
                            container: toolbar,
                             handlers: {
                                // 自定义上传图片到服务器
                                image: function() {
                                    // quill插件实例
                                    let _self = this
                                    // 创建上传文件input并触发
                                    let fileInput = document.createElement('input')
                                    fileInput.setAttribute('type', 'file')
                                    fileInput.setAttribute('multiple', 'multiple')
                                    fileInput.setAttribute('accept', 'image/*')
                                    fileInput.addEventListener('change', () => {
                                        if (fileInput.files !== null) {
                                            const files = Array.from(fileInput.files).reverse()
                                            // 利用es6迭代器异步顺序上传图片,保证图片插入顺序正常
                                            const it = files[Symbol.iterator]()
                                            uploadFile()

                                            function uploadFile () {
                                               const { done, value: _file } = it.next()
                                                if (done) return
                                                let reader = new FileReader()
                                                reader.onload = (event) => {
                                                    const range = _self.quill.getSelection(true)
                                                    // 设置图片上传地址
                                                    const uploadImgServer = 'https://upload.com'
                                                    // 创建formData参数提交(文件+签名信息)
                                                    const formData = new FormData()
                                                    formData.append('file', _file)
                                                    for (const [key, val] of Object.entries(vm.imgSign)) {
                                                        formData.append(key, val)
                                                    }
                                                    // 发送图片上传请求
                                                    const xhr = new XMLHttpRequest()
                                                    xhr.open('POST', uploadImgServer)
                                                    xhr.timeout = 6000
                                                    xhr.ontimeout = () => {
                                                        alert('图片上传超时')
                                                    }
                                                    xhr.onreadystatechange = () => {
                                                        let result
                                                        if (xhr.readyState === 4) {
                                                            // http status code
                                                            if (xhr.status < 200 || xhr.status >= 300) {
                                                                return alert(`上传图片发生错误,上传图片发生错误,服务器返回状态是 ${xhr.status}`)
                                                            }
                                                            result = xhr.responseText
                                                            if (typeof result !== 'object') {
                                                                try {
                                                                    result = JSON.parse(result)
                                                                } catch {
                                                                    return alert('上传图片失败', '上传图片返回结果错误,返回结果是: ' + result)
                                                                }
                                                            }
                                                            // 根据服务器返回的结果自行拼接图片地址
                                                            const URI = result.data.items.file.map(v => `https://img.test.com${v.filename}`)[0]
                                                            // 插入到文本
                                                            _self.quill.updateContents(
                                                                new Delta()
                                                                    .retain(range.index)
                                                                    .delete(range.length)
                                                                    .insert({ image: URI })
                                                            )
                                                        }
                                                        // 上传下一个图片
                                                        uploadFile()
                                                    }
                                                    xhr.send(formData)
                                                }
                                                reader.readAsDataURL(_file)
                                            }
                                        }
                                    })
                                    fileInput.click()
                                }
                            }
                        }
                    }
                })
                this.$nextTick(() => {
                    this.showEditor = true
                })
            },
            // 文本改变后同步回父组件绑定的值
            onEditorChange(event) {
                this.$emit('input', event.html)
            }
        }
    }
</script>

// 设定编辑器高度
<style lang="less" scoped>
    .quill-editor /deep/ .ql-container {
        height: 360px;
    }
</style>复制代码父组件引入<QuillEditor v-model="xxx" />
QuillJs扩展用富文本编辑支持表格
quill v1.0 版本不支持插入表格,v2的dev版本支持表格编辑,但目前只能实现在工具栏以外的地方放置按钮,实现点击按钮添加/操作表格,作者已声明:You can do npm install quill@2.0.0-dev.2 but yes use at your own risk.(最新版本为quill@2.0.0-dev.3)
初选方案一
在quill v1.0 版本基础上对quil添加扩展代码从而支持表格,在github上有找到对应的项目https://github.com/dost/quilljs-table ,这个项目中包含两个demo以不同的方式支持表格,分别在quilljs-table和table文件夹中。
优点:
终选方案二
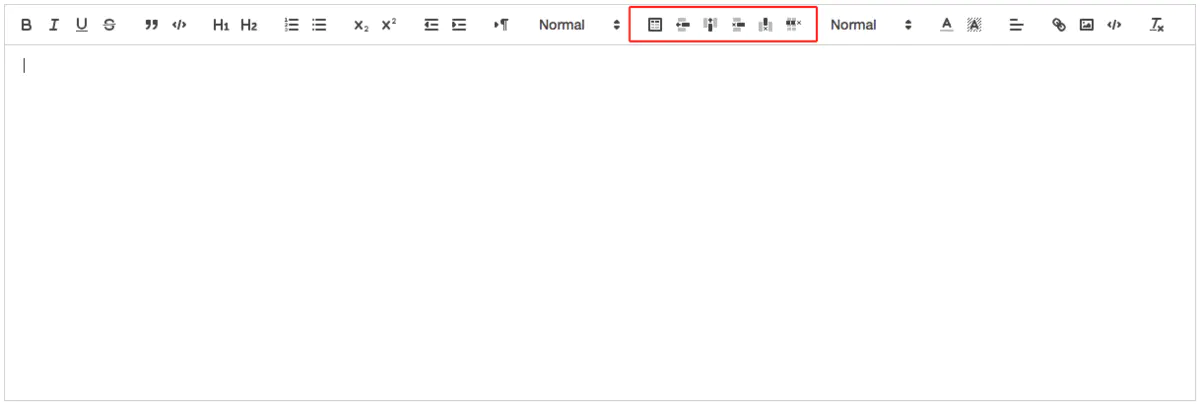
在工具栏添加表格操作图标,使用quill@2.0.0-dev.3中的表格操作方法为图标添加自定义处理方法 ,可实现简单的表格操作,目前较为稳定,暂未发现问题。
quill支持配置自定义的工具栏图标
<br />container和事件处理程序handlers
配置自定义容器
- 配置
toolbar的数组选项从而定制工具栏的功能 ```javascript ```
- 配置
上面的方法只能在工具栏创建quilljs内部定好的按钮格式,如果想创建完全自定义的工具栏,参考下面代码
<div id="toolbar">
  <!-- 此类按钮,quill会根据类名添加对应的事件处理程序 -->
  <button class="ql-bold"></button>
  <button class="ql-italic"></button>

  <!--此类自定义按钮,可自行添加对应的事件处理程序 -->
  <button id="custom-button"></button>
</div>
<div id="editor"></div>
<script>
  const quill = new Quill('#editor', {
   modules: {
      toolbar: '#toolbar'
    }
  });
</script>
- 配置自定义处理程序
<script>
  let toolbarOptions = {
    handlers: {
      'table-body': function (val) {
        this.quill.getModule('table').insertTable(2, 2)
        // this引用工具栏实例, val表示按钮是否处于活动状态active
      },
      'table-insert-rows': function () {
        this.quill.getModule('table').insertRowBelow()
      },
      'table-insert-columns': function () {
        this.quill.getModule('table').insertColumnRight()
      },
      'table-delete-rows': function () {
        this.quill.getModule('table').deleteRow()
      },
      'table-delete-columns': function () {
       this.quill.getModule('table').deleteColumn()
      },
      'table-delete-body': function () {
        this.quill.getModule('table').deleteTable()
      }
    }
  }
  const quill = new Quill('#editor', {
    modules: {
      toolbar: toolbarOptions
    }
  });
  // 也可以按照如下方法添加自定义处理程序
  const toolbar = quill.getModule('toolbar');
  toolbar.addHandler('image', showImageUI);
</script>
- 注意事项
- quilljs升级到v2.0,
pasteHTML方法改为dangerouslyPasteHTML,如果使用vue-quill-editor,需要修改对应方法; - 在创建Quill实例时,配置项中的
module属性需要设置table: true,从而使quill实例能够使用table操作方法; - 在工具栏
toolbar中添加表格按钮后,quill并不会自动拿到对应的图标,需要手动为按钮添加图标,如:
<script>
  const TB = document.getElementsByClassName('ql-table-body')[0]
  TB.innerHTML = `<svg viewbox="0 0 18 18"><rect class="ql-stroke" height="12" width="12" x="3" y="3"></rect><rect class="ql-fill" height="2" width="3" x="5" y="5"></rect><rect class="ql-fill" height="2" width="4" x="9" y="5"></rect><g class="ql-fill ql-transparent"><rect height="2" width="3" x="5" y="8"></rect><rect height="2" width="4" x="9" y="8"></rect><rect height="2" width="3" x="5" y="11"></rect><rect height="2" width="4" x="9" y="11"></rect></g></svg>`
</script>
- 如果不使用2中所述方法添加自定义处理程序,而是通过获取按钮元素并对其添加点击事件处理程序的方法,则会导致首次点击按钮报错,这可能是quill为toolbar中所有按钮添加了默认处理程序的原因,所以最好使用官方提供的方法。
- 参考资料
- https://github.com/dost/quilljs-table
- http://quilljstable.timepress.cz/quilljs-extended-toolbar/index.html
- 在 Vue 项目中引入 tinymce 富文本编辑器
- quilljs官方文档toolbar
- vue中使用vue-quill-editor富文本编辑器,自定义toolbar修改工具栏options
- Vue之使用 vue-quill-editor自定义toolbar修改图片上传方式
- 富文本编辑器比较
- https://github.com/surmon-china/vue-quill-editor/issues/7
- quill@2.0.0-dev.3在codepen上使用示例
- quill@2.0.0-dev.3 in npm
- https://github.com/quilljs/quill/issues/117
- 结果展示

若有收获,就点个赞吧
0 人点赞
