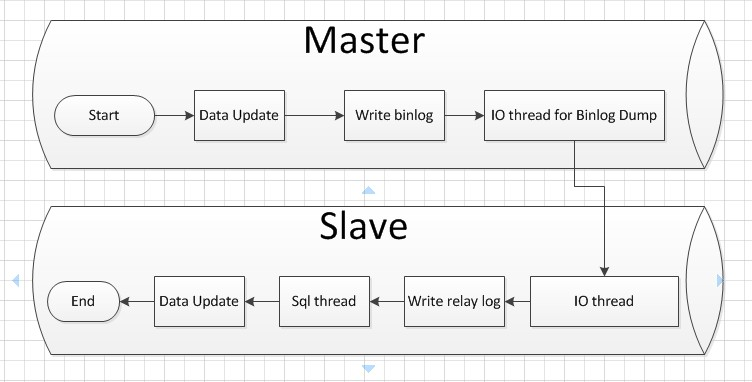
原理简介
、工作流程:

mysql安装
- 首先在两台服务器上安装好mysql数据库,具体操作可参考如下文档。
centos下安装mysql数据库
双主配置
环境简介
| 服务器 | 系统环境 | 角色 |
|---|---|---|
| 10.8.11.111 | CentOS release 6.9 (Final) | master1 |
| 10.8.11.112 | CentOS release 6.9 (Final) | master2 |
| 10.8.11.119 | 虚拟IP,无系统 | VIP(虚拟,供外部连接访问数据库) |
- 供参考,mysql主主互备
配置master-master
修改master1和master2的数据库配置文件
vi /usr/local/mysql/my.cnf11.111上面
server-id = 1log-bin = mysql-binsync_binlog = 1binlog_checksum = nonebinlog_format = mixedauto-increment-increment = 2auto-increment-offset = 1slave-skip-errors = all
11.112上面
server-id = 2 #注意这个是不同的log-bin = mysql-binsync_binlog = 1binlog_checksum = nonebinlog_format = mixedauto-increment-increment = 2auto-increment-offset = 1slave-skip-errors = all
service mysql restart,后登录
创建同步用户
授予用户连接此数据库
grant replication slave,replication client on *.* to root@'10.8.11.%' identified by "xc123456";或者下面的命令,(这个有待商榷)grant ALL PRIVILEGES on *.* to root@'10.8.11.%' identified by "xc123456";flush privileges;刷新系统权限表
这是11.111服务器上的

这是11.112服务器上的

同步数据,
如下是11.111上面操作的
change master to master_host='10.8.11.112',master_user='root',master_password='xc123456',master_log_file='mysql-bin.000001',master_log_pos=986;
如下是11.112上面操作的
change master to master_host='10.8.11.111',master_user='root',master_password='xc123456',master_log_file='mysql-bin.000001',master_log_pos=986;
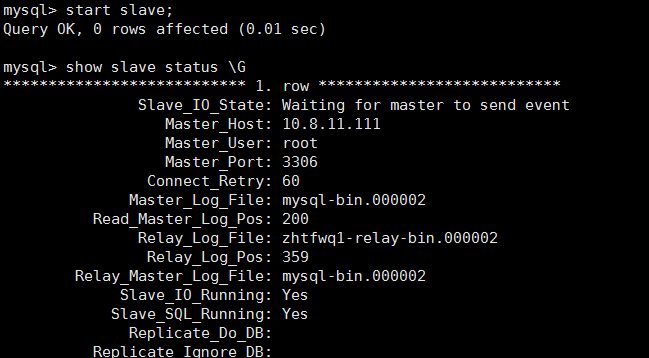
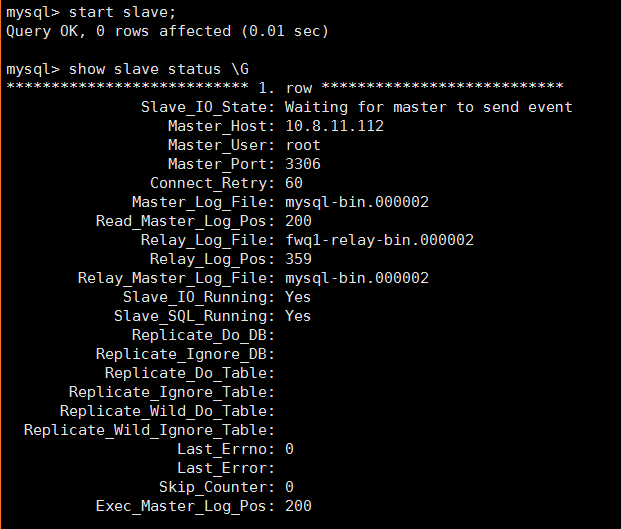
P.S.或许会报错,当报错 got fatal error 1236的解决办法start slave;show slave status \G查看同步状态同步成功后的效果图,
这是11.112上面的

这是11.111上面的

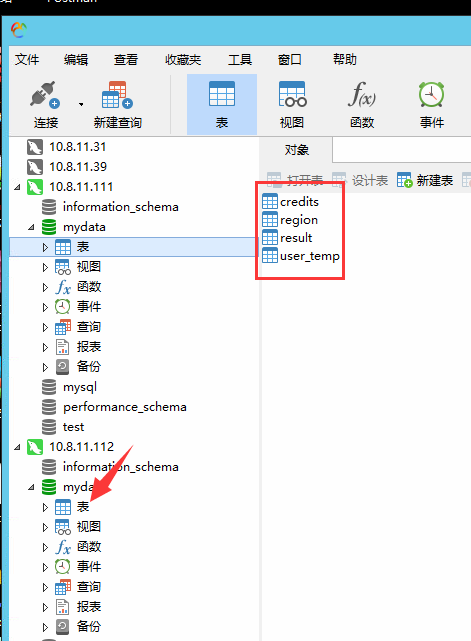
测试
经测试,达到了数据同步

配置keepalived
两台机器都需要安装
下载依赖环境
yum install -y pcre-devel openssl-devel popt-develwget http://www.keepalived.org/software/keepalived-1.2.23.tar.gztar -zxvf keepalived-1.2.23.tar.gz进入到安装目录,进行编译和安装
cd keepalived-1.2.23/./configure --prefix=/usr/local/keepalivedmake && make install将keepalived配置成系统服务
cp /usr/local/keepalived/etc/rc.d/init.d/keepalived /etc/init.d/cp /usr/local/keepalived/etc/sysconfig/keepalived /etc/sysconfig/mkdir -p /etc/keepalivedcp /usr/local/keepalived/etc/keepalived/keepalived.conf /etc/keepalived/cp /usr/local/keepalived/sbin/keepalived /usr/sbin/
配置master1上的keepalived
vi /etc/keepalived/keepalived.conf清空或备份! Configuration File for keepalivedglobal_defs{notification_email{sysadmin@firewall.loc}notification_email_from Alexandre.Cassen@firewall.locsmtp_server 127.0.0.1smtp_connect_timeout 30router_id mysql #master1和master2上一样}vrrp_instance VI_1{state BACKUP #master1和master2一样都为BACKUPinterface eth0 #注意自己服务器的网口名virtual_router_id 59 #路由器标识,master1和master2必须是一致的priority 100 #优先级,master1比master2高,0-255间的数字都可advert_int 1nopreempt #不主动抢占资源,只在master1这台优先级高的设置,master2不设置authentication{auth_type PASSauth_pass 1111}virtual_ipaddress{10.8.11.119 #VIP}}virtual_server 10.8.11.119 3306 #VIP{delay_loop 2lb_algo rrlb_kind NATpersistence_timeout 50protocol TCPreal_server 10.8.11.111 3306{weight 3notify_down /usr/local/keepalived/mysql.sh #当mssql服务down时,执行此脚本,#杀死keepalived,实现切换TCP_CHECK{connect_timeout 10 #连接超时nb_get_retry 3 #重试次数delay_before_retry 3 #重试间隔时间connect_port 3306}}}
编写脚本,并授予权限
vi /usr/local/keepalived/mysql.sh,脚本内容如下#!/bin/bashpkill keepalived
授权,
chmod +x /usr/local/keepalived/mysql.sh重启,
service keepalived start添加到开机自启,
echo "/etc/init.d/keepalived start " >> /etc/rc.d/rc.sysinit
不对??
配置master2上的keepalived
vi /etc/keepalived/keepalived.conf清空或备份! Configuration File for keepalivedglobal_defs{notification_email{sysadmin@firewall.loc}notification_email_from Alexandre.Cassen@firewall.locsmtp_server 127.0.0.1smtp_connect_timeout 30router_id mysql}vrrp_instance VI_1{state BACKUPinterface eth0virtual_router_id 59priority 90advert_int 1authentication{auth_type PASSauth_pass 1111}virtual_ipaddress{10.8.11.119}}virtual_server 10.8.11.119 3306{delay_loop 2lb_algo rrlb_kind NATpersistence_timeout 50protocol TCPreal_server 10.8.11.112 3306{weight 3notify_down /usr/local/keepalived/mysql.shTCP_CHECK{connect_timeout 10nb_get_retry 3delay_before_retry 3connect_port 3306}}}
mysql.sh脚本及授权,同上master1。
测试
用navicat在内网范围,链接VIP(10.8.11.119),并进行读写测试,和高可用测试。
注意,路由器标识这里,因为在10.8.11.37和11.38上面做过mysql+keepalived的双主热备了,换成
virtual_router_id 52,再次重启keepalived就可以实现了。

