1.在我们的数据库中新建一张表,字段如下:
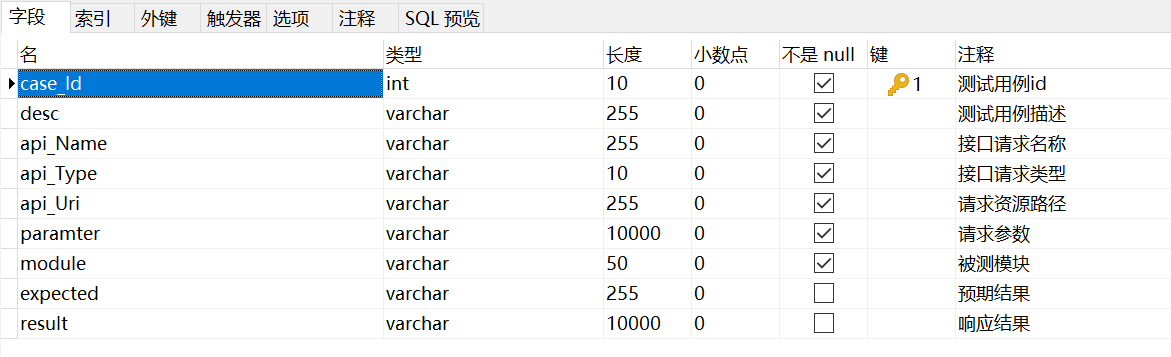
2.将字段封装为一个对象,方便我们取出:
public class MySQLTestData {private Integer case_Id;private String desc;private String api_Name;private String api_Type;private String api_Uri;private String paramter;private String module;private String expected;private String result;public Integer getCase_Id() {return case_Id;}public void setCase_Id(Integer case_Id) {this.case_Id = case_Id;}public String getDesc() {return desc;}public void setDesc(String desc) {this.desc = desc;}public String getApi_Name() {return api_Name;}public void setApi_Name(String api_Name) {this.api_Name = api_Name;}public String getApi_Type() {return api_Type;}public void setApi_Type(String api_Type) {this.api_Type = api_Type;}public String getApi_Uri() {return api_Uri;}public void setApi_Uri(String api_Uri) {this.api_Uri = api_Uri;}public String getParamter() {return paramter;}public void setParamter(String paramter) {this.paramter = paramter;}public String getModule() {return module;}public void setModule(String module) {this.module = module;}public String getExpected() {return expected;}public void setExpected(String expected) {this.expected = expected;}public String getResult() {return result;}public void setResult(String result) {this.result = result;}@Overridepublic String toString() {return "MySQLTestData{" +"case_Id=" + case_Id +", desc='" + desc + '\'' +", api_Name='" + api_Name + '\'' +", api_Type='" + api_Type + '\'' +", api_Uri='" + api_Uri + '\'' +", paramter='" + paramter + '\'' +", module='" + module + '\'' +", expected='" + expected + '\'' +", result='" + result + '\'' +'}';}}
3.在我们的自动化框架中的pom,加入依赖:
 <!-- spring依赖 -->
     <dependencies>
        <!-- https://mvnrepository.com/artifact/org.springframework/spring-context -->
        <dependency>
            <groupId>org.springframework</groupId>
            <artifactId>spring-context</artifactId>
            <version>5.2.4.RELEASE</version>
        </dependency>
        <!-- https://mvnrepository.com/artifact/org.springframework/spring-beans -->
        <dependency>
            <groupId>org.springframework</groupId>
            <artifactId>spring-beans</artifactId>
            <version>5.2.1.RELEASE</version>
        </dependency>
        <!-- https://mvnrepository.com/artifact/com.alibaba/druid -->
        <dependency>
            <groupId>com.alibaba</groupId>
            <artifactId>druid</artifactId>
            <version>1.1.10</version>
        </dependency>
        <!-- https://mvnrepository.com/artifact/org.springframework/spring-tx -->
        <dependency>
            <groupId>org.springframework</groupId>
            <artifactId>spring-tx</artifactId>
            <version>5.2.2.RELEASE</version>
        </dependency>
        <!-- https://mvnrepository.com/artifact/org.springframework/spring-core -->
        <dependency>
            <groupId>org.springframework</groupId>
            <artifactId>spring-core</artifactId>
            <version>5.2.1.RELEASE</version>
        </dependency>
        <!-- https://mvnrepository.com/artifact/org.springframework/spring-jdbc -->
        <dependency>
            <groupId>org.springframework</groupId>
            <artifactId>spring-jdbc</artifactId>
            <version>5.2.2.RELEASE</version>
        </dependency>
        <!-- https://mvnrepository.com/artifact/mysql/mysql-connector-java -->
        <dependency>
            <groupId>mysql</groupId>
            <artifactId>mysql-connector-java</artifactId>
            <version>8.0.15</version>
        </dependency>
        <!-- https://mvnrepository.com/artifact/org.springframework/spring-orm -->
        <dependency>
            <groupId>org.springframework</groupId>
            <artifactId>spring-orm</artifactId>
            <version>5.2.2.RELEASE</version>
        </dependency>
        <!-- https://mvnrepository.com/artifact/org.springframework/spring-expression -->
        <dependency>
            <groupId>org.springframework</groupId>
            <artifactId>spring-expression</artifactId>
            <version>5.2.4.RELEASE</version>
        </dependency>
        <!-- https://mvnrepository.com/artifact/org.springframework/spring-aop -->
        <dependency>
            <groupId>org.springframework</groupId>
            <artifactId>spring-aop</artifactId>
            <version>5.1.5.RELEASE</version>
        </dependency>
    </dependencies>
4.新建一个properties文件取名为autoTestData,写入内容:
注:通过properties文件将数据库连接信息配置化,properties数据存储格式是key = value,取出数据亦是如此;
5.开始代码分层:
5.1我们从底向上写,新建一个package命名为dao
5.1.1先写一个接口类命名为AutoMatedTestDataGenerator
   public interface AutoMatedTestDataGenerator {

    List<MySQLTestData> getTestDataList(String module, String api_Uri);

    void dataProduction(List<Object[]> testData);

}
5.1.2通过新建一个class命名为AutoMatedTestDataGeneratorImpl通过implements实现父类方法:
@Repository
@Transactional//添加事务注解,对于数据库的操作保持一致性,要么全部成功,要么全部失败
public class AutoMatedTestDataGeneratorImpl implements AutoMatedTestDataGenerator {

    @Autowired
    private JdbcTemplate jdbcTemplate;


    /**
     * 根据模块名和资源路径获取测试数据
     * @param module
     * @param api_Uri
     * @return
     */
    public List<MySQLTestData> getTestDataList(String module, String api_Uri) {
        List<MySQLTestData> list = new ArrayList<MySQLTestData>();
        if (module != null && api_Uri != null) {
            String sql = "select * from apiautotestparamter where module = ? and api_Uri = ?";
            RowMapper<MySQLTestData> rowMapper = new BeanPropertyRowMapper(MySQLTestData.class);
            List<MySQLTestData> mySQLTestData = jdbcTemplate.query(sql, new Object[]{module, api_Uri}, rowMapper);
            list.addAll(mySQLTestData);
        } else {
            throw new RuntimeException("没有输入模块名/资源路径!");
        }
        return list;
     }

    /**
     * 自动生成测试数据
     * @param testData
     */
    public void dataProduction(List<Object[]> testData) {
        for (Object[] objects : testData) {
            for (Object object : objects) {
                System.out.println(object);
            }
        }
        if (testData.size() > 0) {
            String sql = "insert into apiautotestparamter values(null,?,?,?,?,?,?,?,null)";
            jdbcTemplate.batchUpdate(sql, testData);
        } else {
            throw new RuntimeException("请传入测试数据!");
        }
    }
}
5.2开始写service层,新建一个package命名service
5.2.1老套路先写一个接口class,命名为TestDataService:
public interface TestDataService {

    void setTestData(List<WriterMySQLTestData>  testData);

    void getMySQLTestDataClass(String module,String api_uri);

}
5.2.2新建一个class命名为TestDataServiceimpl通过implements实现我们的接口:
@Service//spring注解,实现自动代理
public class TestDataServiceimpl implements TestDataService {


    @Autowired
    private AutoMatedTestDataGenerator autoMatedTestDataGenerator;


     /**
     * 通过模块名和资源路径获取测试数据
     * @param module
     * @param api_uri
     */
    @Override
    public void getMySQLTestDataClass(String module, String api_uri) {
        if (module != null && api_uri != null) {
            List<MySQLTestData> testDataList = autoMatedTestDataGenerator.getTestDataList(module, api_uri);
            for (MySQLTestData testData : testDataList) {
                System.out.println(testData);
            }
        } else {
            throw new RuntimeException("modult/api_uri不能为空!");
        }
    }


    /**
     * 传入MySQLTestData,生成测试数据
     *
     * @param testData
     */
    @Override
    public void setTestData(List<WriterMySQLTestData> testData) {
        List<Object[]> list = new ArrayList<Object[]>();
        for (WriterMySQLTestData writerMySQLTestData : testData) {
            list.add(new Object[]{writerMySQLTestData.getDesc(),writerMySQLTestData.getApi_Name(),
            writerMySQLTestData.getApi_Type(),writerMySQLTestData.getApi_Uri(),
            writerMySQLTestData.getParamter(),writerMySQLTestData.getModule(),writerMySQLTestData.getExpected()});
        }
        autoMatedTestDataGenerator.dataProduction(list);
    }
}
5.3开始写我们的controller层,新建一个package文件命名controller
5.3.1新建一个class命名testDataController,写入代码:
@Controller(value = "testData")//value设置为testData,方便我们在test方法操作
public class testDataController {

    @Autowired
    private TestDataService testDataService;


   /**
     * 获取测试数据
     */
    public void getTestData() {
       testDataService.getMySQLTestDataClass("login","login_by");
    }

   /**
     * 生成测试数据
     */
    public void writerTestData() {
        List<WriterMySQLTestData> list = new ArrayList<>();
        Map<String,Object> map = new HashMap<>();
        map.put("test",1);
        map.put("desc","这是测试数据写入");
        list.add(new WriterMySQLTestData("数据写入测试","test_home","post","test/api", JSON.toJSONString(map),"test","{\"code\":\"1001\"}"));
        list.add(new WriterMySQLTestData("参数写入测试11","test_home11","post11","test/api", JSON.toJSONString(map),"test","{\"code\":\"1001\"}"));
        testDataService.setTestData(list);
    }
}
5.3.2因为我们需要经常写入测试数据,所以我们还是封装了一个类,命名为WriterMySQLTestData:
注:小伙伴可能有疑问为什么不用之前封装数据库实体类?
因为操作数据库的实体类是不能有构造器的,所以我们重新封装!
package com.autotest.pojo;

public class WriterMySQLTestData {

    private String desc;

    private String api_Name;

    private String api_Type;

    private String api_Uri;

    private String paramter;

    private String module;

    private String expected;


    public String getDesc() {
        return desc;
    }

    public void setDesc(String desc) {
        this.desc = desc;
    }

    public String getApi_Name() {
        return api_Name;
    }

    public void setApi_Name(String api_Name) {
        this.api_Name = api_Name;
    }

    public String getApi_Type() {
        return api_Type;
    }

    public void setApi_Type(String api_Type) {
        this.api_Type = api_Type;
    }

    public String getApi_Uri() {
        return api_Uri;
    }

    public void setApi_Uri(String api_Uri) {
        this.api_Uri = api_Uri;
    }

    public String getParamter() {
        return paramter;
    }

    public void setParamter(String paramter) {
        this.paramter = paramter;
    }

    public String getModule() {
        return module;
    }

    public void setModule(String module) {
        this.module = module;
    }

    public String getExpected() {
        return expected;
    }

    public void setExpected(String expected) {
        this.expected = expected;
    }

    public WriterMySQLTestData(String desc, String api_Name, String api_Type, String api_Uri, String paramter, String module, String expected) {
        this.desc = desc;
        this.api_Name = api_Name;
        this.api_Type = api_Type;
        this.api_Uri = api_Uri;
        this.paramter = paramter;
        this.module = module;
        this.expected = expected;
    }

    @Override
    public String toString() {
        return "WriterMySQLTestData{" +
                "desc='" + desc + '\'' +
                ", api_Name='" + api_Name + '\'' +
                ", api_Type='" + api_Type + '\'' +
                ", api_Uri='" + api_Uri + '\'' +
                ", paramter='" + paramter + '\'' +
                ", module='" + module + '\'' +
                ", expected='" + expected + '\'' +
                '}';
    }
}
5.4新建一个spring-config.xml配置文件命名为MysqlTestData
注:如果鼠标右键new不出来,请检查pom文件中的spring依赖是否少加!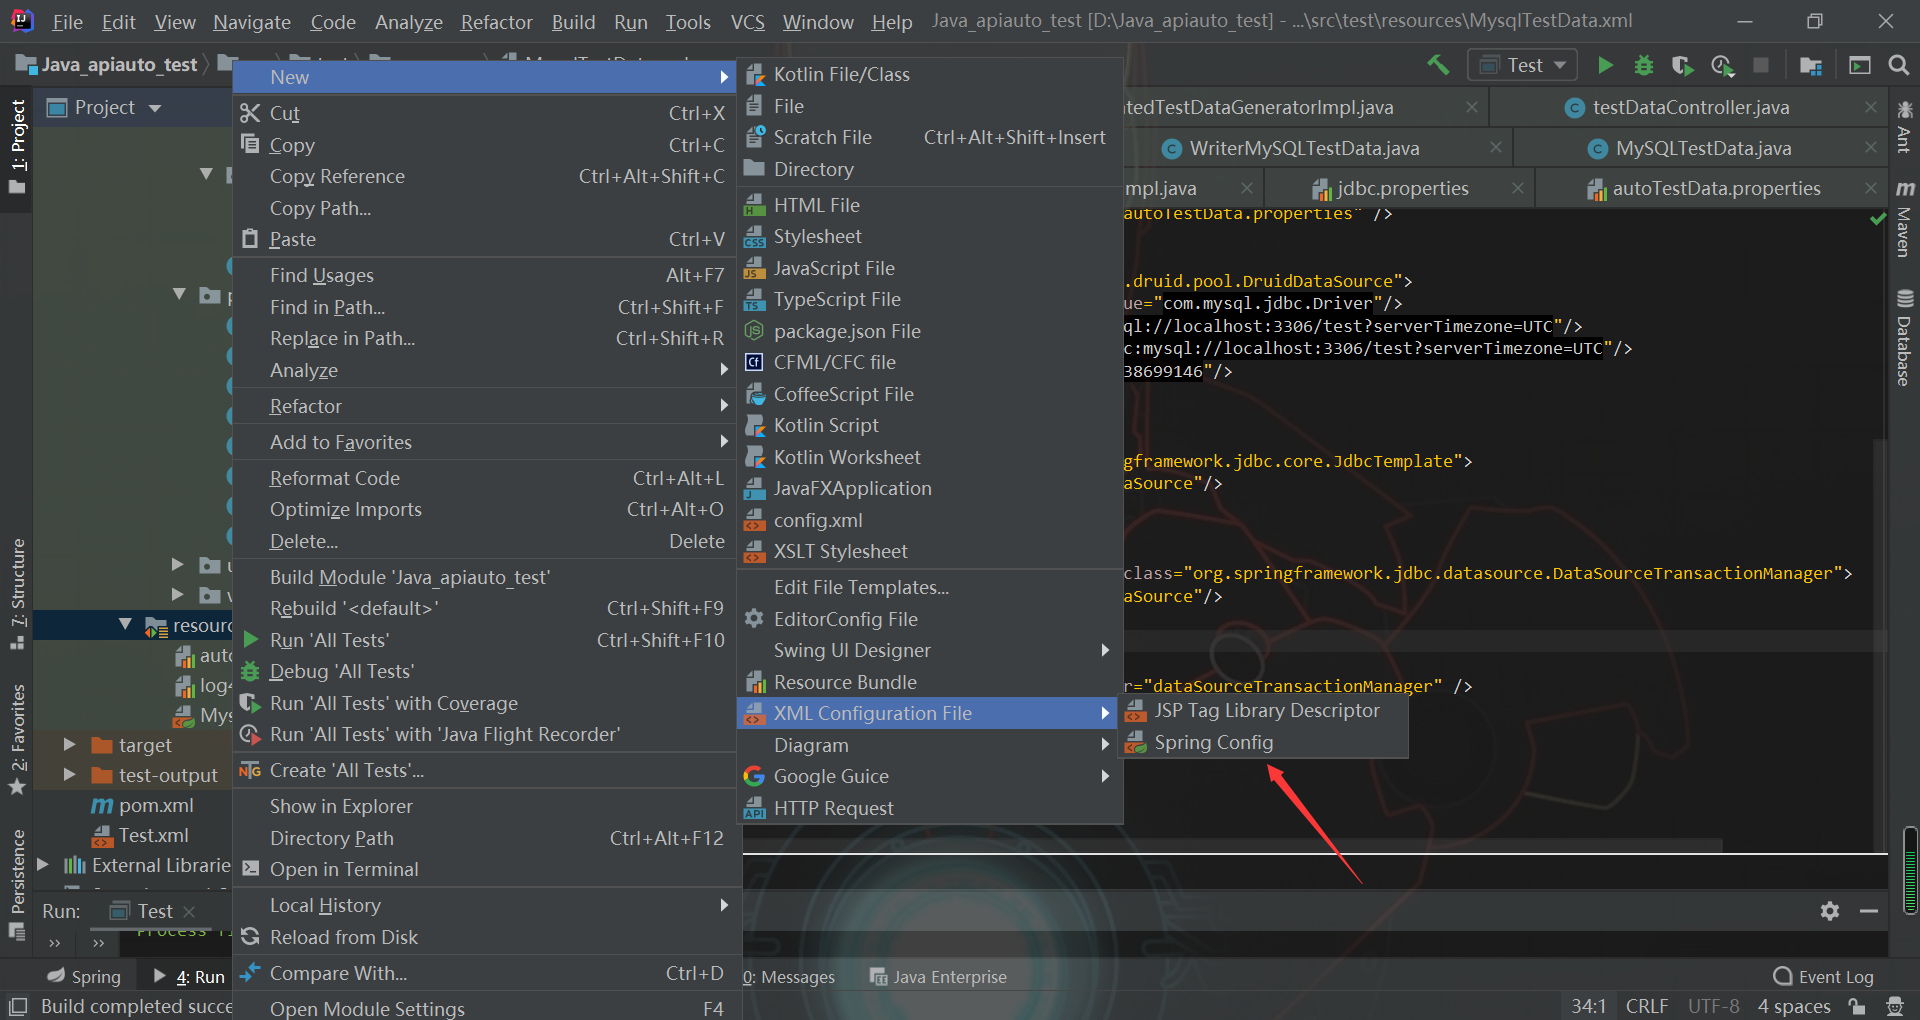
5.4.1最关键的地方到啦!!!配置我们的spring-config.xml文件,如下:
<?xml version="1.0" encoding="UTF-8"?>
<beans xmlns="http://www.springframework.org/schema/beans"
       xmlns:xsi="http://www.w3.org/2001/XMLSchema-instance"
       xmlns:context="http://www.springframework.org/schema/context" xmlns:tx="http://www.springframework.org/schema/tx"
       xsi:schemaLocation="http://www.springframework.org/schema/beans http://www.springframework.org/schema/beans/spring-beans.xsd
       http://www.springframework.org/schema/context
       https://www.springframework.org/schema/context/spring-context.xsd
       http://www.springframework.org/schema/tx http://www.springframework.org/schema/tx/spring-tx.xsd">


    <!-- 配置自动扫描组件 -->
    <context:component-scan base-package="com.autotest"/>

    <!-- 引入属性文件 -->
    <context:property-placeholder location="autoTestData.properties" />

    <!-- 创建数据源 -->
    <bean id="dataSource" class="com.alibaba.druid.pool.DruidDataSource">
        <property name="driverClassName" value="${jdbc.driver}"/>
        <property name="url" value="${jdbc.url}"/>
        <property name="username" value="${jdbc.url}"/>
        <property name="password" value="${jdbc.password}"/>
    </bean>

    <!-- 通过数据源配置jdbcTemplate -->
    <bean id="jdbcTemplate" class="org.springframework.jdbc.core.JdbcTemplate">
        <property name="dataSource" ref="dataSource"/>
    </bean>

    <!-- 配置事务管理器 -->
    <bean id="dataSourceTransactionManager" class="org.springframework.jdbc.datasource.DataSourceTransactionManager">
        <property name="dataSource" ref="dataSource"/>
    </bean>

    <!-- 开启事务注解驱动 -->
    <tx:annotation-driven transaction-manager="dataSourceTransactionManager" />
</beans>
6.创建一个class命名为test,开始小测试:
public class Test {

    public static void main(String[] args) {
        //获取spring配置文件
        ApplicationContext ac = new ClassPathXmlApplicationContext("MysqlTestData.xml");
        //
        testDataController testData = ac.getBean("testData", testDataController.class);
        //testData.getTestData();
        testData.writerTestData();
    }
}
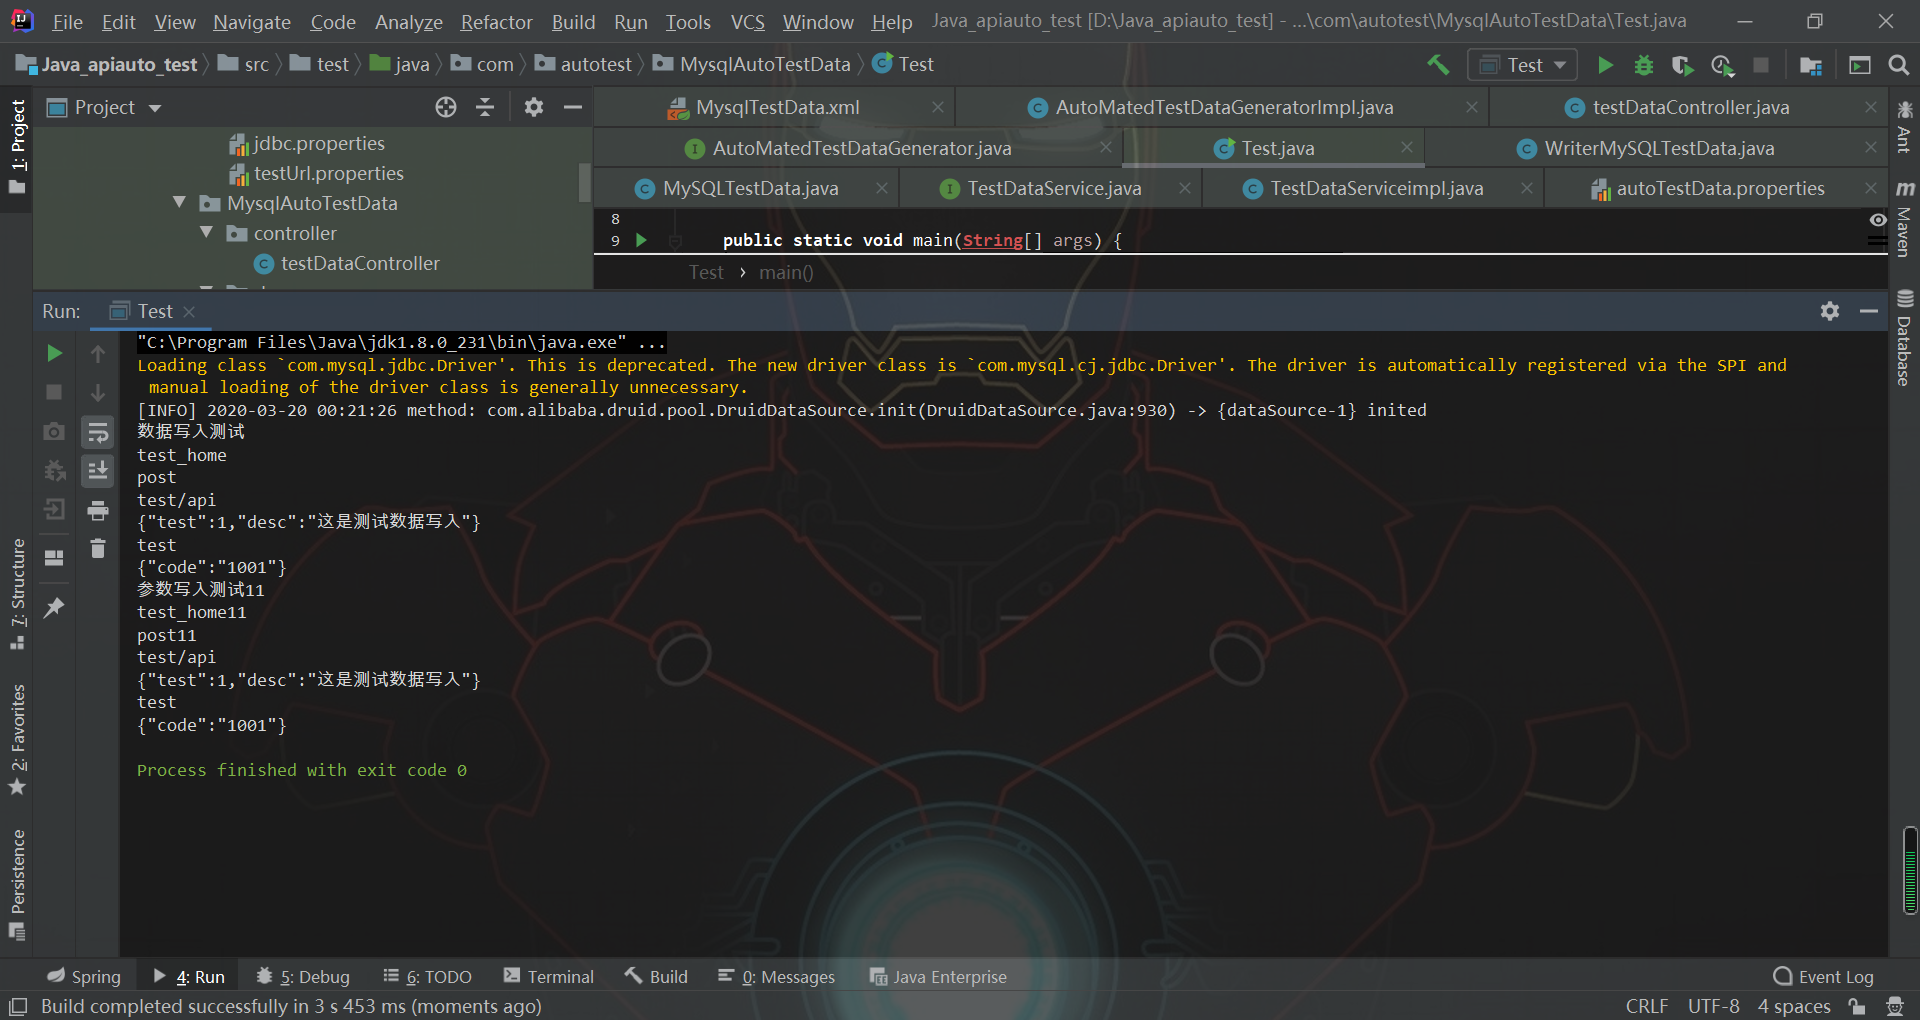
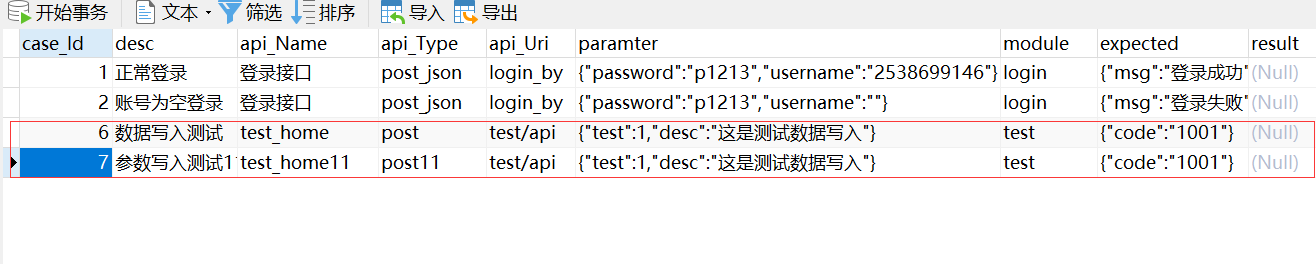
6.1写入测试数据运行结果如下:
6.2获取数据库中的测试数据,运行结果如下:
注释:因为我在controller层写死了要获取的数据,module=login,api_Uri=login_by,因此返回如下结果!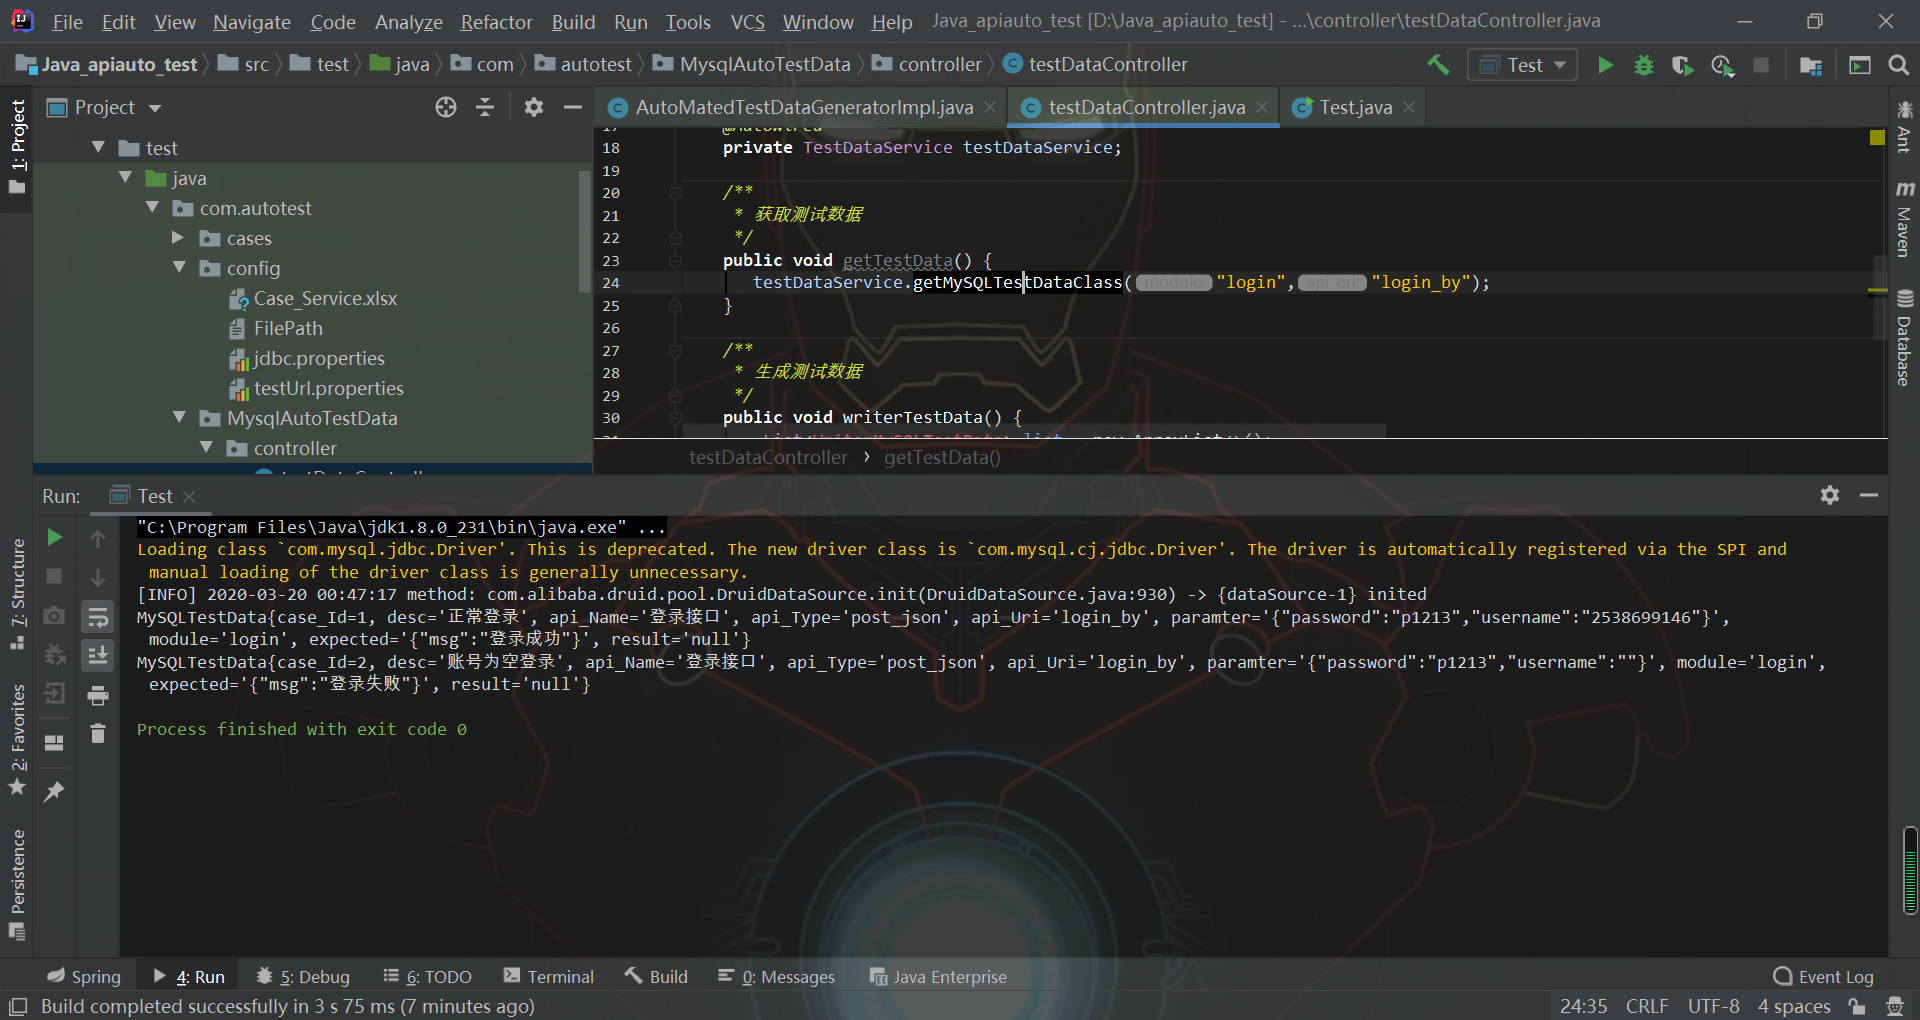
7.测试大白话:
7.1数据库表的设计我相信大家肯定都有好的思路,此文只做交流哈,写的不好也勿怪!
7.2方法的封装大家一定开阔思维,因为写功能都是按照自己想象去实现:脑海中浮现一个想法—>开始构造—>我要把它实现。
注:写东西的时候可以多看csdn/博客园,因为里面有很多前辈们的思路,把自己的想法再结合大佬们的思路去实现一定很棒!哈哈哈,我一直热衷于这种模式。

若有收获,就点个赞吧
0 人点赞
