摘自 :https://www.jianshu.com/p/04e436cf75ba
1.基础搭建
1.初始化项目
npm init

2.安装webpack,用@4版本
npm install --D webpack@4.44.2 webpack-dev-server webpack-cli

3.src下新建index.js

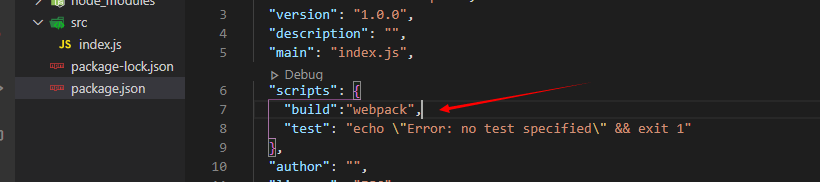
4.package.json配置打包命令
5.打包测试

2.配置webpack
1.创建webpack.config.js

2.基本配置
const path = require("path");function resolve(dir) {return path.resolve(__dirname, dir)}module.exports = {// 指定构建环境mode:"development",// 入口entry: {app: "./src/index"},// 出口output: {path : resolve("../dist"),filename: "js/[name].[hash].js",publicPath: "/" // 打包后的资源的访问路径前缀},// 模块module:{},// 插件plugins:[],// 开发环境本地启动的服务配置devServer: {}}
3.安装html的模板打包
npm install -D html-webpack-plugin

4.根目录新建index.html
<div id="app"></div>

5.webpack配置
let HtmlWebpackPlugin = require("html-webpack-plugin")
new HtmlWebpackPlugin({
    filename: resolve('./../dist/index.html'), // html模板的生成路径
    template: 'index.html',//html模板
    inject: true, // true:默认值,script标签位于html文件的 body 底部
    hash: true, // 在打包的资源插入html会加上hash
    //  html 文件进行压缩
    minify: {
        removeComments: true,               //去注释
        collapseWhitespace: true,           //压缩空格
        removeAttributeQuotes: true         //去除属性 标签的 引号  例如 <p id="test" /> 输出 <p id=test/>
    }
})
6.修改打包命令
"build": "webpack --config build/webpack.config.js"

7.npm run build测试

3.抽取webpack配置文件
为了区分开发环境和生产环境,下面我们一步一步抽取wenpack公共配置
分别创建 utils.js ,webpack.base.config.js , webpack.dev.config.js , webpack.prod.config.js
1.webpack-merge插件
在抽取webpack配置过程中,需要使用webpack-merge插件,安装方式
npm install -D webpack-merge
这个插件是用来合并webpack配置的,可以对不同文件的webpack配置合并成一个完整的webpack配置。
2.utils.js配置
const path = require("path")
exports.resolve = function (dir) {
    return path.resolve(__dirname, dir)
}
utils.js是webpack配置用的工具方法
3.webpack.base.config.js配置
const utils = require("./utils")

module.exports = {
    // 入口
    entry: {
        app: "./src/index"
    },
    // 出口
    output: {
        path : utils.resolve("../dist"),
        filename: "js/[name].[hash].js",
        publicPath: "/" // 打包后的资源的访问路径前缀
    },
    // 模块
    module:{

    },
}
webpack.base.config.js 是webpack在不同环境的公共配置
4.webpack.dev.config.js配置
const webpackMerge = require("webpack-merge");
const baseWebpackConfig = require("./webpack.base.config")
const utils = require("./utils")
const HtmlWebpackPlugin = require("html-webpack-plugin")

module.exports = webpackMerge.merge(baseWebpackConfig,{
    // 指定构建环境
    mode:"development",
    // 插件
    plugins:[
        new HtmlWebpackPlugin({
            filename: utils.resolve('./../dist/index.html'), // html模板的生成路径
            template: 'index.html',//html模板
            inject: true, // true:默认值,script标签位于html文件的 body 底部
        })
    ],
    // 开发环境本地启动的服务配置
    devServer: {

    }
});
webpack.dev.config.js 是项目开发环境的配置
4.webpack.prod.config.js配置
const webpackMerge = require("webpack-merge");
const baseWebpackConfig = require("./webpack.base.config")
const utils = require("./utils")
const HtmlWebpackPlugin = require("html-webpack-plugin")

module.exports = webpackMerge.merge(baseWebpackConfig,{
    // 指定构建环境
    mode:"production",
    // 插件
    plugins:[
        new HtmlWebpackPlugin({
            filename: utils.resolve('./../dist/index.html'), // html模板的生成路径
            template: 'index.html',//html模板
            inject: true, // true:默认值,script标签位于html文件的 body 底部
            hash: true, // 在打包的资源插入html会加上hash
            //  html 文件进行压缩
            minify: {
                removeComments: true,               //去注释
                collapseWhitespace: true,           //压缩空格
                removeAttributeQuotes: true         //去除属性引用
            }
        })
    ],
})
webpack.prod.config.js 是项目生产环境环境的配置
5.package.json配置
"build": "webpack --config build/webpack.prod.config.js"
6.测试
配置生产环境webpack.dev.config.js其实上面步骤已经完成
4.配置开发环境
1.开发环境基本打包
"dev": "webpack-dev-server",
测试:

但是这种方式没有指定配置文件启动,所以还需改成指定配置文件启动
"dev": "webpack-dev-server --inline --progress --config build/webpack.dev.config.js",
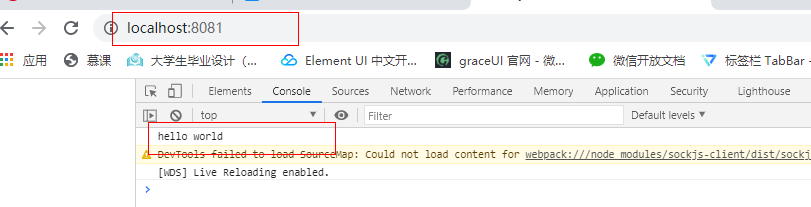
测试:

打开浏览器 http://localhost:8081/ 就运行了js文件
2.添加开发环境devServer
    // 开发环境本地启动的服务配置
    devServer: {
        historyApiFallback: true, // 当找不到路径的时候,默认加载index.html文件
        hot: true,
        contentBase: false, // 告诉服务器从哪里提供内容。只有在你想要提供静态文件时才需要
        compress: true, // 一切服务都启用gzip 压缩:
        port: "8081", // 指定段靠谱
        publicPath: "/", // 访问资源加前缀
        proxy: {
            // 接口请求代理
        },

    }
3.修改index..js进行测试
由于配置了热模块,修改了js文件是可以实时编译的

5.引入react框架
此时webpack还不能编译构建react的代码,需要配置
要想把react的代码使用webpack编译构建成浏览器可以运行的代码,需要使用babel等工具进行”翻译一下”
1.安装:
npm install -D @babel/core @babel/preset-env @babel/preset-react
npm install -D @babel/plugin-transform-runtime @babel/runtime @babel/runtime-corejs2

2.配置.babelrc
项目目录创建.babelrc文件
{
  "presets": [
    ["@babel/preset-env", {
      "modules": false,
      "targets": {
        "browsers": ["> 1%", "last 2 versions", "not ie <= 8"]
      }
    }],
    "@babel/preset-react"
  ],
  "plugins": [
    ["@babel/plugin-transform-runtime",{
      "corejs": 2, // polyfill 需要使用@babel/runtime-corejs2
      "useBuildIns":"usage", //按需引入,即使用什么新特性打包什么新特性, 可以减小打包的体积
    }]

  ]
}

3.安装loader
- babel-loader 使用babel进行编译项目
npm install -D babel-loader
- style-loader,css-loader 编译css文件
npm install -D style-loader css-loader
- url-loader file-loader 引入文件路径(图片,字体)
npm install -D url-loader file-loader
- less-loader 识别less文件
npm install -D less less-loader
4. webpacl.base.config.js 添加rules
rules:[
    {
        test: /\.(js|jsx)$/,//一个匹配loaders所处理的文件的拓展名的正则表达式,这里用来匹配js和jsx文件(必须)
        exclude: /node_modules/,//屏蔽不需要处理的文件(文件夹)(可选)
        loader: 'babel-loader',//loader的名称(必须)
    },
    {
        test: /\.css$/,
        use:[
            {
                loader: 'style-loader', // 创建 <style></style>
            },
            {
                loader: 'css-loader',  // 转换css
            }
        ]
    },
    {
        test: /\.less$/,
        use: [
            {
            loader: 'style-loader',
            },
            {
            loader: 'css-loader',
            },
            {
            loader: 'less-loader', // 编译 Less -> CSS
            },
        ],
    },
    {
        test: /\.(png|jpe?g|gif|svg)(\?.*)?$/,
        loader: 'url-loader',
        options: {
            limit: 10000, // url-loader 包含file-loader,这里不用file-loader, 小于10000B的图片base64的方式引入,大于10000B的图片以路径的方式导入
            name: 'static/img/[name].[hash:7].[ext]'
        }
    },
    {
        test: /\.(woff2?|eot|ttf|otf)(\?.*)?$/,
        loader: 'url-loader',
        options: {
            limit: 10000, // 小于10000B的图片base64的方式引入,大于10000B的图片以路径的方式导入
            name: 'static/fonts/[name].[hash:7].[ext]'
        }
    }
]
resolve: {
    extensions: ['.js', '.json'], // 解析扩展。(当我们通过路导入文件,找不到改文件时,会尝试加入这些后缀继续寻找文件)
    alias: {
        '@': path.join(__dirname, '..', "src") // 在项目中使用@符号代替src路径,导入文件路径更方便
    }
}
5.编写测试
1.home/index.js
import React from 'react'
import "./test.less"
import "./test.css"
import buyImg from "@/assets/img/icon_buy_task.png"
import testImg from "@/assets/img/bg_store.png"
export default class Home extends React.Component {
    render(){
        return (
            <div className="test test2">
                <p>hello world</p>
                <img src={buyImg} alt="" />
                <img src={testImg} alt="" style={{width:360,height:60}}/>
            </div>
        )
    }
}
2.home/test.css
.test2 {
    font-size: 32px;
}
3.home/test.less
.test {
    background: rebeccapurple;
}
4.src/index.js
import React from 'react'
import ReactDom from 'react-dom'
import HomePage from "./home"
class App extends React.Component {
    render(){
        return (
            <div style={{color:"#333"}} className="test test2">
                <HomePage />
            </div>
        )
    }
}
ReactDom.render(<App/>,document.getElementById("app"))
5.打包运行

6.判断是否正常打包
npm install -g http-server


ok…

若有收获,就点个赞吧
0 人点赞
