安装
建议安装启用epel源,采用yum的方式安装openvpn。
yum install -y epel-releaseyum update -yyum install -y openssl lzo pam openssl-devel lzo-devel pam-develyum install -y easy-rsayum install -y openvpn
确定私有子网
Server 与 Client 的VPN通道子网,不要与已有环境的网络冲突即可。
默认:10.8.0.0/16
配置证书密钥
我们通过yum方式安装的 easy-rsa 版本是3.x,直接从安装路径copy一份工具出来。这里用默认的 easy-rsa 3.x 来配置生成证书密钥。
当前下载的是版本号是3.0.8
cp -rf /usr/share/easy-rsa/3.0.8 /etc/openvpn/server/easy-rsacd /etc/openvpn/server/easy-rsa./easyrsa init-pki./easyrsa build-ca nopass./easyrsa build-server-full server nopass./easyrsa build-client-full client1 nopass./easyrsa build-client-full client2 nopass./easyrsa gen-dhopenvpn --genkey --secret ta.key
创建使用的目录
# 日志存放目录mkdir -p /var/log/openvpn/# 用户管理目录mkdir -p /etc/openvpn/server/user# 配置权限chown openvpn:openvpn /var/log/openvpn
创建Server配置文件
编辑/etc/openvpn/server/server.conf文件,并写入以下内容:
################################################## This file is for the server side ## of a many-clients <-> one-server ## OpenVPN configuration. ## ## Comments are preceded with '#' or ';' ##################################################port 1194proto tcp-server## Enable the management interface# management-client-auth# management localhost 7505 /etc/openvpn/user/management-filedev tun # TUN/TAP virtual network deviceuser openvpngroup openvpnca /etc/openvpn/server/easy-rsa/pki/ca.crtcert /etc/openvpn/server/easy-rsa/pki/issued/server.crtkey /etc/openvpn/server/easy-rsa/pki/private/server.keydh /etc/openvpn/server/easy-rsa/pki/dh.pemtls-auth /etc/openvpn/server/easy-rsa/ta.key 0## Using System user auth.# plugin /usr/lib64/openvpn/plugins/openvpn-plugin-auth-pam.so login## Using Script Pluginsauth-user-pass-verify /etc/openvpn/server/user/checkpsw.sh via-envscript-security 3# client-cert-not-required # Deprecated optionverify-client-certusername-as-common-name## Connecting clients to be able to reach each other over the VPN.client-to-client## Allow multiple clients with the same common name to concurrently connect.duplicate-cn# client-config-dir /etc/openvpn/server/ccd# ifconfig-pool-persist ipp.txtserver 10.8.0.0 255.255.255.0 #10.8.0.0是自己设定的,不要与服务器内网网段冲突就行push "dhcp-option DNS 114.114.114.114"push "dhcp-option DNS 1.1.1.1"push "route 172.17.0.0 255.255.255.0" #172.17.0.0是服务器内网网段# comp-lzo - DEPRECATED This option will be removed in a future OpenVPN release. Use the newer --compress instead.compress lzo# cipher AES-256-CBCncp-ciphers "AES-256-GCM:AES-128-GCM"## In UDP client mode or point-to-point mode, send server/peer an exit notification if tunnel is restarted or OpenVPN process is exited.# explicit-exit-notify 1keepalive 10 120persist-keypersist-tunverb 3log /var/log/openvpn/server.loglog-append /var/log/openvpn/server.logstatus /var/log/openvpn/status.log
注意!!! 这里创建完配置文件后,需要做个配置文件的软连接,因为当前版本的 openvpn systemd 启动文件中读取的是.service.conf配置
cd /etc/openvpn/server/ln -sf server.conf .service.conf
创建用户密码文件
格式是用户 密码以空格分割即可,如果需要多个账号,换行继续填写即可
tee /etc/openvpn/server/user/psw-file << EOFmytest mytestpassEOFchmod 600 /etc/openvpn/server/user/psw-filechown openvpn:openvpn /etc/openvpn/server/user/psw-file
创建密码检查脚本
编辑 /etc/openvpn/server/user/checkpsw.sh,保存后授予执行权限
#!/bin/sh############################################################ checkpsw.sh (C) 2004 Mathias Sundman <mathias@openvpn.se>## This script will authenticate OpenVPN users against# a plain text file. The passfile should simply contain# one row per user with the username first followed by# one or more space(s) or tab(s) and then the password.PASSFILE="/etc/openvpn/server/user/psw-file"LOG_FILE="/var/log/openvpn/password.log"TIME_STAMP=`date "+%Y-%m-%d %T"`###########################################################if [ ! -r "${PASSFILE}" ]; thenecho "${TIME_STAMP}: Could not open password file \"${PASSFILE}\" for reading." >> ${LOG_FILE}exit 1fiCORRECT_PASSWORD=`awk '!/^;/&&!/^#/&&$1=="'${username}'"{print $2;exit}' ${PASSFILE}`if [ "${CORRECT_PASSWORD}" = "" ]; thenecho "${TIME_STAMP}: User does not exist: username=\"${username}\", password=\"${password}\"." >> ${LOG_FILE}exit 1fiif [ "${password}" = "${CORRECT_PASSWORD}" ]; thenecho "${TIME_STAMP}: Successful authentication: username=\"${username}\"." >> ${LOG_FILE}exit 0fiecho "${TIME_STAMP}: Incorrect password: username=\"${username}\", password=\"${password}\"." >> ${LOG_FILE}exit 1
网络配置
确保防火墙为开启的状态,并添加如下配置,否则只能访问到装了vpn的那台机器,不能访问其内外中的其他机器
//centos6及以下才需要这样操作,centos7已默认开启vim /etc/sysctl.confnet.ipv4.ip_forward = 1sysctl –p(使之立即生效)
firewall-cmd --permanent --add-masqueradefirewall-cmd --permanent --add-service=openvpn# 或者添加自定义端口# firewall-cmd --permanent --add-port=1194/tcpfirewall-cmd --permanent --direct --passthrough ipv4 -t nat -A POSTROUTING -s 10.8.0.0/24 -o eth0 -j MASQUERADEfirewall-cmd --reload
或者为如下命令:
iptables -t nat -A POSTROUTING -s 10.8.0.0/24 -o eth0 -j MASQUERADE
启动服务
# 查看service名rpm -ql openvpn |grep service/usr/lib/systemd/system/openvpn-client@.service/usr/lib/systemd/system/openvpn-server@.service/usr/lib/systemd/system/openvpn@.service# 启动systemctl start openvpn-server@.service.service# 或openvpn /etc/openvpn/server/server.conf &
配置客户端
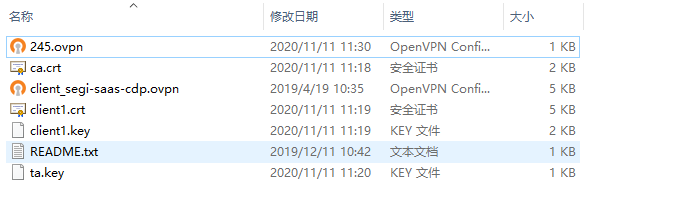
从server上将生成的ca.crt、client1.crt、client1.key、ta.key文件下载到客户端,客户端配置内容C:\Program Files\OpenVPN\config\245.ovpn如下:
#clientproto tcp-clientdev tunauth-user-passremote yourserver.domain 1194ca ca.crtcert client1.crtkey client1.keytls-auth ta.key 1remote-cert-tls serverauth-nocachepersist-tunpersist-keycomp-lzoverb 4mute 10
记住密码
1. 在OpenVPN安装目录下\OpenVPN\config文件夹中找到vpnserver.ovpn文件。
2. 在文件最后一行加入auth-user-pass pass.txt保存。
3. 在同目录下创建pass.txt文件。
4. 文件中录入用户名和密码,用户名和密码独占一行
另外可以将crt,key这些直接配置在245.ovpn文件里面,如下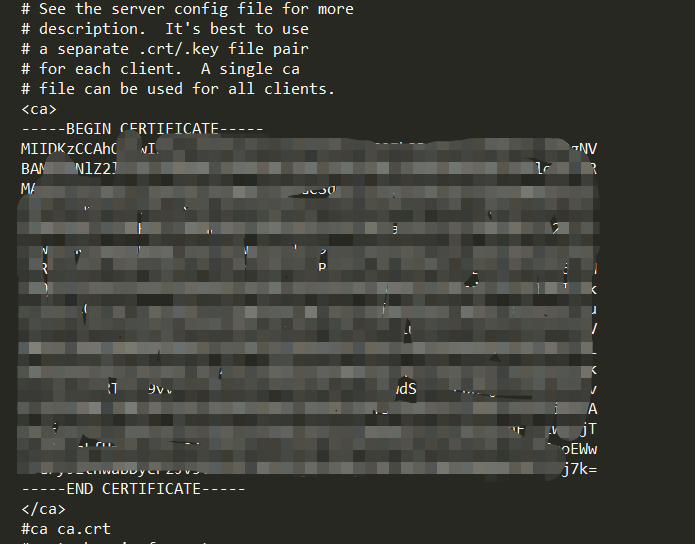
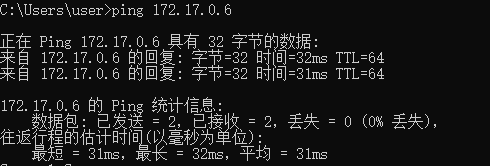
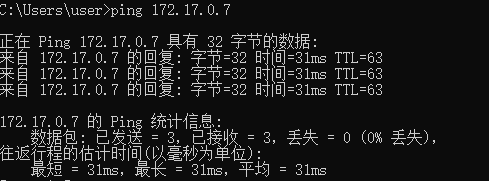
效果

若有收获,就点个赞吧
0 人点赞
