linux实现一台监测机定时监测多台服务器(主机是否在线、内存使用率、CPU使用率),并实现邮件报警。
1、信任关系建立
首先要实现监测机server与被监测机client之间的ssh信任关系。
步骤:
1、client机以root角色在root目录下生成 .ssh文件夹
[root@db ~]$ ssh localhostThe authenticity of host 'localhost(127.0.0.1)' can't be established.RSA key fingerprint isc5:08:8a:e3:b9:fb:44:f4:0b:e3:9f:c4:d7:e2:11:8a.Are you sure you want to continueconnecting (yes/no)? yesWarning: Permanently added 'localhost'(RSA) to the list of known hosts.root@db's password:[root@db ~]# ls -a. .. anaconda-ks.cfg .bash_history .bash_logout .bash_profile .bashrc .cshrc id_rsa.pub .ssh .tcshrc
2、修改配置文件/etc/sshd_configRSAAuthentication yes //开启RSA加密PubkeyAuthentication yes //开启公钥AuthorizedKeysFile .ssh/authorized_keys //密钥的路径PermitRootLogin yes //允许root登陆PasswordAuthentication no //关闭密码验证
3、在server机上生成公钥,并传到client机上。注意替换IP。
注意:存在多台被监控机时,公钥只需生成一遍。
[root@localhost .ssh]# scp id_rsa.pub root@你的IP:/root/The authenticity of host '192.168.4.71 (192.168.4.71)' can't be established.ECDSA key fingerprint is SHA256:xyeUDbFoTbHGZxhpSUJNadqWZPoxvqHbKPtGWxHiQlw.ECDSA key fingerprint is MD5:0a:3d:80:d2:8e:12:eb:f1:9e:35:4b:26:72:83:c9:59.Are you sure you want to continue connecting (yes/no)? yesWarning: Permanently added '192.168.4.71' (ECDSA) to the list of known hosts.root@192.168.4.71's password:id_rsa.pub 100% 408 220.8KB/s 00:00
4、在client机root目录下可以看到传过来的id_rsa.pub公钥,把公钥存放在/root/.ssh目录下命名为authorized_keys,并修改权限。
[root@db ~]# mv id_rsa.pub /root/.ssh/authorized_keys[root@db ~]# chmod 644 /root/.ssh/authorized_keys
5、此时,再通过server机ssh连接client机,即可不用密码登录。
[root@localhost .ssh]# ssh -l root Client机IPLast failed login: Fri Jul 10 11:08:45 CST 2020 from 192.168.4.73 on ssh:nottyThere was 1 failed login attempt since the last successful login.Last login: Fri Jul 10 11:08:27 2020 from 192.168.3.168[root@db ~]#
至此信任关系建立成功
2、监控服务器
准备
1、server机安装mutt邮件工具。yum install mutt
2、server机准备监控列表iplist.txt。其中存放已建立信任关系的被监测机ip。可从附件下载,该文件必须为unix格式文件,否则读取ip列表时会读取到换行。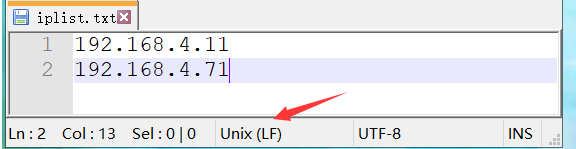
步骤
1、编写监控脚本monitor.sh,可从附件下载,该文件必须为unix格式文件,否则shell脚本会出错。
本文iplist.txt和shell脚本均放在/data/monitor下。
#!/bin/bashprint_str="monitor:" #最终邮件内容flag="false" #判断标志位,防止空邮件for ip in `cat /data/monitor/iplist.txt`;do #iplist地址需指定访问路径ping $ip -c1>/dev/null #先检查主机是否在线,如果在线则进行进一步监控if [ $? -eq 0 ]; then# rootused=`ssh $ip df -h|grep /$|awk '{print $4}'|cut -d% -f1` #取根目录使用情况#for hardid in `ssh $ip df -h|grep "^\/dev\/s[a-z][a-z]"|awk '{print $1}'`;do#hardused=`ssh -$ip df -h|grep $hardid|awk '{print $5}'|cut -d% -f1` #取其它本地硬盘的使用情况# donememtotal=`ssh $ip free -m|grep Mem|awk '{print $2}'`memused=`ssh $ip free -m|grep Mem|awk '{print $3}'`mem=`expr $memused \* 100 / $memtotal`idelcpu=`ssh $ip top -b -n1 | fgrep "Cpu(s)" | tail -1 | awk -F'id,' '{split($1, vs, ","); v=vs[length(vs)]; printf "%d", v; }'`cpuused=`expr 100 - $idelcpu`if [[ $mem -gt 80 ]] || [[ $cpuused -gt 90 ]]; then #如果内存使用高于80%或CPU高于90%则邮件通知flag="true"print_str="${print_str}\n warn:$ip memory is $mem%; the Cpu used is $cpuused%"fielseecho "host:$ip is not alive"|/usr/bin/mutt -s"$ip monitor report" xxxx@163.com #如果主机无法ping通则邮件通知fidoneif [[ $flag == "true" ]]; thenecho -e "$print_str"|/usr/bin/mutt -s"monitor report" xxxx@163.com #统一发送一封告警邮件 mutt命令需指明访问路径fi
2、crontab每五分钟执行一次脚本监听。
[root@localhost ~]# crontab -e*/5 * * * * bash /data/monitor/monitor.sh
问题查错
1、可通过/var/log下cron.log查看cron执行日志,检查定时任务是否成功执行。
2、可通过/var/spool/mail查看root.log日志,检查mutt邮件发送是否成功。
建议使用163邮箱,目前公司邮箱和QQ邮箱经测试由于收信规则等原因无法接收邮件。

若有收获,就点个赞吧
0 人点赞
