摘要
对于一家公司而言,数据量越来越多,如果快速去查找这些信息是一个很难的问题,在计算机领域有一个专门的领域IR(Information Retrival)研究获取信息,做信息检索。
在国内的如百度这样的搜索引擎也属于这个领域,要自己实现一个搜索引擎是非常难的,不过信息查找对每一个公司都非常重要,对于开发人员也可以选一些市场上的开源项目来构建自己的站内搜索引擎,本文将通过ElasticSearch来构建一个这样的信息检索项目。
1 技术选型
- 搜索引擎服务使用 ElasticSearch
- 提供的对外 web 服务选 Springboot web
1.1 ElasticSearch
Elasticsearch是一个基于Lucene的搜索服务器。它提供了一个分布式多用户能力的全文搜索引擎,基于RESTful web接口。Elasticsearch是用Java语言开发的,并作为Apache许可条款下的开放源码发布,是一种流行的企业级搜索引擎。Elasticsearch用于云计算中,能够达到实时搜索,稳定,可靠,快速,安装使用方便。
官方客户端在Java、.NET(C#)、PHP、Python、Apache Groovy、Ruby和许多其他语言中都是可用的。根据DB-Engines的排名显示,Elasticsearch是最受欢迎的企业搜索引擎,其次是Apache Solr,也是基于Lucene。
现在开源的搜索引擎在市面上最常见的就是ElasticSearch和Solr,二者都是基于Lucene的实现,其中ElasticSearch相对更加重量级,在分布式环境表现也更好,二者的选需考虑具体的业务场景和数据量级。对于数据量不大的情况下,完全需要使用像Lucene这样的搜索引擎服务,通过关系型数据库检索即可。
1.2 Spring Boot
Spring Boot makes it easy to create stand-alone, production-grade Spring based Applications that you can “just run”.2
现在 Spring Boot 在做 web 开发上是绝对的主流,其不仅仅是开发上的优势,在布署,运维各个方面都有着非常不错的表现,并且 Spring 生态圈的影响力太大了,可以找到各种成熟的解决方案。
1.3 ik分词器
ElasticSearch 本身不支持中文的分词,需要安装中文分词插件,如果需要做中文的信息检索,中文分词是基础,此处选了ik,下载好后放入 elasticSearch 的安装位置的 plugin 目录即可。
2 环境准备
需要安装好elastiSearch以及kibana(可选),并且需要lk分词插件。
- 安装elasticSearch elasticsearch官网. 笔者使用的是7.5.1。
- ik插件下载 ik插件github地址. 注意下载和你下载elasticsearch版本一样的ik插件。
- 将ik插件放入elasticsearch安装目录下的plugins包下,新建报名ik,将下载好的插件解压到该目录下即可,启动es的时候会自动加载该插件。

搭建 Spring Boot 项目 idea ->new project ->spring initializer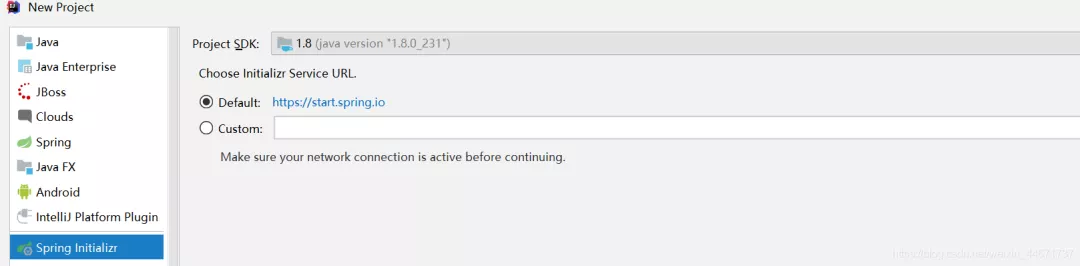
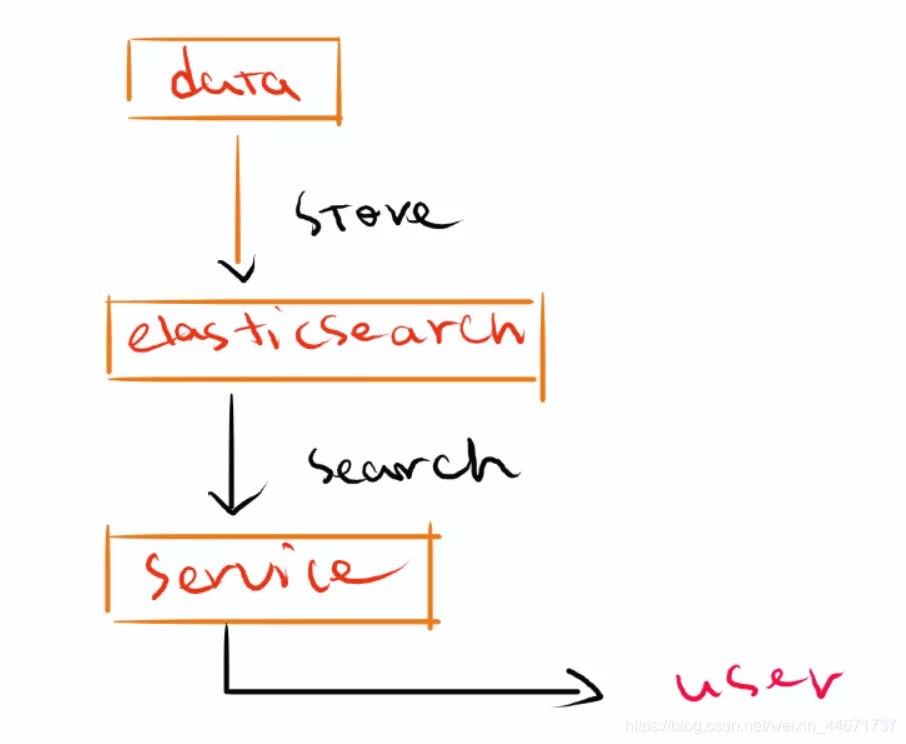
3 项目架构
- 获取数据使用ik分词插件
- 将数据存储在es引擎中
- 通过es检索方式对存储的数据进行检索
- 使用es的java客户端提供外部服务
4 实现效果
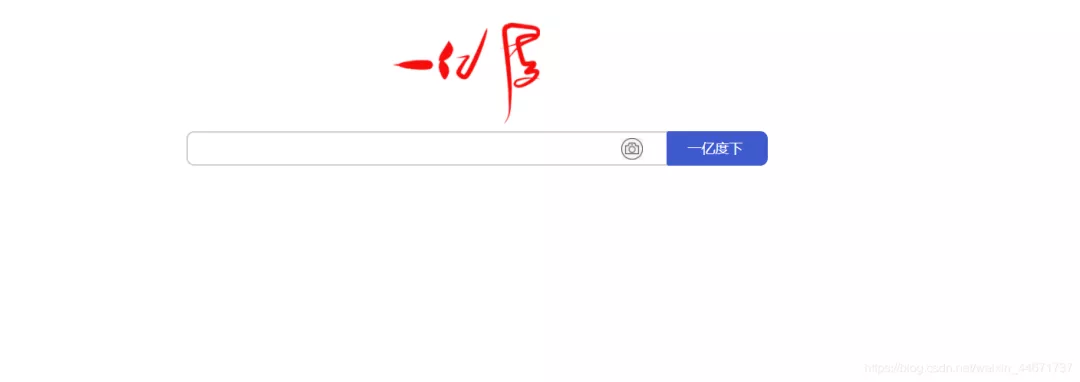
4.1 搜索页面
4.2 搜索结果页面
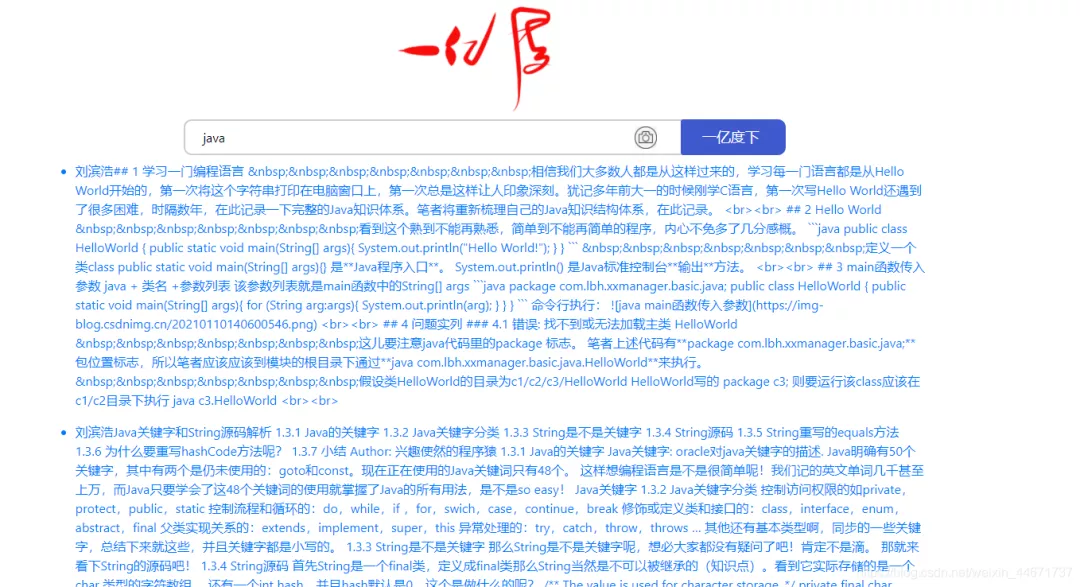
点击第一个搜索结果是我个人的某一篇博文,为了避免数据版权问题,笔者在es引擎中存放的全是个人的博客数据。
5 具体代码实现
5.1 全文检索的实现对象
按照博文的基本信息定义了如下实体类,主要需要知道每一个博文的url,通过检索出来的文章具体查看要跳转到该url。
5.2 客户端配置
通过java配置es的客户端。
5.3 业务代码编写
包括一些检索文章的信息,可以从文章标题,文章内容以及作者信息这些维度来查看相关信息。
5.4 对外接口
和使用springboot开发web程序相同。
5.5 页面
此处页面使用thymeleaf,主要原因是笔者真滴不会前端,只懂一丢丢简单的h5,就随便做了一个可以展示的页面。
搜索页面
<!DOCTYPE html><html lang="en" xmlns:th="http://www.thymeleaf.org"><head><meta charset="UTF-8" /><meta name="viewport" content="width=device-width, initial-scale=1.0" /><title>YiyiDu</title><!--input:focus设定当输入框被点击时,出现蓝色外边框text-indent: 11px;和padding-left: 11px;设定输入的字符的起始位置与左边框的距离--><style>input:focus {border: 2px solid rgb(62, 88, 206);}input {text-indent: 11px;padding-left: 11px;font-size: 16px;}</style><!--input初始状态--><style class="input/css">.input {width: 33%;height: 45px;vertical-align: top;box-sizing: border-box;border: 2px solid rgb(207, 205, 205);border-right: 2px solid rgb(62, 88, 206);border-bottom-left-radius: 10px;border-top-left-radius: 10px;outline: none;margin: 0;display: inline-block;background: url(/static/img/camera.jpg) no-repeat 0 0;background-position: 565px 7px;background-size: 28px;padding-right: 49px;padding-top: 10px;padding-bottom: 10px;line-height: 16px;}</style><!--button初始状态--><style class="button/css">.button {height: 45px;width: 130px;vertical-align: middle;text-indent: -8px;padding-left: -8px;background-color: rgb(62, 88, 206);color: white;font-size: 18px;outline: none;border: none;border-bottom-right-radius: 10px;border-top-right-radius: 10px;margin: 0;padding: 0;}</style></head><body><!--包含table的div--><!--包含input和button的div--><div style="font-size: 0px;"><div align="center" style="margin-top: 0px;"><img src="../static/img/yyd.png" th:src = "@{/static/img/yyd.png}" alt="一亿度" width="280px" class="pic" /></div><div align="center"><!--action实现跳转--><form action="/home/query"><input type="text" class="input" name="keyword" /><input type="submit" class="button" value="一亿度下" /></form></div></div></body></html>
搜索结果页面
<!DOCTYPE html><html lang="en" xmlns:th="http://www.thymeleaf.org"><head><link rel="stylesheet" href="https://cdn.staticfile.org/twitter-bootstrap/4.3.1/css/bootstrap.min.css"><meta charset="UTF-8"><title>xx-manager</title></head><body><header th:replace="search.html"></header><div class="container my-2"><ul th:each="article : ${articles}"><a th:href="${article.url}"><li th:text="${article.author}+${article.content}"></li></a></ul></div><footer th:replace="footer.html"></footer></body></html>

若有收获,就点个赞吧
0 人点赞
