1、下载并安装官方的 yum repository (新建了mysql文件夹)
wget -i -c http://dev.mysql.com/get/mysql57-community-release-el7-10.noarch.rpm
2、安装下载过来的文件(yum repository)
yum -y install mysql57-community-release-el7-10.noarch.rpm
3、进入正题:yum安装mysql
yum -y install mysql-community-server
4, 启动mysql
service mysqld start
5 查看是否启动成功
service mysqld status
出现以下标准则代表启动成功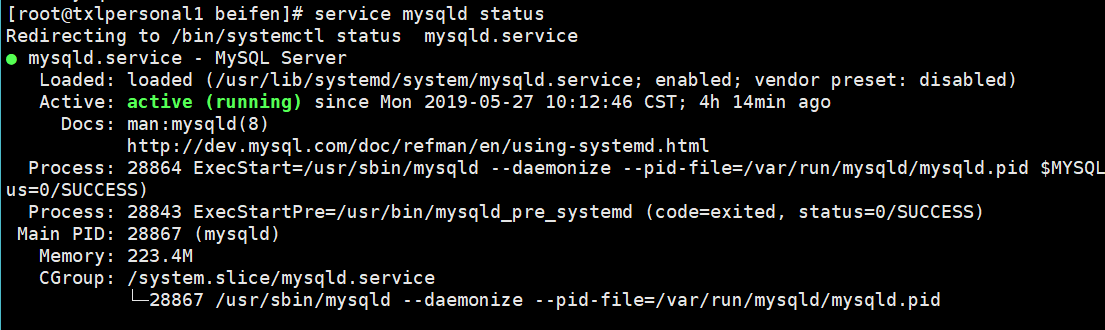
6 查看初始密码
grep “password” /var/log/mysqld.log
7 进入数据库
mysql -uroot -p 这里到-p就行了,回车会提示你输入密码的
8 修改初始密码
ALTER USER ‘root’@’localhost’ IDENTIFIED BY ‘new password’ 注意密码需要有大小写字母数字
9 授权远程登录
grant all on . to root@’%’ identified by ‘new password’
mysql 重要目录说明
#(a)数据库目录
/var/lib/mysql/
#(b)配置文件
/usr/share /mysql(mysql.server命令及配置文件)
#(c)相关命令
/usr/bin(mysqladmin mysqldump等命令)
#(d)启动脚本
/etc/rc.d/init.d/(启动脚本文件mysql的目录)
mysql配置文件: /etc/my.cnf
问题一:/usr/sbin/mysqld: Table ‘mysql.plugin’ doesn’t exist
原因:
table ‘mysql.host’不存在的原因是因为新安装的mysql服务后,一般需要执行数据库初始化操作 ,从而生成与权限相关的表,执行命令如下:
/usr/bin/mysql_install_db --user=mysql
注:以上命令中的mysql_install_db与你安装的mysql服务位置有关,如果不知道在哪,可以使用find / -name mysql_install_db找到其位置,然后执行上面的命令。
1. [root@hadoop11 mysql]# find / -name mysql_install_db2. /usr/bin/mysql_install_db
问题二:Linux下安装mysql后,添加服务的问题
mysql安装完毕后,使用chkconfig —add 添加服务时提示“在mysqld服务中读取信息时出错:没有那个文件或目录”
找到mysql.server服务文件复制到/etc/rc.d/init.d下
cp /usr/local/mysql/support-files/mysql.server /etc/rc.d/init.d/mysqld (会导致启动和关闭服务报错)
chmod +x /etc/rc.d/init.d/mysqld
然后执行chkconfig —add mysqld时提示“服务 mysql 不支持 chkconfig”,解决办法
要让chkconfig支持,就得在写好的脚本中添加 两行注释:
# chkconfig: 234 19 08
# description: xxxxxxxxxxxxxxxxx
chkconfig 后的数字表明 脚本默认在运行级 2, 3, 4 启动,启动优先权为19,停止优先权为 08。
添加脚本之后就可以运行 chkconfig —add 了
问题三:linux安装mysql时使用临时密码登录不进去mysql: [Warning] Using a password on the command line interface can be insec
1.在root用户下,停止mysql
service mysqld stop
2.vi /etc/my.cnf
在[mysqld]的段中加上一句skip-grant-tables
[mysqld]
skip-grant-tables
shift+z+z;保存退出
3.重新启动mysql
systemctl start mysqld
3.登录修改mysql 的密码
[root@python2 hadoop]# mysql -uroot -p
Enter password:
一直敲回车
Welcome to the MySQL monitor. Commands end with ; or \g.
Your MySQL connection id is 2
Server version: 5.7.21 MySQL Community Server (GPL)
看到welcome登录成功
5.FLUSH PRIVILEGES; 执行这条命令刷新
6.授权
mysql> GRANT ALL PRIVILEGES ON . TO ‘myuser’@’%’IDENTIFIED BY ‘mypassword’ WITH GRANT OPTION;
Query OK, 0 rows affected, 1 warning (0.01 sec)
6:修改密码
mysql> ALTER USER ‘root’@’localhost’ IDENTIFIED BY ‘123456’;
Query OK, 0 rows affected (0.00 sec)
7.退出 quit;
- 到vi /etc/my.cnf 删除skip-grant-tables

若有收获,就点个赞吧
0 人点赞
