流程
- 创建项目
- 到pom.xml文件中
看spark版本多少, 还有scala版本
<properties><maven.compiler.source>8</maven.compiler.source><maven.compiler.target>8</maven.compiler.target></properties><dependencies><!-- https://mvnrepository.com/artifact/org.apache.spark/spark-core --><dependency><groupId>org.apache.spark</groupId><artifactId>spark-core_2.13</artifactId><version>3.2.1</version></dependency><!-- https://mvnrepository.com/artifact/org.apache.spark/spark-yarn --><dependency><groupId>org.apache.spark</groupId><artifactId>spark-yarn_2.13</artifactId><version>3.2.1</version><scope>provided</scope></dependency><!-- https://mvnrepository.com/artifact/org.apache.spark/spark-sql --><dependency><groupId>org.apache.spark</groupId><artifactId>spark-sql_2.13</artifactId><version>3.2.1</version><scope>provided</scope></dependency><!-- https://mvnrepository.com/artifact/mysql/mysql-connector-java --><dependency><groupId>mysql</groupId><artifactId>mysql-connector-java</artifactId><version>8.0.28</version></dependency><!-- https://mvnrepository.com/artifact/org.apache.spark/spark-hive --><dependency><groupId>org.apache.spark</groupId><artifactId>spark-hive_2.13</artifactId><version>3.2.1</version><scope>provided</scope></dependency><!-- https://mvnrepository.com/artifact/org.apache.hive/hive-exec --><dependency><groupId>org.apache.hive</groupId><artifactId>hive-exec</artifactId><version>3.1.2</version></dependency><!-- https://mvnrepository.com/artifact/org.apache.spark/spark-streaming --><dependency><groupId>org.apache.spark</groupId><artifactId>spark-streaming_2.13</artifactId><version>3.2.1</version><scope>provided</scope></dependency><!-- https://mvnrepository.com/artifact/org.apache.spark/spark-streaming-kafka --><dependency><groupId>org.apache.spark</groupId><artifactId>spark-streaming-kafka_2.11</artifactId><version>1.6.3</version></dependency><!-- https://mvnrepository.com/artifact/com.fasterxml.jackson.core/jackson-core --><dependency><groupId>com.fasterxml.jackson.core</groupId><artifactId>jackson-core</artifactId><version>2.13.2</version></dependency><!-- https://mvnrepository.com/artifact/com.alibaba/druid --><dependency><groupId>com.alibaba</groupId><artifactId>druid</artifactId><version>1.2.8</version></dependency></dependencies><build><plugins><plugin><!-- 该插件用于将 Scala 代码编译成 class 文件 --><!-- https://mvnrepository.com/artifact/net.alchim31.maven/scala-maven-plugin --><groupId>net.alchim31.maven</groupId><artifactId>scala-maven-plugin</artifactId><version>4.5.6</version><executions><execution><!-- 将声明绑定到maven的compile阶段 --><goals><goal>testCompile</goal></goals></execution></executions></plugin><plugin><groupId>org.apache.maven.plugins</groupId><artifactId>maven-assembly-plugin</artifactId><version>3.3.0</version><configuration><descriptorRefs><descriptorRef>jar-with-dependencies</descriptorRef></descriptorRefs></configuration><executions><execution><id>make-assembly</id><phase>package</phase><goals><goal>single</goal></goals></execution></executions></plugin></plugins></build>
如果是子模块的话, 需要添加scala的支持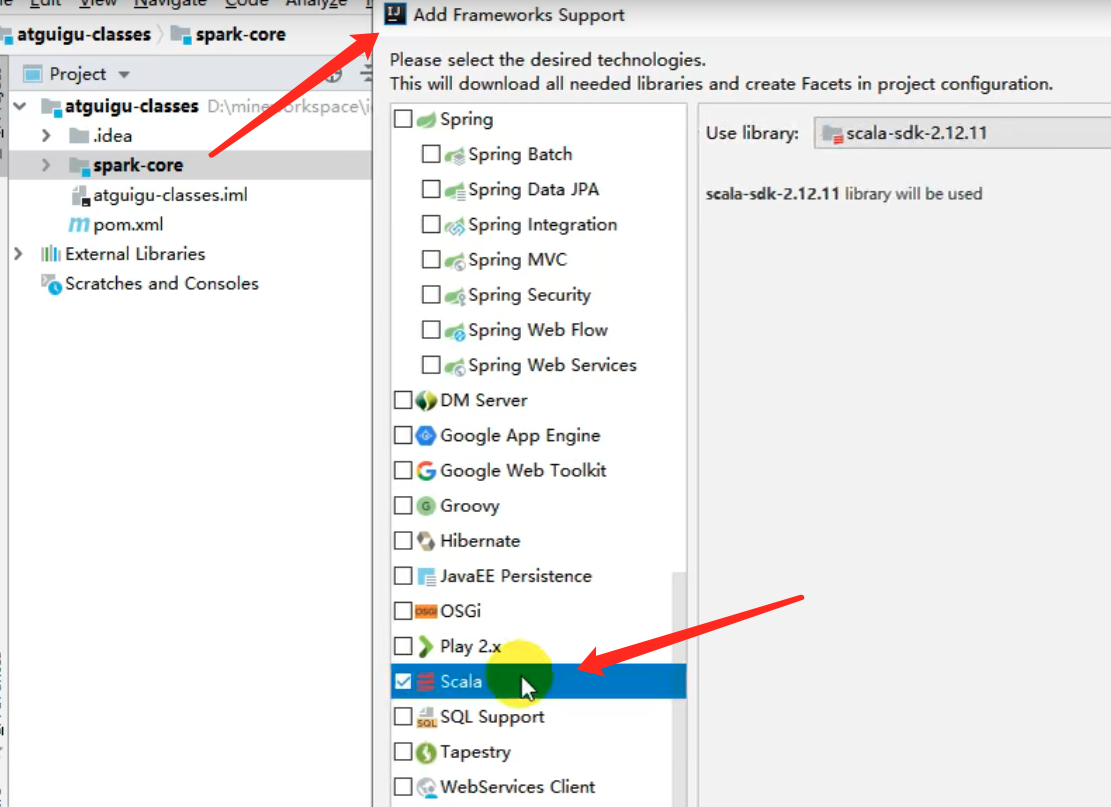
- 创建scala类
import org.apache.spark.SparkContext //一切任务的起源,所有计算的开头import org.apache.spark.SparkConf //spark的配置信息,相当于mr当中的那个conf,他会覆盖掉默认的配置文件(如果你进行了配置),他的主要作用,app的名字,设置运行时本地模式还是集群模式
- 写代码(参考官方文档)
如果是在windows上运行,设置setMaster(‘local[n]’)
如果是线上运行,把setMaster(‘local[n]’)去掉,或者setMaster(‘spark://master’)(不建议,因为写死了)
注意两个关键词:transformation,actionspark中saveAsTextFile如何最终生成一个文件
在默认textfile中,如果从hdfs中读取文件,源码中默认的分区数是2,如果想改变分区数,可以在textfile中设置第二个参数”分区数”
一般而言.saveAsTextFile会按照执行task的多少生成多少个文件,比如part-00000一直到part-0000n,n自然就是task的个数,也就是最后的stage的分区数
在RDD上调用coalesce(1, true).saveAsTextFile(),意味着做完计算之后将数据汇集到一个分区,然后再执行保存的动作.显然,一个分区,spark自然只起一个task来执行保存的动作.也就只有一个文件产生了,又或者可以调用repartition(1),它其实是coalesce的一个包装,默认第二个参数为true.
虽然可以这么做,但是代价是巨大的.因为spark面对的是大量的数据,并且是并行执行的.如果强行要求最后只有一个分区,必然会导致大量的磁盘IO和网络IO产生,并且最终执行reduce操作的节点的内存也会承受很大考验.spark会很慢,甚至会死掉
saveAsTextFile要求保存的目录之前是没有的,否则会报错.所以先判断一下
shell
打jar包,去掉setMaster
spark-submit \--master spark://master:7077 \--executor-memory 512M \--total-executor-cores 2 \--class org.apache.spark.WordCount \xxx.jar \in \out \

若有收获,就点个赞吧
0 人点赞
