scrapy框架真的比request库写爬虫麻烦挺多,但是作为一个框架,他有自己的优势,今天就试着用scrapy爬取汽车之家的图片,改名爬一下pixiv的图片试试hh,这次也是网易云课程的项目实践。
准备工作
首先创建项目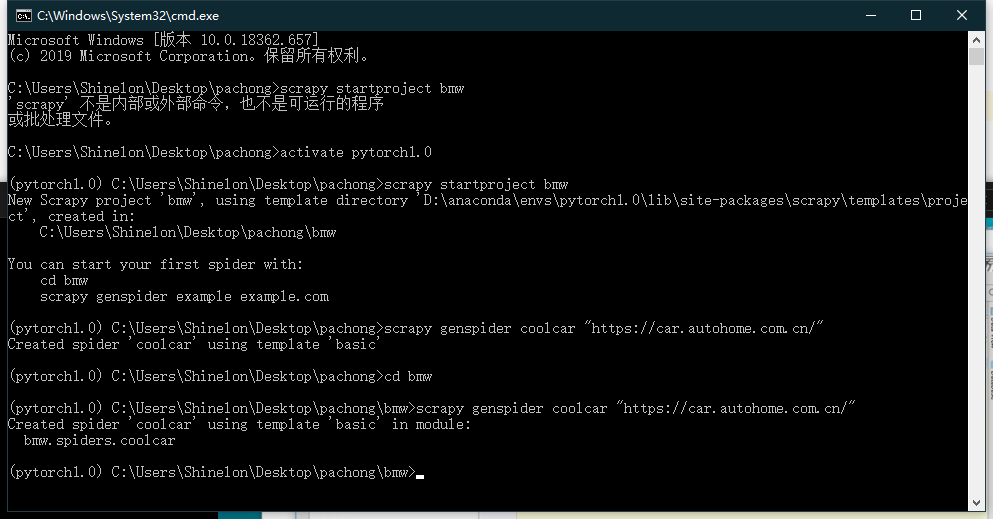
这里是用的基本创建scrapy框架的步骤:
1.先创建project
2.将创建相应的启动程序,固定套路。
3.进去去除机器人协议
4.设置请求头headers(这两步在settings文件下设定)
'User-Agent': 'Mozilla/5.0 (Windows NT 10.0; Win64; x64) AppleWebKit/537.36 (KHTML, like Gecko) Chrome/72.0.3626.121 Safari/537.36'
请求头user-agent都是固定的,所以我拿过来。
然后创建一个cmd_starts.py,方便代码的调试。
from scrapy import cmdlinecmdline.execute(("scrapy crawl coolcar").split())
正式开始-一种基础的下载方法
coolcar.py
# -*- coding: utf-8 -*-import scrapyfrom bmw.items import BmwItemclass CoolcarSpider(scrapy.Spider):name = 'coolcar'allowed_domains = ['car.autohome.com.cn/']start_urls = ['https://car.autohome.com.cn/pic/series/4867.html#pvareaid=2042194']def parse(self, response):uiboxs = response.xpath("//div[@class = 'uibox']")[1:]for uibox in uiboxs:category = uibox.xpath(".//div[@class = 'uibox-title']/a/text()").get()urls = uibox.xpath(".//ul/li/a/img/@src").getall()urls = list(map(lambda url:response.urljoin(url),urls) ) #匿名函数,执行代码,加入https://,但是要注意转换成listitem = BmwItem(category= category,urls = urls)yield item #这里使用生成器,当然也可以总的生成一个列表返还回去
上面是爬虫的主体部分,负责爬虫。
然后还要指定结构体,item。items.py
# -*- coding: utf-8 -*-# See documentation in:# https://doc.scrapy.org/en/latest/topics/items.htmlimport scrapyclass BmwItem(scrapy.Item):category = scrapy.Field()urls = scrapy.Field()
这样就得到了相应的url了。
# -*- coding: utf-8 -*-# Define your item pipelines here## Don't forget to add your pipeline to the ITEM_PIPELINES setting# See: https://doc.scrapy.org/en/latest/topics/item-pipeline.htmlimport osfrom urllib import requestclass BmwPipeline(object):def __init__(self):self.path = os.path.join(os.path.dirname(os.path.dirname(__file__)),'imges')if not os.path.exists(self.path):os.mkdir(self.path) #判断有没有文件夹,没有的话就创建一个def process_item(self, item, spider):category = item['category']urls = item['urls']category_path = os.path.join(self.path,category)if not os.path.exists(category_path):os.mkdir(category_path)for url in urls:image_name = url.split("_")[-1] #得到图片名字request.urlretrieve(url,os.path.join(category_path,image_name))return item
异步操作-更快更高更强
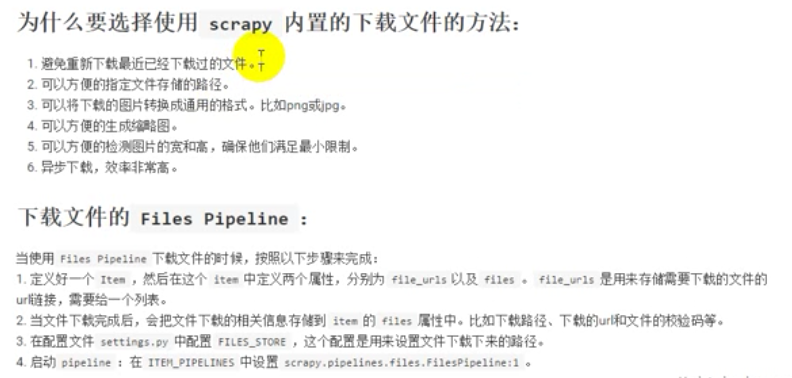
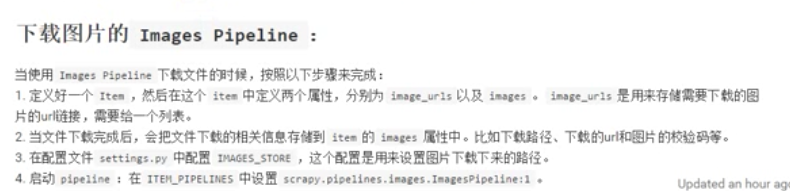
懒得输入了,之间搬截图,可以看出这个方法是指定的方法。
下面用简单的下载方法表示一下:
修改的地方有下面两个: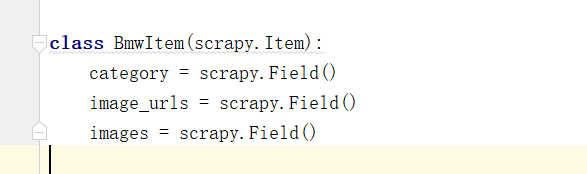

分别在items和主程序进行一定修改。
然后settings修改一下如下:
ITEM_PIPELINES = {# 'bmw.pipelines.BmwPipeline': 300,'scrapy.pipelines.images.ImagesPipeline':1,}#在最后面要制定下载路径IMAGES_STORE = os.path.join(os.path.dirname(os.path.dirname(__file__)),'images')
其实就是用的上面的方法,但是速度直接提升了几倍。
但是缺点是下载下来的图片是这样滴。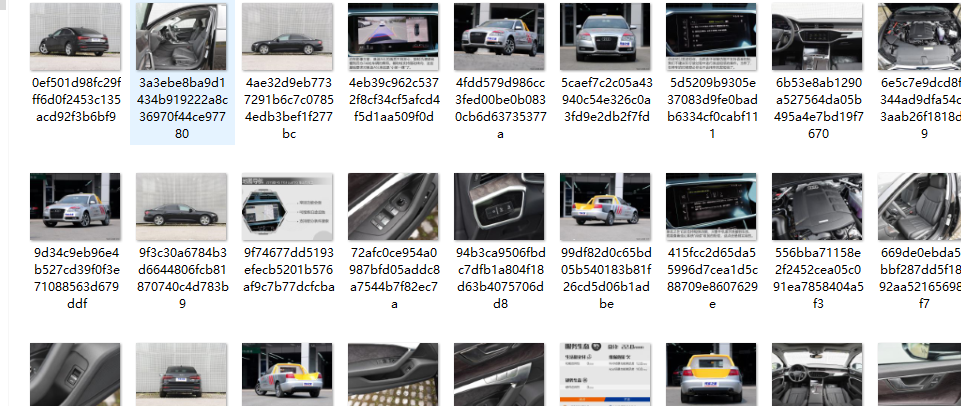
呕吼,没有分类撒。别急,接下来还要操作一番。要想实现需求,就要自己重写一下pipeline。这样就很难很难了我觉得。
首先,先放代码:
class Bmw_pipeline(ImagesPipeline):def get_media_requests(self, item, info):#这个方法实在发送下载请求之前调用#其实这个方法本身就是去发送下面的请求的request_objs = super(Bmw_pipeline, self).get_media_requests(item,info) #返回有request对象的一个列表for request_obj in request_objs:request_obj.item = item #这里把item绑定在request上来return request_objsdef file_path(self, request, response=None, info=None):#这个方法是在图片将要被图片存储的时候调用,来获取图片的存储路径path = super(Bmw_pipeline, self).file_path(request,response,info)category = request.item.get('category') #这里其实传递进来了images_store = settings.IMAGES_STORE #这里取基础目录category_path = os.path.join(images_store,category)#加入一个路径,文件夹+下属的文件夹名字image_name = path.replace("full/","")image_path = os.path.join(category_path,image_name)return image_path
将pipeline1内的class类完成替换(后面还是要在settings内再把pipeline替换成我们的新的class:
ITEM_PIPELINES = {# 'bmw.pipelines.BmwPipeline': 300,#'scrapy.pipelines.images.ImagesPipeline':1,'bmw.pipelines.Bmw_pipeline':1,}
饱经沧桑的pipeline。。。这里的思路是将images函数里面的方法进行改写,继承,太难受了,pipeline下载的时候不同通道可以一起下载,也算一个小发现吧。其中最难理解的是:request_obj.item = item
这里之前得到了request_objs,是一个装有request请求的列表,这里将item属性给其加了上去。item其实就是urls。执行了一个request.get()请求,将category内容传递了过来,item = BmwItem(``category``= category,``image_urls ``= urls)
把item进行了修改。
最后得到的是如下的情况: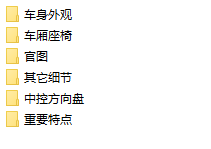
啊啊啊啊,终于弄清楚了这个东西,累死了,改明用这个爬虫试着改下,爬取pixiv图片hh,这波先放个大大的插图做封面,ovo。帅帅帅!

若有收获,就点个赞吧
0 人点赞
