操作指南
Tengine是由淘宝网发起的Web服务器项目。它在Nginx的基础上,针对大访问量网站的需求,添加了很多高级功能和特性。Tengine的性能和稳定性已经在大型的网站如淘宝网,天猫商城等得到了很好的检验。它的最终目标是打造一个高效、稳定、安全、易用的Web平台。
Tengine,简单的讲就是对nginx进行了二次开发并提供了更丰富的功能官网地址:http://tengine.taobao.org/;目前最新的稳定版本是2.2.0下载地址:http://tengine.taobao.org/download/tengine-2.2.0.tar.gz
1、下载
wget http://tengine.taobao.org/download/tengine-2.2.0.tar.gz
2、解压
tar -zxvf tengine-2.2.0.tar.gzcd tengine-2.2.0/
3、检查依赖库
在安装之前首先检查一下是否已安装nginx的一些模块依赖的lib库,诸如g++、gcc、pcre-devel、openssl-devel和zlib-devel。所以下面这些命令最好挨个跑一遍,已安装的会提示不用安装,未安装或需要更新的则会执行安装及更新:
yum -y install gcc-c++ pcre pcre-devel zlib zlib-devel openssl openssl-devel --setopt=protected_multilib=false

4、安装完依赖后下面就可以放心开始安装nginx了,输入安装命令并指定安装路径
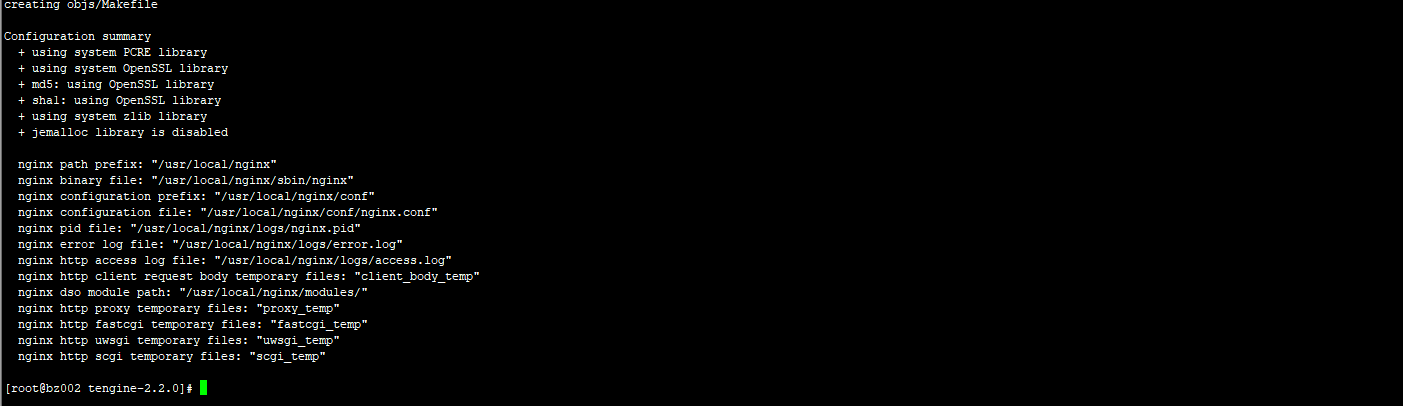
/configure --prefix=/usr/local/nginx
看到如下提示信息恭喜你,成功一大半啦!
5、最后通过make以及make install进行编译安装:
make && make install
6、安装完成后启动一下,输入启动命令
/usr/local/nginx/sbin/nginx[root@tlzhghglu local]# nginxbash: nginx: command not found...#解决方案:将nginx的启动路径加入到环境变量中:1. 打开环境变量所在的文件:vim /etc/profile2. 在命令模式下按GG至末尾,加上一行PATH=$PATH:/usr/local/nginx/sbin3. 重新加载环境source profile
7、设置为系统服务
vim /lib/systemd/system/nginx.service 创建文件[Unit]Description=The nginx HTTP and reverse proxy serverAfter=syslog.target network.target remote-fs.target nss-lookup.target[Service]Type=forkingPIDFile=/usr/local/nginx/logs/nginx.pidExecStartPre=/usr/local/nginx/sbin/nginx -tExecStart=/usr/local/nginx/sbin/nginx -c /usr/local/nginx/conf/nginx.confExecReload=/bin/kill -s HUP $MAINPIDExecStop=/bin/kill -s QUIT $MAINPIDPrivateTmp=true[Install]WantedBy=multi-user.targetchmod 745 nginx.service【 chmod 745 /lib/systemd/system/nginx.service】systemctl enable nginx.service
完后就可以使用以下命令管理tengine服务器了:
service nginx startservice nginx stopservice nginx restartsystemctl enable nginx.service【开机自启动】
8、让Tengine可以处理PHP:nginx.conf
#隐藏服务器版本号server_tokens off;server {listen 80;server_name localhost;root /var/www;location / {index index.html index.htm index.php;if (!-e $request_filename) {rewrite ^(.*)$ /index.php?s=$1 last;break;}}location ~ \.php(.*)$ {fastcgi_pass 127.0.0.1:9000;fastcgi_index index.php;fastcgi_split_path_info ^((?U).+\.php)(/?.+)$;fastcgi_param SCRIPT_FILENAME $document_root$fastcgi_script_name;fastcgi_param PATH_INFO $fastcgi_path_info;fastcgi_param PATH_TRANSLATED $document_root$fastcgi_path_info;include fastcgi_params;}}
9、开启80端口(其他端口类似,只针对firewall防火墙)
service firewalld start(启动防火墙)firewall-cmd --zone=public --add-port=80/tcp --permanent(开放端口)
命令含义:
–zone #作用域
–add-port=80/tcp #添加端口,格式为:端口/通讯协议
–permanent #永久生效,没有此参数重启后失效
重启防火墙
firewall-cmd --reload【service firewalld restart(重新启动防火墙)】
CentOS 7.0默认使用的是firewall作为防火墙
查看防火墙状态
firewall-cmd --state1
停止firewall
systemctl stop firewalld.service1
禁止firewall开机启动
systemctl disable firewalld.service
关闭selinux
进入到/etc/selinux/config文件
vi /etc/selinux/config1
将SELINUX=enforcing改为SELINUX=disabled
配制免密登录的命令
ssh-keygen -t rsassh-copy-id root@master12
scp -P 22 /Users/che/Downloads/jdk-8u161-linux-x64.rpm root@192.168.1.100:/software/
安装: yum install -y jdk-8u161-linux-x64.rpm设置环境变量cd /usr/java//usr/java/jdk1.8.0_161vi /etc/profileexport JAVA_HOME=/usr/java/jdk1.8.0_161export PATH=$JAVA_HOME/bin:$PATH
设置ntp时间同步服务
1、安装ntp
yum install -y ntp
2、设置NTP服务开机启动
chkconfig ntpd on
service nptd start
参考文件配置
#user nobody;worker_processes 1;#error_log logs/error.log;#error_log logs/error.log notice;#error_log logs/error.log info;#pid logs/nginx.pid;events {worker_connections 1024;}# load modules compiled as Dynamic Shared Object (DSO)##dso {# load ngx_http_fastcgi_module.so;# load ngx_http_rewrite_module.so;#}http {include mime.types;default_type application/octet-stream;log_format main '$remote_addr - $remote_user [$time_local] "$request" ''$status $body_bytes_sent "$http_referer" ''"$http_user_agent" "$http_x_forwarded_for"';access_log logs/access.log main;sendfile on;#tcp_nopush on;#keepalive_timeout 0;keepalive_timeout 65;gzip on;reset_timedout_connection on; # 关闭不响应的客户端连接,释放客户端所占的内存空间client_body_buffer_size 8k; # 指定用于读取客户端请求主体的缓冲区大小client_header_buffer_size 1k; # 指定用于读取客户端请求首部的缓冲区大小large_client_header_buffers 4 8k; # 指定用于读取客户端请求中较大首部的缓冲区的最大数量和大小client_max_body_size 20m; # 指定用于客户端请求主体的最大大小client_header_timeout 30s; # 指定用于读取客户端请求报文首部的超时时长,单位秒client_body_timeout 30s; # 指定用于读取客户端请求报文主体的超时时长,单位秒send_timeout 30s; # 指定用于向客户端发送响应报文的超时时长,单位秒include /usr/local/nginx/conf/conf.d/*.conf;}
操作指南
Tengine是由淘宝网发起的Web服务器项目。它在Nginx的基础上,针对大访问量网站的需求,添加了很多高级功能和特性。Tengine的性能和稳定性已经在大型的网站如淘宝网,天猫商城等得到了很好的检验。它的最终目标是打造一个高效、稳定、安全、易用的Web平台。
Tengine,简单的讲就是对nginx进行了二次开发并提供了更丰富的功能官网地址:http://tengine.taobao.org/;目前最新的稳定版本是2.2.0下载地址:http://tengine.taobao.org/download/tengine-2.2.0.tar.gz
1、下载
wget http://tengine.taobao.org/download/tengine-2.2.0.tar.gz
2、解压
tar -zxvf tengine-2.2.0.tar.gzcd tengine-2.2.0/
3、检查依赖库
在安装之前首先检查一下是否已安装nginx的一些模块依赖的lib库,诸如g++、gcc、pcre-devel、openssl-devel和zlib-devel。所以下面这些命令最好挨个跑一遍,已安装的会提示不用安装,未安装或需要更新的则会执行安装及更新:
yum -y install gcc-c++ pcre pcre-devel zlib zlib-devel openssl openssl-devel --setopt=protected_multilib=false
4、安装完依赖后下面就可以放心开始安装nginx了,输入安装命令并指定安装路径
/configure --prefix=/usr/local/nginx
看到如下提示信息恭喜你,成功一大半啦!
5、最后通过make以及make install进行编译安装:
make && make install
6、安装完成后启动一下,输入启动命令
/usr/local/nginx/sbin/nginx[root@tlzhghglu local]# nginxbash: nginx: command not found...#解决方案:将nginx的启动路径加入到环境变量中:1. 打开环境变量所在的文件:vim /etc/profile2. 在命令模式下按GG至末尾,加上一行PATH=$PATH:/usr/local/nginx/sbin3. 重新加载环境source profile
7、设置为系统服务
vim /lib/systemd/system/nginx.service 创建文件[Unit]Description=The nginx HTTP and reverse proxy serverAfter=syslog.target network.target remote-fs.target nss-lookup.target[Service]Type=forkingPIDFile=/usr/local/nginx/logs/nginx.pidExecStartPre=/usr/local/nginx/sbin/nginx -tExecStart=/usr/local/nginx/sbin/nginx -c /usr/local/nginx/conf/nginx.confExecReload=/bin/kill -s HUP $MAINPIDExecStop=/bin/kill -s QUIT $MAINPIDPrivateTmp=true[Install]WantedBy=multi-user.targetchmod 745 nginx.service【 chmod 745 /lib/systemd/system/nginx.service】systemctl enable nginx.service
完后就可以使用以下命令管理tengine服务器了:
service nginx startservice nginx stopservice nginx restartsystemctl enable nginx.service【开机自启动】
8、让Tengine可以处理PHP:nginx.conf
#隐藏服务器版本号server_tokens off;server {listen 80;server_name localhost;root /var/www;location / {index index.html index.htm index.php;if (!-e $request_filename) {rewrite ^(.*)$ /index.php?s=$1 last;break;}}location ~ \.php(.*)$ {fastcgi_pass 127.0.0.1:9000;fastcgi_index index.php;fastcgi_split_path_info ^((?U).+\.php)(/?.+)$;fastcgi_param SCRIPT_FILENAME $document_root$fastcgi_script_name;fastcgi_param PATH_INFO $fastcgi_path_info;fastcgi_param PATH_TRANSLATED $document_root$fastcgi_path_info;include fastcgi_params;}}
9、开启80端口(其他端口类似,只针对firewall防火墙)
service firewalld start(启动防火墙)firewall-cmd --zone=public --add-port=80/tcp --permanent(开放端口)
命令含义:
–zone #作用域
–add-port=80/tcp #添加端口,格式为:端口/通讯协议
–permanent #永久生效,没有此参数重启后失效
重启防火墙
firewall-cmd --reload【service firewalld restart(重新启动防火墙)】
CentOS 7.0默认使用的是firewall作为防火墙
查看防火墙状态
firewall-cmd --state1
停止firewall
systemctl stop firewalld.service1
禁止firewall开机启动
systemctl disable firewalld.service
关闭selinux
进入到/etc/selinux/config文件
vi /etc/selinux/config1
将SELINUX=enforcing改为SELINUX=disabled
配制免密登录的命令
ssh-keygen -t rsassh-copy-id root@master12
scp -P 22 /Users/che/Downloads/jdk-8u161-linux-x64.rpm root@192.168.1.100:/software/
安装: yum install -y jdk-8u161-linux-x64.rpm设置环境变量cd /usr/java//usr/java/jdk1.8.0_161vi /etc/profileexport JAVA_HOME=/usr/java/jdk1.8.0_161export PATH=$JAVA_HOME/bin:$PATH
设置ntp时间同步服务
1、安装ntp
yum install -y ntp
2、设置NTP服务开机启动
chkconfig ntpd on
service nptd start
参考文件配置
#user nobody;worker_processes 1;#error_log logs/error.log;#error_log logs/error.log notice;#error_log logs/error.log info;#pid logs/nginx.pid;events {worker_connections 1024;}# load modules compiled as Dynamic Shared Object (DSO)##dso {# load ngx_http_fastcgi_module.so;# load ngx_http_rewrite_module.so;#}http {include mime.types;default_type application/octet-stream;log_format main '$remote_addr - $remote_user [$time_local] "$request" ''$status $body_bytes_sent "$http_referer" ''"$http_user_agent" "$http_x_forwarded_for"';access_log logs/access.log main;sendfile on;#tcp_nopush on;#keepalive_timeout 0;keepalive_timeout 65;gzip on;reset_timedout_connection on; # 关闭不响应的客户端连接,释放客户端所占的内存空间client_body_buffer_size 8k; # 指定用于读取客户端请求主体的缓冲区大小client_header_buffer_size 1k; # 指定用于读取客户端请求首部的缓冲区大小large_client_header_buffers 4 8k; # 指定用于读取客户端请求中较大首部的缓冲区的最大数量和大小client_max_body_size 20m; # 指定用于客户端请求主体的最大大小client_header_timeout 30s; # 指定用于读取客户端请求报文首部的超时时长,单位秒client_body_timeout 30s; # 指定用于读取客户端请求报文主体的超时时长,单位秒send_timeout 30s; # 指定用于向客户端发送响应报文的超时时长,单位秒include /usr/local/nginx/conf/conf.d/*.conf;}

若有收获,就点个赞吧
0 人点赞
