起步
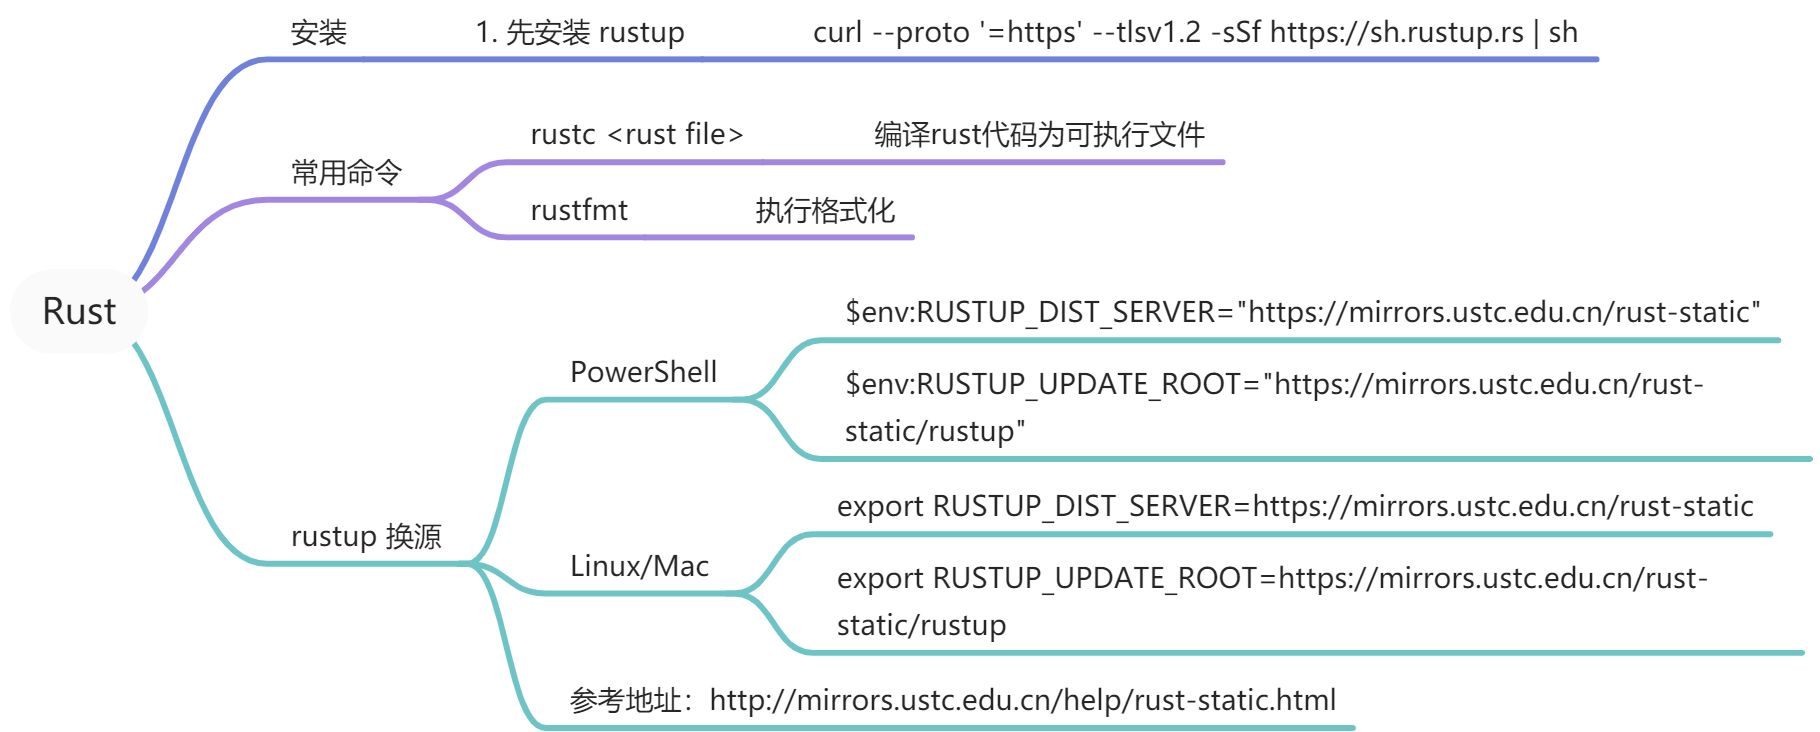
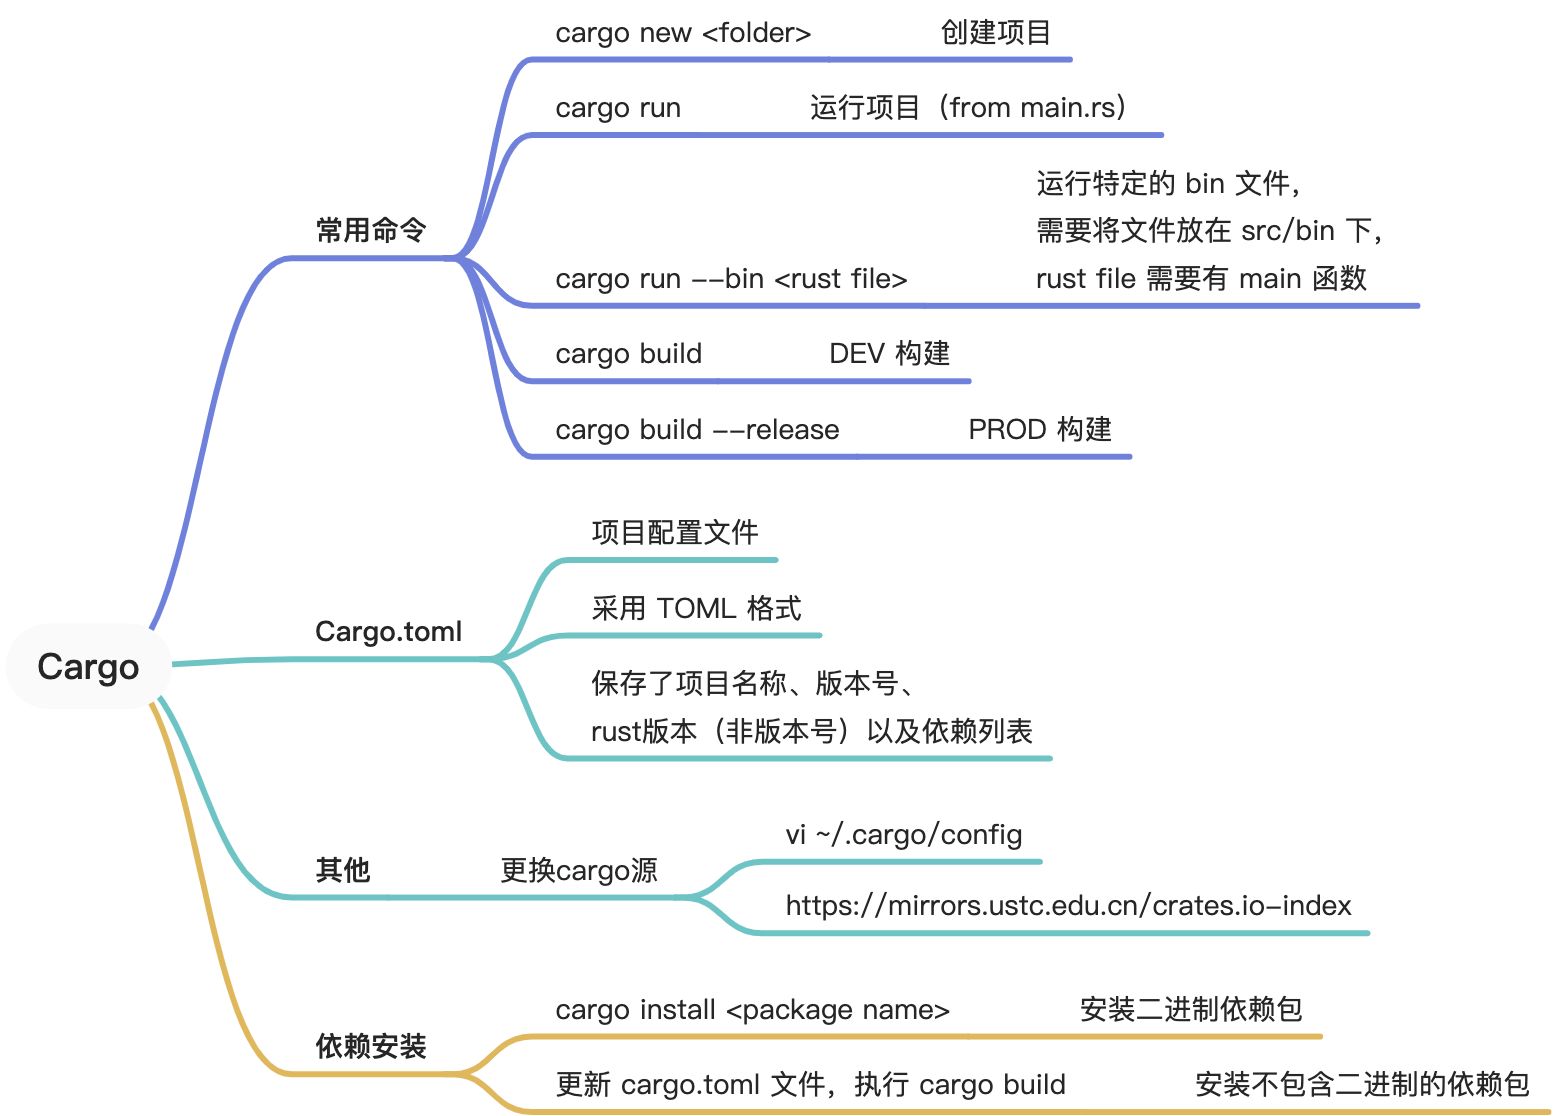
包管理(类比 JS 的 NPM)
Cargo config 文件样例:
[source.crates-io]registry = "https://github.com/rust-lang/crates.io-index"replace-with = 'ustc'[source.ustc]registry = "git://mirrors.ustc.edu.cn/crates.io-index"
语言基础
常量&变量
变量隐藏实际上只是复用了变量名,变量本身是完全重新申明的! 常量不可以被隐藏!
fn main() {// 定义常量const PI: f64 = 3.14;// 定义可变变量let mut num = 5;// 输出 PI=3.14,num=5println!("PI={},num={}", PI, num);num = 10;// 输出 num=10println!("num={}", num);// 定义不可变变量let num2 = 5;// 会报错:cannot assign twice to immutable variable// num2 = 6; // 注释掉才能编译通过println!("num2={}", num2);// 变量隐藏,通过 let 关键词复用变量名let num2 = 10;// 输出 num2=10println!("num2={}", num2);// 隐藏可变变量 num,之后 num 将不可变了let num = 20;// num = 222; // 需要注释掉才能编译通过,证明是一个全新的不可变变量// 输出 num=20println!("num={}", num);// 常量不可以被隐藏// let PI = 11; // 需要注释掉才能编译通过}
数据类型

fn main() {// f64let n1 = 4.63;let n2: f32 = 4.63;let c1: char = '中';let b1 = n1 == n2;println!("{}, {}", b1, c1);// 定义字符串let s1: &str = "中文";println!("{} -> {}", c1, s1);// 不加 r 前缀,转义let s2: &str = "A\nB";// 加上 r 前缀,原样输出let s3: &str = r"A\nB";println!("{} -> {}", s2, s3);}
函数
fn main() {fn1();fn2(45);let res3 = fn3(3);println!("res3={}", res3);}// 无参数无返回值fn fn1() {println!("call fn1");}// 有参数无返回值fn fn2(num: i32) {println!("call fn2, arg num={}", num);}// 有参数有返回值fn fn3(num: i32) -> i64 {println!("call fn3");return (num * 2).into();}
控制流(循环&条件判定)
fn main() {// Loop 循环let mut i = 0;loop {i = i + 1;println!("loop, i={}", i);if i > 5 {break;}}// While 循环while i < 15 {i = i + 1;println!("while, i={}", i);}// For 循环for j in (i..20) {println!("for, j={}", j);}// For 循环,包含 25for j in (i..=25) {println!("for, j={}", j);}// IF 判定println!("i={}", i);if i == 15 {println!("i={}", i);}// 条件表达式作为结果let res = if i == 15 { 5 } else { 6 };println!("res={}", res);}
所有权
Rust 中非常特别设计,通过所用权的引用和借用,实现了无GC下的内存管理。 这个在我看来是 Rust 的设计理念之一,需要重点理解!
fn main() {let s1 = "s1";let s1_copy = s1;println!("s1={}, s1_copy={}", s1, s1_copy);let s2 = String::from("s2");// 变量复制 -> 指针移动,原始指针会失效let s2_copy = s2;// 如下语句会失效,需要注释才能运行// println!("s2={}", s2); // error: value borrowed here after move// 手动指定要进行深拷贝let s2_new = s2_copy.clone();println!("s2_copy={}, s2_new={}", s2_copy, s2_new);// 引用移动let s3 = String::from("Hello");let s3_len = calculate_string_length(s3);// println!("s3={}, s3 len={}", s3, s3_len); // 会报错, s3 已经被释放// 借用(用完会把s4的所有权换回来)let s4 = String::from("Rust");let s4_len = calculate_string_length_pass_address(&s4);// 此时可以正常打印出来println!("s4={}, s4 len={}", s4, s4_len);}fn calculate_string_length(str: String) -> usize {str.len()}fn calculate_string_length_pass_address(str: &String) -> usize {return str.len();}
所有权(悬垂指针)
// 特性:所有权(悬垂引用:悬垂指针是其指向的内存可能已经被分配给其它持有者)fn main() {// 如下调用会报错,返回的引用指向的内存区域已经被释放了// let reference_to_nothing = dangle();let safe_str = safe();println!("safe_str={}", safe_str);}// 需要先注释,避免编译错误// fn dangle() -> &String {// let s = String::from("hello");// &s // 返回字符串 s 的引用,s 离开函数就被释放,引用是无效的// }fn safe() -> String {let s = String::from("hello");s}
Slice 类型
// Slice 类型(无所有权的类型,字符串字面量就是slice)fn main() {let str = String::from("hello rust");let part1 = &str[0..5];let part2 = &str[6..str.len()];println!("str={}, part1={}, part2={}", str, part1, part2);// 获取全部 strlet str_copy = &str[..];println!("str={}, str_copy={}", str, str_copy);}
猜数字游戏
use rand::Rng;use std::cmp::Ordering;use std::io;fn main() {let source = rand::thread_rng().gen_range(1..=100);println!("猜数字游戏!随机数字[0-100]已就绪");// 循环进行猜测~loop {println!("请输入你的猜测:");// 定义一个可变变量let mut num = String::new();io::stdin().read_line(&mut num).expect("输入错误");// 转换输入的字符串为数字// trim 是为了移除输入内容中的换行符let num: u16 = match num.trim().parse() {Ok(num) => num,Err(_) => {println!("你的输入是{},不是数字,请重新输入", num.trim());// 重新输入continue;}};// 比较两个数字match num.cmp(&source) {Ordering::Equal => {println!("恭喜,猜测正确!");// 退出循环break;}Ordering::Greater => {println!("你猜得太大了!");}Ordering::Less => println!("你猜得太小了!"),}}}
常见问题
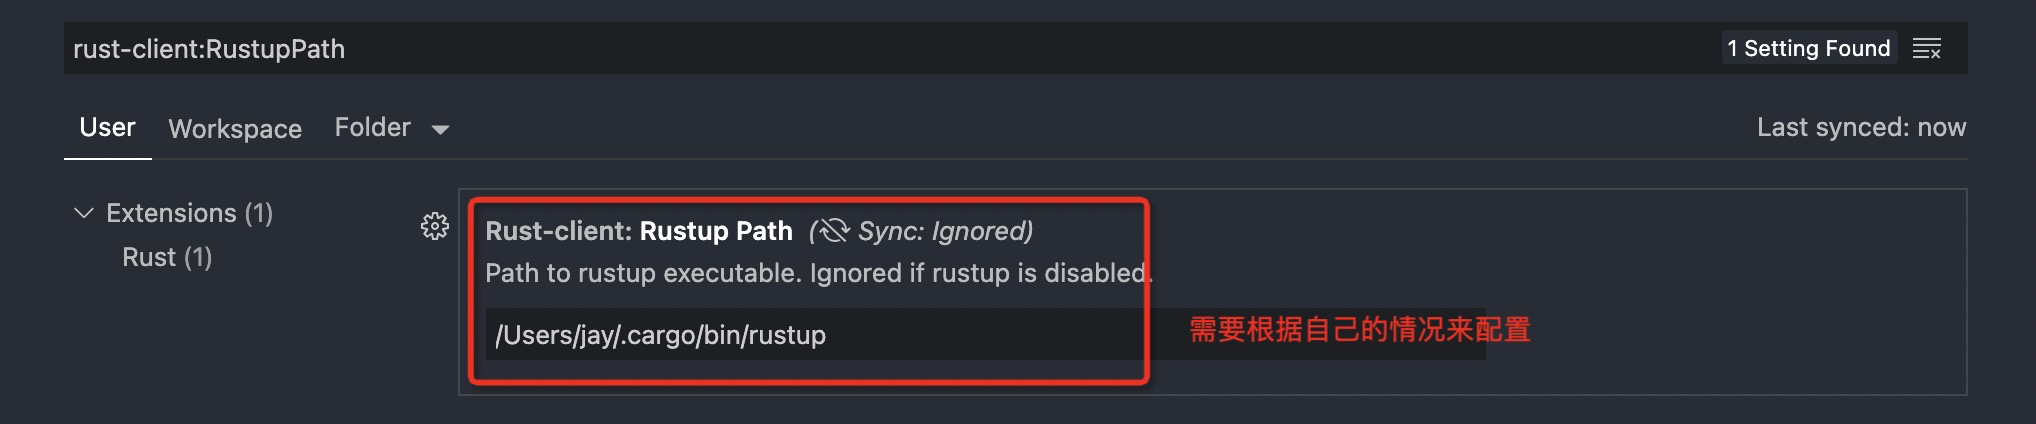
- VSCode 中安装 Rust 插件后,无法启动 Language Server

这是由于这个插件默认的 rustup 地址不对,需要在 Code -> Perferences -> Settings 中去修改“rust-client.rustupPath”的值为具体的 rustup 地址。该地址一般可用如下方式找到:
# 找到 cargo bin 目录cd ~/.cargo/bin# 打印当前目录路径pwd# 拼接上 rustup 进行配置,可参考下图


若有收获,就点个赞吧
0 人点赞
