原文 https://zhangyuyu.github.io/python-unit-test/
06 Apr 2021
Reading time ~15 minutes
前言
单元测试成神之路系列里,GoLang篇作为首篇,除了介绍Golang单元测试的选型,还介绍了单元测试的意义和编写单元测试的一般方法。C篇介绍了基于C的单元测试框架的选型以及Mock框架。而本篇文章则主要介绍如何在Python中写单元测试以及单元测试报告的生成。
本文直接从常用的Python单元测试框架出发,分别对几种框架进行了简单的介绍和小结,然后介绍了Mock的框架,以及测试报告生成方式,并以具体代码示例进行说明,最后列举了一些常见问题。
一、常用Python单测框架
| Unittest | Nose | Pytest | |
|---|---|---|---|
| 特点 | Python标准库中自带的单元测试框架。 | Python的一个第三方单元测试框架,带插件的unittest。nose停止维护了,nose2并不支持nose的全部功能。 | Python的一个第三方单元测试框架,丰富的插件生态,兼容unittest和nose测试集, 社区繁荣 |
| Mock框架 | unittest.mock | unittest.mock | pytest-mock |
| 推荐指数 | ★★★★☆ | ★★☆☆☆ | ★★★★★ |
若你不想安装或不允许第三方库,那么 unittest 是最好也是唯一的选择。反之,pytest 无疑是最佳选择,众多 Python 开源项目(如大名鼎鼎的 requests)都是使用 pytest 作为单元测试框架。甚至,连 nose2 在官方文档上都建议大家使用 pytest。我们知道,nose已经进入了维护模式,取代者是nose2。相比nose2,pytest的生态无疑更具优势,社区的活跃度也更高。
总体来说,unittest用例格式复杂,兼容性无,插件少,二次开发方便。pytest更加方便快捷,用例格式简单,可以执行unittest风格的测试用例,较好的兼容性,插件丰富。
二、unittest
1. 基本概念
unittest中最核心的四个概念是:test fixture、test case、test suite、test runner 。
- test fixture:表示执行一个或多个测试所需的准备,以及任何关联的清理操作。例如这可能涉及创建临时或代理数据库、目录或启动服务器进程。
- test case:测试用例是最小的测试单元。它检查特定的输入集的响应。单元测试提供了一个基类测试用例,可用于创建新的测试用例。
- test suite:测试套件是测试用例、测试套件或两者的集合,用于归档需要一起执行的测试。
- test runner:是一个用于执行和输出结果的组件。这个运行器可能使用图形接口、文本接口,或返回一个特定的值表示运行测试的结果。
2. 编写规则
- 编写单元测试时,我们需要编写一个测试类,从
unittest.TestCase继承。 - 以
test开头的方法就是测试方法,不以test开头的方法不被认为是测试方法,测试的时候不会被执行。 - 对每一类测试都需要编写一个
test_xxx()方法。
3. 简单示例
3.1 目录结构
$ tree ..├── README.md├── requirements.txt└── src├── demo│ └── calculator.py└── tests└── demo├── __init__.py├── test_calculator_unittest.py└── test_calculator_unittest_with_fixture.py
3.2 计算器实现代码
class Calculator:def __init__(self, a, b):self.a = int(a)self.b = int(b)def add(self):return self.a + self.bdef sub(self):return self.a - self.bdef mul(self):return self.a * self.bdef div(self):return self.a / self.b
3.3 计算器测试代码
import unittestfrom src.demo.calculator import Calculatorclass TestCalculator(unittest.TestCase):def test_add(self):c = Calculator()result = c.add(3, 5)self.assertEqual(result, 8)def test_sub(self):c = Calculator()result = c.sub(10, 5)self.assertEqual(result, 5)def test_mul(self):c = Calculator()result = c.mul(5, 7)self.assertEqual(result, 35)def test_div(self):c = Calculator()result = c.div(10, 5)self.assertEqual(result, 2)if __name__ == '__main__':unittest.main()
3.4 执行结果
Ran 4 tests in 0.002sOK
4. 用例前置和后置
基于unittest的四个概念的理解,上述简单用例,可以修改为:
import unittestfrom src.demo.calculator import Calculatorclass TestCalculatorWithFixture(unittest.TestCase):# 测试用例前置动作def setUp(self):print("test start")# 测试用例后置动作def tearDown(self):print("test end")def test_add(self):c = Calculator()result = c.add(3, 5)self.assertEqual(result, 8)def test_sub(self):c = Calculator()result = c.sub(10, 5)self.assertEqual(result, 5)def test_mul(self):c = Calculator()result = c.mul(5, 7)self.assertEqual(result, 35)def test_div(self):c = Calculator()result = c.div(10, 5)self.assertEqual(result, 2)if __name__ == '__main__':# 创建测试套件suit = unittest.TestSuite()suit.addTest(TestCalculatorWithFixture("test_add"))suit.addTest(TestCalculatorWithFixture("test_sub"))suit.addTest(TestCalculatorWithFixture("test_mul"))suit.addTest(TestCalculatorWithFixture("test_div"))# 创建测试运行器runner = unittest.TestRunner()runner.run(suit)
5. 参数化
标准库的unittest自身不支持参数化测试,可以通过第三方库来支持:parameterized和ddt。
其中parameterized只需要一个装饰器@parameterized.expand,ddt需要三个装饰器@ddt、@data、@unpack,它们生成的test分别有一个名字,ddt会携带具体的参数信息。
5.1 parameterized
import unittestfrom parameterized import parameterized, paramfrom src.demo.calculator import Calculatorclass TestCalculator(unittest.TestCase):@parameterized.expand([param(3, 5, 8),param(1, 2, 3),param(2, 2, 4)])def test_add(self, num1, num2, total):c = Calculator()result = c.add(num1, num2)self.assertEqual(result, total)if __name__ == '__main__':unittest.main()
执行结果:
test_add_0 (__main__.TestCalculator) ... oktest_add_1 (__main__.TestCalculator) ... oktest_add_2 (__main__.TestCalculator) ... ok----------------------------------------------------------------------Ran 3 tests in 0.000sOK
5.2 ddt
import unittestfrom ddt import data, unpack, ddtfrom src.demo.calculator import Calculator@ddtclass TestCalculator(unittest.TestCase):@data((3, 5, 8),(1, 2, 3),(2, 2, 4))@unpackdef test_add(self, num1, num2, total):c = Calculator()result = c.add(num1, num2)self.assertEqual(result, total)if __name__ == '__main__':unittest.main()
执行结果:
test_add_1__3__5__8_ (__main__.TestCalculator) ... oktest_add_2__1__2__3_ (__main__.TestCalculator) ... oktest_add_3__2__2__4_ (__main__.TestCalculator) ... ok----------------------------------------------------------------------Ran 3 tests in 0.000sOK
6. 断言
unittest提供了丰富的断言,常用的包括:
assertEqual、assertNotEqual、assertTrue、assertFalse、assertIn、assertNotIn等。
具体可以直接看源码提供的方法: 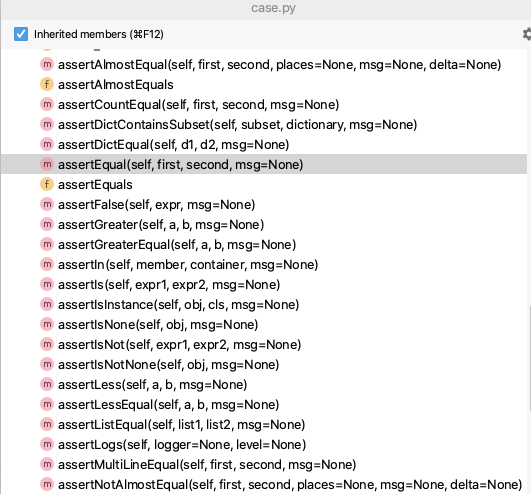
三、nose
nose已经进入维护模式,从github nose上可以看到,nose最近的一次代码提交还是在2016年5月4日。
继承nose的是nose2,但要注意的是,nose2并不支持nose的全部功能,它们的区别可以看这里。nose2的主要目的是扩展Python的标准单元测试库unittest,因此它的定位是“带插件的unittest”。nose2提供的插件,例如测试用例加载器,覆盖度报告生成器,并行测试等内置插件和第三方插件,让单元测试变得更加完善。
nose2的社区没有pytest的活跃,要使用高级框架,推荐使用pytest,因此下文不做过多详述。
1. 编写规则
- nose2的测试用例并不限制于类,也可以直接使用函数。
- 任何函数和类,只要名称匹配一定的条件(例如,以test开头或以test结尾等),都会被自动识别为测试用例;
- 为了兼容unittest, 所有的基于unitest编写的测试用例,也会被nose自动识别为。
2. 简单示例
2.1 计算器代码
参考unittest的计算器代码部分。
2.2 计算器测试代码
import nose2from src.demo.calculator import Calculatordef test_add():c = Calculator()result = c.add(3, 5)assert result == 8def test_sub():c = Calculator()result = c.sub(10, 5)assert result == 5def test_mul():c = Calculator()result = c.mul(5, 7)assert result == 35def test_div():c = Calculator()result = c.div(10, 5)assert result == 2if __name__ == '__main__':nose2.main()
2.3 执行结果
....----------------------------------------------------------------------Ran 4 tests in 0.000sOK
3. 参数化
import nose2from nose2.tools import paramsfrom src.demo.calculator import Calculatortest_data = [{"nums": (3, 5), "total": 8},{"nums": (1, 2), "total": 3},{"nums": (2, 2), "total": 4}]@params(*test_data)def test_add(data):c = Calculator()result = c.add(*data['nums'])assert result == data['total']if __name__ == '__main__':nose2.main()
四、pytest
1. 编写规则
- 测试文件以test_开头(以test结尾也可以)
- 测试类以Test开头,并且不能带有 init 方法
- 测试函数以test_开头
- 断言使用基本的assert即可
可以通过下面的命令,查看 Pytest 收集到哪些测试用例:
$ py.test --collect-only
2. 简单示例
2.1 计算器代码
参考unittest的计算器代码部分。
2.2 计算器实现代码
import pytestfrom src.demo.calculator import Calculatorclass TestCalculator():def test_add(self):c = Calculator()result = c.add(3, 5)assert result == 8def test_sub(self):c = Calculator()result = c.sub(10, 5)assert result == 5def test_mul(self):c = Calculator()result = c.mul(5, 7)assert result == 35def test_div(self):c = Calculator()result = c.div(10, 5)assert result == 2if __name__ == '__main__':pytest.main(['-s', 'test_calculator_pytest.py'])
2.3 执行结果
============================= test session starts ==============================platform darwin -- Python 3.8.3, pytest-6.2.2, py-1.10.0, pluggy-0.13.1rootdir: python-ut/src/tests/demoplugins: metadata-1.11.0, html-3.1.1collected 4 itemstest_calculator_pytest.py ....============================== 4 passed in 0.01s ===============================
3. 用例前置和后置
加上fixture夹具,有几种方式:
- 将夹具函数名称作为参数传递到测试用例函数当中
- @pytest.mark.usefixtures(“夹具函数名称”)
- @pytest.fixture(autouse=True),设置了autouse,就可以不用上述两种手动方式,默认就会使用夹具
import pytestfrom src.demo.calculator import Calculator@pytest.fixture()def set_up():print("[pytest with fixture] start")yieldprint("[pytest with fixture] end")class TestCalculator():def test_add(self, set_up):c = Calculator()result = c.add(3, 5)assert result == 8def test_sub(self, set_up):c = Calculator()result = c.sub(10, 5)assert result == 5@pytest.mark.usefixtures("set_up")def test_mul(self):c = Calculator()result = c.mul(5, 7)assert result == 35@pytest.mark.usefixtures("set_up")def test_div(self):c = Calculator()result = c.div(10, 5)assert result == 2if __name__ == '__main__':pytest.main(['-s', 'test_calculator_pytest_with_fixture.py'])
执行结果:
============================= test session starts ==============================platform darwin -- Python 3.8.3, pytest-6.2.2, py-1.10.0, pluggy-0.13.1rootdir: python-ut/src/tests/demoplugins: metadata-1.11.0, html-3.1.1collected 4 itemstest_calculator_pytest_with_fixture.py [pytest with fixture] start.[pytest with fixture] end[pytest with fixture] start.[pytest with fixture] end[pytest with fixture] start.[pytest with fixture] end[pytest with fixture] start.[pytest with fixture] end============================== 4 passed in 0.01s ===============================
4. 参数化
4.1 基础知识
- 如果只有一个参数,里面则是值的列表,比如
@pytest.mark.parametrize("num1", [3, 5, 8]) - 如果有多个参数,则需要用元祖来存放值,一个元祖对应一组参数的值,比如
@pytest.mark.parametrize("num1, num2, total", [(3, 5, 8), (1, 2, 3), (2, 2, 4)]) - 当装饰器
@pytest.mark.parametrize装饰测试类时,会将数据集合传递给类的所有测试用例方法 - 一个函数或一个类可以装饰多个
@pytest.mark.parametrize,当参数化有多个装饰器时,用例数是N*M…
4.2 参数化测试
import pytestfrom src.demo.calculator import Calculatorclass TestCalculator():@pytest.mark.parametrize("num1, num2, total", [(3, 5, 8), (1, 2, 3), (2, 2, 4)])def test_add(self, num1, num2, total):c = Calculator()result = c.add(num1, num2)assert result == totalif __name__ == '__main__':pytest.main(['test_calculator_pytest_with_parameterize.py'])
执行结果:
============================= test session starts ==============================platform darwin -- Python 3.8.3, pytest-6.2.2, py-1.10.0, pluggy-0.13.1rootdir: python-ut/src/tests/demoplugins: metadata-1.11.0, html-3.1.1collected 3 itemstest_calculator_pytest_with_paramtrize.py ...============================== 3 passed in 0.01s ===============================
4.3 参数化标记数据
class TestCalculator():@pytest.mark.parametrize("num1, num2, total", [pytest.param(5, 1, 4, marks=pytest.mark.passed),pytest.param(5, 2, 4, marks=pytest.mark.fail),(5, 4, 1)])def test_sub(self, num1, num2, total):c = Calculator()result = c.sub(num1, num2)assert result == totalif __name__ == '__main__':pytest.main(['test_calculator_pytest_with_parameterize.py'])
执行结果:
============================= test session starts ==============================platform darwin -- Python 3.8.3, pytest-6.2.2, py-1.10.0, pluggy-0.13.1rootdir: python-ut/src/tests/demoplugins: metadata-1.11.0, html-3.1.1collected 3 itemstest_calculator_pytest_with_paramtrize.py .F. [100%]=================================== FAILURES ===================================________________________ TestCalculator.test_sub[5-2-4] ________________________self = <demo.test_calculator_pytest_with_paramtrize.TestCalculator object at 0x110813d00>num1 = 5, num2 = 2, total = 4@pytest.mark.parametrize("num1, num2, total", [pytest.param(5, 1, 4, marks=pytest.mark.passed),pytest.param(5, 2, 4, marks=pytest.mark.fail),(5, 4, 1)])def test_sub(self, num1, num2, total):c = Calculator()result = c.sub(num1, num2)> assert result == totalE assert 3 == 4test_calculator_pytest_with_paramtrize.py:21: AssertionError=========================== short test summary info ============================FAILED test_calculator_pytest_with_paramtrize.py::TestCalculator::test_sub[5-2-4]=================== 1 failed, 2 passed, 2 warnings in 0.04s ====================
5. 断言
在unittest单元测试框架中提供了丰富的断言方法,例如assertEqual()、assertIn()、assertTrue()、assertIs()等,而pytest单元测试框架中并没提供特殊的断言方法,而是直接使用python的assert进行断言。
- assert可以使用
==、!=、<、>、>=、<=等符号来比较相等、不相等、小于、大于、大于等于和小于等于。 - 断言包含和不包含,使用
assert a in b和assert a not in b - 断言真假,使用
assert condition和assert not condition 断言异常,使用pytest.raise获取信息
# 详细断言异常def test_zero_division_long():with pytest.raises(ZeroDivisionError) as excinfo:1 / 0# 断言异常类型 typeassert excinfo.type == ZeroDivisionError# 断言异常 value 值assert "division by zero" in str(excinfo.value)
6. 重跑
需要安装额外的插件pytest-rerunfailures
import pytest@pytest.mark.flaky(reruns=5)def test_example():import randomassert random.choice([True, False, False])
执行结果:
collecting ... collected 1 item11_reruns.py::test_example RERUN [100%]11_reruns.py::test_example PASSED [100%]========================= 1 passed, 1 rerun in 0.05s ==========================
五、Mock
1. mock
mock原是python的第三方库,python3以后mock模块已经整合到了unittest测试框架中。
如果使用的是python3.3以后版本,那么不用单独安装,使用的时候在文件开头引入from unittest import mock即可。
如果使用的是python2,需要先pip install mock安装后再import mock即可。
1.1 Mock一个方法
import unittestfrom unittest import mockfrom src.demo.calculator import Calculatordef multiple(a, b):return a * bclass TestCalculator(unittest.TestCase):@mock.patch('test_calculator_mock.multiple')def test_function_multiple(self, mock_multiple):mock_return = 1mock_multiple.return_value = mock_returnresult = multiple(3, 5)self.assertEqual(result, mock_return)if __name__ == '__main__':unittest.main()
1.2 Mock一个对象里面的方法
分别给出了普通写法和注解写法,以及side_effect关键参数的效果案例。
import unittestfrom unittest import mockfrom src.demo.calculator import Calculatorclass TestCalculator(unittest.TestCase):def test_add(self):c = Calculator()mock_return = 10c.add = mock.Mock(return_value=mock_return)result = c.add(3, 5)self.assertEqual(result, mock_return)def test_add_with_side_effect(self):c = Calculator()mock_return = 10# 传递side_effect关键字参数, 会覆盖return_value参数值, 使用真实的add方法测试c.add = mock.Mock(return_value=mock_return, side_effect=c.add)result = c.add(3, 5)self.assertEqual(result, 8)@mock.patch.object(Calculator, 'add')def test_add_with_annotation(self, mock_add):c = Calculator()mock_return = 10mock_add.return_value = mock_returnresult = c.add(3, 5)self.assertEqual(result, mock_return)if __name__ == '__main__':unittest.main()
1.3 Mock每次调用返回不同的值
import unittestfrom unittest import mockfrom src.demo.calculator import Calculatorclass TestCalculator(unittest.TestCase):@mock.patch.object(Calculator, 'add')def test_add_with_different_return(self, mock_add):c = Calculator()mock_return = [10, 8]mock_add.side_effect = mock_returnresult1 = c.add(3, 5)result2 = c.add(3, 5)self.assertEqual(result1, mock_return[0])self.assertEqual(result2, mock_return[1])if __name__ == '__main__':unittest.main()
1.4 Mock抛出异常的方法
import unittestfrom unittest import mockfrom src.demo.calculator import Calculator# 被调用函数def multiple(a, b):return a * b# 实际调用函数def is_error(a, b):try:return multiple(a, b)except Exception as e:return -1class TestCalculator(unittest.TestCase):@mock.patch('test_calculator_mock.multiple')def test_function_multiple_exception(self, mock_multiple):mock_multiple.side_effect = Exceptionresult = is_error(3, 5)self.assertEqual(result, -1)if __name__ == '__main__':unittest.main()
1.5 Mock多个方法
import unittestfrom unittest import mockfrom src.demo.calculator import Calculatordef multiple(a, b):return a * bclass TestCalculator(unittest.TestCase):# z'h@mock.patch.object(Calculator, 'add')@mock.patch('test_calculator_mock.multiple')def test_both(self, mock_multiple, mock_add):c = Calculator()mock_add.return_value = 1mock_multiple.return_value = 2self.assertEqual(c.add(3, 5), 1)self.assertEqual(multiple(3, 5), 2)if __name__ == '__main__':unittest.main()
2. pytest-mock
如果项目本身使用的框架是 pytest,则 Mock 更建议使用 pytest-mock 这个插件,它提供了一个名为mocker的fixture,仅在当前测试funciton或method生效,而不用自行包装。
mocker和mock.patch有相同的api,支持相同的参数。
2.1 简单示例
import pytestfrom src.demo.calculator import Calculatorclass TestCalculator():def test_add(self, mocker):c = Calculator()mock_return = 10mocker.patch.object(c, 'add', return_value=mock_return)result = c.add(3, 5)assert result == mock_returnif __name__ == '__main__':pytest.main(['-s', 'test_calculator_pytest_mock.py'])
2.2 mock方法和域
class ForTest:field = 'origin'def method():passdef test_for_test(mocker):test = ForTest()# 方法mock_method = mocker.patch.object(test, 'method')test.method()# 检查行为assert mock_method.called# 域assert 'origin' == test.fieldmocker.patch.object(test, 'field', 'mocked')# 检查结果assert 'mocked' == test.field
3. monkeypatch
monkeypatch是pytest框架内置的固件,有时候,测试用例需要调用某些依赖于全局配置的功能,或者这些功能本身又调用了某些不容易测试的代码(例如:网络接入)。monkeypatch提供了一些方法,用于安全地修补和模拟测试中的功能:
monkeypatch.setattr(obj, name, value, raising=True)monkeypatch.delattr(obj, name, raising=True)monkeypatch.setitem(mapping, name, value)monkeypatch.delitem(obj, name, raising=True)monkeypatch.setenv(name, value, prepend=False)monkeypatch.delenv(name, raising=True)monkeypatch.syspath_prepend(path)monkeypatch.chdir(path)
主要考虑以下情形:
- 修改测试的函数行为或类的属性
- 修改字典的值
- 修改测试环境的环境变量
- 在测试期间,用于修改和 更改当前工作目录的上下文。
六、单元测试覆盖率报告
coverage 是 Python 推荐使用的覆盖率统计工具。
pytest-cov 是 pytest 的插件,它可以让你在 pytest 中使用 cpverage.py。
HtmlTestRunner,需要在代码里面写入一点配置,但是报告生成比较美观。
coverage和pytest-cov只需要配置,就可直接使用,不需要测试代码配合。
1. coverage
1.1 安装
pip install coverage
详情可参考:coverage
1.2 运行
coverage run -m unittest discover
运行结束之后,会生成一个覆盖率统计结果文件(data file).coverage文件,在pycharm里可识别为一个数据库: 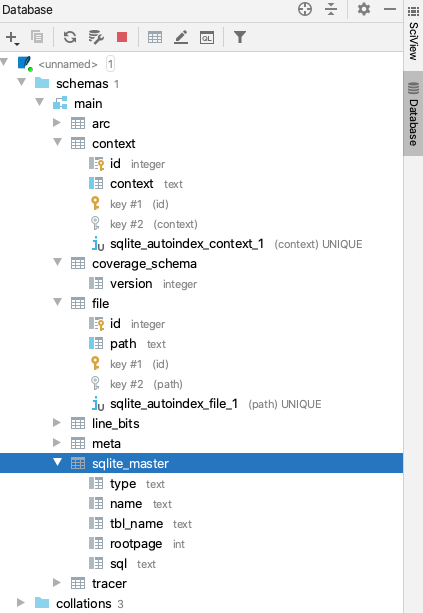
1.3 结果
1.3. 1 report
coverage report -m
执行结果如下:
$ coverage report -mName Stmts Miss Cover Missing---------------------------------------------------------------------------------------------src/tests/demo/test_calculator_pytest_with_fixture.py 28 16 43% 8-10, 15-17, 20-22, 26-28, 32-34, 38src/tests/demo/test_calculator_pytest_with_parameterize.py 15 7 53% 9-11, 19-21, 25src/tests/demo/test_calculator_unittest.py 22 1 95% 31src/tests/demo/test_calculator_unittest_with_ddt.py 13 1 92% 18
1.3.2 html
会生成htmlcov/index.html文件,在浏览器查看:
coverage html
点击各个py文件,可以查看详细情况。
2. html-testRunner
2.1 安装
pip install html-testRunner
详细说明可参考HtmlTestRunner。
2.2 运行
在代码中加上HTMLTestRunner,如下
import HtmlTestRunner# some tests hereif __name__ == '__main__':unittest.main(testRunner=HtmlTestRunner.HTMLTestRunner())
如果是在测试套件中运行,换成HTMLTestRunner即可:
# 创建测试运行器# runner = unittest.TestRunner()runner = HTMLTestRunner()runner.run(suit)
2.3 结果
默认会生成reports/ 文件夹,按照时间显示报告: 
3. pytest-cov
3.1 安装
pip install pytest-cov
详细可参考pytest-cov
3.2 运行
pytest --cov --cov-report=html
或者指定目录:
pytest --cov=src --cov-report=html
3.3 结果
会生成htmlcov/index.html文件,在浏览器查看,类似于coverage的报告。
4. 可能的问题
4.1 报告没生成
如果出现不了报告,pycharm运行的时候,记得选择python,而不是Python tests
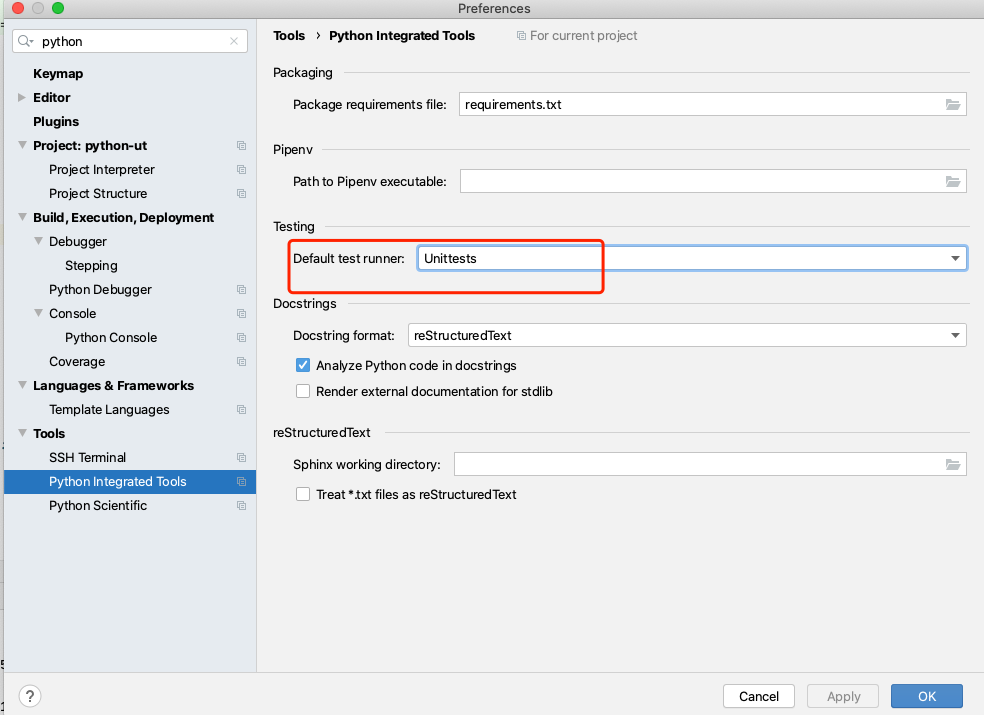
4.2 在Pycharm中配置覆盖率展示
可选择unittest和pytest为默认runner
可显示覆盖率窗口: 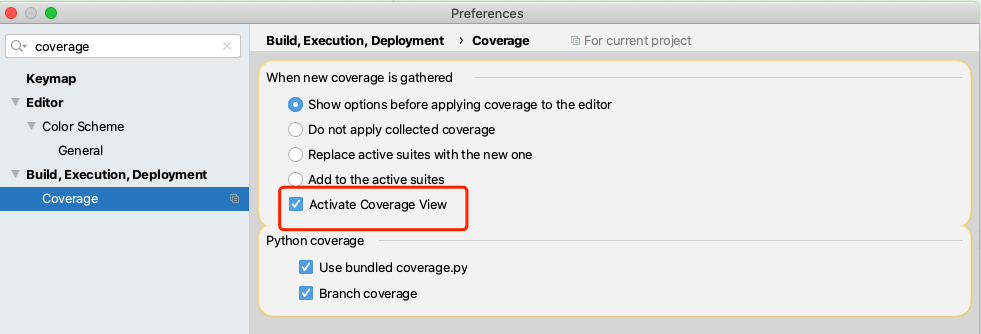
七、情景示例
1. 概览
1.1 项目介绍
一个简单的博客系统,包含:
- 创建文章
- 获取文章
- 获取文章列表
1.2 项目结构
├── README.md├── requirements.txt└── src├── blog│ ├── __init__.py│ ├── app.py│ ├── commands.py│ ├── database.db│ ├── init_db.py│ ├── models.py│ └── queries.py└── tests└── blog├── __init__.py├── conftest.py├── schemas│ ├── Article.json│ ├── ArticleList.json│ └── __init__.py├── test_app.py├── test_commands.py└── test_queries.py
1.3 关键技术
- Flask,web框架
- SQLite,轻量级数据库,文件格式
- pytest,单元测试框架
- Pydantic,数据校验
2. Service测试
2.1 创建文章
models.py如下:
import osimport sqlite3import uuidfrom typing import Listfrom pydantic import BaseModel, EmailStr, Fieldclass NotFound(Exception):passclass Article(BaseModel):id: str = Field(default_factory=lambda: str(uuid.uuid4()))author: EmailStrtitle: strcontent: str@classmethoddef get_by_id(cls, article_id: str):con = sqlite3.connect(os.getenv('DATABASE_NAME', 'database.db'))con.row_factory = sqlite3.Rowcur = con.cursor()cur.execute("SELECT * FROM articles WHERE id=?", (article_id,))record = cur.fetchone()if record is None:raise NotFoundarticle = cls(**record) # Row can be unpacked as dictcon.close()return article@classmethoddef get_by_title(cls, title: str):con = sqlite3.connect(os.getenv('DATABASE_NAME', 'database.db'))con.row_factory = sqlite3.Rowcur = con.cursor()cur.execute("SELECT * FROM articles WHERE title = ?", (title,))record = cur.fetchone()if record is None:raise NotFoundarticle = cls(**record) # Row can be unpacked as dictcon.close()return article@classmethoddef list(cls) -> List['Article']:con = sqlite3.connect(os.getenv('DATABASE_NAME', 'database.db'))con.row_factory = sqlite3.Rowcur = con.cursor()cur.execute("SELECT * FROM articles")records = cur.fetchall()articles = [cls(**record) for record in records]con.close()return articlesdef save(self) -> 'Article':with sqlite3.connect(os.getenv('DATABASE_NAME', 'database.db')) as con:cur = con.cursor()cur.execute("INSERT INTO articles (id,author,title,content) VALUES(?, ?, ?, ?)",(self.id, self.author, self.title, self.content))con.commit()return self@classmethoddef create_table(cls, database_name='database.db'):conn = sqlite3.connect(database_name)conn.execute('CREATE TABLE IF NOT EXISTS articles (id TEXT, author TEXT, title TEXT, content TEXT)')conn.close()
commands.py如下:
from pydantic import BaseModel, EmailStrfrom src.blog.models import Article, NotFoundclass AlreadyExists(Exception):passclass CreateArticleCommand(BaseModel):author: EmailStrtitle: strcontent: strdef execute(self) -> Article:try:Article.get_by_title(self.title)raise AlreadyExistsexcept NotFound:passarticle = Article(author=self.author,title=self.title,content=self.title).save()return article
单元测试test_commands.py:
import pytestfrom src.blog.commands import CreateArticleCommand, AlreadyExistsfrom src.blog.models import Articledef test_create_article():"""GIVEN CreateArticleCommand with a valid properties author, title and contentWHEN the execute method is calledTHEN a new Article must exist in the database with the same attributes"""cmd = CreateArticleCommand(author='john@doe.com',title='New Article',content='Super awesome article')article = cmd.execute()db_article = Article.get_by_id(article.id)assert db_article.id == article.idassert db_article.author == article.authorassert db_article.title == article.titleassert db_article.content == article.contentdef test_create_article_with_mock(monkeypatch):"""GIVEN CreateArticleCommand with valid properties author, title and contentWHEN the execute method is calledTHEN a new Article must exist in the database with same attributes"""article = Article(author='john@doe.com',title='New Article',content='Super awesome article')monkeypatch.setattr(Article,'save',lambda self: article)cmd = CreateArticleCommand(author='john@doe.com',title='New Article',content='Super awesome article')db_article = cmd.execute()assert db_article.id == article.idassert db_article.author == article.authorassert db_article.title == article.titleassert db_article.content == article.contentdef test_create_article_already_exists():"""GIVEN CreateArticleCommand with a title of some article in databaseWHEN the execute method is calledTHEN the AlreadyExists exception must be raised"""Article(author='jane@doe.com',title='New Article',content='Super extra awesome article').save()cmd = CreateArticleCommand(author='john@doe.com',title='New Article',content='Super awesome article')with pytest.raises(AlreadyExists):cmd.execute()
当多次运行时候,需要清理数据库,那么需要使用到用例前置和后置:
confest.py:
import osimport tempfileimport pytestfrom src.blog.models import Article@pytest.fixture(autouse=True)def database():_, file_name = tempfile.mkstemp()os.environ['DATABASE_NAME'] = file_nameArticle.create_table(database_name=file_name)yieldos.unlink(file_name)
再次运行,执行结果:
$ python3 -m pytest src/tests/blog/test_commands.py=================== test session starts ======================platform darwin -- Python 3.8.3, pytest-6.2.2, py-1.10.0, pluggy-0.13.1rootdir: python-utplugins: metadata-1.11.0, html-3.1.1, mock-3.5.1collected 3 itemssrc/tests/blog/test_commands.py ... [100%]===================== 3 passed in 0.02s =======================
2.2 获取文章列表
queries.py:
from typing import Listfrom pydantic import BaseModelfrom src.blog.models import Articleclass ListArticlesQuery(BaseModel):def execute(self) -> List[Article]:articles = Article.list()return articles
单元测试test_queries.py:
from src.blog.models import Articlefrom src.blog.queries import ListArticlesQuery, GetArticleByIDQuerydef test_list_articles():"""GIVEN 2 articles stored in the databaseWHEN the execute method is calledTHEN it should return 2 articles"""Article(author='jane@doe.com',title='New Article',content='Super extra awesome article').save()Article(author='jane@doe.com',title='Another Article',content='Super awesome article').save()query = ListArticlesQuery()assert len(query.execute()) == 2
2.3 获取文章
queries.py里面加入:
class GetArticleByIDQuery(BaseModel):id: strdef execute(self) -> Article:article = Article.get_by_id(self.id)return article
单元测试test_queries.py里加入:
def test_get_article_by_id():"""GIVEN ID of article stored in the databaseWHEN the execute method is called on GetArticleByIDQuery with id setTHEN it should return the article with the same id"""article = Article(author='jane@doe.com',title='New Article',content='Super extra awesome article').save()query = GetArticleByIDQuery(id=article.id)assert query.execute().id == article.id
3. 其他功能测试
应用入口app.py:
from flask import Flask, jsonify, requestfrom src.blog.commands import CreateArticleCommandfrom src.blog.queries import GetArticleByIDQuery, ListArticlesQueryfrom pydantic import ValidationErrorapp = Flask(__name__)@app.route('/articles/', methods=['POST'])def create_article():cmd = CreateArticleCommand(**request.json)return jsonify(cmd.execute().dict())@app.route('/articles/<article_id>/', methods=['GET'])def get_article(article_id):query = GetArticleByIDQuery(id=article_id)return jsonify(query.execute().dict())@app.route('/articles/', methods=['GET'])def list_articles():query = ListArticlesQuery()records = [record.dict() for record in query.execute()]return jsonify(records)@app.errorhandler(ValidationError)def handle_validation_exception(error):response = jsonify(error.errors())response.status_code = 400return responseif __name__ == '__main__':app.run()
暴露json schema,校验响应payload:
Article.json
{"$schema": "http://json-schema.org/draft-07/schema#","title": "Article","type": "object","properties": {"id": {"type": "string"},"author": {"type": "string"},"title": {"type": "string"},"content": {"type": "string"}},"required": ["id","author","title","content"]}
ArticleList.json
{"$schema": "http://json-schema.org/draft-07/schema#","title": "ArticleList","type": "array","items": {"$ref": "file:Article.json"}}
从应用本身,串起来整个流程的测试,测试test_app.py:
import jsonimport pathlibimport pytestfrom jsonschema import validate, RefResolverfrom src.blog.app import appfrom src.blog.models import Article@pytest.fixturedef client():app.config['TESTING'] = Truewith app.test_client() as client:yield clientdef validate_payload(payload, schema_name):"""Validate payload with selected schema"""schemas_dir = str(f'{pathlib.Path(__file__).parent.absolute()}/schemas')schema = json.loads(pathlib.Path(f'{schemas_dir}/{schema_name}').read_text())validate(payload,schema,resolver=RefResolver('file://' + str(pathlib.Path(f'{schemas_dir}/{schema_name}').absolute()),schema # it's used to resolve file: inside schemas correctly))def test_create_article(client):"""GIVEN request data for new articleWHEN endpoint /articles/ is calledTHEN it should return Article in json format matching schema"""data = {'author': 'john@doe.com','title': 'New Article','content': 'Some extra awesome content'}response = client.post('/articles/',data=json.dumps(data),content_type='application/json',)validate_payload(response.json, 'Article.json')def test_get_article(client):"""GIVEN ID of article stored in the databaseWHEN endpoint /articles/<id-of-article>/ is calledTHEN it should return Article in json format matching schema"""article = Article(author='jane@doe.com',title='New Article',content='Super extra awesome article').save()response = client.get(f'/articles/{article.id}/',content_type='application/json',)validate_payload(response.json, 'Article.json')def test_list_articles(client):"""GIVEN articles stored in the databaseWHEN endpoint /articles/ is calledTHEN it should return list of Article in json format matching schema"""Article(author='jane@doe.com',title='New Article',content='Super extra awesome article').save()response = client.get('/articles/',content_type='application/json',)validate_payload(response.json, 'ArticleList.json')@pytest.mark.parametrize('data',[{'author': 'John Doe','title': 'New Article','content': 'Some extra awesome content'},{'author': 'John Doe','title': 'New Article',},{'author': 'John Doe','title': None,'content': 'Some extra awesome content'}])def test_create_article_bad_request(client, data):"""GIVEN request data with invalid values or missing attributesWHEN endpoint /create-article/ is calledTHEN it should return status 400 and JSON body"""response = client.post('/articles/',data=json.dumps(data),content_type='application/json',)assert response.status_code == 400assert response.json is not None
4. 小结
自此,上面的web小应用基本可以完成,包含了基本的服务层单元测试、数据库模拟、mock创建文章以及参数化请求验证。
七、结语
1. 小结
Python的单元测试框架中,Python库本身提供了unittest,也有第三方框架进行了封装。原生的库插件少,二次开发非常方便。第三方框架融合了不少插件,上手简单。
Python属于脚本语言,不像编译型语言那样先将程序编译成二进制再运行,而是动态地逐行解释运行,虽然其本身的结构灵活多变,但是仍然不妨碍我们用单元测试保证其质量、权衡其设计、设置其有形和无形的约束,为开发保驾护航。
2. 推荐阅读
- Python测试框架最全资源汇总
- Python Testing Tools Taxonomy
- Modern Test-Driven Development in Python
- 单元测试成神之路——GoLang篇
- 单元测试成神之路——C++篇

若有收获,就点个赞吧
0 人点赞
