CentOS7
CentOS8
1. root 登录
2. 创建新用户
# 创建用户adduser zhx# 为用户设置密码passwd zhx# 输入密码并确认
3. 授予管理权限
# 设置用户权限 可以使用 sudousermod -aG wheel zhx
4. 设置基本的防火墙
说明:有些虚拟机平台,平台自己配置了外网的防火墙规则,需要自己手动在平台上修改,需要注意。
4.1 安装防火墙
# 安装防火墙dnf install firewalld -y# 防火墙默认允许 ssh 连接, 开启防火墙systemctl start firewalld# 检查防火墙状态systemctl status firewalld

# 设置开机自启systemctl enable firewalld# 再查询状态systemctl status firewalld
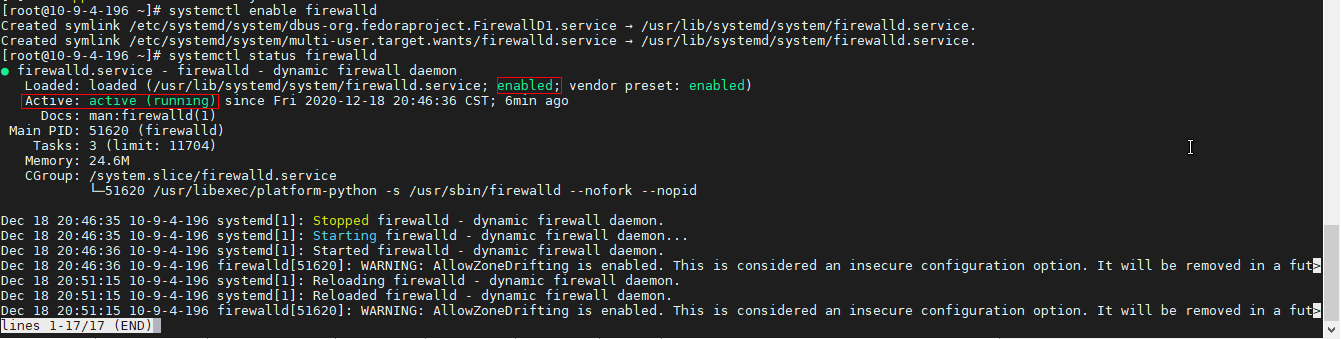
说明:图中标记的enable 和 active,表明它既是激活的,也是启用的,这意味着如果服务器重新启动,它将默认启动。
4.2 获取和设置防火墙的策略信息
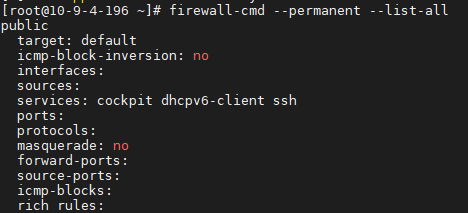
# 让我们列出已经允许的服务firewall-cmd --permanent --list-all
# 查看可以通过名称启用的其他服务firewall-cmd --get-services

# 要添加一个应该被允许的服务,添加http服务,并允许传入的TCP通信流到端口80firewall-cmd --permanent --add-service=http# 重新加载防火墙,使设置生效firewall-cmd --reload

5. 为常规用户启用外部访问
# 密码验证登录的情况,使用新用户 ssh 登录ssh sammy@your_server_ip
6. 禁止 root 远程登录,修改ssh连接端口
6.1 修改ssh配置文件
# 修改ssh配置文件sshd_configvi /etc/ssh/sshd_config
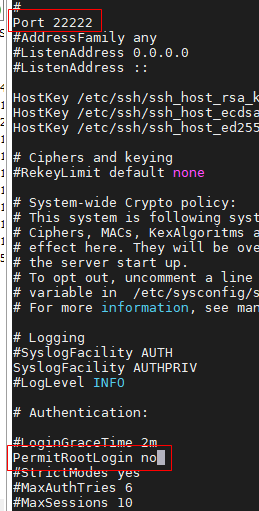
说明:Port 默认22,PermitRootLogin 默认yes
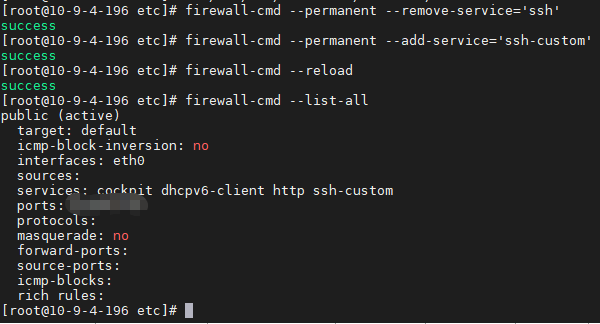
6.2 将自定义端口SSH服务添加到firewalld并重新加载
# 复制一份配置文件cp -av /usr/lib/firewalld/services/ssh.xml /usr/lib/firewalld/services/ssh-custom.xml# 修改配置vi /usr/lib/firewalld/services/ssh-custom.xml
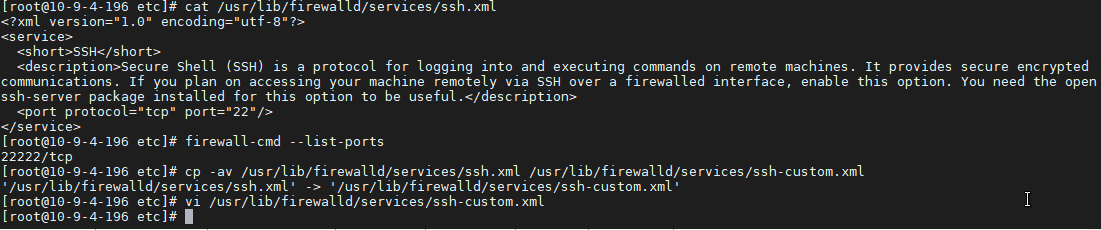

“port”=”22222”
# 删除原有ssh 22 portfirewall-cmd --permanent --remove-service='ssh'# 启用自定义配置 22222 portfirewall-cmd --permanent --add-service='ssh-custom'# 重新加载防火墙firewall-cmd --reload# 查看防火墙配置firewall-cmd --list-all
6.3 重新启动SSH服务,检查SSH服务是否已经开始监听新端口
# 查询 ssh 监听端口netstat -plunt | grep sshd# 查询ssh服务状态systemctl status sshd# 重启ssh 服务systemctl restart sshd# 查询 ssh 监听端口netstat -plunt | grep sshd# 查询ssh服务状态systemctl status sshd


若有收获,就点个赞吧
0 人点赞
