0.写在前面
- 本笔记用作复习查看用,基础完整总结部分,基础不牢,地动山摇! | 🔥Java帝国之行🔥 | 地址 | | —- | —- | | Java核心编程总结(一、继承) 🔥 | https://blog.csdn.net/Augenstern_QXL/article/details/116209463 | | Java核心编程总结(二、抽象类与接口)🔥 | https://blog.csdn.net/Augenstern_QXL/article/details/116209487 | | Java核心编程总结(三、多态与内部类)🔥 | https://blog.csdn.net/Augenstern_QXL/article/details/116209507 | | Java核心编程总结(四、异常与线程) 🔥 | https://blog.csdn.net/Augenstern_QXL/article/details/116209529 | | Java核心编程总结(五、线程池与死锁)🔥 | https://blog.csdn.net/Augenstern_QXL/article/details/116209580 | | Java核心编程总结(六、常用API与集合)🔥 | https://blog.csdn.net/Augenstern_QXL/article/details/116209607 | | Java核心编程总结(七、Stream流)🔥 | https://blog.csdn.net/Augenstern_QXL/article/details/116209624 | | Java核心编程总结(八、IO输入输出流)🔥 | https://blog.csdn.net/Augenstern_QXL/article/details/116209648 | | Java核心编程总结(九、File文件类)🔥 | https://blog.csdn.net/Augenstern_QXL/article/details/116209674 | | Java核心编程总结(十、反射) 🔥 | https://blog.csdn.net/Augenstern_QXL/article/details/117744497 |
1.环境配置
1.DOS命令提示符
| 操作 | 说明 |
|---|---|
| 盘符名称: | 盘符切换 E: 回车 |
| dir | 查看当前路径下的内容 |
| cd 目录 | 进入单级目录。 cd JAVA |
| cd 目录1\目录2\ | 进入多级目录 |
| cd\ | 回退到盘符目录 |
| cls | 清屏 |
| exit | 退出命令提示符窗口 |
2.path环境变量的配置
1.win+E 打开此电脑
2.右键此电脑-属性-高级系统设置-高级-环境变量-找到系统变量下的Path-新建-名称改为 JAVA_HOME ,变量值为安装JAVA的路径,在bin路径之前
3.右键此电脑-属性-高级系统设置-高级-环境变量-找到系统变量下的Path-编辑-编辑文本-在变量值前面添加 %JAVA_HOME%\bin;
4.win+r -> cmd回车,输入javac
3.helloworld
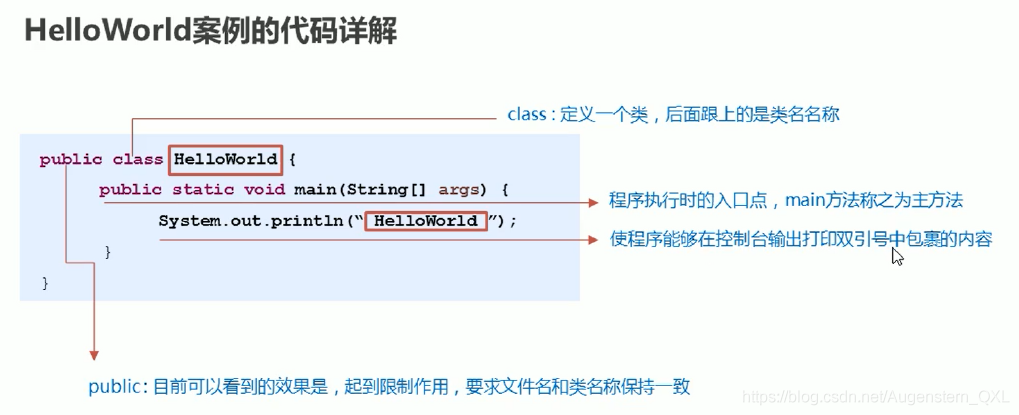
public class HelloWorld {public static void main(String[] args)System.out.println("helloWorld");}}
4.Notepad++
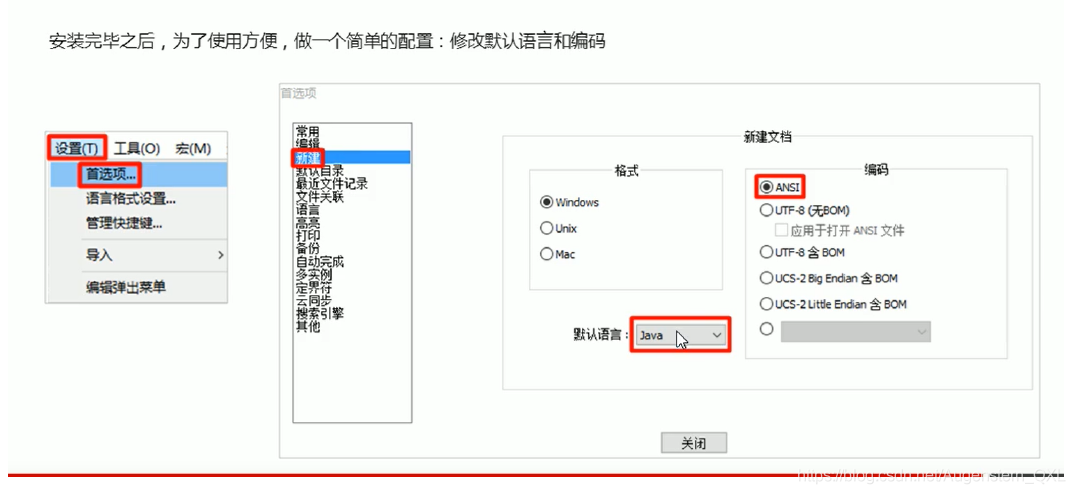
- 很多入门书籍与视频都是以Notepad++来讲解第一个 HelloWorld 案例,这里给出配置
- 具有IDEA、eclipse等的可直接使用自己的编译软件,不需安装Notepad++
2.基本语法
1.注释
单行注释
// 单行注释
多行注释
/* 注释信息 */
文档注释
/** 注释信息 **/
2.关键字
1.关键字的字母全部都是小写
2.常用的代码编辑器,针对关键字有特殊的颜色标记。
4.标识符
1.Java 对各种变量、方法和类等要素命名时使用的字符序列称为标识符
2.凡是自己可以起名字的地方都叫标识符
定义合法标识符规则:
1.由26个英文字母大小写,0-9 ,_或 $ 组成
2.数字不可以开头
3.不可以使用关键字和保留字,但能包含关键字和保留字
4.Java中严格区分大小写,长度无限制
5.标识符不能包含空格
5.命名规范
1.包名:多单词组成时所有字母都小写:xxxyyyzzz
2.类名、接口名:多单词组成时,所有单词的首字母大写:XxxYyyZzz
3.变量名、方法名:多单词组成时,第一个单词首字母小写,第二个单词开始每个单词首字母大写:xxxYyyZzz
4.常量名:所有字母都大写。多单词时每个单词用下划线连接:XXX_YYY_ZZZ
6.变量
1.整数类型
byte、short、int、long
- java的整型常量默认为 int 型,声明long型常量须后加‘l’或‘L’
2.浮点类型
float、double
1.Java 的浮点型常量默认为double型,声明float型常量,须后加‘f’或‘F’
2.浮点型常量有两种表示形式:3.字符型
1.char 型数据用来表示通常意义上“字符”(2字节)
2.字符型常量的三种表现形式:
①:字符常量是用单引号(‘ ’)括起来的单个字符,涵盖世界上所有 书面语的字符。例如:char c1 = ‘a’; char c2 = ‘中’; char c3 = ‘9’;
②:Java中还允许使用转义字符‘\’来将其后的字符转变为特殊字符型常量。例如:char c3 = ‘\n’; ‘\n’表示换行符
③:直接使用 Unicode 值来表示字符型常量:‘\uXXXX’。其中,XXXX代表一个十六进制整数。如:\u000a 表示 \n
3.char类型是可以进行运算的。因为它都对应有Unicode码
| 转义字符 | 说明 |
|---|---|
| \b | 退格符 |
| \n | 换行符 |
| \r | 回车符 |
| \t | 制表符 |
| \ ’ ’ | 双引号 |
| \ ’ | 单引号 |
| \ \ | 反斜线 |
4.布尔类型
1.boolean 类型适于逻辑运算,一般用于程序流程控制
2.boolean类型数据只允许取值true和false,无null
3.不可以0或非 0 的整数替代false和true,这点和C语言不同
5.字符串
1.值null可以赋值给任何引用类型(类、接口、数组)的变量,用以表示这个引用类型变量中保存的地址为空
2.String类属于引用类型,可用null赋值
3.String类是一个典型的不可变类,String对象创建出来就不可能被改变
6.变量的注意事项
1.变量名不允许重复定义
2.一条语句可以定义多个变量,但需要使用逗号进行分割
3.变量在使用之前一定要进行赋值
4.定义float 和long 变量的注意事项
5.变量的作用域范围
public class Demo {/* 1.变量名不允许重复定义 */public static void main(String[] args){int a = 10;// int a = 20; 错误代码a = 20;System.out.println(a);}}
public class Demo {/* 2.一条语句可以定义多个变量,但需要使用逗号进行分割*//* 一条语句:java当中使用分号作为一条语句的结束 */public static void main(String[] args){int a = 10,b = 20, c = 30;System.out.println(a);System.out.println(b);System.out.println(c);}}
public class Demo {/* 3.变量在使用之前一定要进行赋值 */int a; //使用之前一定赋值System.out.println(a);}
public class Demo {public statci void main(String[] args){/* 4.定义float 和 long 变量的注意事项 *//* 定义float类型变量的时候: 需要在数值后面加入F的标识,F可以大写也可以小写 *//* 定义long类型变量的时候: 需要在数值后面加入L的标识,L尽量大写 */float a = 12.3F;long b = 1000L;System.out.println(a);System.out.println(b);}}
public class Demo {public static void main(String[] args){/* 变量的作用域范围: 只在它所在的大括号中有效 */int a = 10;System.out.println(a);{int b = 20;// 当这个大括号中的代码执行完毕后,内部所[定义]的变量就会从内存中消失System.out.println(b);}/* System.out.println(b); 编译错误*/}}
7.键盘录入
import java.util.Scanner;public class DemoScanner {/* 步骤1: 导包,需要写在class的上面import java.util.Scanner;步骤2: 创建对象Scanner sc = new Scanner(System.in);只有sc可以改变,其他属于固定格式步骤3: 使用变量接收数据int i = sc.nextInt();只有 i 变量可以改变,其他属于固定格式*/public static void main(String[] args) {// 步骤2: 创建对象Scanner sc =new Scanner(System.in);// 步骤3: 使用[变量]接收数据int a = sc.nextInt();System.out.println(a);}}
7.类型转换
1.隐式转换
将数据类型中,取值范围小的数据,给取值范围大的类型赋值,可以直接赋值
简单记:小的给大的,可以直接给
public class Demo {public static void main(String[] args){int a = 10; // int 4个字节double b = a; // double 8个字节System.out.println(b) // 10.0}}
2.强制转换
把一个表示数据范围大的数值或变量赋值给另一个表示数据范围小的变量
简单记忆:大的给小的,不能直接给,需要强转
int a = 10; // int 4个字节byte b = (byte)a; // byte 1个字节double num1 = 12.9;int num2 = (int)num1;System.out.println(num1); // 12
8.强制类型转换
1.自动类型转换的逆过程,将容量大的数据类型转换为容量小的数据类型。使用时要加上强制转换符(()),但可能造成精度降低或溢出,格外要注意。
2.通常,字符串不能直接转换为基本类型,但通过基本类型对应的包装类则可以实现把字符串转换成基本类型
9.运算符
1.算数运算符
| 符号 | 作用 | 说明 |
|---|---|---|
| + | 加 | |
| - | 减 | |
| * | 乘 | |
| / | 除 | |
| % | 取余 | 获取两个数据做除法的余数 |
2.字符的”+”操作
public class Demo {public static void main(String[] args){int a = 1;char b = 'a';// 当(byte short char int)在一起运算的时候,都会提升为int //System.out.println(a + b);}}/* 'a' -- 97'A' -- 65'o' -- 48*/
3.字符串的”+”操作
pubic class Demo {public static void main(String[] args) {// 当 + 操作出现字符串时,这个 + 是[字符串连接符],而不是算数运算// 字符串可以使用 + 号,跟[任意数据类型]拼接System.out.println("ItHeiMa" + 666);// ItHeiMa666System.out.println(1 + 99 + "年");// 100年System.out.println("5 + 5" + 5 + 5 )// 5 + 555}}
4.案例:数值拆分
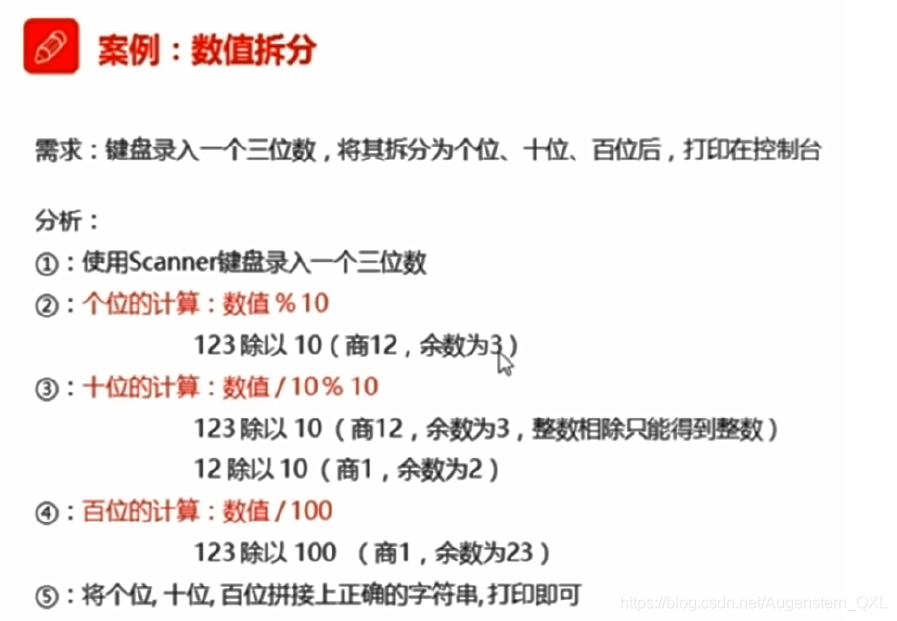
import java.util.Scanner;public class Demo{public static void main(String[] args){// 1.使用Scanner 键盘录入一个三位数Scanner sc = new Scanner(System.in);System.out..println("请输入一个三位数:");int num = sc.nextInt();// 2.个位的计算: 数值 % 10int ge = num % 10;// 3.十位的计算: 数值 / 10 % 10int shi = num / 10 % 10;// 4.百位的计算: 数值 / 100int bai = num / 100;System.out.println("整数"+num+"的个位为:"+ge);System.out.println("整数"+num+"的十位为:"+shi);System.out.println("整数"+num+"的百位为:"+bai);}}
公式总结:
个位: 数值 % 10
十位: 数值 / 10 % 10
百位: 数值 / 10 / 10 % 10
千位: 数值 / 10 / 10 / 10 % 10
5.自增自减运算符
| 符号 | 作用 | 说明 |
|---|---|---|
| ++ | 自增 | 变量的值加1 |
| – | 自减 | 变量的值减1 |
- ++ 和 —可以放在变量的后边,也可以放在变量的前面
单独使用的时候,++ 和 – 无论放在变量的前边和后边,结果是一样的 ```java public class Demo { public static void main(String[] args){
int a = 10;// ++在前,先对该变量做自增或自减,然后再拿变量参与操作int a = 10;int b = ++a;System.out.println(a); // 11System.out.println(b); // 11// ++在后 先将该变量原本的值,取出来参与操作,随后再自增int aa = 10;int bb = aa++;System.out.println(aa); // 11System.out.println(bb); // 10
int num = 123;System.out.println(num++); // 123}
}
<a name="jUDE1"></a>### 4.赋值运算符| **符号** | **作用** | **说明** || --- | --- | --- || = | 赋值 | a = 10,将10赋值给变量a || += | 加后赋值 | a + = b,将 a + b 的值给a || - = | 减后赋值 | a - = b,将 a - b的值给a || * = | 乘后赋值 | a * = b,将a × b 的值给a || / = | 除后赋值 | a / = b,将a ÷ b 的商给a || % = | 取余后赋值 | a % = b,将a ÷b 的余数给a |<a name="DOou4"></a>### 10.关系运算符| **符号** | **说明** || --- | --- || = = | a == b,判断a 和 b的值是否相等 || ! = | a != b,判断a 和 b的值是否不相等 || > | a > b,判断a的值是否大于b的值 || > = | a >= b,判断a的值是否大于等于b的值 || < | a < b,判断a的值是否小于b的值 || < = | a 《= b,判断a的值是否小于等于b的值 |<a name="rHHQa"></a>### 11.逻辑运算符| **符号** | **说明** || --- | --- || & | 与 || | | 或 || ! | 非(取反) || ^ | 异或(相同为false,不同为true) |```javapublic class Demo {public static void main(String[] args){System.out.println(true ^ true); // falseSystem.out.println(false ^ false); // falseSystem.out.println(true ^ false); // trueSystem.out.println(false ^ true); // true/* 两边一样就是false,不一样即为true */}}
12.短路逻辑运算符
| 符号 | 作用 | 说明 |
|---|---|---|
| && | 短路与 | 作用与&相同,但是有短路效果 |
| || | 短路或 | 作用与|相同,但是有短路效果 |
public class Demo {public static void main(String[] args){/*& 和 && 的区别:& :无论符号左边是 true 还是 false,右边都要继续执行&& :具有短路效果,符号左边为false的时候,右边就不执行如果符号左边为true,右边要继续执行*/int x = 3;int y = 4;// false & trueSystem.out.println(++x > 4 & y-- < 5); //falseSystem.out.println("x=" + x); // 4System.out.println("y=" + y); // 3int x = 3;int y = 4;// false && trueSystem.out.println(++x > 4 & y-- < 5); //falseSystem.out.println("x=" + x); // 4System.out.println("y=" + y); // 4}}
注意事项:
1.逻辑与 &:无论左边真假,右边都要执行
2.短路与 &&:如果左边为真,右边执行,如果左边为假,右边不执行
3.逻辑或 | : 无论左边真假,右边都要执行
4.短语或 ||:颗左边为假,右边执行,如果左边为真,右边不执行
13.三元运算符
关系表达式 ? 表达式1 : 表达式2
14.案例:求三个和尚最高身高
public class Demo{public static void main(String[] args){// 1.定义三个变量用于保存和尚的身高int a = 150;int b = 210;int c = 165;// 2.用三元运算符,比较前两个变量,获取较大值int temp = a > b ? a : b;// 3.用三元运算符,比较较大值和第三个变量int Max = temp > c ? temp : c;System.out.println(Max);}}
10.流程控制语句
1.if
import java.util.Scanner;public class Demo{public static void main(String[] args){Scanner score = new Scanner(System.in);System.out.println("请输入您的考试成绩:");int score = sc.nextInt();if(score >= 0 && score <= 100){if(score >= 95 && score <= 100){System.out.println("666");}else if(score >= 90 && score <= 94){System.out.println("66");}else if(score >= 80 && score <= 89){System.out.println("6");}else{System.out.println("挨顿揍!");}}else{System.out.println("您的成绩输入有误");}}}
2.switch
switch(表达式) {case 值1:语句体1;break;case 值2:语句体2;break;default:语句体3;break;}
1.案例:减肥计划
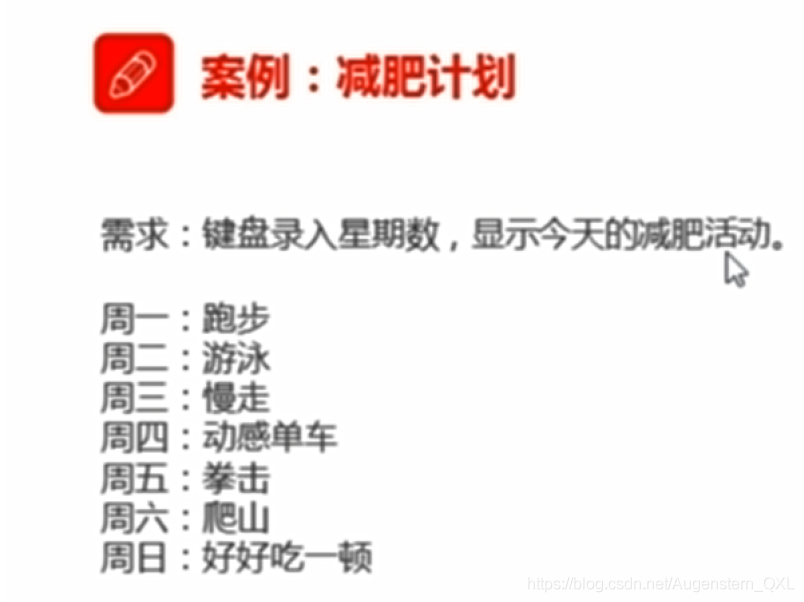
import java.util.Scanner;public class Demo{public static void main(String[] args){Scanner sc = new Scanner(System.in);System.out.println("今天是周几:");int week = sc.nextInt();switch(week){case 1:System.out.println("");break;case 2:System.out.println("");break;case 2:System.out.println("");break;default:System.out.println("您的输入有误");break;}}}
3.case穿透
如果switch语句中,case省略了break语句,就会开始case穿透
现象:当开始case穿透,后序的case就不会具有匹配效果,内部的语句都会执行
直到看到break,或者将整体switch语句执行完毕,才会结束
4.for
for(初始化语句;条件判断语句;条件控制语句){循环体语句;}
1.案例:输出数据

public class Demo{public static void main(String[] args){for(int i = 1; i <= 5;i++){System.out.println(i);}for(int i = 5; i >= 1; i--){System.out.println(i);}}}
2.案例:求1-5数据和
int sum = 0;for(int i = 1;i <= 5;i++){sum += i;}System.out.println(sum);
3.案例:求1-100偶数和
int sum = 0;for(int i = 1; i <= 100;i++){if(i % 2 == 0){sum += i;}}System.out.println(sum);
4.案例:逢7过
for(int i = 1; i <= 100;i++){int ge = i % 10;int shi =i / 10 % 10;if(ge == 7 || shi == 7 || i % 7 == 0){System.out.println(i);}}
5.案例:水仙花数
for(int i = 100; i <= 999; i++){int ge = i % 10;int shi = i / 10 % 10;int bai = i / 10 / 10 % 10;if(ge*ge*ge + shi*shi*shi + bai*bai*bai == i){System.out.println(i);}}
6.每行打印两个水仙花
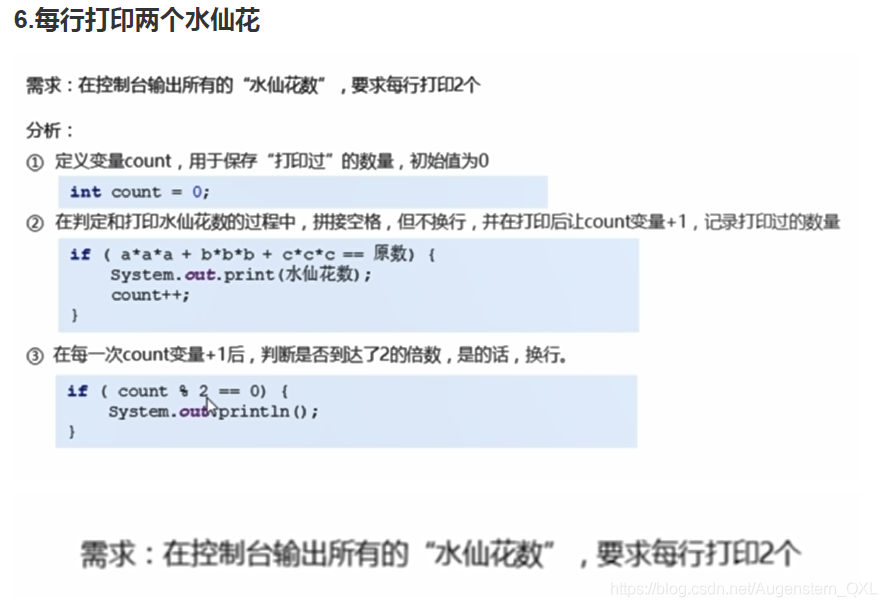
int count = 0;for(int i = 100; i <= 999; i++){int ge = i % 10;int shi = i / 10 % 10;int bai = i / 10 / 10 % 10;if(ge*ge*ge + shi*shi*shi + bai*bai*bai == i){System.out.print(i + " ");count++;if(count % 2 == 0){System.out.println();}}}
5.while
初始化语句;while(条件判断语句){循环体语句;条件控制语句;}
1.案例:珠穆朗玛峰
public class Demo{/*需求:世界最高山峰是珠穆朗玛峰(8844.43米=8844430毫米),假如我有一张足够大的纸,它的厚度是0.1毫米。请问,我折叠多少次,可以折成珠穆朗玛峰的高度?*/public static void main(String[] args){// 1.定义计数器变量,准备用于统计折叠的次数int count = 0;// 2.准备纸张厚度变量,珠峰高度变量double paper = 0.1;int zf = 8844430;// 3.不确定循环次数,使用while循环while(paper <= zf){paper *= 2;System.out.println(paper);// 每折叠一次,计数器就要自增count++;}System.out.println(count);}}
6.dowhile
初始化语句;do{循环体语句;条件控制语句;}while(条件判断语句);
8.死循环
1.for死循环
public class Demo{public static void main(String[] args){// for死循环格式for(;;){System.out.println("我停不下来了");}}}
2.while死循环
public class Demo{public static void main(String[] args){while(true){System.out.println("我停不下来了");}}}
3.dowhile死循环
public class Demo{public static void main(String[] args){do{System.out.println("我停不下来了");}while(true);}}
9.continue
作用: 跳过某次循环体内容的执行
public class Demo{public static void main(String[] args){// 模拟电梯上升,1-24层,4层不停for(int i = 1;i <= 24 ;i++){if(i == 4){continue;}System.out.println(i + "层到了~");}}}
10.break
作用:终止循环体内容的执行
public class Demo {public static void main(String[] args){// 模拟20岁工作到80岁,60岁退休for(int i = 20; i <= 80; i++){if(i == 60){break; //结束整个循环}System.out.println(i + "岁正在上班");}}}
1.案例:减肥计划改进
import java.util.Scanner;public class Test {/*需求:程序运行后,用户可多次查询星期对应的减肥计划,直到输入0,程序结束步骤:1. 不明确用户操作几次, 使用死循环包裹业务逻辑2. 匹配到0的时候,使用break结束循环死循环*/public static void main (String[] args){lo:while(true){System.out.println("请输入您要查看的星期数:");System.out.println("(如无需继续查看,请输入0退出程序)");// 1. 键盘录入星期数据,使用变量接收Scanner sc = new Scanner(System.in);int week = sc.nextInt();// 2. 多情况判断,采用switch语句实现switch(week){// 3. 在不同的case中,输出对应的减肥计划case 0:System.out.println("感谢您的使用");break lo;case 1:System.out.println("跑步");break;case 2:System.out.println("游泳");break;case 3:System.out.println("慢走");break;case 4:System.out.println("动感单车");break;case 5:System.out.println("拳击");break;case 6:System.out.println("爬山");break;case 7:System.out.println("好好吃一顿");break;default:System.out.println("您的输入有误");break;}}}}
11.Random
作用:用于产生一个随机数
1.导包import java.util.Randompublic class Demo{/*Random:产生随机数1.导包: import java.util.Random;2.创建对象: Random r = new Random();r 是变量名,可以变,其他的都不允许改变3.获取随机数: int numeber = r.nextInt(10);获取数据的范围:[0,10),包括0,不包括10number 是变量名,可以变,数字10可以变,其他的不允许变public static void main(String[] args){*/2.创建对象Random r = new Random();3.获取随机数int num = r.nextInt(num);}
1.案例:猜数字
import java.util.Scanner;import java.util.Random;public static void main(String[] args){// 1.准备 Random 和Scanner对象,分别用于产生随机数和键盘录入Random r = new Random();Scanner sc = new Scanner(System.in);// 2.使用Random 产生一个1-100之间的数,作为要猜的数int randomNum = r.nextInt(100) + 1;while(true){// 3.键盘录入用户猜的数据System.out.println("请输入您猜的数:");int num = sc.nextInt();// 4.进行比较if(num > randomNum){System.out.println("猜大了");}else if(num < randomNum){System.out.println("猜小了")}else{System.out.println("猜中了!");break;}}
4.数组
1.数组定义
// 格式一:数据类型[] 变量名int[] array;// 格式二:数据类型 变量名[]int array[];
// 定义了一个int类型的数组,数组名叫arrint[] arr;System.out.prinln(arr[])
2.数组动态初始化
格式: 数据类型[]变量名 = new 数据类型[数组长度];int[] arr = new int[3];System.out.println(arr[0]); // 0 系统自动分配的默认初始值
3.数组静态初始化
格式一: 数据类型[] 变量名 = new 数据类型[]{数据1,数据2,数据3,.....}int[] arr = new int[]{1,2,3};简化格式: 数据类型[] 变量名 = {数据1,数据2,数据3,....}int[] arr = {1,2,3};
动态初始化: 手动指定数组长度,由系统给出默认初始化值
静态初始化: 手动指定数组元素,系统会根据元素个数,计算出数组的长度
4.数组遍历
// 动态获取数组元素个数: 数组名.lengthint[] arr= {11,22,33,44,55};for(int i = 0;i < arr.length; i++ ){System.out.println(arr[i]);}
5.获取最值
/*1.假设数组中的第一个元素为最大值2.遍历数组,获取每一个元素,准备进行比较3.如果比较的过程,出现了比max更大的,让max记录更大的值4.循环结束后,打印最大值*/public static void main(String[] args){int[] arr = {12,45,98,73,60};int max = arr[0];for(int i = 1; i < arr.length;i++){if(arr[i] > max){max = arr[i];}}System.out.println("max" + max);}
5.方法
1.方法定义
public static void 方法名(){//方法体}public static void eat(){//方法体}
2.方法调用
方法名();eat();
注意:1.方法必须先定义后调用
2.方法与方法之间是平级关系,不能嵌套定义
3.方法没有被调用的时候,都在方法区中的字节码文件(.class)中存储
4.方法被调用的时候,需要进入到栈内存中运行
3.奇偶数判断
public class Demo{public static void main(String[] args){// 3. main 方法中调用methodmethod();}// 1.定义method方法public static void method(){// 2.方法中定义变量,使用if语句判断是奇数还是偶数int num = 10;if(num % 2 ==0){System.out.println("偶数");}else{System.out.println("奇数");}}}
4.带参数的方法
public static void 方法名(数据类型变量名1,数据类型变量名2,....){.}public static void getMax(int number1,int number2){....}
方法名(参数);方法名(变量名1/常量值1,变量名2,常量值2);getMax(5,6);
public class Demo1 {public static void main(String[] args){IsEvenNumber(10);}public static void IsEvenNumber(int num){if(num % 2 == 0){System.out.println("是偶数");}else{System.out.println("是奇数");}}}
1.案例 :打印n-m所有的奇数
public class Demo{public static void main(String[] args){print(10,20);}// 1.定义方法,方法名为print// 2.方法中添加两个int类型的形参public static void print(int n,int m){System.out.println(n + "到" + m + "之间的奇数为");for(int i = n; i <= m;i++){if(i % 2 == 1){System.out.println(i);}}}}
5.带返回值方法
1.定义
public static 数据类型 方法名(参数){return 数据;}public static boolean isEvenNumber(int number){return true;}public static int getMax(int a,int b){return 100;}
注意: 方法定义时 return 后面的返回值与方法定义上的数据类型要匹配,否则程序将报错
2.调用
格式一: 方法名(参数);isEvenNumber(5);格式二: 数据类型 变量名 = 方法名(参数);boolean flag = isEvenNumber(5);
public static void main(String[] args){// 需求: 定义一个方法,计算两个整数相加的和int num = add(10, 10);System.out.println(num);}public static int add(int a, int b){int c = a + b;return c;}
3.案例
设计一个方法可以获取两个数的较大值,数据来自于参数
public class Demo{public static void main(String[] args){int result = getMax(10,20);System.out.println(result);}public static int getMax(int a, int b){if(a > b){return a;}else{return b;}}}
6.方法的通用格式
public static 返回值类型 方法名(参数){方法体;return 数据;}
7.方法的注意事项
1.方法不能嵌套定义
2.方法的返回值类型为 void ,表示该方法没有返回值,没有返回值的方法可以省略 return 语句不写。如果要编写return,后面不能跟具体的数据,执行不到,属于无效的代码
3.return 语句下面,不能编写代码,因为永远执行不到,属于无效的代码
8.方法重载
简单记:同一个类中,方法名相同,参数不同的方法
参数不同: 个数不同,类型不同,顺序不同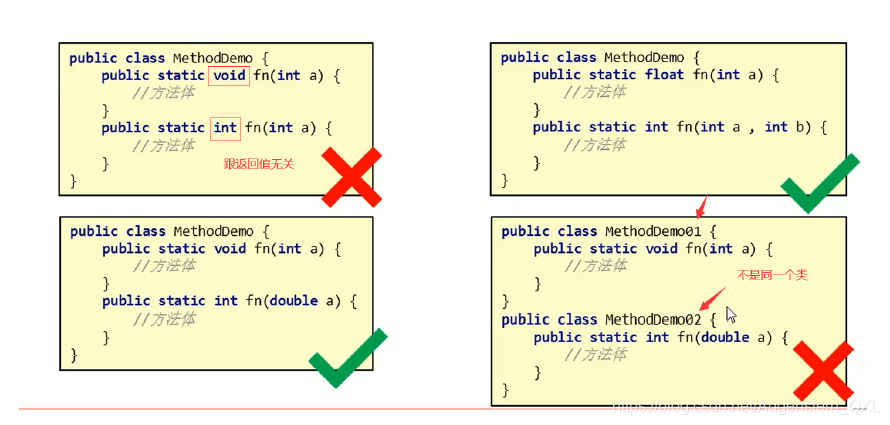
注意
识别方法之间是否是重载关系,只看方法名和参数,跟返回值无关
1.案例:重载练习
// 需求:使用方法重载的思想,设计比较两个整数是否相同的方法,兼容全整数类型()public class Demo{public static void main(String[] args){int a = 10;int b = 20;System.out.println(compare(a,b));}public static boolean compare(int a,int b){return a == b;}public static boolean compare(byte a,byte b){return a == b;}public static boolean compare(short a,short b){return a == b;}public static boolean compare(long a,long b){return a == b;}}
9.方法参数传递
1.方法参数传递(基本类型)
public class Demo{public static void main(String[] args){int number = 100;System.out.println("调用change方法前:" + number);// 100change(number);System.out.println("调用change方法后:" + number);// 100}}
2.方法参数传递(引用类型)
public class Demo{/*方法参数传递为引用数据类型:传入方法中的,是内存地址*/public static void main(String[] args){int[] arr = {10,20,30};System.out.println("调用change方法前:" + arr[1]);// 20change(arr);System.out.println("调用change方法后:" + arr[1]);// 200}public static void change(int[] arr){arr[1] = 200;}}
3.案例:数组遍历
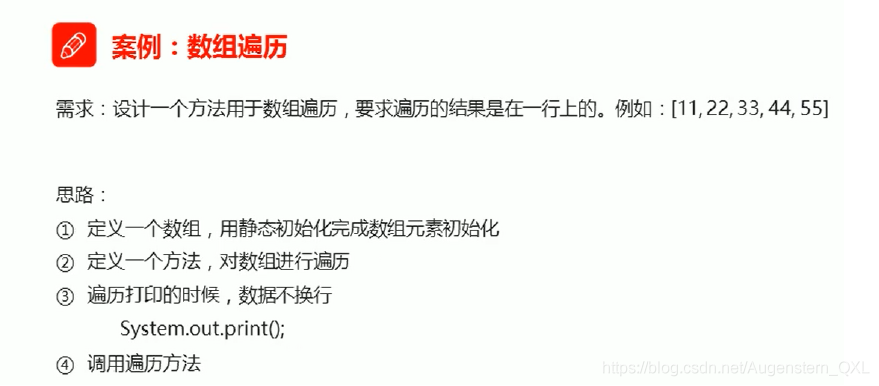
public class Demo{public static void main(String[] args){int[] arr = {11,22,33,44,55};printArray(arr);}// 定义一个方法,对数组进行遍历// 1.参数: int[] arr// 2.返回值类型: voidSystem.out.print("[");public static void printArray(int[] arr){for(int i = 1; i <= arr.length; i++){if(i == arr.length - 1){//最大索引 = 数组长度 - 1System.out.println(arr[i] + "]");}else{System.out.print(arr[i] + ",");}}}}
4.案例:获取数组最大值
public class Demo{public static void main(String[] args){// 1.定义一个数组int[] arr ={11,22,55,44,33};int max = getMax(arr);System.out.println(max);}// 2.定义一个方法,用来获取数组中的最大值// 2.1 参数 int[] arr// 2.2 返回值类型 intpublic static int getMax(int[] arr){int max = arr[0];for(int i = 1; i <= arr.length;i++){if(max < arr[i]){max = arr[i];}}return max;}}
5.案例:获取数组最大值和最小值
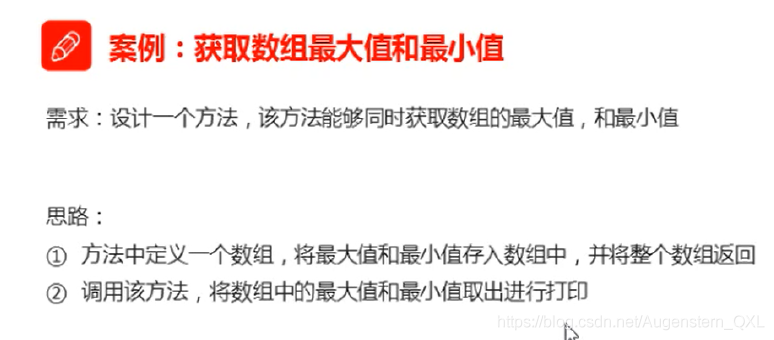
public static void main(String[] args){int[] arr = {11,55,22,33,44};int[] maxAndMin = getMaxAndMin(arr);}// 返回值类型:数组类型 int[]public static int[] getMaxAndMin(int[] arr){int max = arr[0];for(int i = 1; i <= arr.length;i++){if(max < arr[i]){max = arr[i];}}int min = arr[0];for(int i = 1; i <= arr.length;i++){if(min > arr[i]){min = arr[i];}}int[] maxAndMin = {max,min};return maxAndMin;}
8.二维数组
格式一 :数据类型[][] 变量名;int[][] arr;格式二 :数据类型 变量名[][];int arr[][];格式三 :数据类型[] 变量名[];int[] arr[];
1.动态初始化
格式: 数据类型[][] 变量名 = new 数据类型[m][n];m 表示这个二维数组,可以存放多少个一维数组n 表示每一个一维数组,可以存放多少个元素int[][] arr = new int[2][3];// 该数组可以存放 2 个 一维数组,每个一维数组中可以存放 3 个 int 类型元素
2.访问元素
public class Demo{public static void main(String[] args){/*问题:二维数组中存储的是一维数组,那能不能存入[提前创建好的一维数组]呢?*/int[] arr1 = {11,22,33};int[] arr2 = {44,55,66};int[] arr3 = {77,88,99,100};int[][] arr = new int[3][3];arr[0] = arr1;arr[1] = arr2;arr[2] = arr3;System.out.println(arr[1][2]);// 66System.out.println(arr[2][3]);// 100}}
3.静态初始化
// 格式: 数据类型[][] 变量名 = new 数据类型[][] {{元素1,元素2...},{元素1,元素2....}};int[][] arr = new int[][]{{11,22},{33,44}};// 简化格式数据类型[][] 变量名 ={{元素1,元素2},{元素1,元素2....}};int[][] arr ={{11,22},{33,44}};
4.遍历二维数组
public class Demo{/*需求:已知一个二维数组 arr = {{11,22,33},{44,55,66}}遍历该数组,取出所有元素并打印*/public static void main(String[] args){int[][] arr = {{11,22,33},{44,55,66}};// 遍历二维数组,取出里面每一个一维数组for(int i = 0;i < arr.length;i++){// 遍历一维数组,arr[i]就是每一个一维数组for(int j = 0;j < arr[i].length;j++){System.out.println(arr[i][j]);}}}}
5.二维数组求和
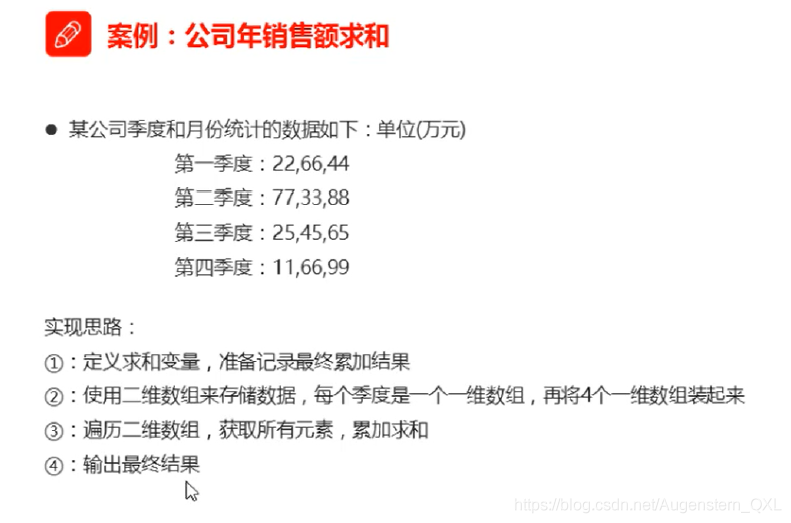
public static void main(String[] args){// 1.定义求和变量int sum = 0;int[][] arr = {{11,22,33},{44,55,66},{77,88,99}};// 2.遍历二维数组,获取所有元素for(int i = 0;i < arr.length;i++){for(int j = 0;i < arr[i].length;j++){sum += arr[i][j];}}System.out.println(sum);}
9.面向对象基础
1.类的定义
类的组成: 属性 和 行为
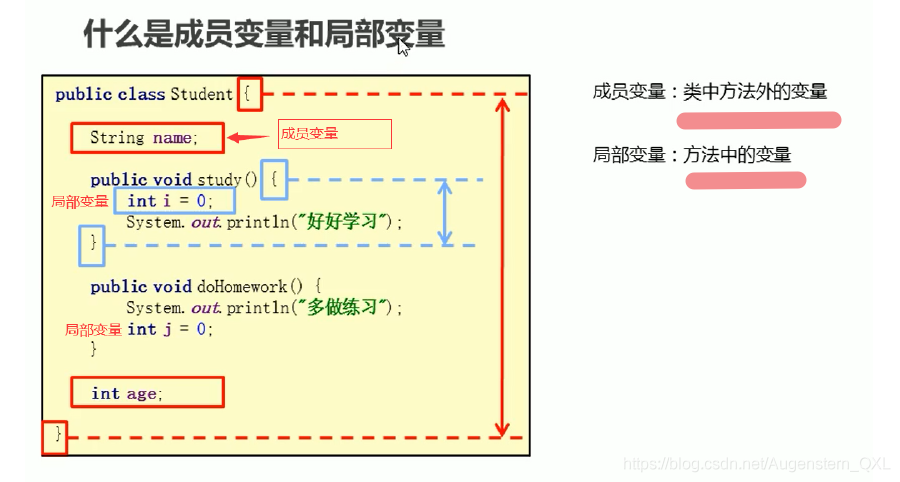
1.属性: 在代码中通过成员变量来体现(类中方法外的变量)
2.行为: 在代码中通过成员方法来体现(和前面的方法相比,去掉static关键字即可)
public class 类名{// 成员变量变量1的数据类型 变量1;变量2的数据类型 变量2;.....// 成员方法方法1;方法2;.......}public class Student{// 属性: 姓名,年龄// 成员变量:跟之前定义变量的格式一样,只不过位置发生了改变,类中方法外String name;int age;// 在不在Student 类中 ? 在// 在不在方法外? 在,因为Student 类中没有方法// 行为: 学习// 成员方法:跟之前定义方法的格式一样,只不过去掉了static关键字public void study(){System.out.println("学习");}}
2.创建对象
创建对象// 格式: 类名 对象名 = new 类名();// Student s = new Student();使用对象// 1.使用成员变量// 格式: 对象名.变量名s.name// 2.使用成员方法// 格式: 对象名.方法名()s.study();
public class TestStudent {/*创建对象的格式:类名 对象名 = new 类名();调用成员变量的格式:对象名.变量名调用成员方法的格式:对象名.方法名();*/public static void main(String[] args){// 1.创建对象Student stu = new Student();// 2.调用成员变量stu.name = "张三";stu.age = 23;// 3.调用成员方法stu.study();}}
1.案例:手机类
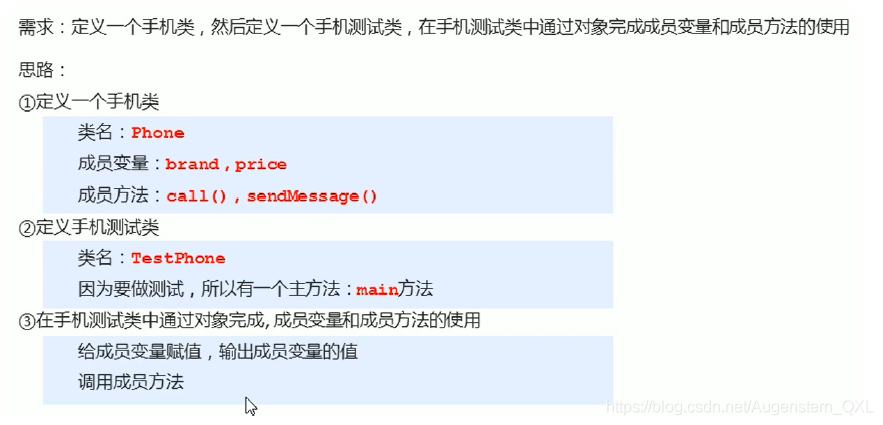
public class Phone {// 品牌,价格String brand;int price;// 打电话 发短信public void call(String name){Sout("给" + name + "打电话");}public void sendMessage(){Sout("群发短信");}}public class TestPhone {public static void main(Sring[] args){Phone p = new Phone();p.brand = "iPhone12";p.price = 7000;p.call();}}
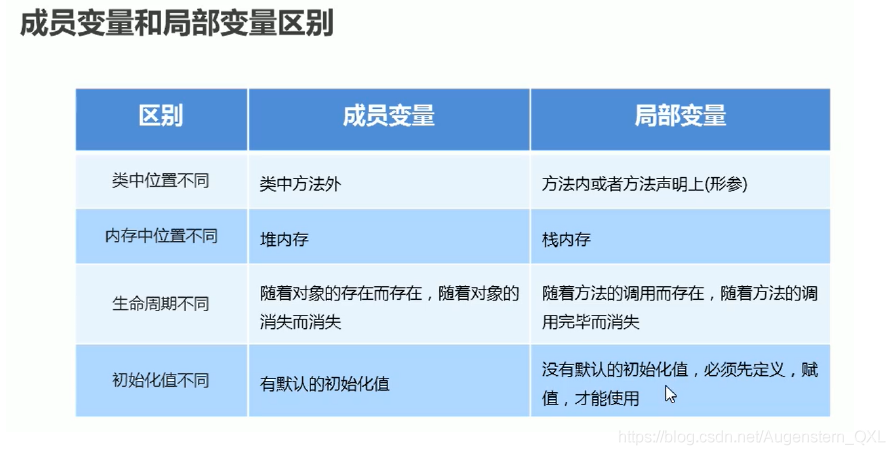
3.成员变量和局部变量
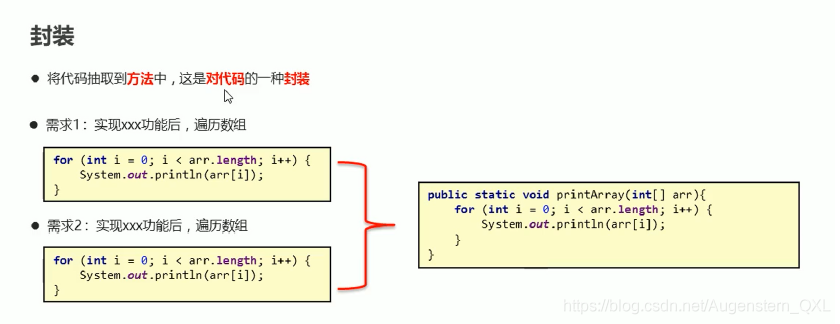
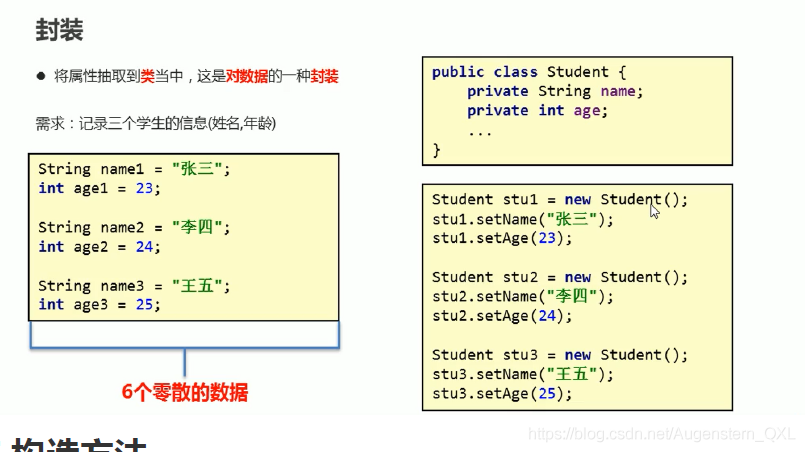
4.封装
1.private关键字
private是一个权限修饰符,可以用来修饰成员(变量,方法)
特点:被private修饰的成员只能在本类中才能访问
public class Student {private int age;// 设置值public void setAge(int a){if(a >= 0 && a <= 120){age = a;}else {System.out.println("您输入的年龄不合理");}}// 获取值public void getAge(){return age;}}public class TestStudent {public static void main(String[] args){Student stu = new Student();stu.setAge(23);}}
2.private关键字的使用
public class Student {private String name;private int age;//设置姓名值public void setName(String n){name = n;}//获取姓名值public String getName(){return name;}//设置年龄值public void setAge(int a){age = a;}//获取年龄值public int getAge(){return age;}public void show(){System.out.println(name + "..." + age);}}
右键-new-Java Class
public class TestStudent {public static void main(String[] args){Student stu = new Student();stu.setName("张三");stud.setAge(23);System.out.println(stu.getName());System.out.println(stu.getAge());}}
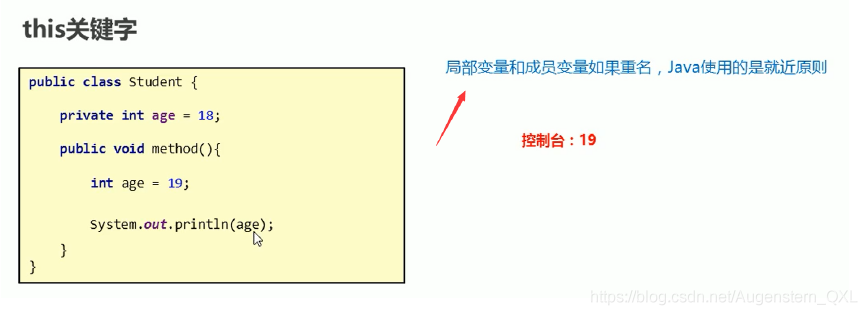
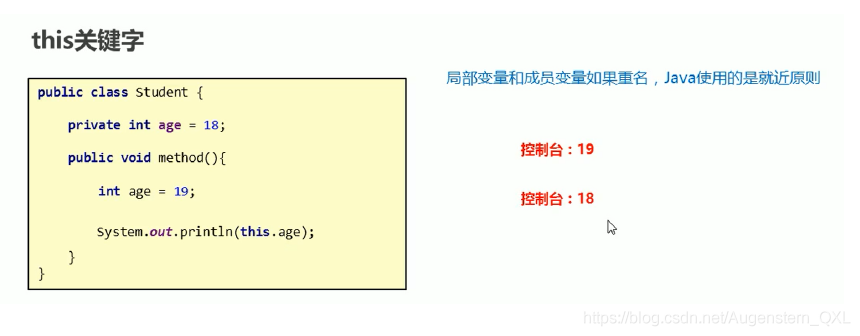
3.this 关键字
4.封装
5.构造方法
构造方法:构建、创建对象的时候,所调用的方法
格式:1.方法名与类名相同,大小写也要一致2.没有返回值类型,连void都没有3.没有具体的返回值(不能由return带回结果数据)public class Student { // 类public Student(){ // 构造方法System.out.println("我是Student类的构造方法");}}
// 调用方法public class TestStudent {public static void main(String[] args){Student stu = new Student();// 我是Student类的构造方法}}// 执行时机// 1.创建对象的时候调用,每创建一次对象,就会执行一次构造方法// 2.不能手动调用构造方法stu.Student(); // 报错
1.StringBuilder
| 方法名 | 说明 |
|---|---|
| public StringBuilder() | 创建一个空白可变字符串对象,不含有任何内容 |
| public StringBuilder(String str) | 根据字符串的内容,来创建可变字符串对象 |
public class Demo {public static void main(Srting[] args){// public StringBuilder():创建一个空白可变字符串对象,不含有任何内容StringBuilder sb = new StringBuilder();System.out.println(sb); // 打印出来是空白// public StringBuilder(String str): 根据字符串的内容,来创建可变字符串对象StringBuilder sb2 = new StringBuilder("abc");System.out.println(sb); // 打印出来 abc}}
2.注意事项
一.构造方法的创建
1.如果没有定义构造方法,系统将给出一个默认的无参数构造方法
2.如果定义了构造方法,系统将不再提供默认的构造方法
解决方法:
无论是否使用,都手动书写无参数构造方法,和带参数构造方法
6.案例
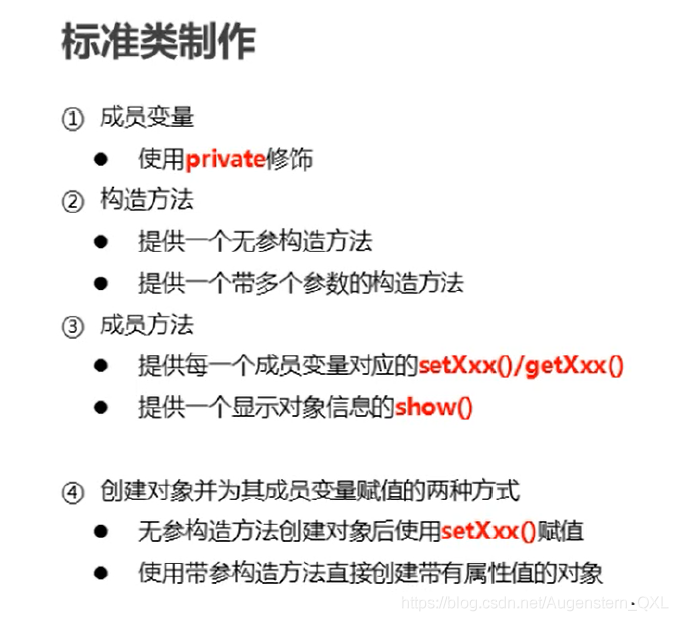
/*javaBean类: 封装数据*/public class Student {// 两个成员变量 私有private String name;private int age;// 无参数构造方法public Student(){}// 有参数构造方法public Student(String name,int age){this.name = name;this.age = age;}// 成员方法: setXX \ gerXXpublic void setName(String name){this.name = name;}public String getName(){return name;}public void setAge(int age){this.age = age}public int getAge(){return age;}public void show(){System.out.print;n(name + "..." + age);}}
快捷键方法
只需要写一个类
在写私有方法即可
public class Student{private String name;private int age;}
无参构造方法 鼠标右键-Generate-Constructor-SelectNone
有参构造方法 鼠标右键-Generate-Constructor-Ctrl+A-OK
setXX\getXX 鼠标右键-Generate-Getter and Setter -Ctrl+A-OK
2.测试,新建一个类,需要有主函数
public class TestStudent{public static void main(String[] args){// 1. 无参数构造方法创建对象,通过setXX方法给成员变量进行赋值Student stu1 = new Student();stu1.setName("张三");stu1.setAge(23);stu1.show();// 2.通过带参数构造方法,直接给属性进行赋值Student stu2 = new Student("李四",24);stu2.show();}}
10.API
API: Application Programming Interface 应用程序编程接口
1.Scanner
public class Demo{/*next(): 遇到了空格,就不再录入数据结束标记:空格,tab键nextLine(): 可以将数据完整的接收过来结束标记:回车换行符*/public static void main(String[] args){// 1.创建Scanner对象Scanner sc = new Scanner(System.in);System.out.println("请输入:");// 2.调用nextLine 方法接收字符串// ctrl + alt + v :快速生成方法的返回值String s = sc.nextLine();System.out.println(s);}}
public java.util.Scanner;public class Demo{/*nextInt 和 nextLine 方法配合使用的时候,nextLine方法就没有键盘录入的机会了建议:今后键盘录入数据的时候,如果是字符串和整数一起接收,建议使用next方法接收字符串*/public static void main(String[] args){Scanner.sc = new Scanner(System.in);System.out.println("请输入整数:");int num = sc.nextInt(); // 10 + 回车 ,10 记录给num,回车保留System.out.println("请输入字符串:");String s =sc.next();}}
2.String
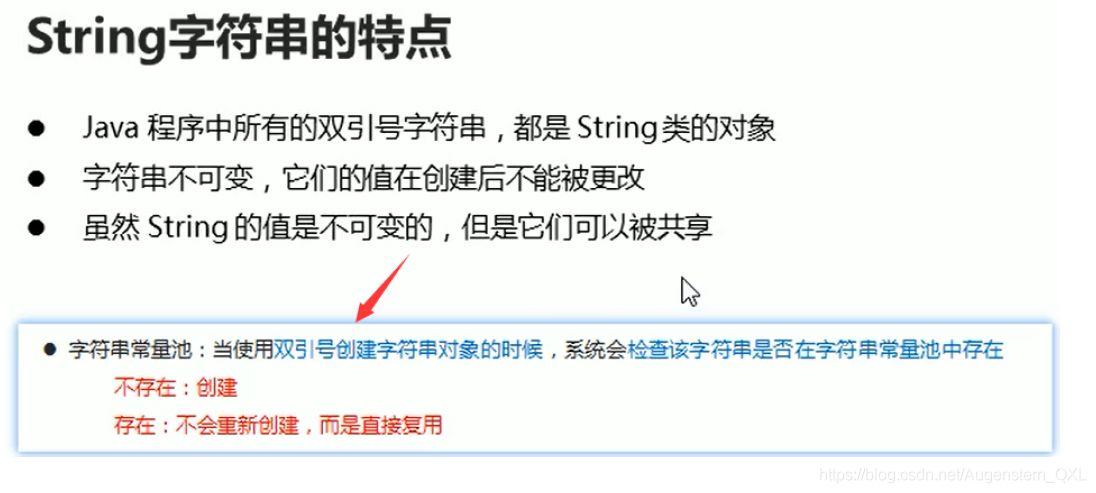
String 类 在 java.lang 包下,所以使用的时候不需要导包
public class Demo {/*java程序种,所有的双引号字符串,都是String这个类的对象,可以通过对象名.的方法点出对象的成员方法字符串是常量,它们的值在创建后不能更改*/public static void main(String[] args){String s1 = "abc";int length = s1.length();System.out.println(length); // 3}}
3.String常见构造方法
| 方法名 | 说明 |
|---|---|
| public String() | 创建一个空白字符串对象,不含有任何内容 |
| public String(char[] chs) | 根据字符数组的内容,来创建字符串对象 |
| public String(String original) | 根据传入的字符串内容,来创建字符串对象 |
| String s = “abc” | 直接赋值的方法创建字符串对象,内容就是abc |
public statci void main(String[] args){// 1. public String()String s1 = new String();System.out.println(s1); // 空白// 2. public String(char[] chs)char[] chs = {'a','b','c'};String s2 = new String(chs);System.out.println(s2);// 3. public String(String original)String s3 = new String("123");System.out.println(s3);}
4.区别
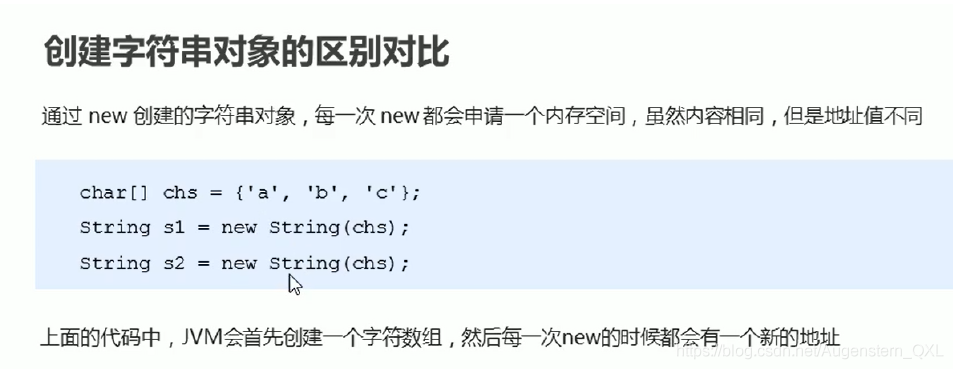
创建字符串对象的区别对比
问题: 构造方法能创建对象,双引号也能创建字符串对象,有什么区别吗?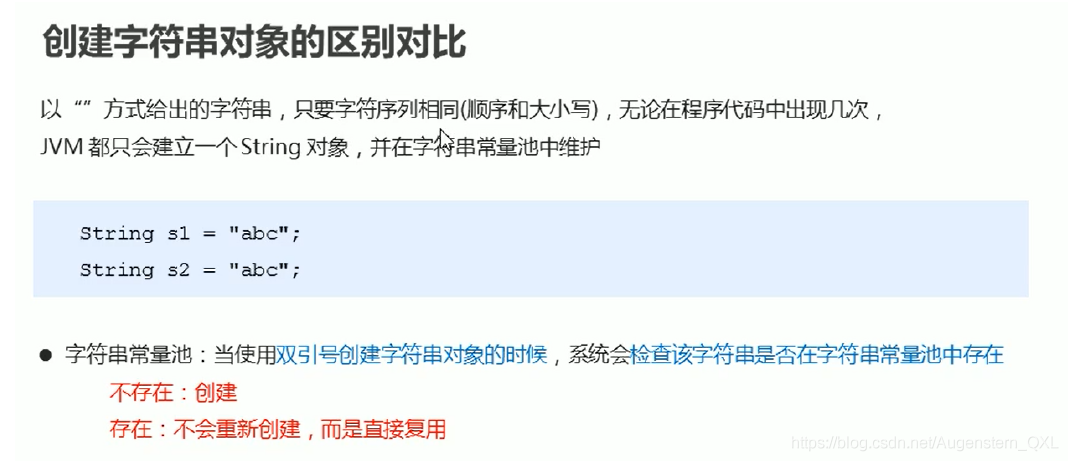
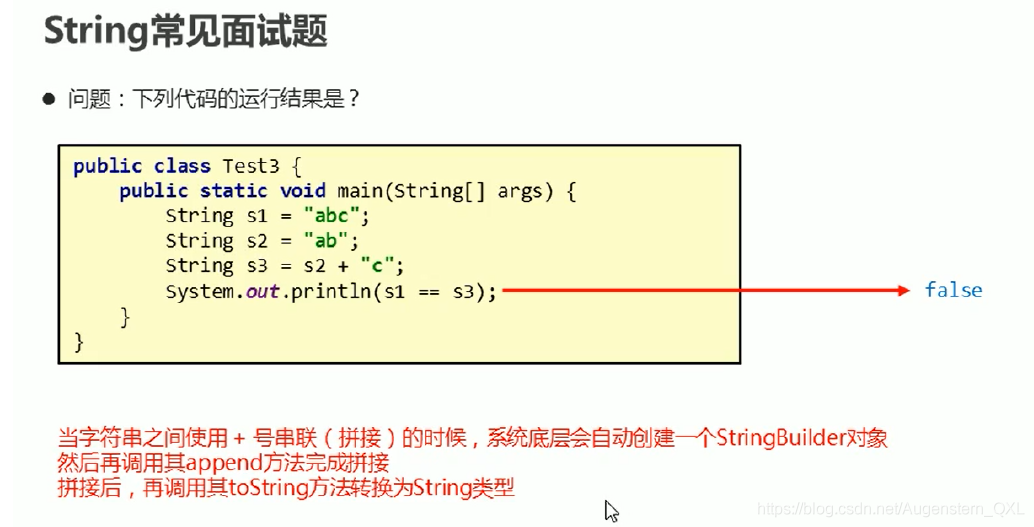
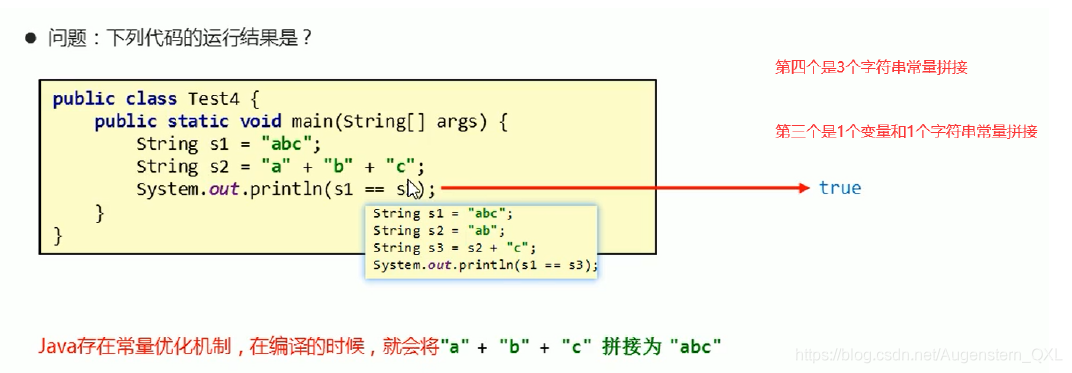
5.面试题
6.字符串的比较
字符串是对象,它比较内容是否相同,是通过一个方法来实现的,这个方法叫做: equals
public class Demo{public static void main(String[] args){String s1 = "abc";String s2 = "ABC";String s3 = "abc";System.out.println(s1.equals(s2)); // falseSystem.out.println(s1.equals(s3)); // true// 忽略字符串大小写来比较System.out.println(s1.equalsIgnoreCase(s2)); // true}}
7.字符串的遍历
需求:键盘录入一个字符串,使用程序实现在控制台遍历该字符串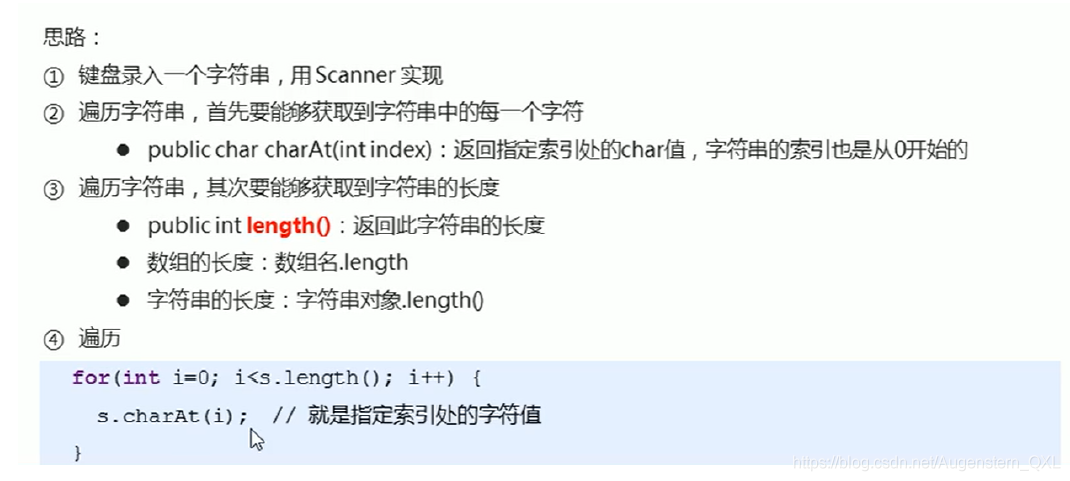
1.public char charAt(int index);2.public char[] toCharArray();
import java.util.Scanner;public class Demo1 {public static void main(String[] args) {// 1.键盘录入一个字符串Scanner sc = new Scanner(System.in);System.out.println("请输入:");String s = sc.nextLine();// 2.遍历字符串,首先要能够获取到字符串中的每一个字符for(int i = 0; i < s.length();i++){char c = s.charAt(i);System.out.println(c);}}}
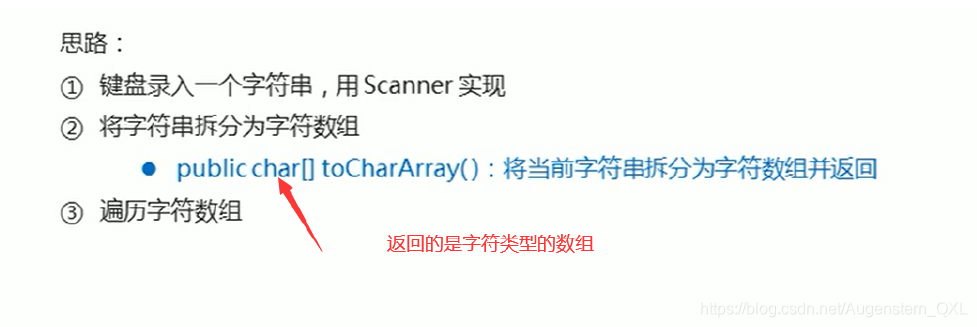
import java.util.Scanner;public class Demo1 {public static void main(String[] args) {// 1.键盘录入一个字符串Scanner sc = new Scanner(System.in);System.out.println("请输入:");String s = sc.nextLine();// 2.将字符串拆分为字符数组char[] chars = s.toCharArray();// 3.遍历字符数组for(int i = 0; i < chars.length; i++){System.out.println(chars[i]);}
8.统计字符次数
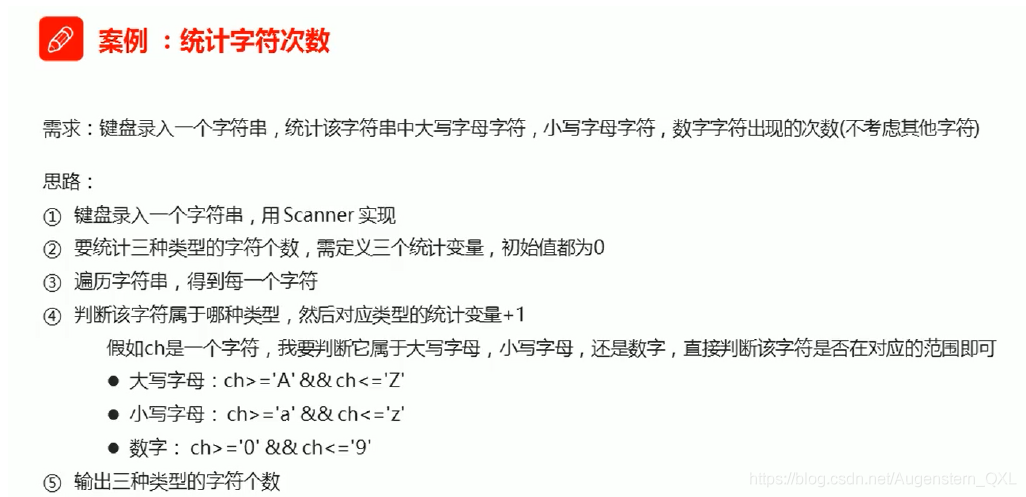
import java.util.Scanner;public class Demo1 {public static void main(String[] args) {// 1.键盘录入一个字符串Scanner sc = new Scanner(System.in);System.out.println("请输入:");String s = sc.nextLine();// 2.统计三种类型的字符个数int bigCount = 0;int smallCount = 0;int numCount = 0;// 3.遍历字符串,得到每一个字符char[] chars = s.toCharArray();for(int i = 0; i < chars.length;i++){char c = chars[i];// 4.判断该字符属于哪种类型,然后对应类型的统计变量+1if(c >= 'A' && c <= 'Z'){bigCount++;}else if(c >= 'a' && c <= 'z'){smallCount++;}else if(c >= '0' && c <= '9'){numCount++;}// 5.输出三种类型的字符个数System.out.println("大写字母字符" + bigCount);System.out.println("小写字母字符" + smallCount);System.out.println("数字字母字符" + numCount);}
9.字符串截取
1.public char substring(int beginIndex);2.public char substring(int beginIndx,endIndex);
public class Demo {/*截取字符串:String substring(int beginIndex):从传入的索引位置处向后截取,一直截取到末尾,得到新字符串并返回String substring(int beginIndex, int endIndex):从beginIndex索引位置开始截取,截取到endIndex索引位置,得到新字符串并返回(包括头,不包括尾)*/public static void main(String[] args){String s = "itheima";String ss = s.substring(2);System.out.println(ss);// heimaString sss = s.substring(0,2);System.out.println(sss);// it}}
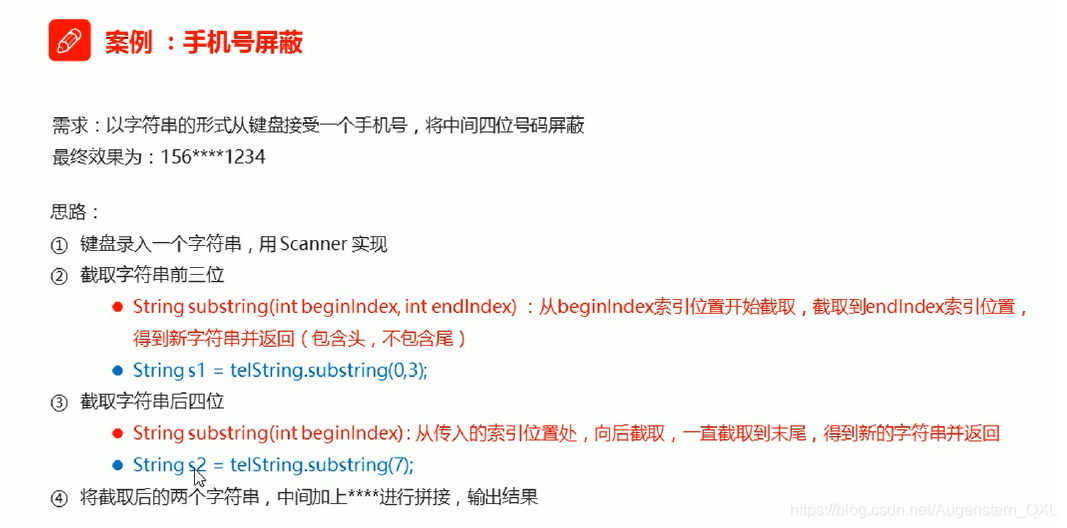
import java.util.Scannerpublic class Demo{public static void main(String[] args){// 1.键盘录入一个字符串Scanner sc = new Scanner(System.in);System.out.println("请输入手机号:");String telString = sc.nextLine();// 2.截取字符串前三位String start = telString.substring(0,3);// 3.截取字符串后四位String end = telString.substring(7);// 4.将截取后的两个字符串,中间加上****进行拼接System.out.println(start + "****" + end);}}
10.字符串替换
String replace(CharSequence target,Char Sequense replacement)// 第一个参数为target(被替换的旧值)内容// 第二个参数为replacement(替换的新值)进行替换// 返回新的字符串
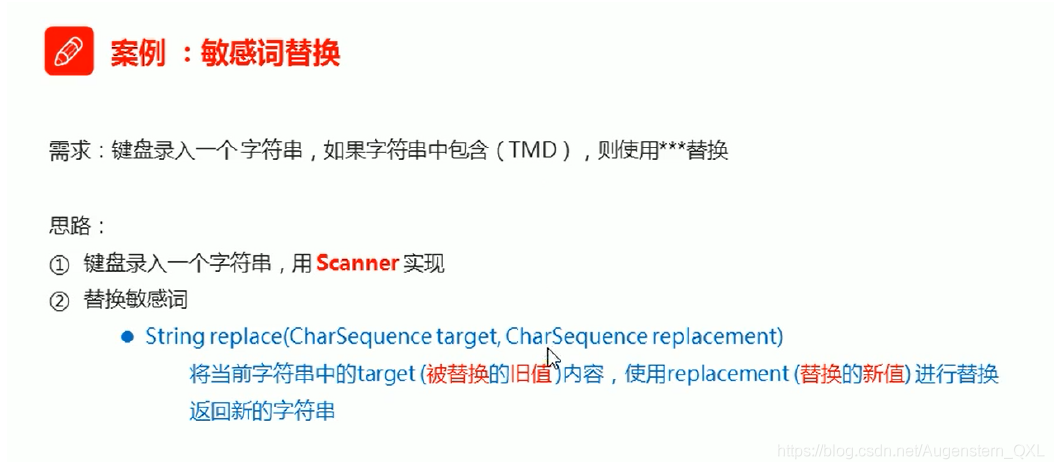
import java.util.Scannerpublic class Demo{public static void main(String[] args){// 1.键盘录入一个字符串Scanner sc = new Scanner(System.in);System.out.println("请输入:");String s = sc.nextLine();// 2.进行敏感提替换String result = s.replace("TMD","***");// 3.输出结果System.out.println(result);
11.切割字符串
String[] split(String regex);// 根据传入的字符串作为规则进行切割,将切割后的内容存入字符串数组中,并将字符串数组返回String[] sArr = stuInfo.split(",");
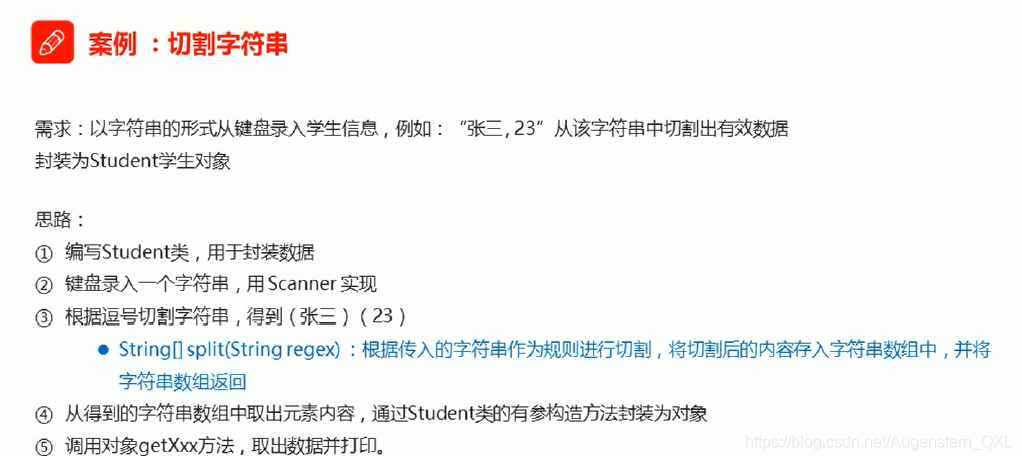
// 1.编写Student类,用于封装数据public class Student {// 两个成员变量私有private String name;private String age;// 无参数构造方法public Student() {}// 有参数构造方法public Student(String name,String age){this.name = name;this.age = age;}// 成员方法:setXX\ getXXpublic String getName(){return name;}public void setName(String name ){this.name = name;}public String getAge() {return age;}}
public class TestStudent {public static void main(String[] args){// 2. 键盘录入字符串Scanner sc = new Scanner(System.in);System.out.println("请输入学生信息:");String stuInfo = sc.nextLine();// stuInfo = "张三,23";// 3.根据逗号切割字符串String[] sArr = stuInfo.split(",");// 4.从得到的字符串数组中取出元素内容,通过Student类的有参构造方法封装为对象Student stu = new Student(sArr[0],sArr[1]);// 5.调用对象getXXX方法,取出数据并打印System.out.println(stu.getName() + "..." + stu.getAge());}}
12.总结
1.字符串的比较
| public boolean equals(Object anObject) | 比较字符串的内容,严格区分大小写 |
|---|---|
| public boolean equalslgnoreCase(String anotherString) | 比较字符串的内容,忽略大小写 |
2.字符串的长度
| public int length() | 返回此字符串的长度 |
|---|---|
3.字符串的遍历
| public char charAt(int index) | 返回指定索引处的char值 |
|---|---|
| public char[] toCharArray() | 将字符串拆分为字符数组后返回 |
4.字符串的截取
| public String substring(int beginIndex,int endIndex) | 根据开始和结束索引进行截取,得到新的字符串(包含头,不包含尾) |
|---|---|
| public String substring(int beginIndex) | 从传入的索引处截取,截取到末尾,得到新的字符串 |
5.字符串的替换
| public String replacr(CharSequence target,CharSequence replacement) | 使用新值,将字符串中的旧值替换,得到新的字符串 |
|---|---|
6.字符串的切割
| public String[] split(String regex) | 根据传入的规则切割字符串,得到字符串数组 |
|---|---|
11.StringBuilder
1.StringBuilder
| 方法名 | 说明 |
|---|---|
| public StringBuilder append(任意类型) | 添加数据,并返回对象本身 |
| public StringBuilder reverse() | 返回相反的字符序列 |
| public int length() | 返回长度(字符出现的个数) |
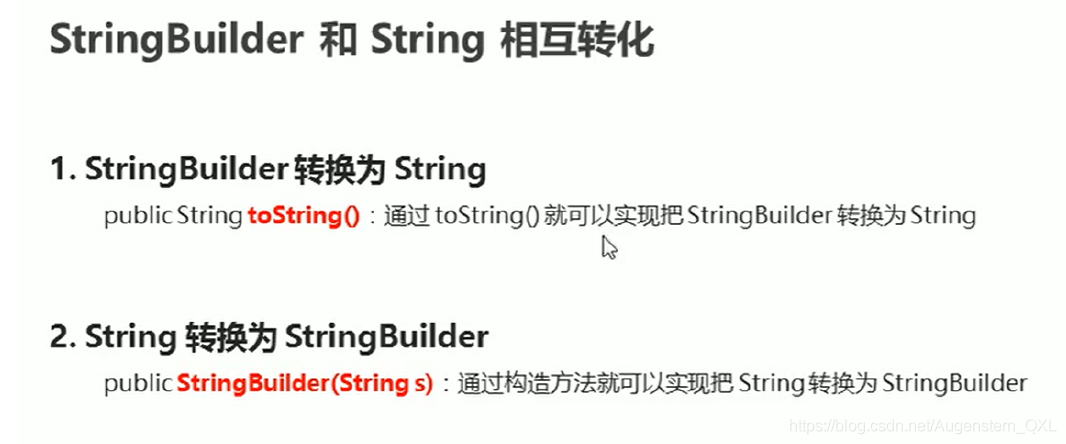
| public String toString() | 通过toString()就可以实现把StringBuilder 转换为String |
public class Demo {/*成员方法:public StringBuilder append(任意类型) : 添加数据,并返回对象public StringBuilder reverse():返回相反的字符序列public int length():返回长度(字符出现的个数)public String toString():通过toString()就可以实现把StringBuilder 转换为String*/public static void main(String[] args) {StringBuilder sb = new StringBuilder();sb.append(123);sb.append("abc");sb.append(true);System.out.println(sb);// 123abctruesb.append("红色").append("蓝色").append("绿色");System.out.println("反转前:" + sb);// 红色蓝色绿色sb.reverse();System.out.println("反转后:" + sb);// 色绿色蓝色红System.out.println("sb中字符的个数:" + sb.length());// 6String s = sb.toString();System.out.println(s);// 色绿色蓝色红}}
2.案例
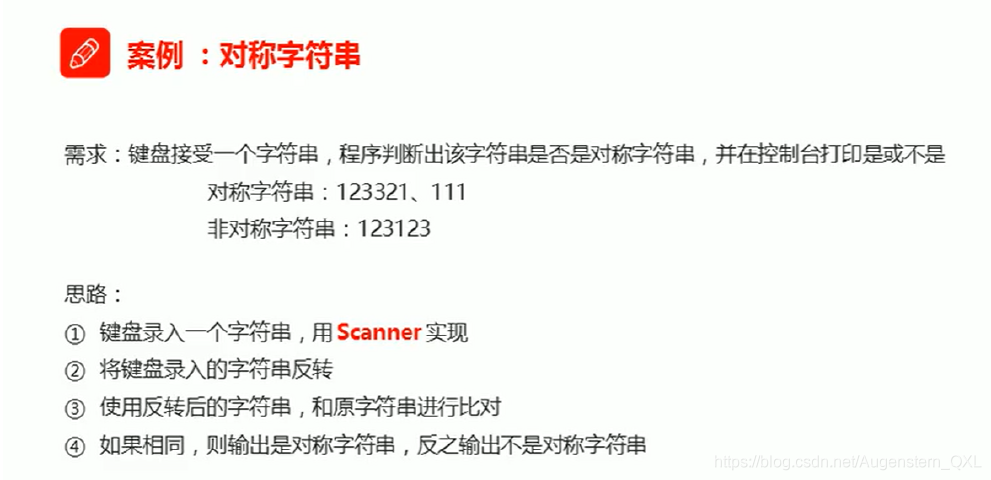
import java.util.Scanner;public class Demo {public static void main(String[] args){// 1.键盘录入一个字符串Scanner sc = new Scanner(System.in);System.out.println("请输入对称字符串:");String s = sc.nextLine();// 2.将键盘录入的字符串反转// 将字符串封装为StringBuilder对象,目的事为了调用其反转的方法StringBuilder sb = new StringBuilder(s);sb.reverse();// s : String// sb: StringBuilderString reverseStr = sb.toString();// 3.使用反转之后的字符串,和原字符串进行比对if(s.equals(reverseStr)){System.out.println("是对称字符串");}else{System.out.println("不是对称字符串");}}}
3.拼接字符串
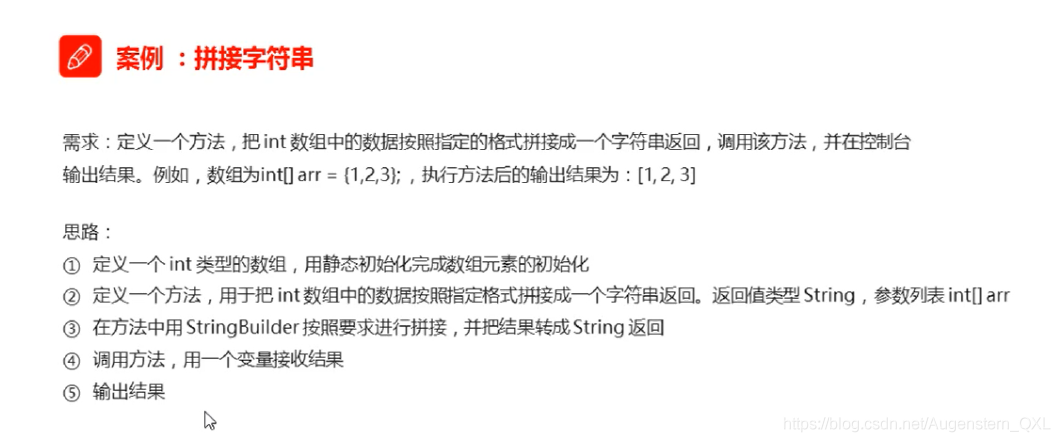
public static void main(String[] args){// 1.定义一个 int 类型的数组,用静态初始化完成数组元素的初始化int[] arr = {1,2,3};}// 2.定义一个方法,返回值类型 String,参数列表 int[] arrpublic static String arrayToString(int[] arr){// 3.在方法中用StringBuilder 按照要求进行拼接,并将结果转成 String 返回StringBuilder sb = new StringBuilder();}
12.集合基础
package com.DL.Demo.domain;public class Student {private String name;private int age;public Student() {}public Student(String name, int age) {this.name = name;this.age = age;}public String getName() {return name;}public void setName(String name) {this.name = name;}public int getAge() {return age;}public void setAge(int age) {this.age = age;}}
package com.DL.Demo;import com.DL.Demo.domain.Student;public class Demo {/*需求:将(张三,23)(李四,24)(王五,25)封装为3个学生对象并存入数组随后遍历数组,将学生信息输出在控制台思路:1.定义学生类准备用于封装数据2.动态初始化长度为3的数组,类型为Student类型3.根据需求创建3个学生对象4.将学生对象存入数组5.遍历数组,取出每一个学生对象6.调用对象的getXXX方法获取学生信息,并输出在控制台*/public static void main(String[] args) {// 2.动态初始化长度为3的数组,类型为Student类型Student[] arr = new Student[3];// 3.根据需求创建3个学生对象Student stu1 = new Student("张三",23);Student stu2 = new Student("李四",24);Student stu3 = new Student("王五",25);// 4.将学生对象存入数组arr[0] = stu1;arr[1] = stu2;arr[2] = stu3;// 5.遍历数组,取出每一个学生对象for(int i = 0;i < arr.length; i++){Student temp = arr[i];System.out.println(temp.getName() + "..." + temp.getAge());}}}
1.集合和数组的对比
1.集合类的特点:提供一种存储空间可变的存储模型,存储的数据容量可以发生改变
2.集合和数组的区别
①:共同点:都是存储数据的容器
②:不同点:数组的容量是固定的,集合的容量是可变的
如果存储的数据,长度经常发生改变,推荐使用集合
2.ArrayList
集合类有很多,目前我们先学习一下: ArrayList
import java.util.ArrayList;public class Demo{/*ArrayList构造方法:ArrayList() 构造一个初始容量为 10 的空列表成员方法:添加:boolean add(E e) 将指定的元素添加到此列表的尾部void add(int index,E element)将指定的元素插入此列表中的指定位置*/public static void main(String[] args){// 1.创建集合容器对象ArrayList list = new ArrayList();// 2.调用对象的add方法,向容器中添加数据list.add("abc");list.add(123);list.add(true);// 带尖括号表示只能添加尖括号里面的数据类型ArrayList<String> list1 = new ArrayList<>();list1.add("abc");list.add(0,"111");// [111,abc,123,true]}}
3.ArrayList集合常用方法
| 方法名 | 说明 |
|---|---|
| public boolean remove(Object o) | 删除指定的元素,返回删除是否成功 |
| public E remove(int index) | 删除指定索引处的元素,返回被删除的元素 |
| public E set(int index,E element) | 修改指定索引处的元素,返回被修改的元素 |
| public E get(int index) | 返回指定索引处的元素 |
| public int size() | 返回集合中元素的个数 |
/*集合常用成员方法:1.添加:boolean add(E) 将指定的元素添加到此列表的尾部void add(int index,E element)将指定的元素插入此列表中的指定位置2.删除:public boolean remove(Object o) 删除指定的元素,返回删除是否成功public E remove(int index) 删除指定索引处的元素,返回被删除的元素3.修改:public E set(int index,E element) 修改指定索引处的元素,返回被修改的元素4.查询:public E get(int index) 返回指定索引处的元素public int size() 返回集合中的元素的个数*/
public static void main(String[] args){// 1.创建集合容器对象ArrayList<String> list = new ArrayList<>();list.add("abc");list.add("111");list.add("222");list.add("333");list.add("444");list.add("555");// 2.删除// 2.1 public boolean remove(Object o) 删除指定的元素,返回删除是否成功boolean b1 = list.remove("abc");boolean b2 = list.remove("zzz");System.out.println(b1); // trueSystem.out.println(b2); // falseSystem.out.println(list); //[111,222,333,444,555]// 2.2 public E remove(int index) 删除指定索引处的元素,返回被删除的元素String s = list.remove(0);System.out.println(s); // 111System.out.println(list); //[222,333,444,555]// 3.修改// 3.1 public E set(int index,E element) 修改指定索引处的元素,返回被修改的元素list.set("666");// 4.查询// 4.1 public E get(int index) 返回指定索引处的元素String s1 = list.get(0);// 4.2 public int size() 返回集合中的元素的个数int size = list.size();System.out.println(size); // 6}
4.遍历字符串
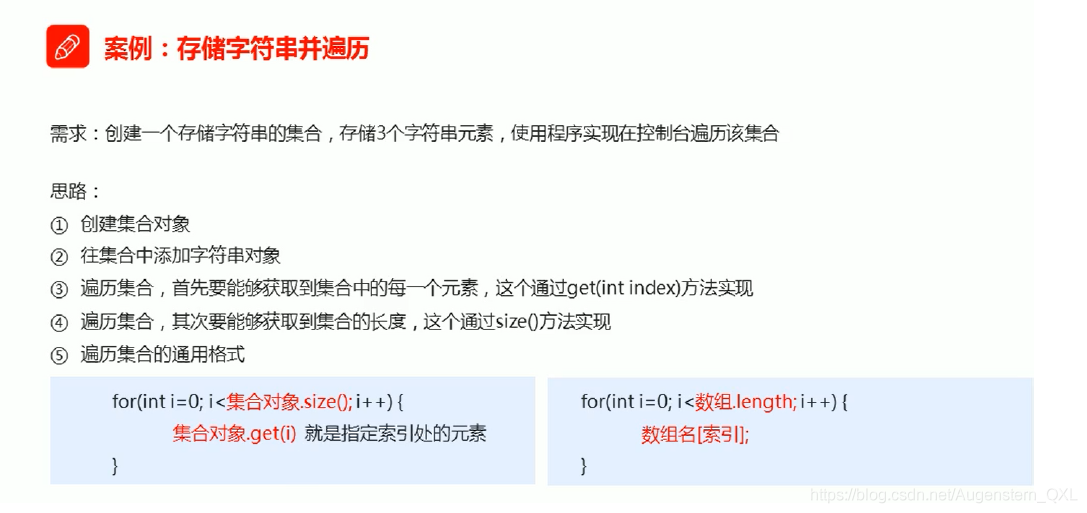
public static void main(String[] args){// 1.创建集合对象ArrayList<String> list = new ArrayList<>();// 2.往集合中添加字符串list.add("张三");list.add("李四");list.add("王五");// 3.遍历集合for(int i = 0; i < list.size(); i++){// i : 每一个索引值list.get(i);String s = list.get(i);System.out.println(s);}}
