1、基本环境准备
1.1、增加索引
增加一个测试索引,索引为 text 类型 name 、keyword 类型 desc,integer 类型 age
PUT /test{"mappings": {"properties": {"name":{"type": "text"},"desc":{"type": "keyword"},"age":{"type": "integer"}}}}
1.2、增加数据
增加3条测试数据
POST test/_doc{"name":"This is name","age":30,"desc":"This is desc"}POST test/_doc{"name":"This is name1","age":20,"desc":"This is desc1"}POST test/_doc{"name":"This is name2","age":15,"desc":"This is desc2"}
2、数据查询
2.1、基础查询 - _search
查询索引的结构信息,包括成功,失败数据统计,文档统计,文档内容
GET test/_search

2.2、限定返回字段 - _source
和 SQL 对比就是 从 select * 变成 select xxx,就是限制返回指定字段,而不需要全部字段都返回
# 筛选字段,只返回 name 字段GET test/_search{"_source": ["name"]}

2.3、排序 - sort
和 SQL 中 order 一样,针对字段进行排序,支持正序,倒序
# 排序,根据 age 进行排序GET test/_search{"query": {"match": {"name": "is"}},"sort": [{"age": {"order": "desc"}}]}

2.4、分页 - from、size
和 MySQL limit 功能一致,对结果数据进行分页返回,from 起始页数(从 0 开始),size 每页大小
# 从 0开始,每页 2个数据GET test/_search{"from": 0,"size": 2}

2.5、都 - must、都不是 - must_not、或者 - should
must 表示 筛选条件都要满足;must_not 表示筛选条件都不能满足;should 功能和 MySQL or 一样,”或者”的功能
# 或者 shouldGET test/_search{"query": {"bool": {"should": [{"match": {"name": "name"}},{"match": {"name": "name2"}}]}}}# 必须不 must notGET test/_search{"query": {"bool": {"must_not": [{"match": {"name": "name"}}]}}}# 必须 mustGET test/_search{"query": {"bool": {"must": [{"match": {"name": "name"}}]}}}
2.6、结果筛选 - filter
针对结果,进行再筛选,比如范围筛选
# 筛选 年龄范围再 [20,30] 之间GET test/_search{"query": {"bool": {"filter": [{"range": {"age": {"gte": 20,"lte": 30}}}]}}}

2.7、多搜索词 - match
match 支持多个搜索词,搜索词之间用空格 隔开
# 多值筛选,中间用 空格隔开GET test/_search{"query": {"match": {"name": "is name"}}}
3、查询方式 term 和 match
查询方式主要分为 term 和 match 两种,两种查询方式针对搜索词的分词效果也是不一样的。
| 项目 | 查询方式 |
|---|---|
| term | 精确查询,只能查询单个单词,通过 “倒排索引”进行检索,不会调用分词器。如果使用多个单词精确查询,也查无数据。 可以通过 terms 进行多个单词检索 |
| match | 会使用分词器。先分析文档,然后再通过分析的文档进行查询 |
# terms 查询关键字数组GET test/_search{"query": {"terms": {"name":["This","is","name"]}}}# term 多个单词查无数据GET test/_search{"query": {"term": {"name":"This is name"}}}# match 能分词,查到数据GET test/_search{"query": {"match": {"name": "This is name"}}}
4、字段类型 text 和 keyword
同样用 term 情况下,根据字段类型不同,是否分词的效果也不同。
在以上基础上,分别查询 “text 类型的 name” 和“keyword 类型的 desc”( name 和 desc 都是 This is xxx)
text
GET test/_search{"query": {"match": {"name": "is"}}}# 根据请求结果可知,text 会调用分词器对文档进行分词

keyword
GET test/_search{"query": {"match": {"desc": "is"}}}# 根据运行结果可知,keyword 不会调用分词器对文档进行分词操作

总结:
text 类型搜索时会调用分词器,而 keyword 不会调用5、高亮
在诸如搜索网站 或者电商页面搜索结果针对 搜索词会有高亮操作,这其实也是 ES 功能。以百度搜索为例

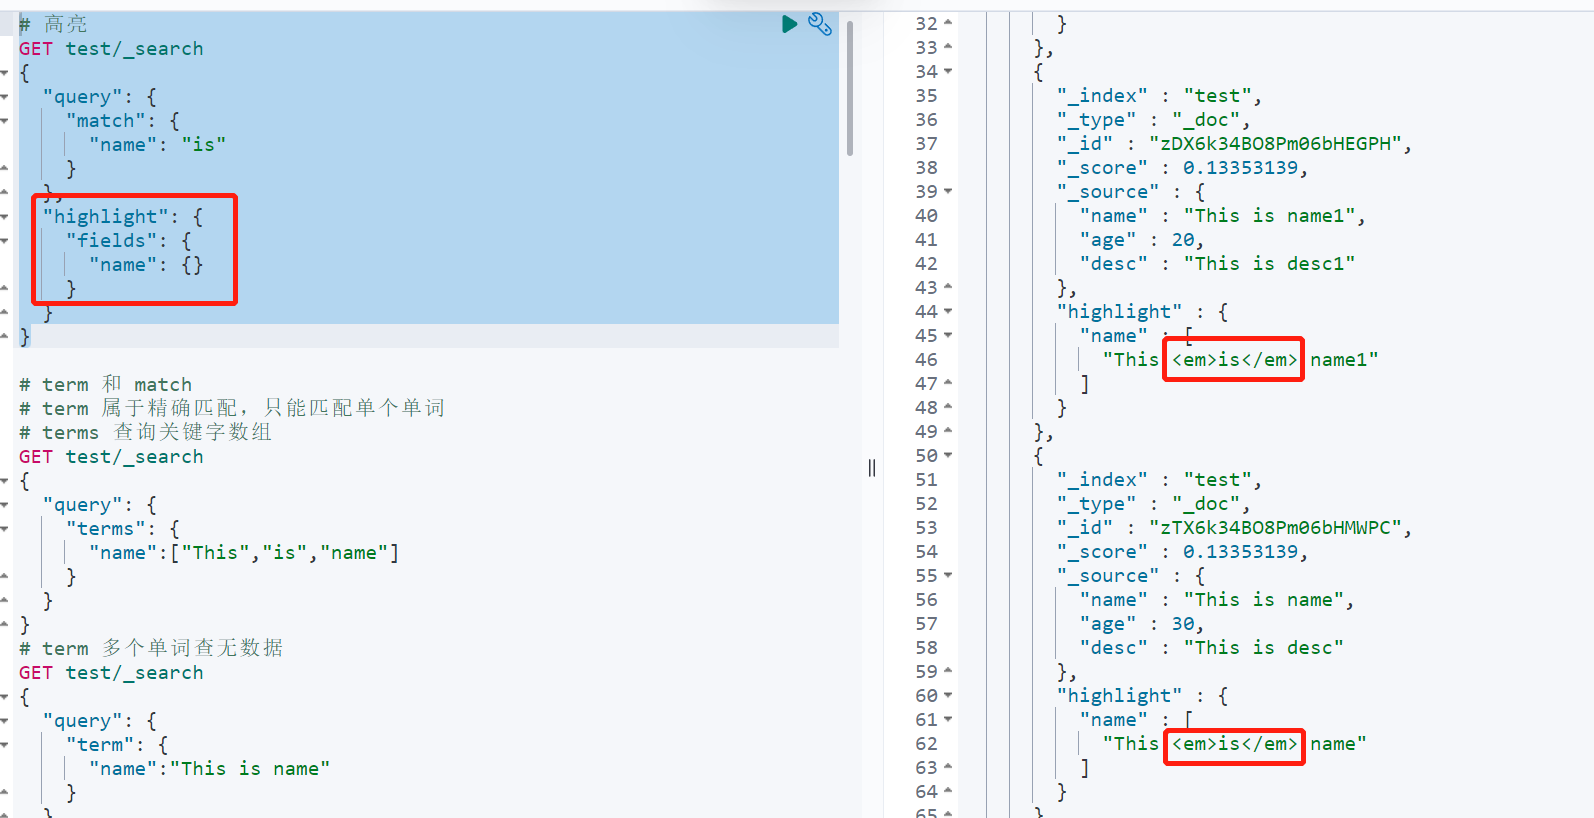
5.1 默认样式高亮
ES 默认是不会开启高亮的,在搜索时,需要声明高亮的字段。默认的 ES 高亮样式是用 把搜索词包裹起来。高亮后的结果会显示在 搜索结果中每一项中的 highlight 中
# 高亮字段 nameGET test/_search{"query": {"match": {"name": "is"}},"highlight": {"fields": {"name": {}}}}
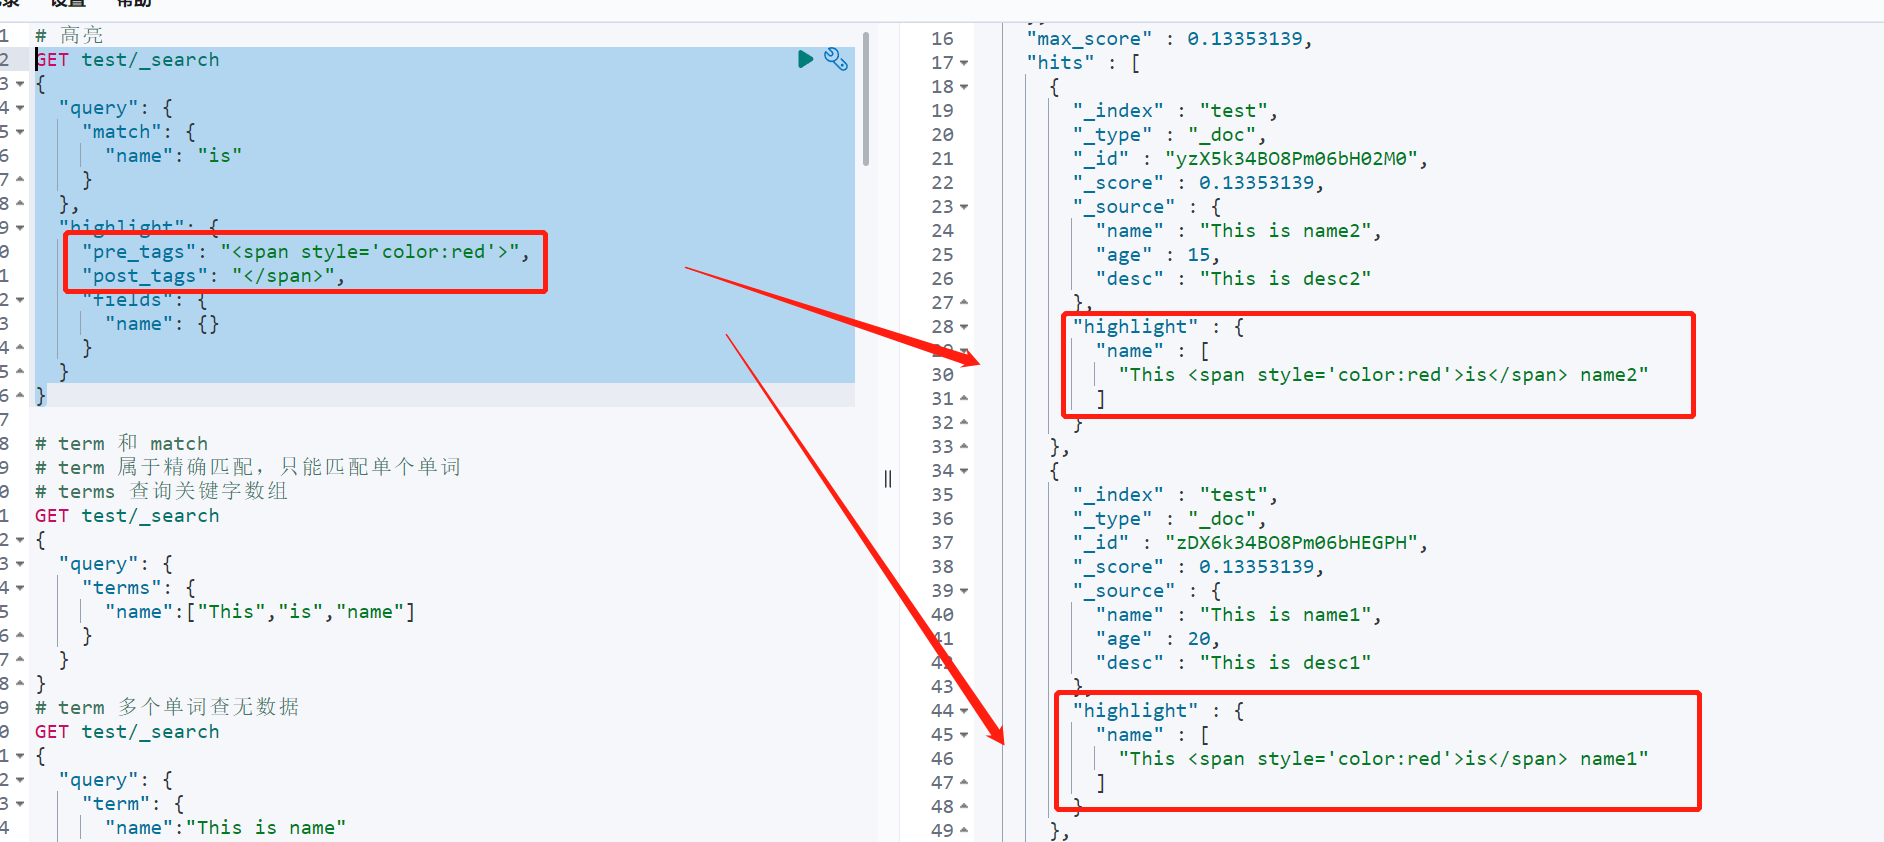
5.2 自定义高亮样式
如果想自定义 高亮的样式,则需要通过pre_tags(标签之前)和 post_tags(标签之后)自定义样式
比如想用 包括高亮,自定义样式后,就会覆盖取代默认样式
GET test/_search{"query": {"match": {"name": "is"}},"highlight": {"pre_tags": "<span style='color:red'>","post_tags": "</span>","fields": {"name": {}}}}

若有收获,就点个赞吧
0 人点赞
