实验五Hibernate 基础应用——基于Hibernate 框架的用户登录模块
一、基础实验——Hibernate 框架搭建
实验内容及步骤
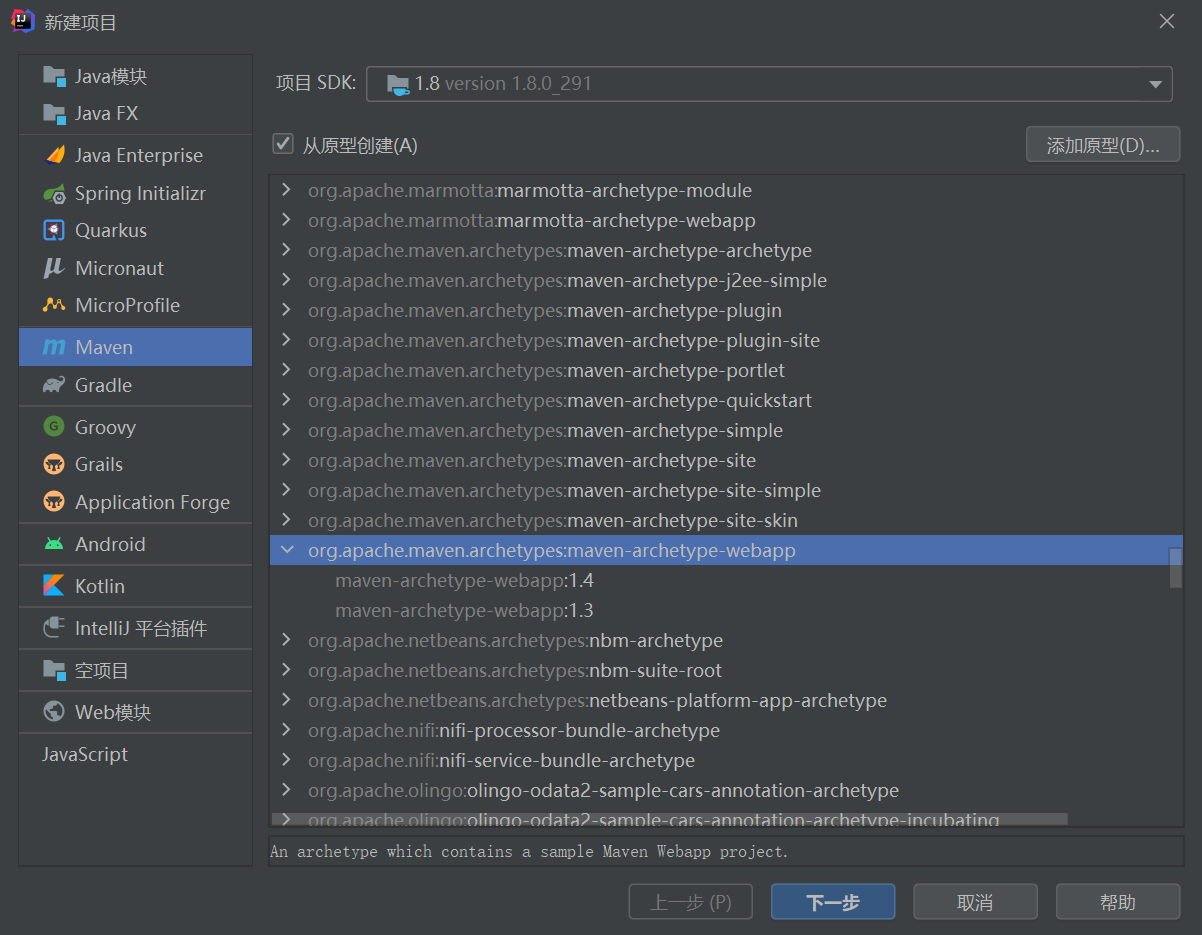
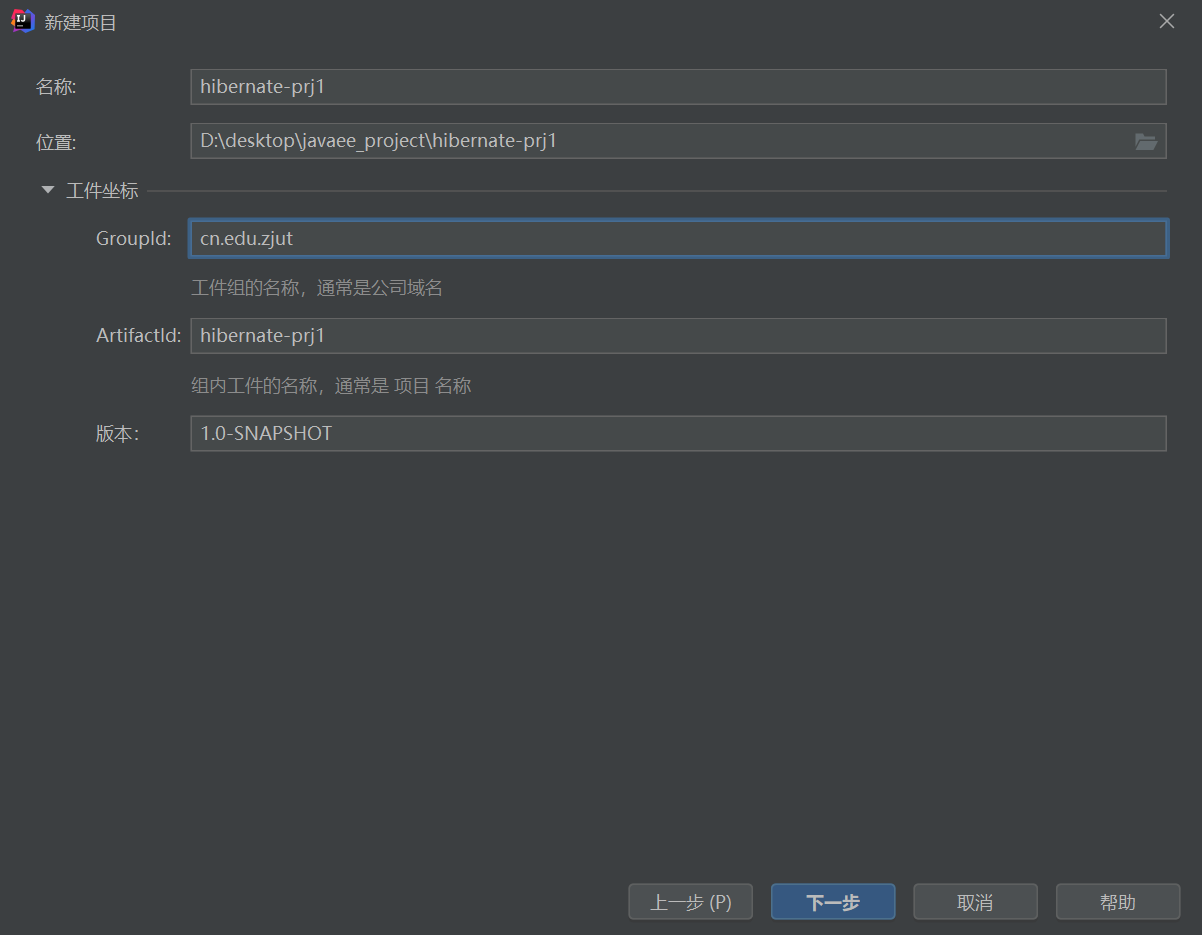
新建maven项目
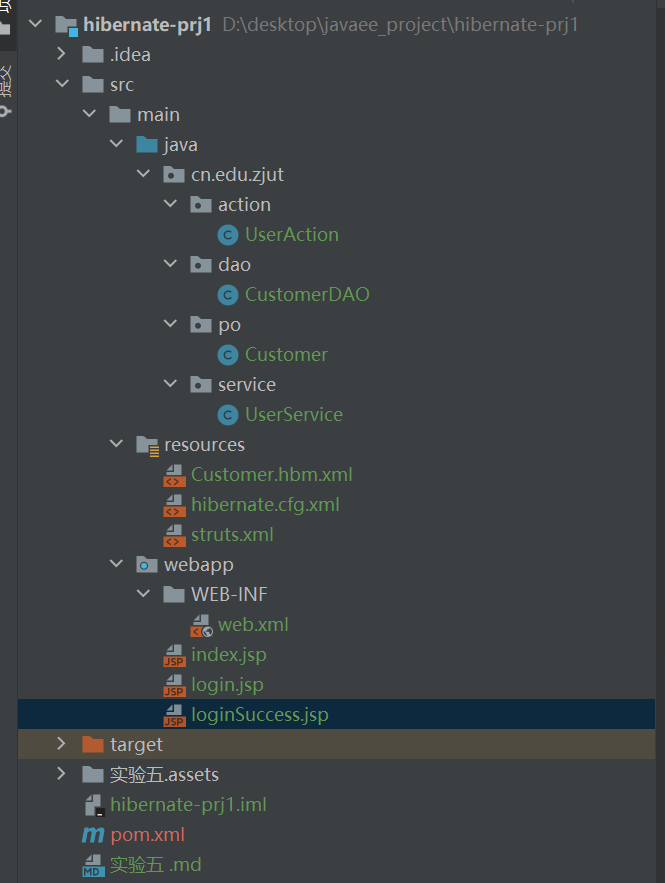
搭建项目框架
新建数据库
create table customer(customerID int not nullprimary key,Account varchar(20) null,Password varchar(20) null,Name varchar(20) null,Sex tinyint null,Birthday date null,Phone varchar(20) null,Email varchar(100) null,Address varchar(200) null,Zipcode varchar(10) null,Fax varchar(20) null);INSERT INTO hibernatedb.customer (customerID, Account, Password, Name, Sex, Birthday, Phone, Email, Address, Zipcode, Fax) VALUES (1, 'zjut', 'Zjut', null, null, null, null, null, null, null, null);INSERT INTO hibernatedb.customer (customerID, Account, Password, Name, Sex, Birthday, Phone, Email, Address, Zipcode, Fax) VALUES (2, 'admin', 'Admin', null, null, null, null, null, null, null, null);INSERT INTO hibernatedb.customer (customerID, Account, Password, Name, Sex, Birthday, Phone, Email, Address, Zipcode, Fax) VALUES (3, 'temp', 'Temp', null, null, null, null, null, null, null, null);
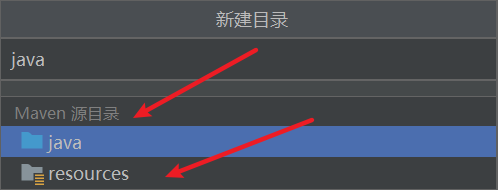
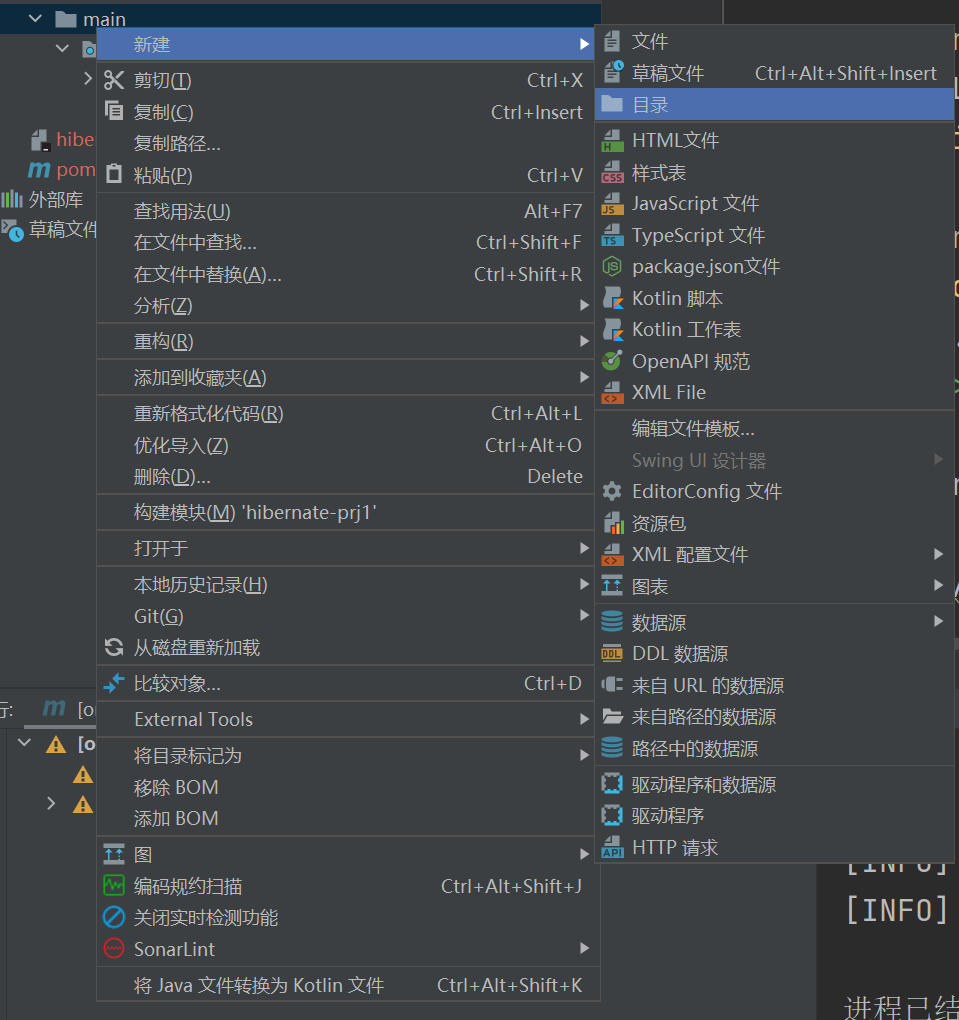
新建目录
在pom.xml中导入如下代码:
<!-- https://mvnrepository.com/artifact/org.hibernate/hibernate-core --><dependency><groupId>org.hibernate</groupId><artifactId>hibernate-core</artifactId><version>5.4.32.Final</version></dependency><!-- mysql驱动包--><dependency><groupId>mysql</groupId><artifactId>mysql-connector-java</artifactId><version>8.0.26</version></dependency><dependency><groupId>org.apache.struts</groupId><artifactId>struts2-core</artifactId><version>2.3.15</version></dependency><dependency><groupId>commons-logging</groupId><artifactId>commons-logging</artifactId><version>1.2</version></dependency><dependency><groupId>org.projectlombok</groupId><artifactId>lombok</artifactId><version>RELEASE</version><scope>compile</scope></dependency>
下面搭建所有类,框架结构如图
新建Hibernate 相关文件
新建Customer.java
package cn.edu.zjut.po;@Datapublic class Customer implements java.io.Serializable{private int customerId;private String account; private String password;private String name; private Boolean sex;private Date birthday; private String phone;private String email; private String address;private String zipcode; private String fax;}
新建Customer.hbm.xml,在resource目录下
<?xml version="1.0"?><!DOCTYPE hibernate-mapping PUBLIC "-//Hibernate/Hibernate Mapping DTD3.0//EN""http://hibernate.sourceforge.net/hibernate-mapping-3.0.dtd"><hibernate-mapping><class name="cn.edu.zjut.po.Customer" table="customer"catalog="hibernatedb"><id name="customerId" type="int"><column name="customerID" /><generator class="assigned" /></id><property name="account" type="string"><column name="account" length="20" unique="true" /></property><property name="password" type="string"><column name="password" length="20" /></property><property name="name" type="string"><column name="name" length="20" /></property><property name="sex" type="java.lang.Boolean"><column name="sex" /></property><property name="birthday" type="date"><column name="birthday" length="10" /></property><property name="phone" type="string"><column name="phone" length="20" /></property><property name="email" type="string"><column name="email" length="100" /></property><property name="address" type="string"><column name="address" length="200" /></property><property name="zipcode" type="string"><column name="zipcode" length="10" /></property><property name="fax" type="string"><column name="fax" length="20" /></property></class></hibernate-mapping>
新建hibernate.cfg.xml,在resource目录下
<?xml version="1.0" encoding="utf-8"?><!DOCTYPE hibernate-configuration PUBLIC"-//Hibernate/Hibernate Configuration DTD 3.0//EN""http://hibernate.sourceforge.net/hibernate-configuration-3.0.dtd"><hibernate-configuration><session-factory name="HibernateSessionFactory"><property name="hibernate.connection.driver_class">com.mysql.jdbc.Driver</property><property name="hibernate.connection.url">jdbc:mysql://localhost:3306/hibernatedb</property><property name="hibernate.connection.username">zhangkun</property><property name="hibernate.connection.password">zhangkun</property><property name="hibernate.dialect">org.hibernate.dialect.MySQLDialect</property><mapping resource="/Customer.hbm.xml" /></session-factory></hibernate-configuration>
注意
新建Struts相关文件
在hibernate-prj1 中新建cn.edu.zjut.dao 包,并在其中创建数据库操作类CustomerDAO.java,具体代码如下:
public class CustomerDAO {private Log log = LogFactory.getLog(CustomerDAO.class);public List findByHql(String hql) {log.debug("finding LoginUser instance by hql");SessionFactory sf= new Configuration().configure().buildSessionFactory();Session session=sf.openSession();try {String queryString = hql;Query queryObject = session.createQuery(queryString);return queryObject.list();} catch (RuntimeException re) {log.error("find by hql failed", re);throw re;} finally{session.close();}}}
在hibernate-prj1 中新建cn.edu.zjut.service 包,并在其中创建UserService.java,用于实现登录逻辑,具体代码如下:
public class UserService {public boolean login(Customer loginUser) {String account = loginUser.getAccount();String password = loginUser.getPassword();String hql = "from Customer as user where account='"+account+ "' and password='" + password +"'";CustomerDAO dao = new CustomerDAO();List list = dao.findByHql(hql);if(list.isEmpty()) {return false;} else {return true;}}}
在hibernate-prj1 中新建cn.edu.zjut.action 包,并在其中创建UserAction.java,定义login()方法用于调用登录逻辑,具体代码如下:
@Datapublic class UserAction {private Customer loginUser;public String login() {UserService userServ = new UserService();if (userServ.login(loginUser)) {return "success";}return "fail";}}
在工程hibernate-prj1 的resource目录中创建struts.xml 文件,用于配置Action 并设置页面导航,代码片段如下:
<?xml version="1.0" encoding="UTF-8" ?><!DOCTYPE struts PUBLIC"-//Apache Software Foundation//DTD Struts Configuration 2.3//EN""http://struts.apache.org/dtds/struts-2.3.dtd"><struts><package name="strutsBean" extends="struts-default" namespace="/"><action name="login" class="cn.edu.zjut.action.UserAction"><result name="success">/loginSuccess.jsp</result><result name="fail">/login.jsp</result></action></package></struts>
编辑Web 应用的web.xml 文件,增加Struts2 核心Filter 的配置,代码片段如下:
<?xml version="1.0" encoding="UTF-8"?><web-app version="3.0" xmlns="http://java.sun.com/xml/ns/javaee"xmlns:xsi="http://www.w3.org/2001/XMLSchema-instance"xsi:schemaLocation="http://java.sun.com/xml/ns/javaeehttp://java.sun.com/xml/ns/javaee/web-app_3_0.xsd"><display-name>Archetype Created Web Application</display-name><welcome-file-list><welcome-file>/login.jsp</welcome-file></welcome-file-list><!-- 定义Struts2 的核心Filter --><filter><filter-name>struts2</filter-name><filter-class>org.apache.struts2.dispatcher.ng.filter.StrutsPrepareAndExecuteFilter</filter-class></filter><!-- 让Struts2 的核心Filter 拦截所有请求--><filter-mapping><filter-name>struts2</filter-name><url-pattern>/*</url-pattern></filter-mapping></web-app>
配置视图页面
新建login.jsp页面
<body><form action="login" method="post"><s:textfield name="loginUser.account"/><br><s:textfield name="loginUser.password"/><br><s:submit name="submit" value="登录" method="login"/></form></body>
新建loginSuccess.jsp页面
<body>登录成功</body>
测试
配置Tomcat
略
启动服务器,输入账号密码如下

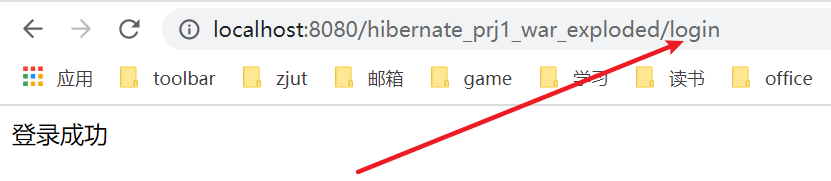
登录成功
实验总结
- 运行结果截图;
观察工程hibernate-prj1 中的Hibernate 配置文件hibernate.cfg.xml,查找相关资料,总结配置文件中各元素及其属性的作用,并记录下来; | 属性 | 作用说明 | | —- | —- | | Hibernate.show_sql | 是否在运行时候sql语句输出到控制台,编码阶段便于测试的。(默认设置为true) | | Hibernate.format_sql | 输出在控制台sql语句是否进行排版,便于阅读。(默认设置为true) | | Hbm2ddl.auto | 可帮助由java代码生成数据库脚本,进而生成具体表结构。如:create/update/create-drop/validate | | Hibernate.default_schema | 默认数据库,如果设置了,则创建表的时候,所有表有前缀。 | | Hibernate.dialect | 配置hibernate方言,可针对特定的数据库优化。 |
观察工程hibernate-prj1 中的JAVA 持久化类Customer.java、Hibernate 映射文件Customer.hbm.xml,总结持久化类与数据库表的映射关系,以及映射文件中主要元素及其属性的作用,并记录下来;
- 根据实验过程,总结Action、Service 和DAO 之间的调用关系,思考实验一的扩展实验中的DAO 类与本实验中DAO 类的区别,并记录下来;
碰到的问题及解决方案或思考;
- Hibernate配置路径问题
一开始是将hibernate.cfg.xml的
路径resource默认配置为”cn/edu/zjut/po/Customer.hbm.xml”,Customer.hbm.xml文件放在Customer.java同级目录下.
但是启动失败了,因为在target文件夹中的Customer.hbm.xml文件并没有复制进target/hibernate-prj1/WEB-INF/classes/cn/edu/zjut/po/,查看Customer.hbm.xml可知该文件读取Customer.java不一定需要配置在同级目录下,因为读取文件是依靠中的name=”cn.edu.zjut.po.Customer”,故为了方便将Customer.hbm.xml放在resource目录下,同时修改hibernate.cfg.xml的配置<mapping resource="/Customer.hbm.xml" />
<hibernate-mapping><class name="cn.edu.zjut.po.Customer" table="customer"catalog="hibernatedb">.....
- Hibernate配置路径问题
实验收获及总结。
二、提高实验——持久化对象与Hibernate 映射文件
实验内容及步骤
创建新表
create table item(ISBN varchar(20) not nullprimary key,title varchar(30) null,cost float null,description varchar(100) null,image blob null);INSERT INTO hibernatedb.item (ISBN, title, cost, description, image) VALUES ('978-7-121-12345-1', 'JAVAEE技术实验指导教程', 19.95, 'WEB程序设计知识回顾、轻量级JAVAEE应用框架、企业级EJB组件编程技术、JAVAEE综合应用开发', null);INSERT INTO hibernatedb.item (ISBN, title, cost, description, image) VALUES ('978-7-121-12345-2', 'JAVAEE技术', 29.95, 'Struts框架、Hibernate框架、Spring框架、会话Bean、实体Bean、消息驱动Bean', null);
搭建Hibernate相关文件
在hibernate-prj1 的cn.edu.zjut.po 包中手动创建JAVA 持久化类Item.java,使其与item 数据表相映射,代码片段如下
@Datapublic class Item {private String itemID;private String title;private String description;private float cost;private Blob image;}
在resource目录下中手动创建Hibernate 映射文件Item.hbm.xml,并参照Customer.hbm.xml(基础实验步骤8)填写Item.hbm.xml 中的内容;
<?xml version="1.0"?><!DOCTYPE hibernate-mapping PUBLIC "-//Hibernate/Hibernate Mapping DTD3.0//EN""http://hibernate.sourceforge.net/hibernate-mapping-3.0.dtd"><hibernate-mapping><class name="cn.edu.zjut.po.Item" table="item"catalog="hibernatedb"><id name="itemID" type="string"><column name="ISBN" length="20" /><generator class="assigned"></generator></id><property name="title" type="string"><column name="title" length="30" /></property><property name="description" type="string"><column name="description" length="100" /></property><property name="cost" type="float"><column name="cost" /></property><property name="image" type="java.sql.Blob"><column name="image" /></property></class></hibernate-mapping>
修改hibernate-prj1 的Hibernate 配置文件hibernate.cfg.xml,增加Item.hbm.xml映射文件声明,代码片段如下:
<mapping resource="/Item.hbm.xml" />
搭建Struts相关文件
在hibernate-prj1 的cn.edu.zjut.dao 包中创建数据库操作类ItemDAO.java,具体代码如下:
public class ItemDAO {private static final Log log = LogFactory.getLog(ItemDAO.class);public List findAll() {log.debug("finding all Item instances");SessionFactory sf= new Configuration().configure().buildSessionFactory();Session session=sf.openSession();try {String queryString = "from Item";Query queryObject = session.createQuery(queryString);return queryObject.list();} catch (RuntimeException re) {log.error("find all failed", re);throw re;} finally{session.close();}}}
在hibernate-prj1 的cn.edu.zjut.service 包中创建ItemService.java,用于获取所有商品信息,具体代码如下:
public class ItemService {private List items = new ArrayList();public List getAllItems() {ItemDAO dao = new ItemDAO();List items = dao.findAll();return items;}}
在hibernate-prj1 的cn.edu.zjut.action 包中创建ItemAction.java,并在其中定义getAllItems()方法用于调用“获取所有商品信息”逻辑,参照UserAction 类(基础实验步骤16)填写ItemAction 类的内容;
import javax.servlet.http.HttpServletRequest;@Datapublic class ItemAction {private Item item;private HttpServletRequest req;public String getAllItems(){ItemService itemService=new ItemService();req = ServletActionContext.getRequest(); //req的获得必须在具体的方法中实现ServletContext context=req.getServletContext();req.getSession().setAttribute("items", itemService.getAllItems());return "allItems";}}
修改hibernate-prj1 的struts.xml 文件,增加ItemAction 的配置并设置页面导航;
<action name="allItems" class="cn.edu.zjut.action.ItemAction" method="getAllItems"><result name="allItems">/itemList.jsp</result></action>
新建视图页面
在hibernate-prj1 中新建itemList.jsp 页面,作为显示所有商品信息的视图,代码片段如下:
<body><center>商品列表</center><table border=1><tr><th>编号</th><th>书名</th><th>说明</th><th>单价</th></tr><s:iterator value="#session.items" ><tr><td><s:property value="itemID"/></td><td><s:property value="title"/></td><td><s:property value="description"/></td><td><s:property value="cost"/></td></tr></s:iterator></table></body>
修改hibernate-prj1 的loginSuccess.jsp 页面,在视图中增加超链接,用于查看所有商品信息,代码片段如下;
<a href="./allItems">查看所有商品信息</a>
查看效果

设置复合主键
假设使用持久化类Item.java 中的itemID 属性和title 属性作为复合主键,则需要将这两个属性封装成一个类,代码片段如下:
@Datapublic class ItemPK implements Serializable {private String itemID;private String title;}
修改Item.java,将ItemPK 主键作为其属性之一,代码片段如下:
@Datapublic class Item implements java.io.Serializable{private ItemPK ipk;private String description;private float cost;private Blob image;}
修改Hibernate 映射文件Item.hbm.xml,将主键类中每个属性和表中的列对应,并指定复合主键的类型,代码片段如下:
<hibernate-mapping><class name="cn.edu.zjut.po.Item" table="item" ><composite-id name="ipk" class="cn.edu.zjut.po.ItemPK"><key-property name="itemID" column="ISBN"/><key-property name="title" column="title"/></composite-id>……</class></hibernate-mapping>
修改itemList.jsp 页面,使其页面中能正确显示书本的编号与书名;
<body><center>商品列表</center><table border=1><tr><th>编号</th><th>书名</th><th>说明</th><th>单价</th></tr><s:iterator value="#session.items" ><tr><td><s:property value="ipk.itemID"/></td><td><s:property value="ipk.title"/></td><td><s:property value="description"/></td><td><s:property value="cost"/></td></tr></s:iterator></table></body>
查看结果

实验总结
- 运行结果截图;
- 结合实验过程,查找相关资料,总结POJO 模式下持久化类的规范,并记
录下来;
| 标签 | 作用 |
|---|---|
| 标签主要用于指定持久化类和数据库表名 | |
| name | 属性指定持久化类得全局路径 |
| table | 属性指定数据库表名 |
| class标签 | 包含一个 |
| id | 用于持久化类的唯标识与数据库表的主键字段的映射,通过定义主键的生成策略 |
| property | 用于持久化类的其他属性和数据表中的非主键字段的映射: |
| name | 持久化类属性名,以小写字母开头 |
| column | 数据库字段名 |
| type | 数据库字段类型 |
| length | 数据库字段定义的长度 |
| not-null | 布尔变量,指定字段是否为空 |
| unique | 布尔变量,指定字段是否唯一 |
| lazy | 布尔变量,指定是否延迟抓取 |
- 结合实验过程,查找相关资料,总结映射文件中主要元素(如class、id、
generator、property)及其属性的含义与作用,并记录下来;
- 结合实验过程,查找相关资料,总结设置复合主键的方法和步骤,并记录
下来;
- 查找相关资料,总结Hibernate 映射文件中主键各种生成策略的作用,并记
录下来;
| 策略 | 说明 |
|---|---|
| assigned | 主键由外部程序负责生成,在 save() 之前必须指定一个。Hibernate不负责维护主键生成。与Hibernate和底层数据库都无关,可以跨数据库。在存储对象前,必须要使用主键的setter方法给主键赋值,至于这个值怎么生成,完全由自己决定,这种方法应该尽量避免。 |
| increment | 由Hibernate从数据库中取出主键的最大值(每个session只取1次),以该值为基础,每次增量为1,在内存中生成主键,不依赖于底层的数据库,因此可以跨数据库。 |
| hilo | hilo(高低位方式high low)是hibernate中最常用的一种生成方式,需要一张额外的表保存hi的值。保存hi值的表至少有一条记录(只与第一条记录有关),否则会出现错误。可以跨数据库 |
| seqhilo | 与hilo类似,通过hi/lo算法实现的主键生成机制,只是将hilo中的数据表换成了序列sequence,需要数据库中先创建sequence,适用于支持sequence的数据库,如Oracle。 |
| sequence | 采用数据库提供的sequence机制生成主键,需要数据库支持sequence。如oralce、DB、SAP DB、PostgerSQL、McKoi中的sequence。MySQL这种不支持sequence的数据库则不行(可以使用identity)。 |
| identity | identity由底层数据库生成标识符。identity是由数据库自己生成的,但这个主键必须设置为自增长,使用identity的前提条件是底层数据库支持自动增长字段类型,如DB2、SQL Server、MySQL、Sybase和HypersonicSQL等,Oracle这类没有自增字段的则不支持。 |
| native | native由hibernate根据使用的数据库自行判断采用identity、hilo、sequence其中一种作为主键生成方式,灵活性很强。如果能支持identity则使用identity,如果支持sequence则使用sequence。 |
| uuid | Hibernate在保存对象时,生成一个UUID字符串作为主键,保证了唯一性,但其并无任何业务逻辑意义,只能作为主键,唯一缺点长度较大,32位(Hibernate将UUID中间的“-”删除了)的字符串,占用存储空间大,但是有两个很重要的优点,Hibernate在维护主键时,不用去数据库查询,从而提高效率,而且它是跨数据库的,以后切换数据库极其方便。 |
| guid | GUID:Globally Unique Identifier全球唯一标识符,也称作 UUID,是一个128位长的数字,用16进制表示。算法的核心思想是结合机器的网卡、当地时间、一个随即数来生成GUID。从理论上讲,如果一台机器每秒产生10000000个GUID,则可以保证(概率意义上)3240年不重复。Hibernate在维护主键时,先查询数据库,获得一个uuid字符串,该字符串就是主键值,该值唯一,缺点长度较大,支持数据库有限,优点同uuid,跨数据库,但是仍然需要访问数据库。 |
| foreign | 使用另外一个相关联的对象的主键作为该对象主键。主要用于一对一关系中。 |
| select | 使用触发器生成主键,主要用于早期的数据库主键生成机制,能用到的地方非常少 |
- 碰到的问题及解决方案或思考;
- 实验收获及总结。
三、扩展实验——粒度设计
实验内容及步骤
将用户的联系方式单独封装到类
在hibernatedb 数据库里的customer 数据表中,包括phone、email、address、zipcode、fax 在内的字段都是用户的联系方式,基于设计的粒度设计将用户的联系方式单独封装到类ContactInfo,代码片段如下:
@Datapublic class ContactInfo {private String phone;private String email;private String address;private String zipcode;private String fax;}
粒度设计
修改Customer.java,将ContactInfo 实例作为Customer 的属性,用于表示用户的联系方式,代码片段如下:
@Datapublic class Customer implements java.io.Serializable{private int customerId;private String account;private String password;private String name;private Boolean sex;private Date birthday;private ContactInfo contactInfo;}
修改hibernate配置文件
修改Hibernate 映射文件Customer.hbm.xml,将customer 表与两个类(Customer和ContactInfo)映射,具体代码如下:
<?xml version="1.0"?><!DOCTYPE hibernate-mapping PUBLIC "-//Hibernate/Hibernate Mapping DTD3.0//EN""http://hibernate.sourceforge.net/hibernate-mapping-3.0.dtd"><hibernate-mapping><class name="cn.edu.zjut.po.Customer" table="customer"catalog="hibernatedb"><id name="customerId" type="int"><column name="customerID" /><generator class="increment" /></id><property name="account" type="string"><column name="account" length="20" unique="true" /></property><property name="password" type="string"><column name="password" length="20" /></property><property name="name" type="string"><column name="name" length="20" /></property><property name="sex" type="java.lang.Boolean"><column name="sex" /></property><property name="birthday" type="date"><column name="birthday" length="10" /></property><component name="contactInfo" class="cn.edu.zjut.po.ContactInfo"><property name="phone" type="string"><column name="phone" length="20" /></property><property name="email" type="string"><column name="email" length="100" /></property><property name="address" type="string"><column name="address" length="200" /></property><property name="zipcode" type="string"><column name="zipcode" length="10" /></property><property name="fax" type="string"><column name="fax" length="20" /></property></component></class></hibernate-mapping>
修改hibernate-prj1 的Hibernate 配置文件hibernate.cfg.xml,开启增删改操作的事务自动提交,代码片段如下:
<?xml version="1.0" encoding="utf-8"?><!DOCTYPE hibernate-configuration PUBLIC"-//Hibernate/Hibernate Configuration DTD 3.0//EN""http://hibernate.sourceforge.net/hibernate-configuration-3.0.dtd"><hibernate-configuration><session-factory name="HibernateSessionFactory">……<property name="connection.autocommit">true</property></session-factory></hibernate-configuration>
新建视图页面
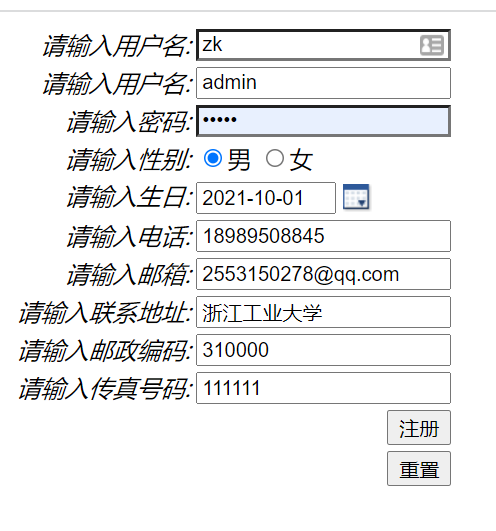
在hibernate-prj1 中新建register.jsp 页面,作为用户注册的视图(可参考“实验二Struts 基础应用”中提高实验里的页面代码,并根据数据库表customer设计页面内容);新建regSuccess.jsp 页面,作为注册成功的视图(可重用“实验二Struts 基础应用”中提高实验里的页面代码);
<%@ taglib prefix="s" uri="/struts-tags" %><%@ taglib prefix="sx" uri="/struts-dojo-tags" %><%@ page contentType="text/html;charset=UTF-8" language="java" %><html><head><title>Title</title><sx:head/></head><body><s:form action="register" method="post"><s:textfield name="loginUser.account" label="请输入用户名"/><s:textfield name="loginUser.name" label="请输入用户名"/><s:password name="loginUser.password" label="请输入密码"/><%-- <s:password name="loginUser.repassword" label="请再次输入密码"/>--%><s:radio name="loginUser.sex" list="#{1 : '男', 0 : '女'}" label="请输入性别"/><sx:datetimepicker name="loginUser.birthday" displayFormat="yyyy-MM-dd" label="请输入生日"/><s:textfield name="loginUser.contactInfo.phone" label="请输入电话"/><s:textfield name="loginUser.contactInfo.email" label="请输入邮箱"/><s:textfield name="loginUser.contactInfo.address" label="请输入联系地址"/><s:textfield name="loginUser.contactInfo.zipcode" label="请输入邮政编码"/><s:textfield name="loginUser.contactInfo.fax" label="请输入传真号码"/><s:submit value="注册"/><s:reset value="重置"/></s:form></body></html>
其中,<%@ taglib prefix=”sx” uri=”/struts-dojo-tags” %>和
<dependency><groupId>org.apache.struts</groupId><artifactId>struts2-dojo-plugin</artifactId><version>2.3.15</version></dependency>
修改Struts配置
修改cn.edu.zjut.dao 包中的CustomerDAO.java,增加“添加新用户”的操作,代码片段如下:
public void save(Customer customer) {log.debug("saving customer instance");SessionFactory sf= new Configuration().configure().buildSessionFactory();Session session=sf.openSession();try {Transaction transaction = session.beginTransaction();System.out.println(customer.toString());session.save(customer);// session.flush();transaction.commit();log.debug("save successful");} catch (RuntimeException re) {log.error("save failed", re);throw re;} finally{session.close();}}
修改cn.edu.zjut.service 包中的UserService.java,增加用户注册逻辑,代码片段如下
public class UserService {// ...public void register(Customer loginUser) {CustomerDAO dao = new CustomerDAO();dao.save(loginUser);}// ...}
修改cn.edu.zjut.action 包中的UserAction.java,定义register()方法用于调用用户注册逻辑,代码片段如下:
public class UserAction {// ……public String register() {UserService userServ = new UserService();userServ.register(loginUser);return "registersuccess";}}
修改工程hibernate-prj1 中的struts.xml 文件,为“用户注册”增加Action 配置并设置页面导航;
<?xml version="1.0" encoding="UTF-8" ?><!DOCTYPE struts PUBLIC"-//Apache Software Foundation//DTD Struts Configuration 2.3//EN""http://struts.apache.org/dtds/struts-2.3.dtd"><struts><package name="strutsBean" extends="struts-default" namespace="/"><action name="login" class="cn.edu.zjut.action.UserAction"><result name="success">/loginSuccess.jsp</result><result name="fail">/login.jsp</result></action><action name="allItems" class="cn.edu.zjut.action.ItemAction" method="getAllItems"><result name="allItems">/itemList.jsp</result></action><action name="register" class="cn.edu.zjut.action.UserAction" method="register"><result name="registersuccess">/regSuccess.jsp</result></action></package></struts>
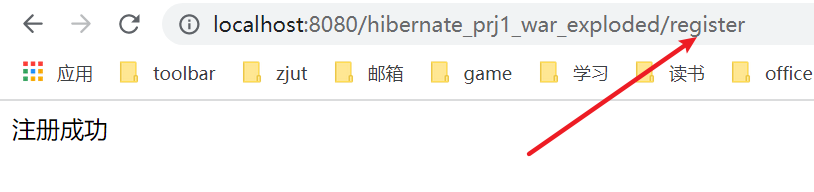
查看效果

粒度设计2
在hibernatedb 数据库里的item 数据表中,image 字段表示商品的照片,使用Blob 类型,所占空间较大,如果该字段不常被使用,则基于性能的粒度设计将表item 映射为两个类,其中一个类为ItemDetail,映射表中所有的字段,而另一个类ItemBasic,映射表中除了image 之外的字段,具体代码如下:
@Datapublic class ItemBasic {private String itemID;private String title;private String description;private float cost;}
@Datapublic class ItemDetail extends ItemBasic {private Blob image;}
在ItemBasic.java 和ItemDetail.java 的同一目录下中手动创建Hibernate 映射文件ItemBasic.hbm.xml 和ItemDetail.hbm.xml,ItemDetail.hbm.xml 的具体代码如下:
<?xml version="1.0"?><!DOCTYPE hibernate-mapping PUBLIC "-//Hibernate/Hibernate Mapping DTD3.0//EN""http://hibernate.sourceforge.net/hibernate-mapping-3.0.dtd"><hibernate-mapping><class name="cn.edu.zjut.po.ItemDetail" table="item"catalog="hibernatedb"><id name="itemID" type="string"><column name="ISBN" length="20" /><generator class="assigned" /></id><property name="title" type="string"><column name="title" length="30" /></property><property name="description" type="string"><column name="description" length="100" /></property><property name="cost" type="float"><column name="cost" /></property></class></hibernate-mapping>
<?xml version="1.0"?><!DOCTYPE hibernate-mapping PUBLIC "-//Hibernate/Hibernate Mapping DTD3.0//EN""http://hibernate.sourceforge.net/hibernate-mapping-3.0.dtd"><hibernate-mapping><class name="cn.edu.zjut.po.ItemDetail" table="item"catalog="hibernatedb" polymorphism="explicit"><id name="itemID" type="string"><column name="ISBN" length="20" /><generator class="assigned" /></id><property name="title" type="string"><column name="title" length="30" /></property><property name="description" type="string"><column name="description" length="100" /></property><property name="cost" type="float"><column name="cost" /></property><property name="image" type="java.sql.Blob"><column name="image" /></property></class></hibernate-mapping>
修改hibernate-prj1 的Hibernate 配置文件hibernate.cfg.xml,增加ItemDetail.hbm.xml 和ItemBasic.hbm.xml 映射文件声明,代码片段如下:
<?xml version="1.0" encoding="utf-8"?><!DOCTYPE hibernate-configuration PUBLIC"-//Hibernate/Hibernate Configuration DTD 3.0//EN""http://hibernate.sourceforge.net/hibernate-configuration-3.0.dtd"><hibernate-configuration><session-factory name="HibernateSessionFactory"><property name="hibernate.connection.driver_class">com.mysql.jdbc.Driver</property><property name="hibernate.connection.url">jdbc:mysql://localhost:3306/hibernatedb</property><property name="hibernate.connection.username">zhangkun</property><property name="hibernate.connection.password">zhangkun</property><property name="hibernate.dialect">org.hibernate.dialect.MySQLDialect</property><property name="connection.autocommit">true</property><mapping resource="/Customer.hbm.xml" /><mapping resource="/ItemDetail.hbm.xml" /><mapping resource="/ItemBasic.hbm.xml" /></session-factory></hibernate-configuration>
删除Item.hbm.xml映射文件声明
相应地修改ItemDAO 将hibernate-prj1 重新部署在Tomcat 服务器上;
public class ItemDAO {private static final Log log = LogFactory.getLog(ItemDAO.class);public List findAll() {log.debug("finding all Item instances");SessionFactory sf= new Configuration().configure().buildSessionFactory();Session session=sf.openSession();try {String queryString = "from ItemBasic ";Query queryObject = session.createQuery(queryString);System.out.println("queryObject.list()="+queryObject.list());return queryObject.list();} catch (RuntimeException re) {log.error("find all failed", re);throw re;} finally{session.close();}}}
修改ItemList.jsp
<body><center>商品列表</center><table border=1><tr><th>编号</th><th>书名</th><th>说明</th><th>单价</th></tr><s:iterator value="#session.items" ><tr><td><s:property value="itemID"/></td><td><s:property value="title"/></td><td><s:property value="description"/></td><td><s:property value="cost"/></td></tr></s:iterator></table></body>

实验总结
- 运行结果截图;
- 结合实验过程,总结两种粒度设计的方法及特点;
- 根据实验步骤4,查找相关资料,写出Hibernate 配置文件hibernate.cfg.xml中的“connection.autocommit”属性的作用;
- hibernate中hibernate.connection.autocommit属性用来设置获取到的jdbc connection的autoCommit属性,默认是false。
- session.connection().getAutoCommit()方法可以获取session对应的connection的autoCommit属性
- hibernate.connection.autocommit 允许被缓存的 JDBC 连接开启自动提交。
碰到的问题及解决方案或思考;
- 最后一步继承问题,hql语句查询ItemBasic时会查询出重复数据,问题主要是多态查询,详细链接如下
- 问题如图所示

- 解决方案参考链接https://blog.csdn.net/pursuer211/article/details/17318379
- 解决方案是 子类映射文件class加polymorphism=”explicit”属性
<class name="cn.edu.zjut.po.ItemDetail" table="item"catalog="hibernatedb" polymorphism="explicit">......
- 问题如图所示
- 最后一步继承问题,hql语句查询ItemBasic时会查询出重复数据,问题主要是多态查询,详细链接如下
实验收获及总结。

若有收获,就点个赞吧
0 人点赞
