说明
部署自定义jar包就是将我们自己编写好的程序打成jar包,然后上传到nexus上供其他人下载
账号类型
默认nexus有三种账号,如下 | 账号 | 作用 | | :—-: | :—-: | | admin | 超级用户 | | deployment | 可以进行部署和搜索等操作,但是在nexus3.x中已经取消了 | | anonymous | 如果没有任何认证信息,那么就是anonymous这个匿名帐号了,可以下载和查看依赖 |
设置deployment账号
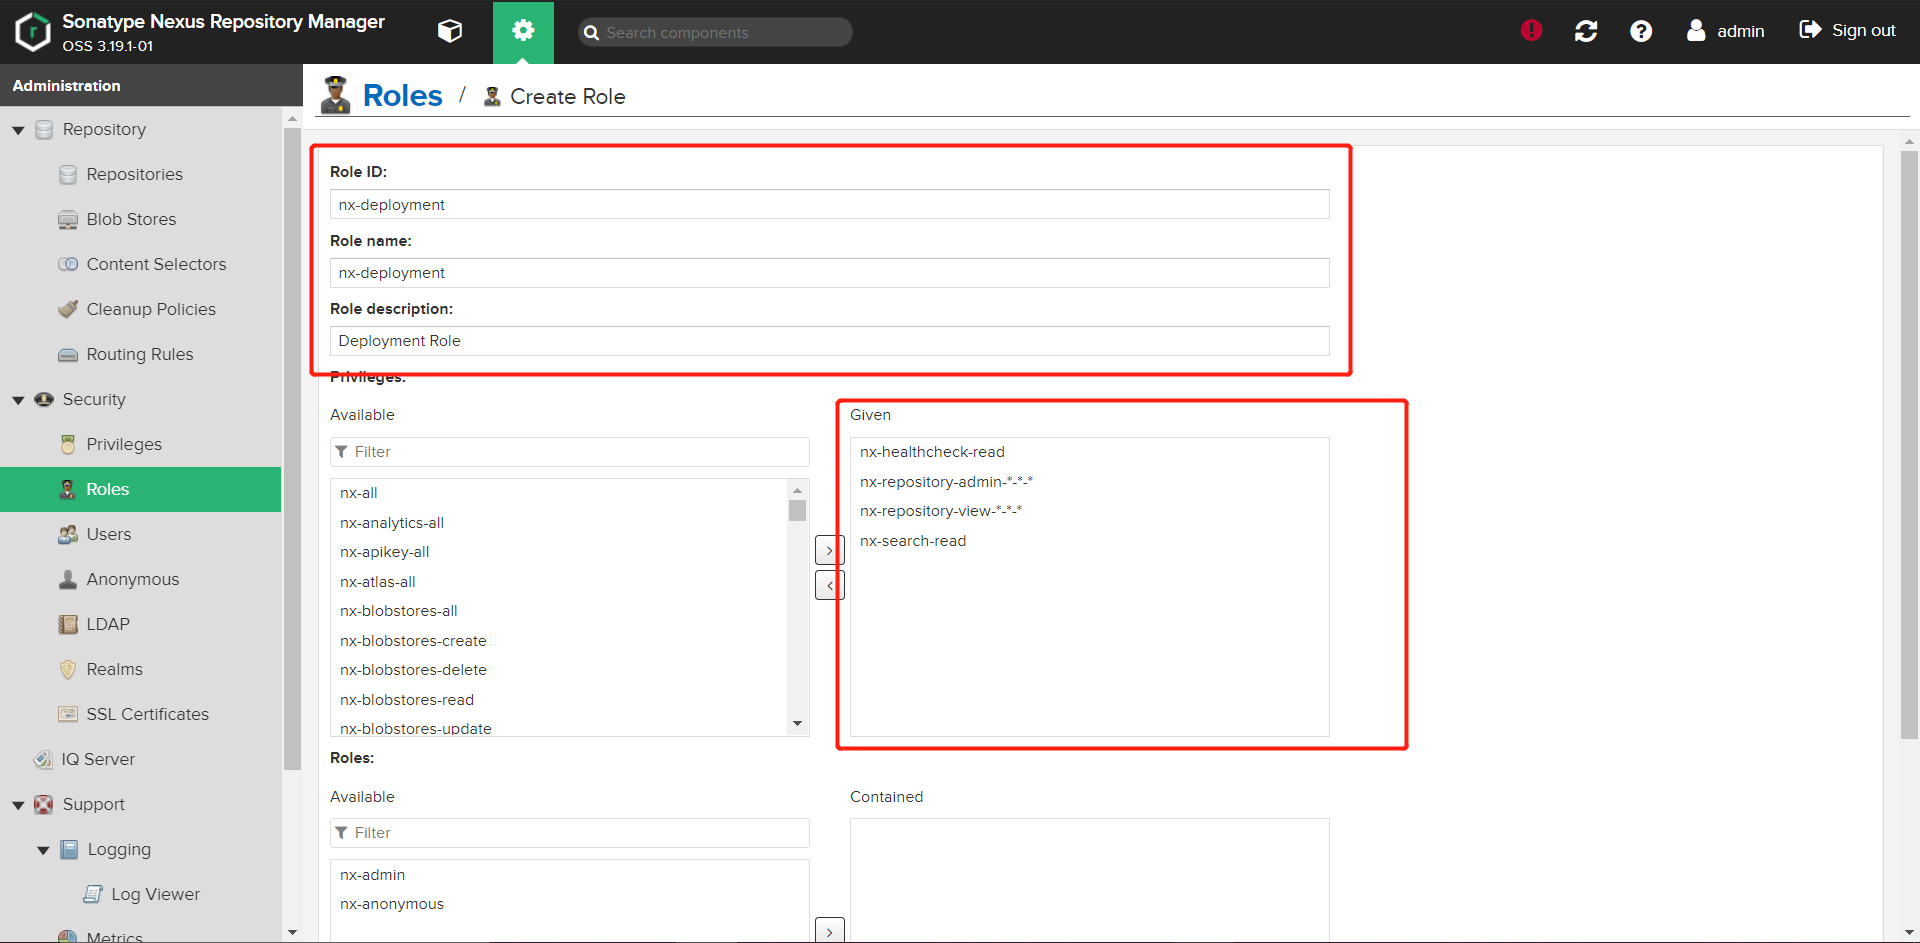
- 进入nexus -> 登录admin用户 -> Security -> Roles -> Create Role -> Nexus role,填写如下内容,最后点击Create Role
- 创建用户,进入nexus -> 登录admin用户 -> Security -> Users -> Create local user,填写如下内容,并将前面创建好的role授权给他

部署专用账号配置
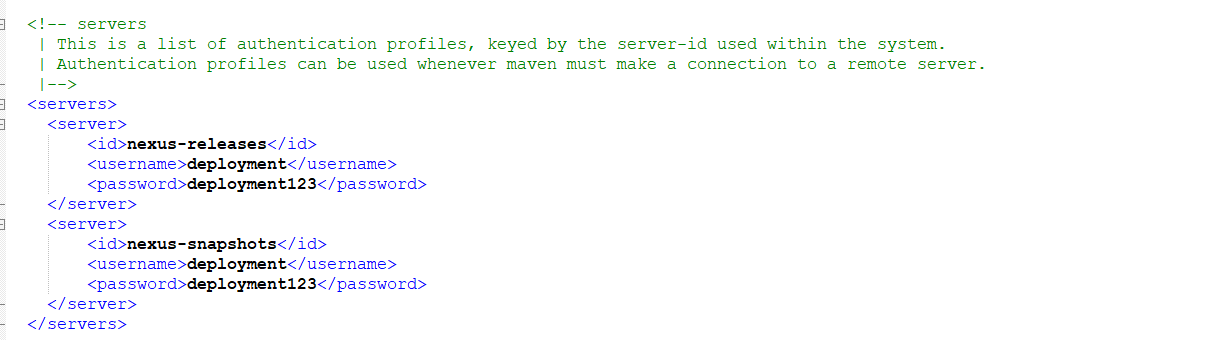
- 在maven setting的server标签中填写deployment的账号和密码
```xml
nexus-releases deployment deployment123 nexus-snapshots deployment deployment123
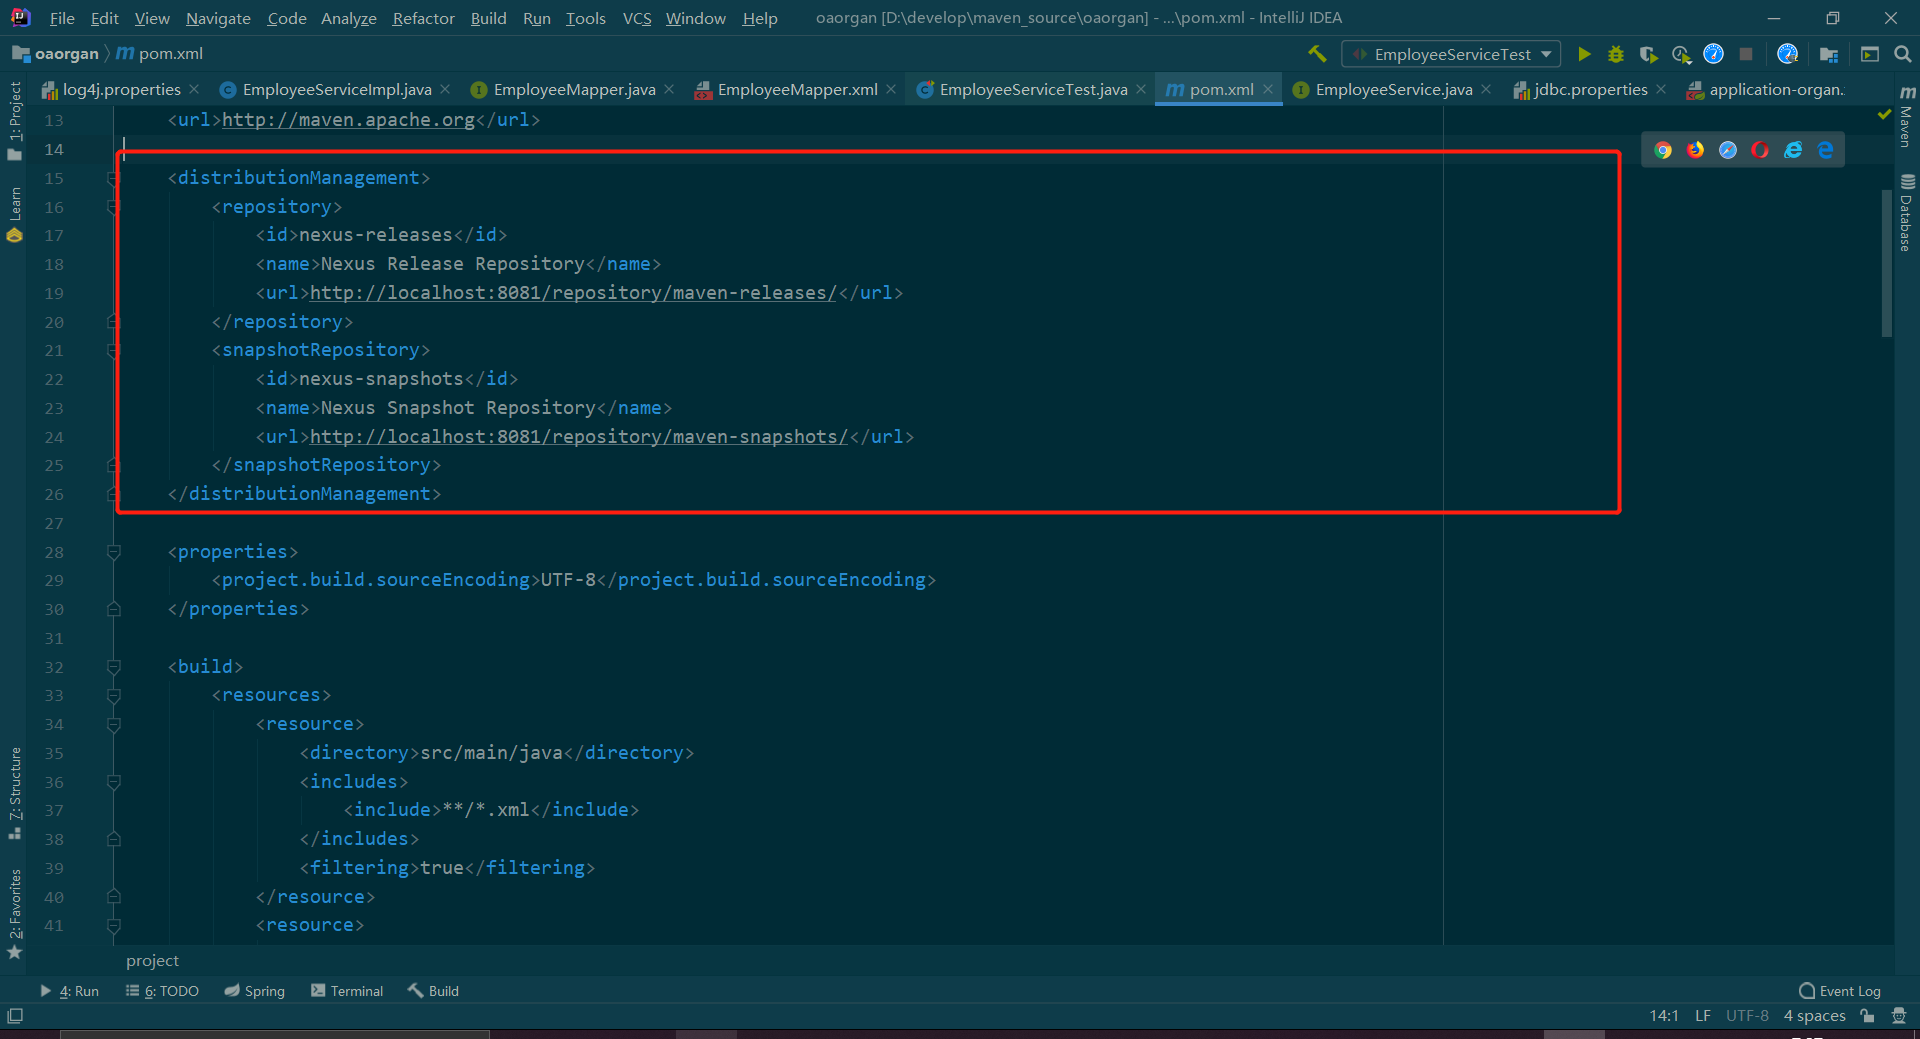
<a name="3GhtS"></a>## 发布仓库配置1. 将项目发布包部署到哪个仓库中,是需要用项目的pom.xml中的配置来设置的,添加仓库信息,仓库地址信息可以在maven私服中获取,每个仓库后面有个copy,这里面就是地址信息```xml<distributionManagement><repository><id>nexus-releases</id><name>Nexus Release Repository</name><url>http://localhost:8081/repository/maven-releases/</url></repository><snapshotRepository><id>nexus-snapshots</id><name>Nexus Snapshot Repository</name><url>http://localhost:8081/repository/maven-snapshots/</url></snapshotRepository></distributionManagement>
执行Maven deploy命令部署到私服
- 在idea中指定deployment命令,将jar包部署至私服中
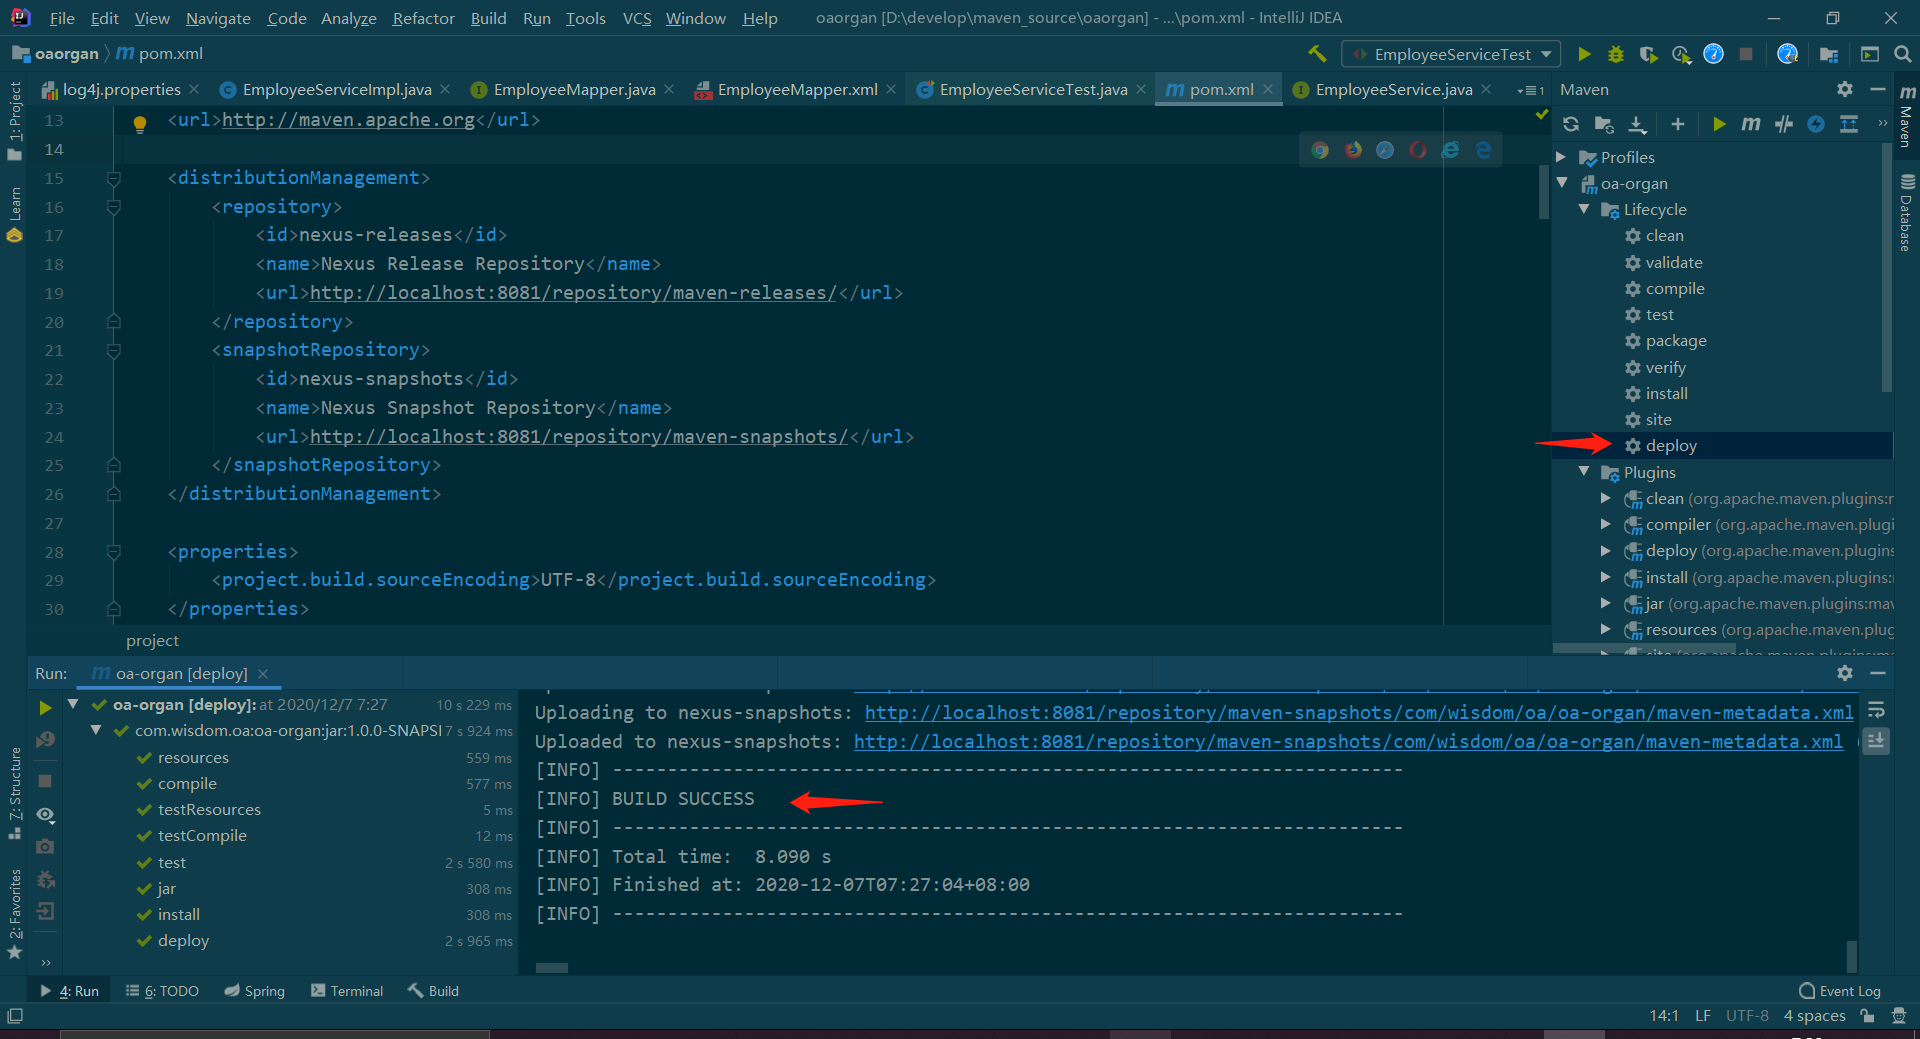
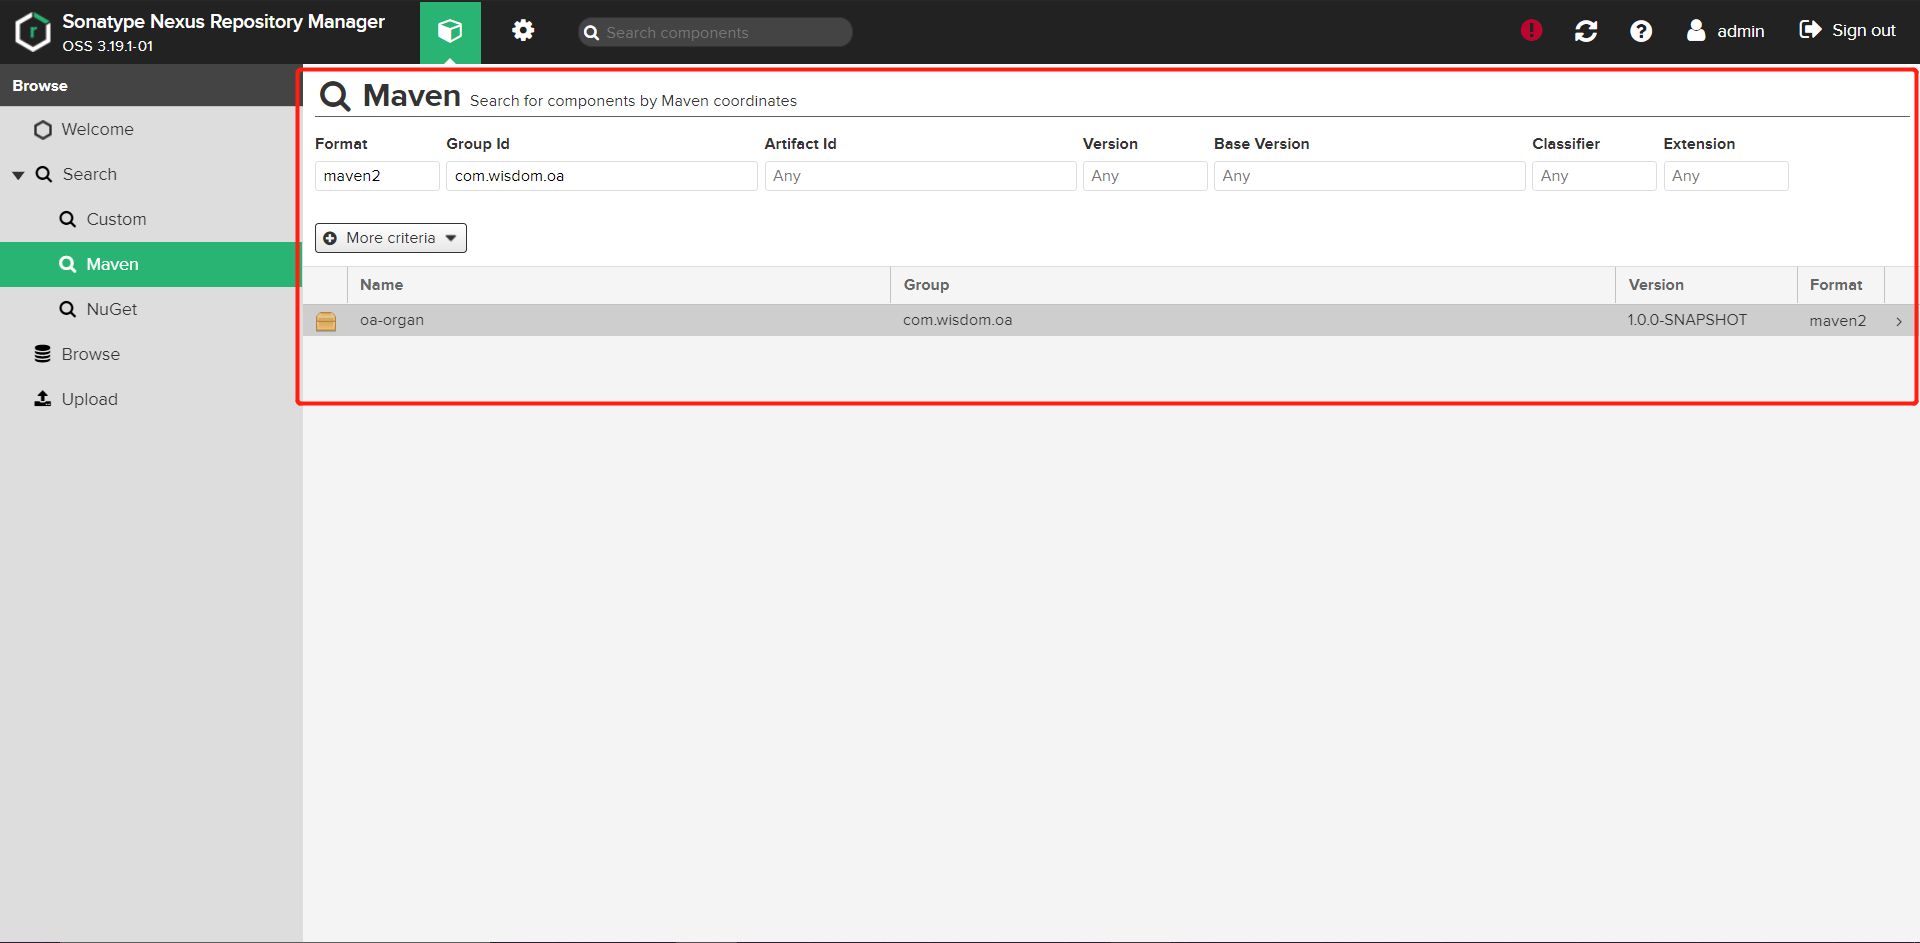
- 出现BUILD SUCCESS后就可以去maven私服检查是否有上传成功
手动上传
- 对于一些中央仓库没有的第三方的jar包就需要我们手动进行上传了,约定俗成上传至nexus-3rd-party这个仓库中
在maven setting中配置nexus-3rd-party的server信息
<server>
 <id>nexus-3rd-party</id>
 <username>deployment</username>
 <password>deployment123</password>
</server>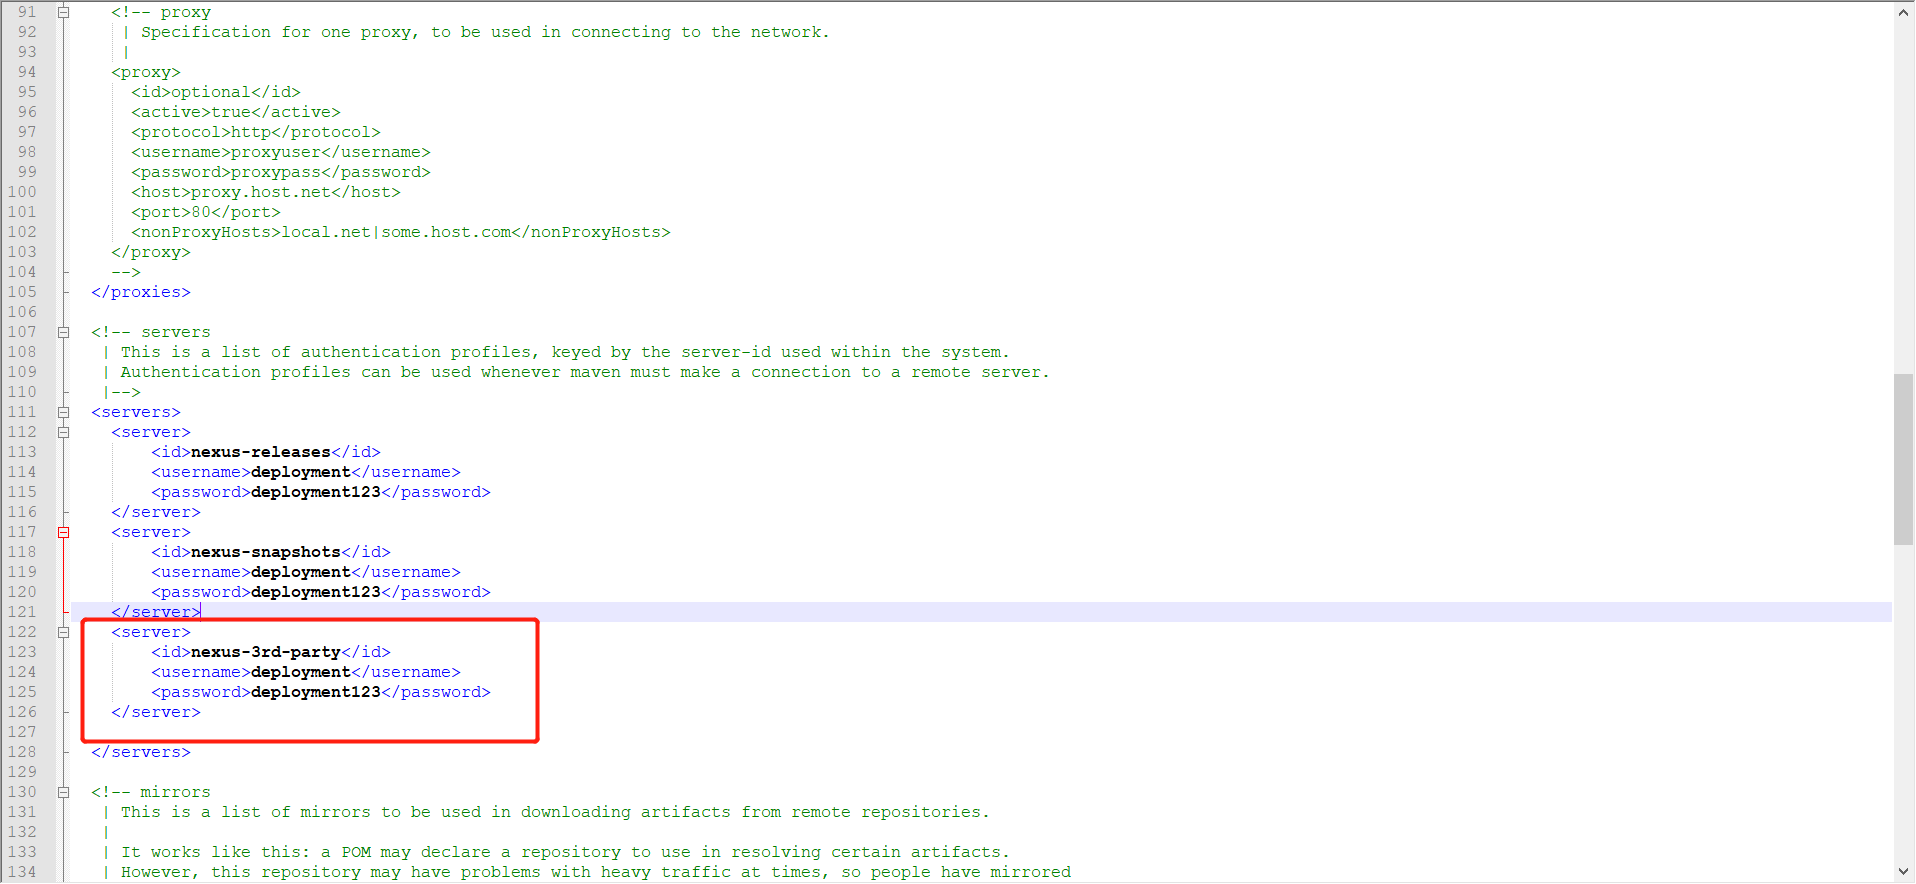
使用命令行的方式进行上传
mvn deploy:deploy-file -DgroupId=com.csource -DartifactId=fastdfs-client-java -Dversion=1.24 -Dpackaging=jar -Dfile=F:\DevelopmentKit\fastdfs_client_v1.24.jar -Durl=http://localhost:8081/repository/3rd-party/ -DrepositoryId=nexus-3rd-party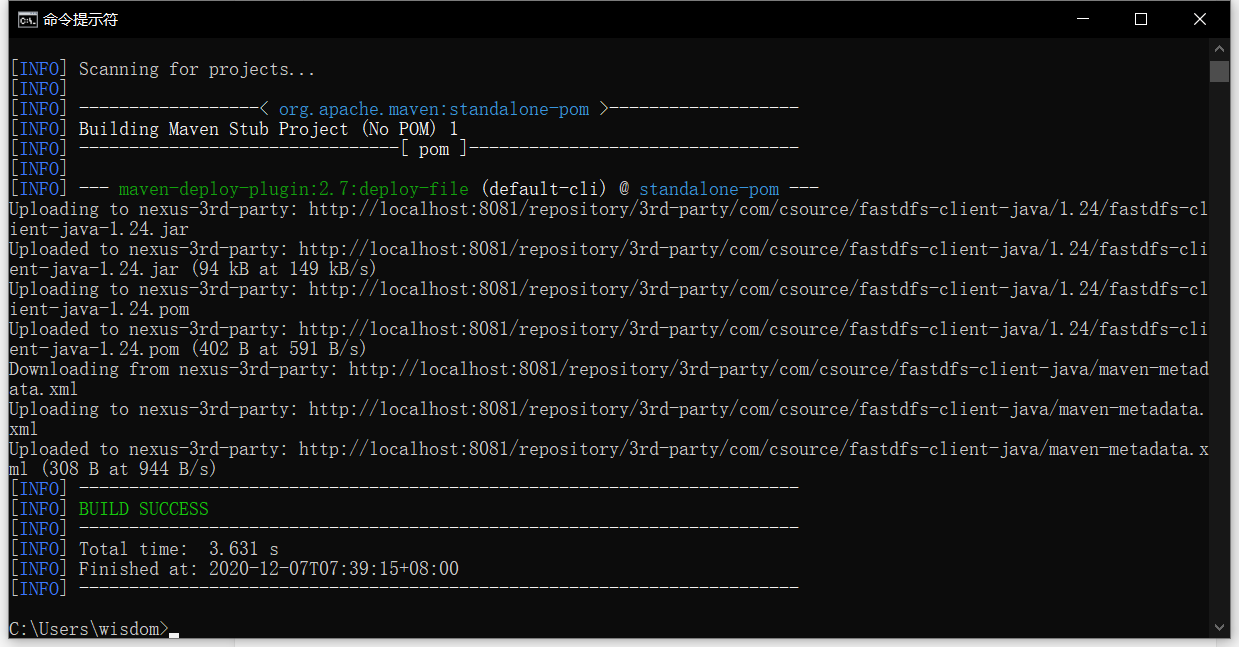
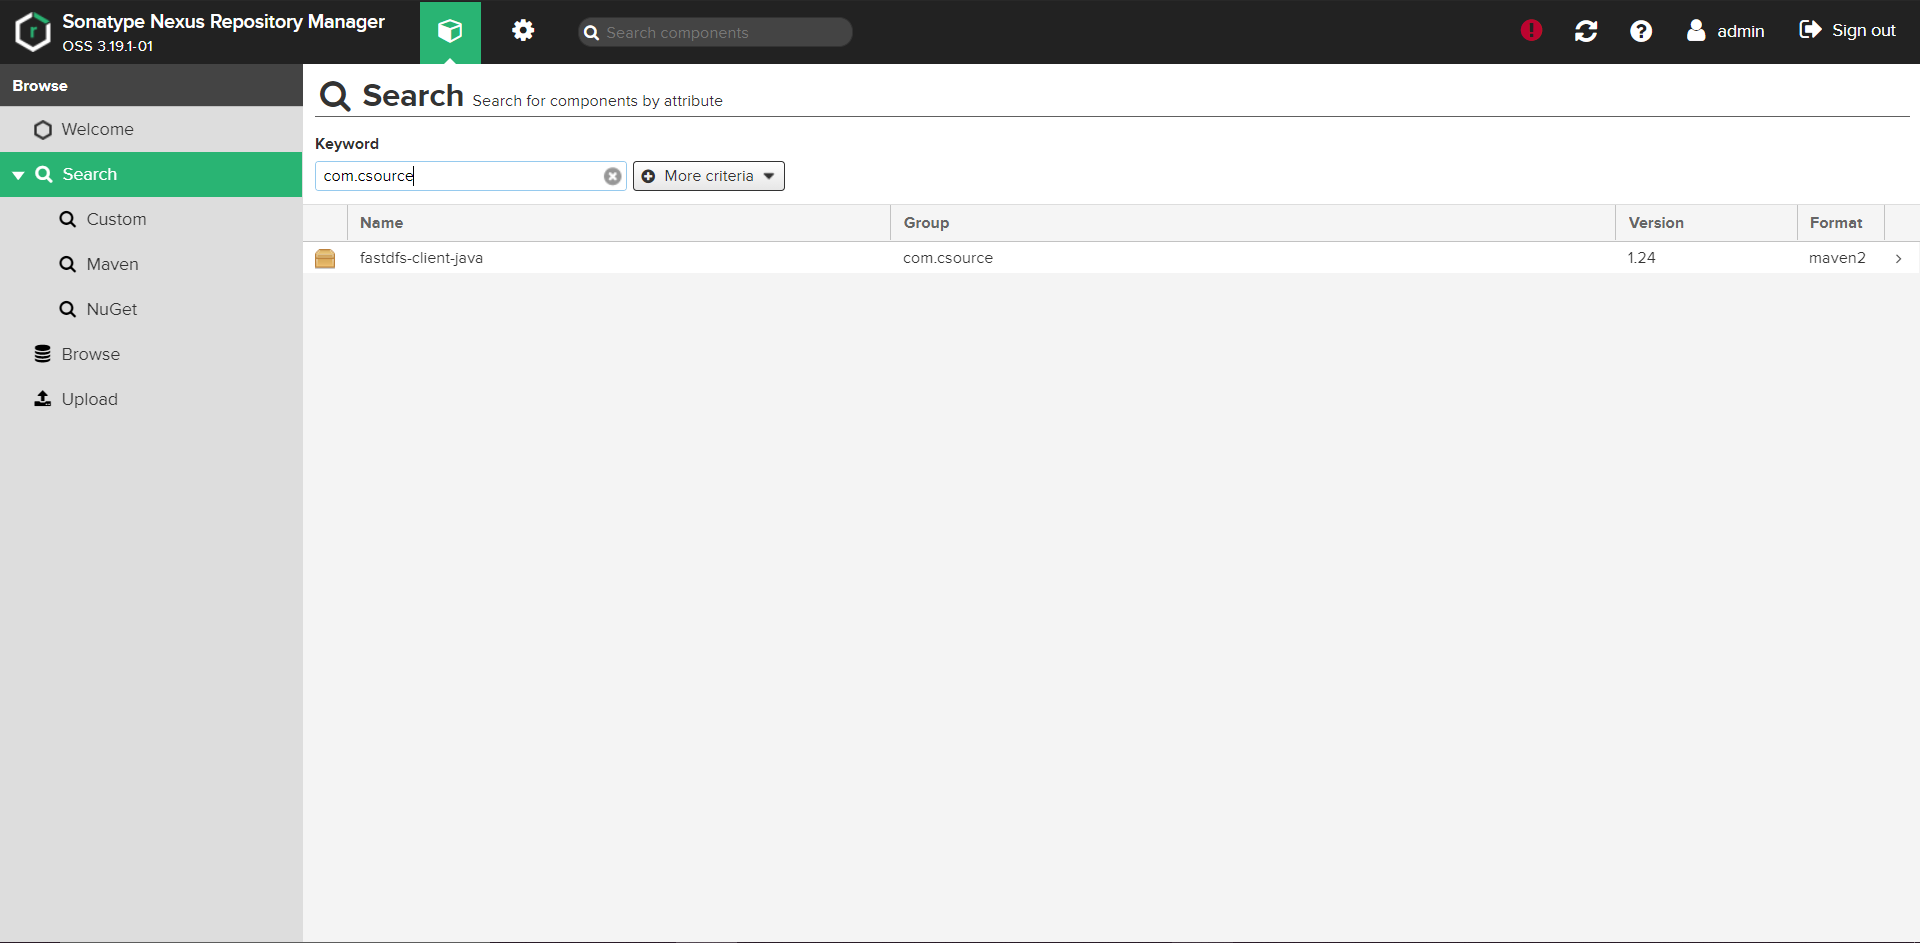
进入maven私服进行验证

若有收获,就点个赞吧
0 人点赞
