Spring Boot项目构建
步骤
(1)初始化
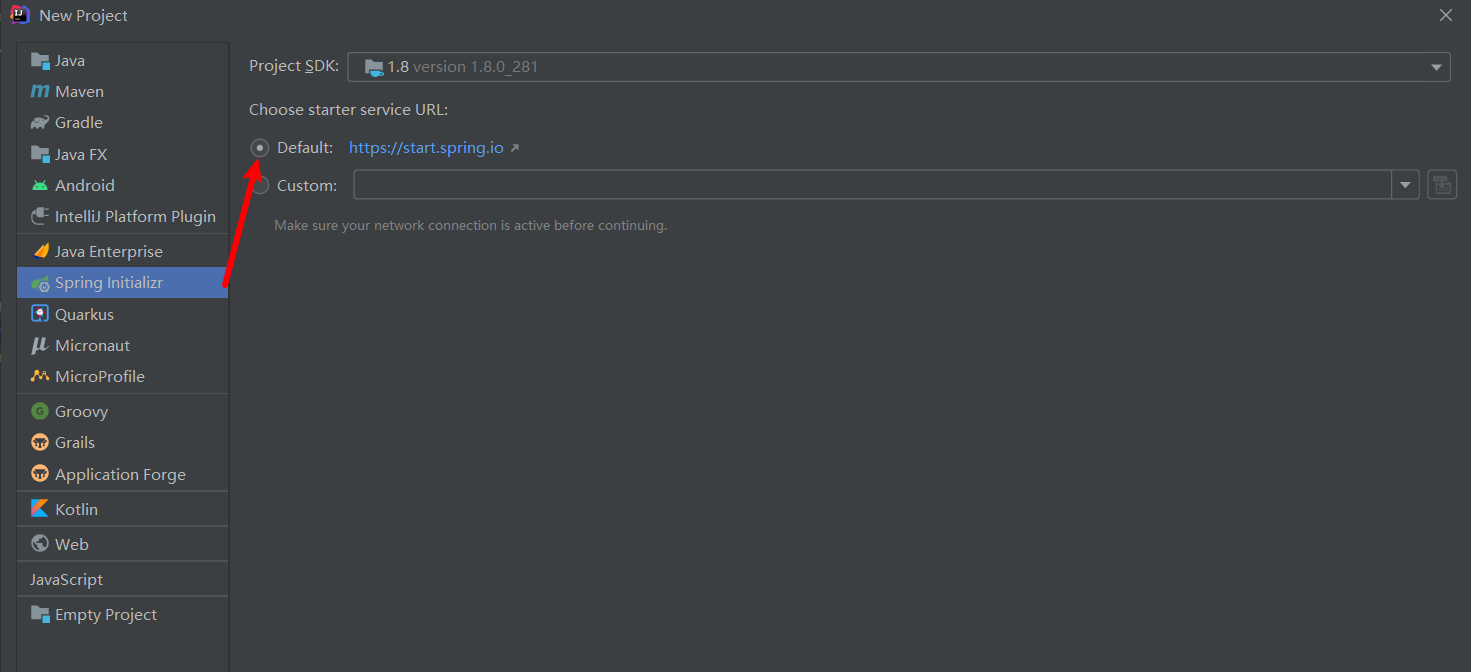
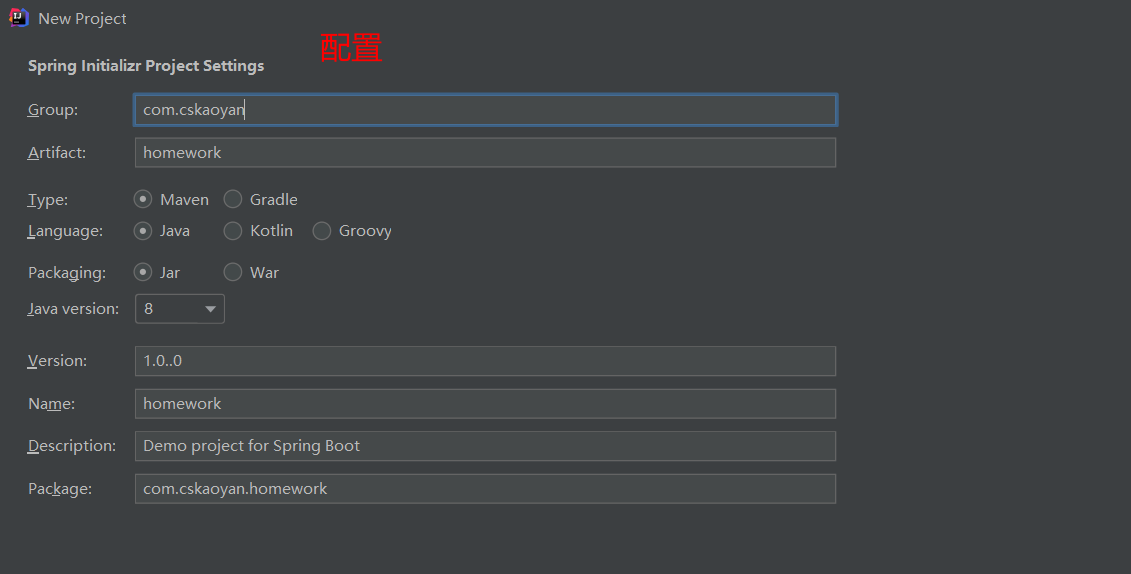
(2)配置
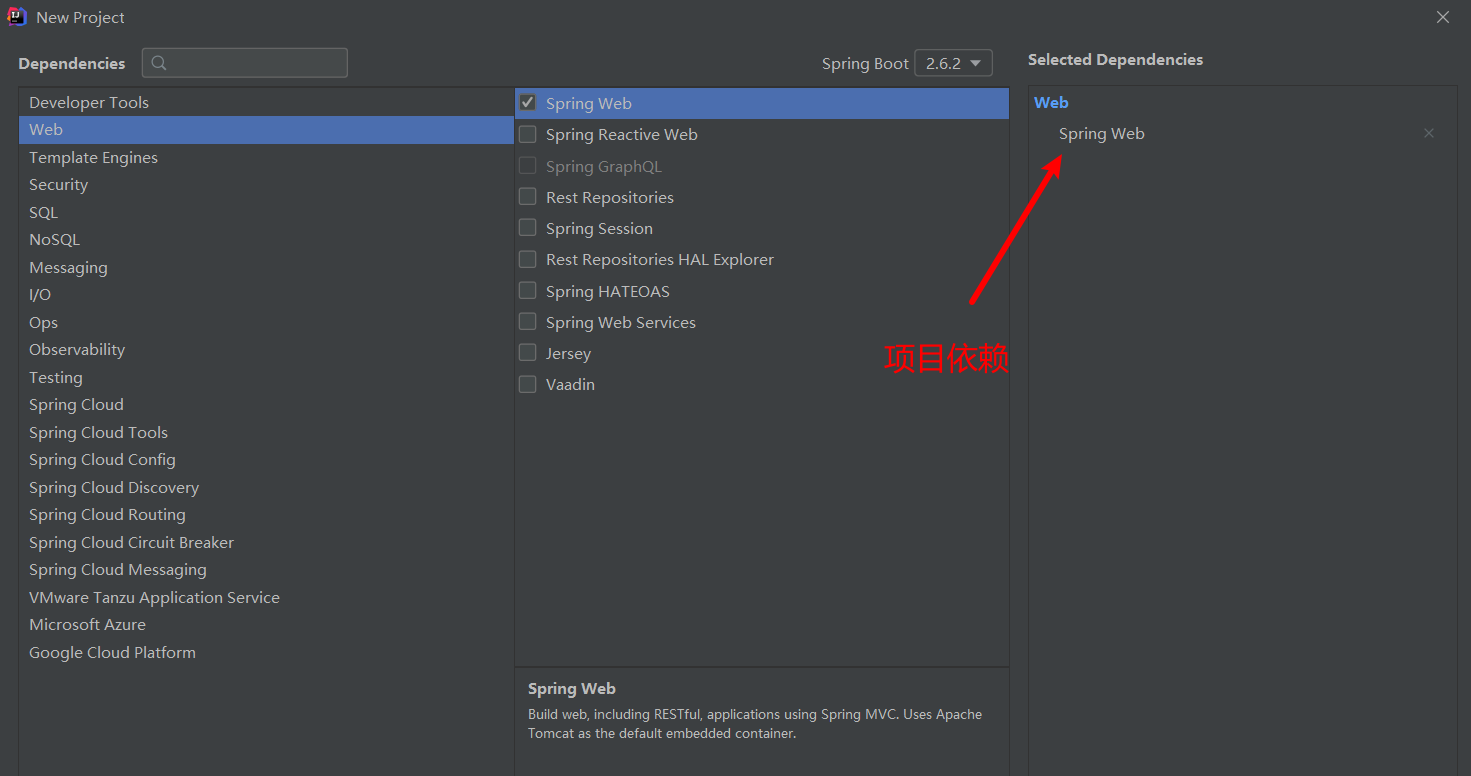
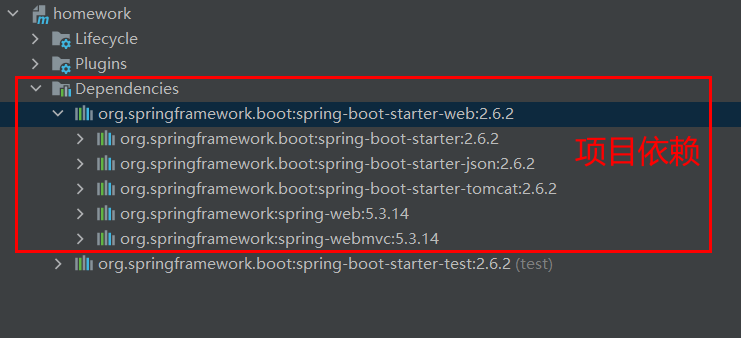
(3)项目依赖
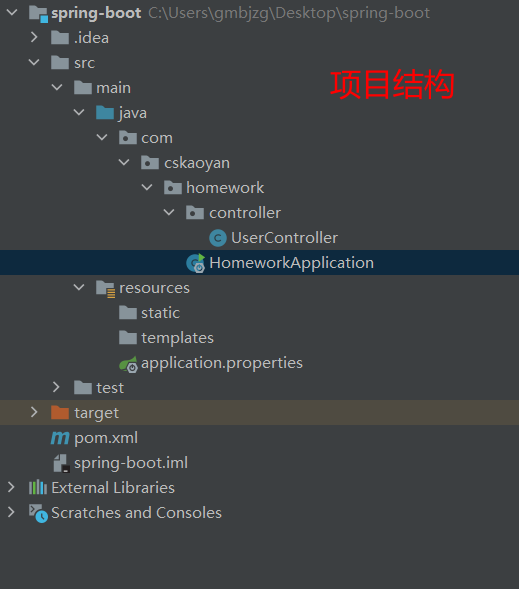
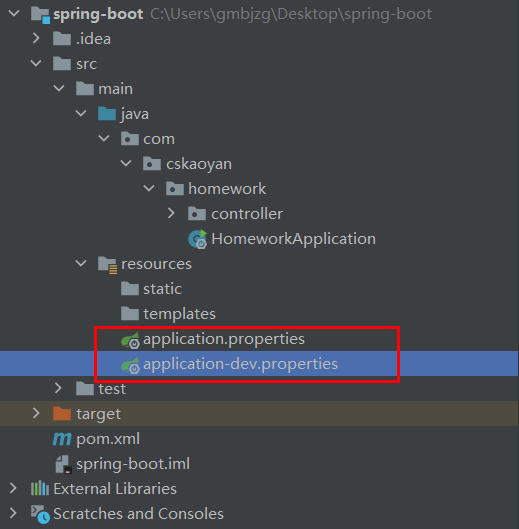
(4)存放位置

(5)测试
新建ControllerServlet
@Controllerpublic class UserController {@ResponseBody@RequestMapping("/user/login")public String userLogin(){return "user login...";}}
启动项目
@SpringBootApplicationpublic class HomeworkApplication {public static void main(String[] args) {SpringApplication.run(HomeworkApplication.class, args);}}
注:
项目结构
Web项目依赖
项目配置
基本配置
application.properties
# 服务器配置server.port=5000server.servlet.context-path=/app
多环境配置
示例如下
application.properties
# 服务器配置spring.profiles.active=dev
组件赋值
@ConfigurationProperties
示例代码
@Component@ConfigurationProperties(prefix = "db")@Datapublic class User {private String username;private String password;}
属性配置文件
# 用户信息db.username=zsdb.password=123456
测试
@SpringBootApplicationpublic class Application {public static void main(String[] args) {ApplicationContext app = SpringApplication.run(Application.class, args);User user = (User) app.getBean("user");System.out.println(user.getUsername());}}
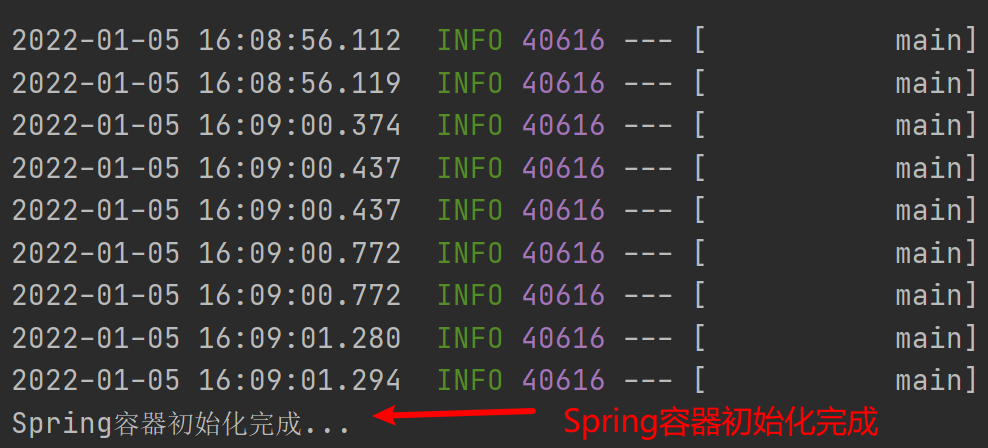
在Spring容器初始化完成之后,如果想要进行一些操作,就可以实现ComnandLineRunner或ApplicationRunner接口。会自动执行run方法
示例代码
@Component@ConfigurationProperties(prefix = "db")@Datapublic class User implements CommandLineRunner {private String username;private String password;@Overridepublic void run(String... args) throws Exception {System.out.println("Spring容器初始化完成...");}}
控制台
Servlet
示例代码
AdminServlet
public class AdminServlet extends HttpServlet {public void doGet(HttpServletRequest request, HttpServletResponse response) throws IOException {response.getWriter().println("admin模块...");}}
注册成为容器中的组件
@Configurationpublic class WebApplicationConfig {@Beanpublic ServletRegistrationBean servletRegist(){ServletRegistrationBean bean = new ServletRegistrationBean();bean.setServlet(new AdminServlet());bean.addUrlMappings("/admin");return bean;}}
过滤器
自定义过滤器
public class SetCharsetEncodingFilter implements Filter {@Overridepublic void init(FilterConfig filterConfig) throws ServletException {}@Overridepublic void doFilter(ServletRequest servletRequest, ServletResponse servletResponse, FilterChain filterChain) throws IOException, ServletException {// 统一编码设置servletRequest.setCharacterEncoding("utf8");servletResponse.setCharacterEncoding("utf8");servletResponse.setContentType("text/html;charset=utf8");// 放行请求filterChain.doFilter(servletRequest, servletResponse);}@Overridepublic void destroy() {}}
注册为容器中的组件
@Componentpublic class WebApplicationConfig {@Beanpublic FilterRegistrationBean charsetFilter(){FilterRegistrationBean bean = new FilterRegistrationBean();bean.setFilter(new SetCharsetEncodingFilter());bean.addUrlPatterns("/*");return bean;}}
拦截器
自定义拦截器
public class PermissionInterceptor implements HandlerInterceptor {@Overridepublic boolean preHandle(HttpServletRequest request, HttpServletResponse response, Object handler) throws Exception {// 请求拦截HttpSession session = request.getSession();if(session.getAttribute("username") == null){// 未登录, 给用户提示response.getWriter().println("请登录...");return false;}else{return true;}}@Overridepublic void postHandle(HttpServletRequest request, HttpServletResponse response, Object handler, ModelAndView modelAndView) throws Exception {}@Overridepublic void afterCompletion(HttpServletRequest request, HttpServletResponse response, Object handler, Exception ex) throws Exception {}}
注册拦截器
@Configurationpublic class WebMvcConfig implements WebMvcConfigurer {@Overridepublic void addInterceptors(InterceptorRegistry registry) {PermissionInterceptor permissionInterceptor = new PermissionInterceptor();registry.addInterceptor(permissionInterceptor).addPathPatterns("/user/**").excludePathPatterns("/user/login");}}
集成Mybatis框架
数据库配置
# 数据库配置spring.datasource.driver-class-name=com.mysql.jdbc.Driverspring.datasource.url=jdbc:mysql://localhost:3306/test?characterEncoding=UTF-8spring.datasource.username=rootspring.datasource.password=123456
方式一
dao层代理对象
@Mapperpublic interface UserDao {User selectUserByUserNameAndPassword(String username, String password);}
方式二
组件扫描器
@SpringBootApplication@MapperScan(basePackages = "com.cskaoyan.demo.dao")public class Application {public static void main(String[] args){SpringApplication.run(Application.class, args);}}
开启日志
# Mybatis开启日志mybatis.configuration.log-impl=org.apache.ibatis.logging.stdout.StdOutImpl
事务
注解方式
开启事务
@EnableTransactionManagement
@SpringBootApplication@MapperScan(basePackages = "com.cskaoyan.demo.dao")@EnableTransactionManagementpublic class Application {public static void main(String[] args){SpringApplication.run(Application.class, args);}}
给需要添加事务的方法添加注解
@Transactional
示例代码
@Transactional@Overridepublic int insertUser(String username, String password) {int res = userDao.insertUser(username, password);// 模拟操作异常int a = 1 / 0;return res;}

若有收获,就点个赞吧
0 人点赞
