视频教程地址: https://www.bilibili.com/video/BV1kT4y1F7Tc
代码地址: https://gitee.com/crazyliyang/video-teaching
1.入门案例一: sprint-security-demo
先新建父工程 spring-security-parent
父工程 pom.xml 文件如下:
<?xml version="1.0" encoding="UTF-8"?><project xmlns="http://maven.apache.org/POM/4.0.0"xmlns:xsi="http://www.w3.org/2001/XMLSchema-instance"xsi:schemaLocation="http://maven.apache.org/POM/4.0.0 http://maven.apache.org/xsd/maven-4.0.0.xsd"><groupId>com.liy.teaching</groupId><artifactId>spring-security-parent</artifactId><version>1.0.0-SNAPSHOT</version><modelVersion>4.0.0</modelVersion><packaging>pom</packaging><properties><spring-boot.version>2.3.3.RELEASE</spring-boot.version></properties><modules><module>spring-security-demo</module><module>spring-security-demo-role</module><module>spring-security-config-simple</module></modules></project>
在父工程中新建子模块: spring-security-demo
pom.xml 文件如下:
<?xml version="1.0" encoding="UTF-8"?><project xmlns="http://maven.apache.org/POM/4.0.0"xmlns:xsi="http://www.w3.org/2001/XMLSchema-instance"xsi:schemaLocation="http://maven.apache.org/POM/4.0.0 http://maven.apache.org/xsd/maven-4.0.0.xsd"><parent><groupId>com.liy.teaching</groupId><artifactId>spring-security-parent</artifactId><version>1.0.0-SNAPSHOT</version></parent><modelVersion>4.0.0</modelVersion><artifactId>spring-security-demo</artifactId><dependencies><!-- 实现对 Spring MVC 的自动化配置 --><dependency><groupId>org.springframework.boot</groupId><artifactId>spring-boot-starter-web</artifactId><version>${spring-boot.version}</version></dependency><!-- 实现对 Spring Security 的自动化配置 --><dependency><groupId>org.springframework.boot</groupId><artifactId>spring-boot-starter-security</artifactId><version>${spring-boot.version}</version></dependency></dependencies></project>

其中配置文件 application.yaml
server:
  port: 8080

spring:
  security: # Spring Security 配置项,对应 SecurityProperties 配置类
    user: # 对应配置默认的 InMemoryUserDetailsManager 的用户账号与密码。
      name: user          # account
      password: user      # password
      #roles: ADMIN       # has role

# 日志级别
logging:
  level:
    org.springframework.*: debug
@RestController
public class DemoController {

    @GetMapping("/home")
    public String home() {
        return "access /home success";
    }

    @GetMapping("/test")
    public String test() {
        return "access /test success";
    }

}
启动类 ApplicationDemo
@SpringBootApplication
public class ApplicationDemo {

    public static void main(String[] args) {
        SpringApplication.run(ApplicationDemo.class, args);
    }

}
测试访问: http://localhost:8080/home
跳转到登录页面: http://localhost:8080/login
输入配置的用户信息 user/user
登录成功, http://localhost:8080/home 接口返回成: access /home success
2.入门案例二: spring-security-config-simple
父工程下新建子模块: spring-security-config-simple **
pom依赖和案例一相同, 本项目结构如下: 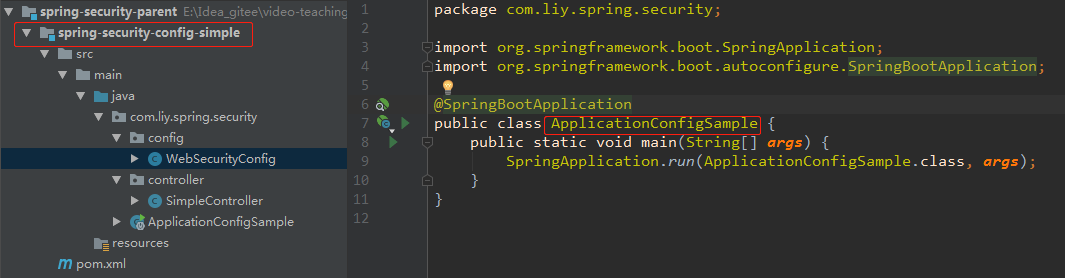
启动类没有什么特别, 来看下配置类: WebSecurityConfig
**
/**
 *  webSpringSecurity 配置类
 */
@Configuration
public class WebSecurityConfig extends WebSecurityConfigurerAdapter {

    @Override
    protected void configure(HttpSecurity http) throws Exception {
        http
                .authorizeRequests() // 配置请求地址的权限
                .antMatchers("/home").permitAll()   // 所有用户可访问无需认证, @PermitAll 一样的功能
                .anyRequest().authenticated()  // 任何请求,访问的用户都需要经过认证
                .and()
                .formLogin()            // 设置 Form 表单登陆
//              .loginPage("/login")   // 登陆 URL 该地址这里可以自定义配置
                .permitAll()         // 所有用户可访问
                .and()
                .logout()       // 配置退出相关
//              .logoutUrl("/logout")    // 退出 URL 该地址这里可以自定义配置
                .permitAll(); // 所有用户可访问
    }

    @Override
    protected void configure(AuthenticationManagerBuilder auth) throws Exception {
        auth.
                inMemoryAuthentication()  // 使用内存中的 InMemoryUserDetailsManager
                .passwordEncoder(NoOpPasswordEncoder.getInstance())  // 不使用 PasswordEncoder 密码编码器
                .withUser("admin").password("admin").roles("ADMIN")            // 配置 admin 用户
                .and().withUser("user").password("user").roles("NORMAL");  // 配置 normal 用户
    }
}
详细解释,看注释内容.
再看下测试类 SimpleController 代码入下:
@RestController
public class SimpleController {

    @GetMapping("/home")  // 在WebSecurityConfig配置了, 所以无需登录验证,就可以访问
    public String home() {
        return "access /home success";
    }


    @GetMapping("/test")
    public String requiredLogin() {
        return "access  /test success";
    }
}
3.入门案例三: spring-security-demo-role
**
父工程下新建子模块: **spring-security-demo-role**<br /> pom依赖和案例一相同, 本项目结构如下: <br />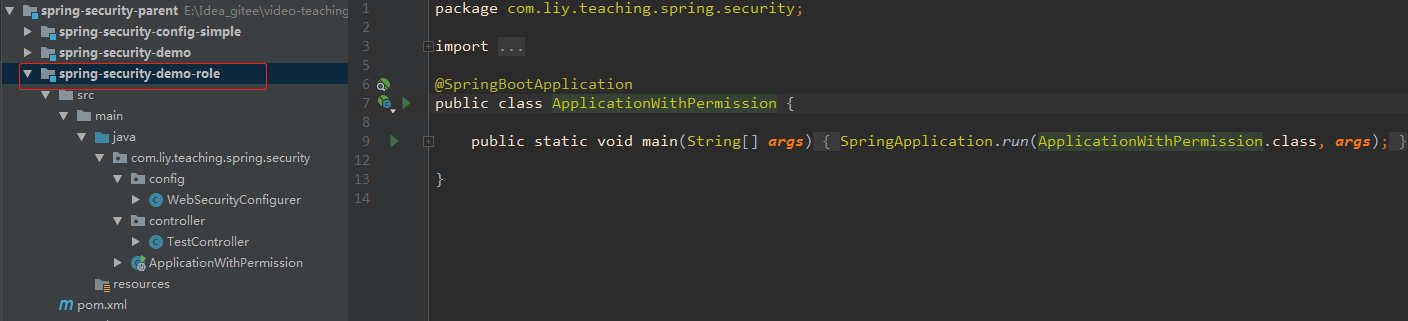<br />启动类没什么特别, **WebSecurityConfigurer** 注意不一样的地方, 代码如下:
@Configuration
@EnableGlobalMethodSecurity(prePostEnabled = true)  // 注意
public class WebSecurityConfigurer extends WebSecurityConfigurerAdapter {

    @Override
    protected void configure(HttpSecurity http) throws Exception {
        http
                .authorizeRequests()   // 配置请求地址的权限
                .antMatchers("/demo").permitAll() // 所有用户可访问,无需登录认证, @PermitAll 功能一样
                .antMatchers("/config/admin").hasRole("ADMIN")  // 需要 ADMIN 角色
                .antMatchers("/config/normal").access("hasRole('ROLE_NORMAL')") // 需要 NORMAL 角色。
                .anyRequest().authenticated()  // 任何请求,访问的用户都需要经过认证
                .and()
                .formLogin()             // 设置 Form 表单登陆
//              .loginPage("/login")     // 登陆 URL 该地址这里可以自定义配置
                .permitAll()
                .and()
                .logout()                // 配置退出相关
//              .logoutUrl("/logout")    // 退出 URL 该地址这里可以自定义配置
                .permitAll();
    }

    @Override
    protected void configure(AuthenticationManagerBuilder auth) throws Exception {
        auth.
                inMemoryAuthentication()// 使用内存中的 InMemoryUserDetailsManager
                .passwordEncoder(NoOpPasswordEncoder.getInstance())// 不使用 PasswordEncoder 密码编码器
                .withUser("admin").password("admin").roles("ADMIN") // 配置 admin 用户
                .and().withUser("user").password("user").roles("NORMAL");// 配置 normal 用户
    }

}
这里 WebSecurityConfigurer 配置类中, 新增了注解 @EnableGlobalMethodSecurity(prePostEnabled = true)
该注解表示开启SpringSecurity的全局方法拦截, 含义是方法上可以添加 ** @PreAuthorize() **注解, 指定该方法在访问时需要什么样的权限, 如果没有该注解指定的权限标识, 那么会被直接拒绝访问!
测类代码: TestController
@RestController
public class TestController {

    @GetMapping("/demo")
    public String demo() {
        return "access  /test/demo  success";
    }

    @PreAuthorize("hasRole('ROLE_ADMIN')")
    @GetMapping("/admin")
    public String admin() {
        return "access /test/admin";
    }

    @PreAuthorize("hasRole('ROLE_NORMAL')")
    @GetMapping("/normal")
    public String normal() {
        return "access /test/normal";
    }

    // 在 WebSecurityConfigurer 中配置的
    @GetMapping("/config/admin")
    public String configAdmin() {
        return "/config/admin";
    }

    // 在 WebSecurityConfigurer 中配置的
    @GetMapping("/config/normal")
    public String configNormal() {
        return "access /config/normal ";
    }
}

若有收获,就点个赞吧
0 人点赞
