一、语义化标签
标签语义化,方便我们直观的看到页面结构,每个功能区可以使用相应意义的标签来包裹,例如,
:底部内容
:导航
:文章、引用部分
:段落标签
:侧边栏,不常用了
二、canvas
1、画线
<canvas id="can" width="500px" height="300px"></canvas><script>var canvas = document.getElementById('can');console.log(canvas);var ctx = canvas.getContext("2d");//获取canvas的画笔ctx.moveTo(100,100);//设置起点ctx.lineTo(200,200);//规划路径ctx.lineTo(100,200);ctx.closePath();//将通过同一个stroke完成的,一笔画出的大于等于两条的线,画成一个闭合的图形,也就是把最后一个位置和起点连接起来ctx.fill();//填充当前绘制的图形内部ctx.lineWidth = 10;//设置线粗ctx.stroke();//根据起点将规划的路径绘制出来</script>
2、画矩形
// ctx.rect(100,100,150,100);//(起点x轴坐标,起点y轴坐标,矩形的宽度,矩形的高度)// ctx.stroke();ctx.strokeRect(100,100,150,100);//这一句等于上边两句ctx.fillRect(200,200,100,50);//直接绘制一个填充的矩形
3、绘制一个运动的矩形
ctx.fillRect(100,100,50,50);//直接绘制一个填充的矩形var height = 100;var timer = setInterval(() => {ctx.clearRect(0,0,1500,1300);//每次执行清除之前绘制的内容ctx.strokeRect(100,height,50,50);height += 2;}, 1000/30);
4、画弧
画弧度需要圆心(x,y),半径(r),起始弧度,结束弧度,方向是顺时针还是逆时针
ctx.arc(100,100,50,0,Math.PI / 2,1);//(圆心x,圆心y,半径,起始弧度,结束弧度,0表示顺时针/1表示逆时针)ctx.lineTo(100,100);//规划路线,起点是圆弧的终点ctx.closePath();//可以绘制一个闭合的饼图ctx.stroke();
5、画圆角矩形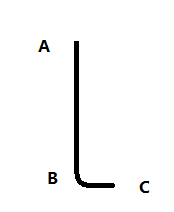
// B点的坐标,C点的坐标(只是一个方向坐标,向着这个坐标的方向),圆角的大小(单位:像素)ctx.moveTo(100,110);//为了避免最后一条线闭合的时候出现弧度比起点低而暴露出起点的直线,要设置起点的沿绘制方向增加一个弧度的大小ctx.arcTo(100,200,200,200,10);ctx.arcTo(200,200,200,100,10);ctx.arcTo(200,100,100,100,10);ctx.arcTo(100,100,100,200,10);ctx.fill();//可填充ctx.stroke();
6、画贝塞尔曲线
ctx.beginPath();//一种规范ctx.moveTo(100,100);// ctx.quadraticCurveTo(200,200,300,100);//二次贝塞尔曲线,两个点ctx.bezierCurveTo(200,200,300,100,400,200);//三次贝塞尔曲线,三个点ctx.stroke();
7、坐标平移旋转与缩放
//线段旋转ctx.beginPath();ctx.translate(100,100);// ctx.rotate(Math.PI / 6);//默认根据画布圆点旋转,设置了上边的translate之后,就换成新的坐标原点ctx.moveTo(0,0);ctx.lineTo(100,0);ctx.stroke();// 矩形缩放ctx.beginPath();// ctx.moveTo(300,300);ctx.scale(2,1);//设置缩放倍数,x轴和y轴上缩放的倍数ctx.strokeRect(300,300,100,100);
8、canvas的save 和 restore
绘制多个图形可能会互相影响,在绘制图形之前,添加一个调用save方法把原始状态保存一下,在绘制第二个图形的时候,先调用以下restore 方法,就表示从此刻开始恢复原始状态,然后进行操作
9、canvas背景填充
var img = new Image();img.src = "me.jpg";img.onload = function(){//以坐标系的原点为准进行填充,如果不希望如此,则可以使用translate设置新的坐标原点var bg = ctx.createPattern(img,'no-repeat');ctx.fillStyle = bg;ctx.fillRect(0,0,600,600);}
10、线性渐变
ctx.beginPath();var bg = ctx.createLinearGradient(0,0,600,0);//创建渐变的路径,从坐标(0,0)到坐标(600,0)bg.addColorStop(0,'#fff');//设置渐变过程,只有0-1的过程,这个起始位置还是从画布的0点开始的,除非设置translatebg.addColorStop(0.5,'#000')bg.addColorStop(1,"#f00")ctx.fillStyle = bg;ctx.fillRect(0,0,600,600);
11、辐射渐变
ctx.beginPath();

var bg = ctx.createRadialGradient(0,100,0,100,100,100);//起始圆的圆心和半径,结束圆的圆心和半径
bg.addColorStop(0,'#0ff');
bg.addColorStop(0.5,'#000')
bg.addColorStop(1,"#f00")
ctx.fillStyle = bg;
ctx.fillRect(0,0,200,200);
12、阴影
                             ctx.beginPath();
ctx.shadowColor = 'red'
ctx.shadowBlur = 12;//阴影大小
ctx.shadowOffsetX = 5;//阴影x方向的平移量

ctx.strokeRect(0,0,200,200);
13、渲染文字
ctx.font = "26px Georgia"
ctx.strokeText("nihao",100,100);//空心文字
ctx.fillStyle = "red"
ctx.fillText("woshi",200,200);//填充文字
14、线端样式
ctx.beginPath();
ctx.lineWidth = 10;
ctx.moveTo(100,100);
ctx.lineTo(200,100);
ctx.lineTo(100,200)
ctx.lineCap = "butt/square/round";//一条线两端的样式
ctx.lineJoin = "miter(miterLimit)/round/bevel";//两线相交的位置的样式
ctx.miterLimit = 2;
ctx.stroke();
三、Svg
矢量图:使用标签和css绘制,放大不会失真,适合大面积的贴图,通常动画较少或者比较简单
canvas:动画都是使用js画的,太大会影响性能,适合小面积的贴图,适合动画
1、画线
<svg width="500px"height="500px">
    <line x1="100" y1="100" x2="200" y2="200"></line>
     <line x1="0" y1="0" x2="50" y2="50"></line>
</svg>

<style>
  line{
     stroke: red;
  }
</style>
2、画矩形
<!-- 默认是充满并且直接绘制出来的(不需要在使用stroke) --><br />
<svg width="500px"height="500px">
    <rect width="50px" height="30px" x="300" y="300" rx="10" ry="20">
      rx\ry是水平和垂直方向上的圆角大小
    </rect>
</svg>

<style>
  rect{
            color:red;
        }
</style>
3、画圆
<svg width="500px"height="500px">
      <circle r="50" cx="200" cy="200"></circle>
</svg>

<style>
  circle{
            fill:transparent;
    /*因为标签默认是填充的,添加这个属性可以去掉,然后再使用后边的stroke,描绘出后边的线条*/
        }
</style>
4、画椭圆
<svg width="500px"height="500px">
     <ellipse rx="50" ry="30" cx="500" cy="500">rx横半径,ry纵半径</ellipse>
</svg>
5、画折线
<svg width="500px"height="500px">
    <polyline points="0 0,50 50,50 100,100 100,70 70" ></polyline>
</svg>

<style>
  polyline{
     fill:transparent; /*因为标签默认是填充的,添加这个属性可以去掉,然后再使用后边的stroke,描绘出后边的线条*/
            stroke:red;
            stroke-width: 3px;
  }
</style>
6、画多边形和文本
<svg width="500px"height="500px">
   <polygon points="0 0,50 50,50 100,100 100,70 70">和折线的区别是,多边形绘制到最后会自动闭合</polygon>
   <text x="30" y="50">nihao </text>
</svg>

<style>
  polygon{
            fill:transparent;
            stroke: red;
        }
        text{
            stroke:blueviolet;
        }
</style>
7、透明度与线条样式
<svg width="500px"height="500px">
    <polyline points="0 0,50 50,50 100,100 100,70 70" ></polyline>
</svg>

<style>
  polyline{
     fill:transparent; /*因为标签默认是填充的,添加这个属性可以去掉,然后再使用后边的stroke,描绘出后边的线条*/
            stroke:red;
            stroke-width: 3px;

                    stroke-opacity: 0.5;/*边框的透明度*/
            fill-opacity: 0.5;/*填充的透明度*/
            stroke-linecap: round/square/butt;/*单线两端的样式*/
            stroke-linejoin: bevel/round/miter/*两线交叉的样式*/
  }
</style>
8、SVG的Path标签
<svg width="500px"height="500px">
    <path d="M 100 100 L 200 100 l 200 200 H 300 V 100 Z"></path>
        <!-- M:起始位置
            L:移动到位置
            l:相对位置,基于上一个点再移动多少的距离
            H:水平方向距离
            V:竖直方向的距离
            z(不许分大小写):闭合区间,   写了就闭合,不写就不闭合-->
</svg>

<style>
   path{
           stroke: red;
           fill:transparent;
       }
</style>
9、Path画弧
<svg width="500px"height="500px">
    <path d="M 100 100 A 100 50 90 1 1 150 200"></path>
        <!-- M 起点
            A:水平半径 纵向半径  椭圆相对于坐标轴的宣祖安角度 绘制大弧度(1)/小弧度(0)  顺时针/逆时针  结束位置的坐标
         -->
</svg>

<style>
   path{
           stroke: red;
           fill:transparent;
       }
</style>
10、svg线性渐变
<svg width="500px"height="500px">
    <defs><!-- 所有的定义要先添加到这个标签里边 -->
        <linearGradient id="bg1" x1="0" y1="0" x2="0" y2="100%">
            <stop offset="0%" style="stop-color: rgb(255,255,0);"></stop>
            <stop offset="100%" style="stop-color: rgb(0,255,0);"></stop>
        </linearGradient>
     </defs>
     <rect x="100" y="100" width="200px" height="300px" style="fill:url(#bg1)"></rect>
</svg>
11、高斯模糊(滤镜)
<svg width="1500px" height="1300px" style="border:1px solid #555">
     <defs>
        <linearGradient id="bg1" x1="0" y1="0" x2="0" y2="100%">
            <stop offset="0%" style="stop-color: rgb(255,255,0);"></stop>
            <stop offset="100%" style="stop-color: rgb(0,255,0);"></stop>
        </linearGradient>
       <!--设置一个高斯滤镜-->
        <filter id="gaosi">
            <feGaussianBlur in="SourceGraphic" stdDeviation="20"></feGaussianBlur>
        </filter>
     </defs>

       <rect x="100" y="100" height="100" width="200" style="fill: url(#bg1);filter:url(#gaosi)"></rect>
    </svg>>
12、虚线及简单动画
<svg width="1500px" height="1300px" style="border:1px solid #555">
     <line x1="100" y1="100" x2="300" y2="100" ></line>
</svg>

 <style>
      line{
     stroke: red;
     stroke-width: 5;
     /*stroke-dasharray: 10px 20px 30px;/*设置这条线如何被切分,包括有色和无色部分,都按照参数给的值进行顺序切割*/
     stroke-dasharray: 200px;
     stroke-dashoffset: 10px;/*向左偏移量,虽然向左移动了,但是左边会变成无色部分*/
     animation: move 3s linear infinite alternate;/*可以利用动画来实现一个线条运动动画*/
  }
  @keyframes move{
      0%{
          stroke-dashoffset: 200px;
      }
      100%{
          stroke-dashoffset:0px
      }
  }
    </style>
13、svg的属性viewbox(比例尺/可视区域)
 <svg width="1500px" height="1300px" viewBox="0,0,250,150" style="border:1px solid #555">

      <!-- viewbox -->
      <!-- 起始位置0,0  宽高取了250和150 ,相当于用250的宽度代替了前边设置的500的宽度,用二分之一的长度就可以代表原来的长度,等于是放大了-->
    </svg>
四、audio与video播放器
audio:音频
video:视频
一个视频播放器
<!DOCTYPE html>
<html lang="en">

<head>
    <meta charset="UTF-8">
    <meta name="viewport" content="width=device-width, initial-scale=1.0">
    <title>Document</title>
    <style>
        line {
            stroke: red;
            stroke-width: 5;
            /*stroke-dasharray: 10px 20px 30px;/*设置这条线如何被切分,包括有色和无色部分,都按照参数给的值进行顺序切割*/
            stroke-dasharray: 200px;
            stroke-dashoffset: 10px;
            /*向左偏移量,虽然向左移动了,但是左边会变成无色部分*/
            animation: move 3s linear infinite alternate;
            /*可以利用动画来实现一个线条运动动画*/
        }

        @keyframes move {
            0% {
                stroke-dashoffset: 200px;
            }

            100% {
                stroke-dashoffset: 0px
            }
        }

        * {
            margin: 0;
            padding: 0;
        }

        .video_player {
            position: relative;
            width: 800px;
            height: 500px;
            margin: 0 a;
        }

        video {
            width: 800px;
            height: 500px;
            position: absolute;
            left: 0px;
            top: 0px;
        }

        .menu {
            position: absolute;
            width: 100%;
            height: 50px;
            background-color: rgba(0, 0, 0, 0.5);
            bottom: 0;
            /* display: none; */
        }

        .play {
            position: absolute;
            width: 40px;
            height: 40px;
            text-align: center;
            border: 1px solid #000;
            color: #fff;
            font-size: 14px;
            line-height: 40px;
            border-radius: 20px;
            margin-top: -20px;
            top: 50%;
            cursor: pointer;
        }

        .time {
            position: absolute;
            height: 40px;
            text-align: center;
            color: #fff;
            font-size: 12px;
            line-height: 40px;
            border-radius: 20px;
            margin-top: -20px;
            top: 50%;
            left: 60px;
            cursor: pointer;
        }
        .progress_bar{
            position: absolute;
            width: 100%;
            height: 2px;
            left: 0px;
            top: -2px;
            background: grey;
        }
        .progress_bar div{
            width: 120px;
            height: 2px;
            background: orange;
            position:absolute;
            left:0px;
            top: 0px;

        }

        .progress_bar i{
            width: 6px;
            height: 6px;
            border-radius: 6px;
            position: absolute;
            left: 120px;
            top: -3px;
            background: rgb(255, 102, 0);
            border: 2px solid #fff;
            cursor: pointer;
        }
        .quick{
            position: absolute;
            width: 70px;
            height: 30px;
            text-align: center;
            color: #fff;
            font-size: 12px;
            line-height: 30px;
            border-radius: 20px;
            margin-top: -15px;
            border: 1px solid #fff;
            border-radius: 10px;
            top: 50%;
            right: 200px;
            cursor: pointer;

        }
        .quick_list{
            position: absolute;
            width: 70px;
            height: 120px;
            /* background: pink; */
            border: 1px solid #999;
            border-radius: 10px;
            /* left: -0px; */
            top: -123px;
            list-style: none;
            display: none;
        }
        .quick_list li{
            position: relative;
            width: 100%;
            height: 30px;
            line-height: 30px;
            text-align: center;
            cursor:pointer;
        }
        .quick_list li:hover{
            color:green;
        }

       .vol div{
            position: absolute;
            width: 20px;
            height: 20px;
            text-align: center;
            color: #fff;
            font-size: 12px;
            line-height: 20px;
            border-radius: 20px;
            margin-top: -10px;
            border: 1px solid #fff;
            border-radius: 10px;

            cursor: pointer;
       }
        .vol_add{
            top: 50%;
            right: 100px;

        }
        .vol_dis{
            top: 50%;
            right: 150px;
        }
        .full_screen{
            position: absolute;
            right: 10px;
            top: 50%;
            margin-top: -15px;
            font-size: 12px;
            color: #fff;
            line-height: 30px;
            text-align: center;
            border-radius: 5px;
            width: 30px;
            height: 30px;
            cursor: pointer;
            border: 1px solid #aaa;
        }
    </style>
</head>

<body>
    <!-- <audio src="" controls>要添加contrls的属性,原生的才可以使用,只是样式是默认的</audio> -->

    <div class="video_player">
        <video src="蓝色的天空.mp4"></video>
        <div class="menu">
            <div class="play">播放</div>
            <div class="progress_bar">
                <div></div>
                <i></i>
            </div>
            <div class="time">00:00:00/45:45:00</div>
            <div class="quick">
                <span>倍速</span>
                <ul class="quick_list">
                    <li>1.0</li>
                    <li>1.25</li>
                    <li>1.5</li>
                    <li>2.0</li>
                </ul>
            </div>
            <div class="vol">
                <div class="vol_add">+</div>
                <div class="vol_dis">-</div>
            </div>
            <div class="full_screen">全屏</div>
        </div>
    </div>


    <script>
        var player = document.getElementsByClassName('video_player')[0];
        var menu = document.getElementsByClassName('menu')[0];
        var play = document.querySelector('.play');
        var video = document.querySelector('video');
        var time = document.querySelector('.time');
        //视频的播放与暂停
        player.onmouseenter = function () {
            menu.style.display = "block"
        }
        player.onmouseleave = function () {
            menu.style.display = "none";
            // quickList.style.display = "none";
        }

        play.onclick = function () {

            if (video.paused) {//判断当前视频是否已经暂停
                video.play();//视频播放方法
                play.innerHTML = "暂停";
            } else {
                video.pause();//视频暂停方法
                play.innerHTML = "播放";
            }

        }
        //视频播放的时间进度显示
        setInterval(() => {
            var total = video.duration;
            var nowTime = video.currentTime;
            time.innerHTML = parseInt(nowTime / 60) + ":" + parseInt(nowTime % 60) + "/" + parseInt(total / 60) + ":" + parseInt(total % 60)
            width = nowTime/total* bar.clientWidth;
            bar.querySelector('div').style.width = width + "px";
            bar.querySelector('i').style.left = width + "px";

        }, (1000));
        //进度条
        var bar = document.querySelector('.progress_bar');
        bar.onmouseenter = function(){
            bar.style.height = "10px";
            bar.style.top = "-10px"
            bar.querySelector('div').style.height = "10px"
            bar.querySelector('i').style.height="12px";
            bar.querySelector('i').style.width="12px";
            bar.querySelector('i').style.borderRadis="12px";
        }
        bar.onmouseleave = function(){
            bar.style.height = "2px";
            bar.style.top = "-2px"
            bar.querySelector('div').style.height = "2px"
            bar.querySelector('i').style.height="6px";
            bar.querySelector('i').style.width="6px";
            bar.querySelector('i').style.borderRadis="6px";
        }
        bar.onclick = function(e){
            var location = e.layerX;
            var width = bar.clientWidth;
            var target = location / width * video.duration;
            video.currentTime = target;
            console.log(width)
            console.log(location);
        }
        //调节视频倍速播放
        var quick = document.querySelector('.quick');
        var quickList = document.querySelector('.quick_list')
        var liList = quickList.querySelectorAll("li");
        console.log(liList);
        quick.onclick = function(){
            console.log("倍速");
            console.log(quickList)
            quickList.style.display = "block";
            console.log(quickList)
        }
        quickList.onmouseleave = function(){
            quickList.style.display = "none";
        }
        liList.forEach(function(item,index){
            item.onclick = function(){
                if(index == 0){
                    video.playbackRate = 1;
                    quick.querySelector('span').innerHTML = "倍速"
                }else if(index ==1){
                    video.playbackRate = 1.25;
                    quick.querySelector('span').innerHTML = "X1.25"
                }else if(index == 2){
                    video.playbackRate = 1.5;
                    quick.querySelector('span').innerHTML = "X1.5"
                }else{
                    video.playbackRate = 2;
                    quick.querySelector('span').innerHTML = "X2"
                }
            }
        })


        // 视频播放音量调节
        var volAdd = document.querySelector('.vol_add');
        var volDis= document.querySelector('.vol_dis');
        volAdd.onclick = function(){
            console.log("add")
            video.volume  = video.volume + 0.1 > 1 ? 1 : video.volume + 0.1;
        }
        volDis.onclick = function(){
            video.volume  = video.volume - 0.1 < 0 ? 0 : video.volume - 0.1;
        }


        // 视频播放器全屏
        var fullScreen = document.querySelector('.full_screen');
        var isFull = false;
        var vOriginWidth = player.offsetWidth;
        var vOrightHeight = player.offsetHeight;
        fullScreen.onclick = function(){

            console.log(vOriginWidth);
            if(!isFull){
                isFull = true;
                var dom = document.documentElement;
                dom.requestFullscreen();
                video.style.width = "100%";
                video.style.height = "100%";
                player.style.width = window.screen.width+ 'px';
                player.style.height = window.screen.height - 50 + "px";
                // fullScreen.innerHTML = "还原"
            }
            // else{
            //     isFull = false;
            //     var dom = document.fullscreenElement;
            //     dom.exitFullscreen()
            //     video.style.width = "100%";
            //     video.style.height = "100%";
            //     player.style.width = vOriginWidth + 'px';
            //     player.style.height = vOrightHeight + "px";
            //     fullScreen.innerHTML = "全屏"
            // }

        }


    </script>
</body>

</html>

若有收获,就点个赞吧
0 人点赞
