- SpringCloud中的介绍
- 声明式REST客户端
- Feign是一个声明式 Web 服务客户端。它使编写 Web 服务客户端变得更容易。它的使用方法是定义一个服务接口然后在上面添加注解。Feign也支持可拔插式的编码器和解码器。Spring Cloud对Feign进行了封装,使其支持了Spring MVC标准注解和HttpMessageConverters。Feign可以与Eureka和Ribbon组合使用以支持负载均衡
- 作用
- Feign旨在使编写Java Http客户端变得更容易。
- 前面在使用Ribbon+RestTemplate时,利用RestTemplate对http请求的封装处理,形成了一套模版化的调用方法。但是在实际开发中,由于对服务依赖的调用可能不止一处,往往一个接口会被多处调用,那么每个类中都需要引入RestTemplate,所以通常都会针对每个微服务自行封装一些客户端类来包装这些依赖服务的调用。
- 所以,Feign在此基础上做了进一步封装,由他来帮助我们定义和实现依赖服务接口的定义。在Feign的实现下,我们只需创建一个接口并使用注解的方式来配置它(以前是Dao接口上面标注Mapper注解,现在是一个微服务接口上面标注一个Feign注解即可),即可完成对服务提供方的接口绑定,简化了使用Spring Cloud Ribbon时,自动封装服务调用客户端的开发量。
- 同时,Feign集成了Ribbon,以实现负载均衡
- OpenFeign是Spring Cloud 在Feign的基础上支持了Spring MVC的注解,如
@RequesMapping等等。
OpenFeign的使用
- 微服务调用接口+@FeignClient注解
演示OpenFeign的使用
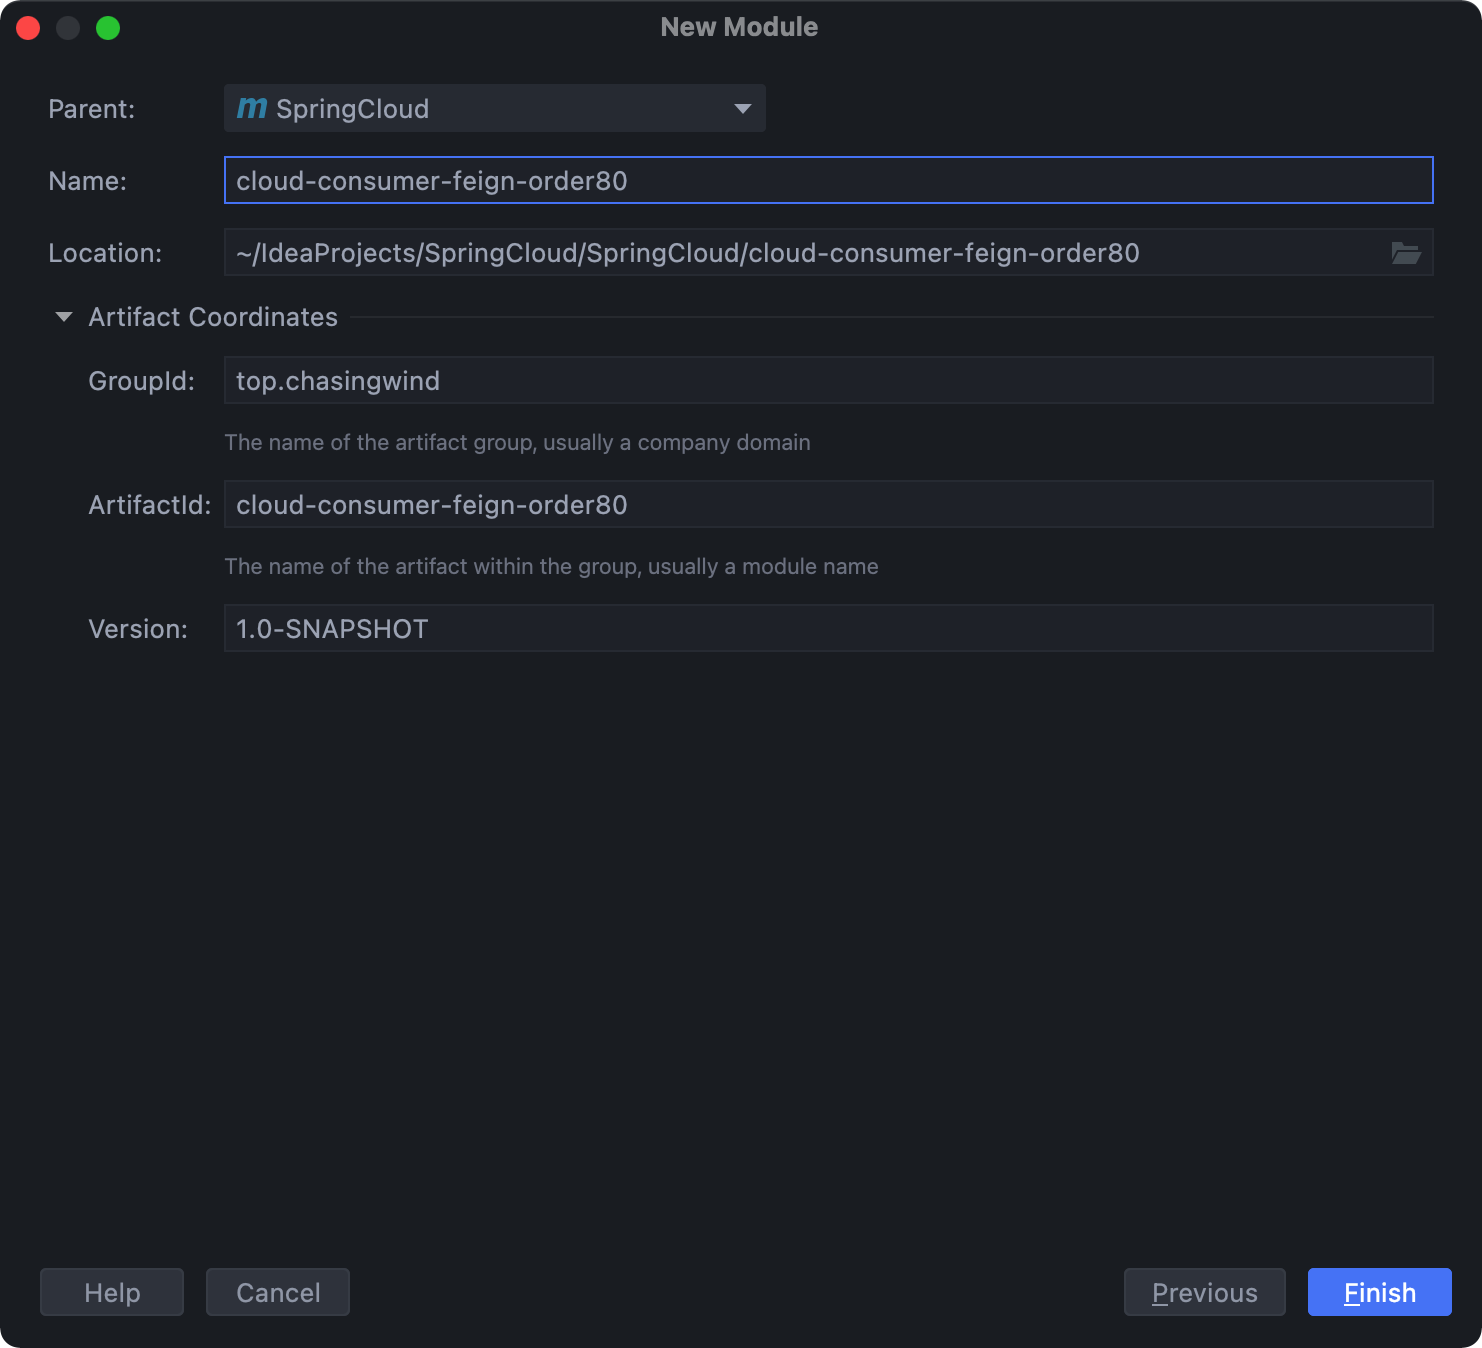
新建Module
xi
修改pom文件
<dependencies><!--openfeign--><dependency><groupId>org.springframework.cloud</groupId><artifactId>spring-cloud-starter-openfeign</artifactId></dependency><!--eureka client--><dependency><groupId>org.springframework.cloud</groupId><artifactId>spring-cloud-starter-netflix-eureka-client</artifactId></dependency><!-- 引入自己定义的api通用包,可以使用Payment支付Entity --><dependency><groupId>top.chasingwind</groupId><artifactId>cloud-api-commons</artifactId><version>${project.version}</version></dependency><!--web--><dependency><groupId>org.springframework.boot</groupId><artifactId>spring-boot-starter-web</artifactId></dependency><dependency><groupId>org.springframework.boot</groupId><artifactId>spring-boot-starter-actuator</artifactId></dependency><!--一般基础通用配置--><dependency><groupId>org.springframework.boot</groupId><artifactId>spring-boot-devtools</artifactId><scope>runtime</scope><optional>true</optional></dependency><dependency><groupId>org.projectlombok</groupId><artifactId>lombok</artifactId><optional>true</optional></dependency><dependency><groupId>org.springframework.boot</groupId><artifactId>spring-boot-starter-test</artifactId><scope>test</scope></dependency></dependencies>
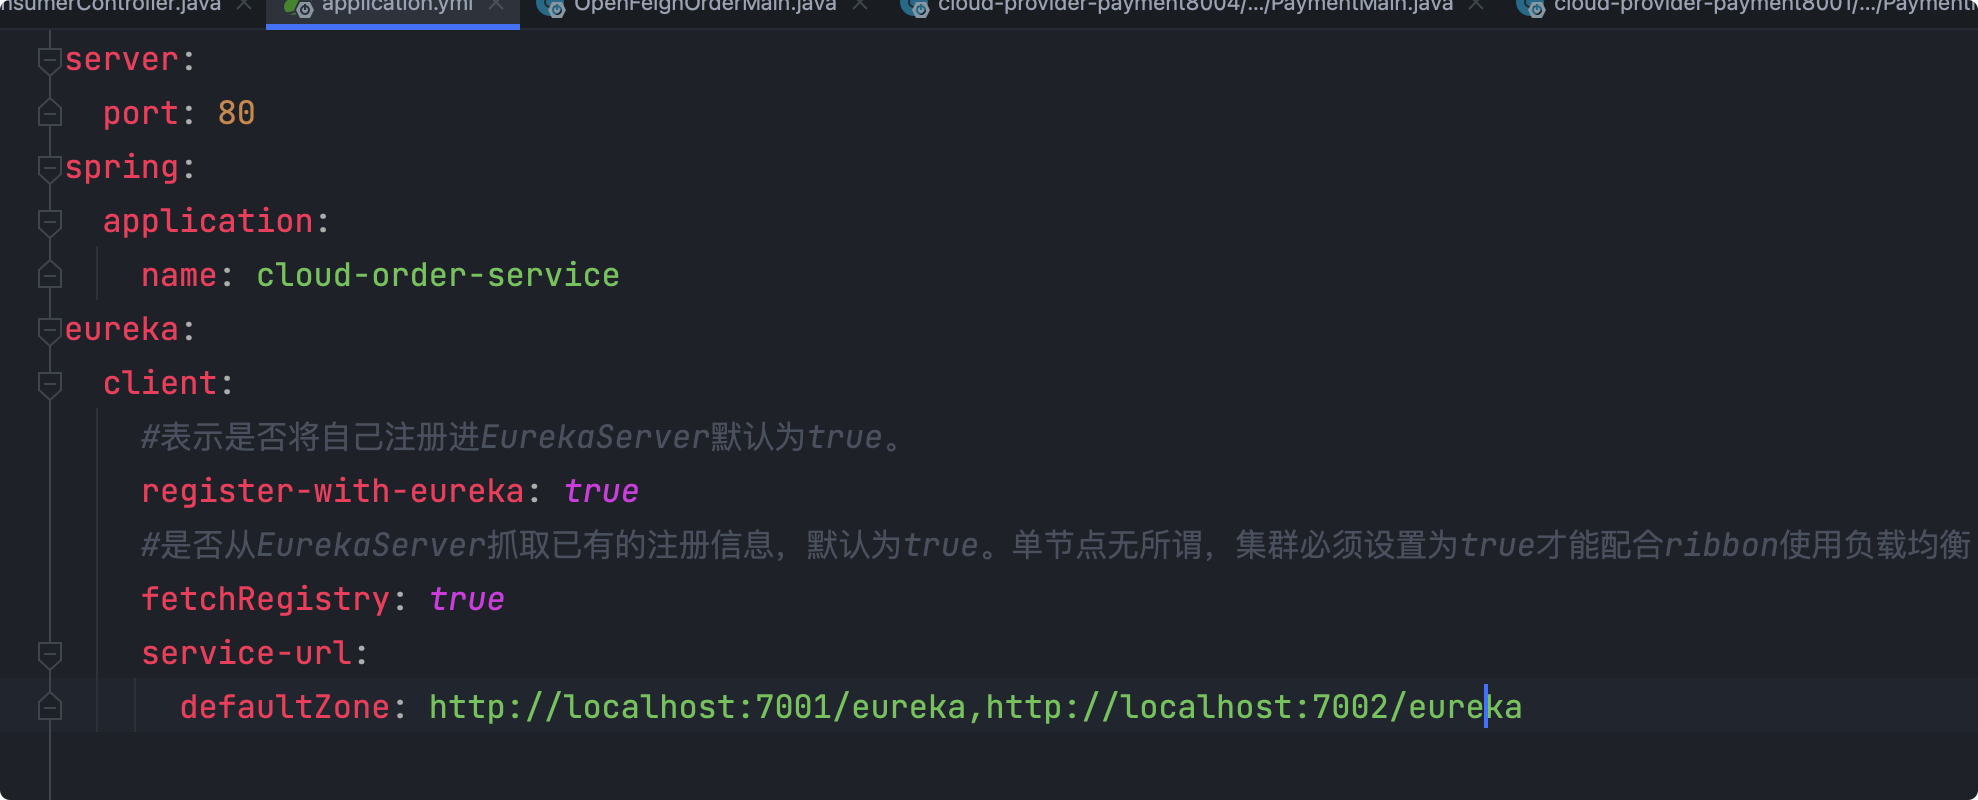
修改配置文件
编写主程序类
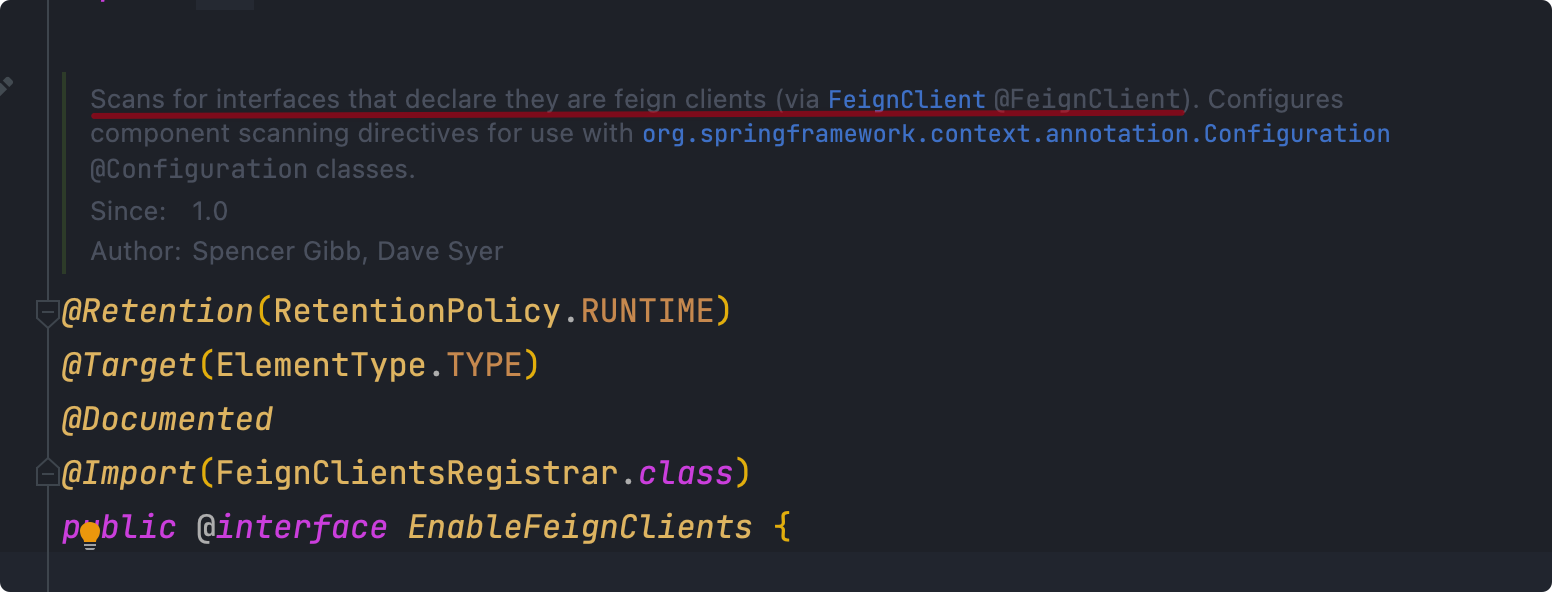
添加注解
@EnableFeignClients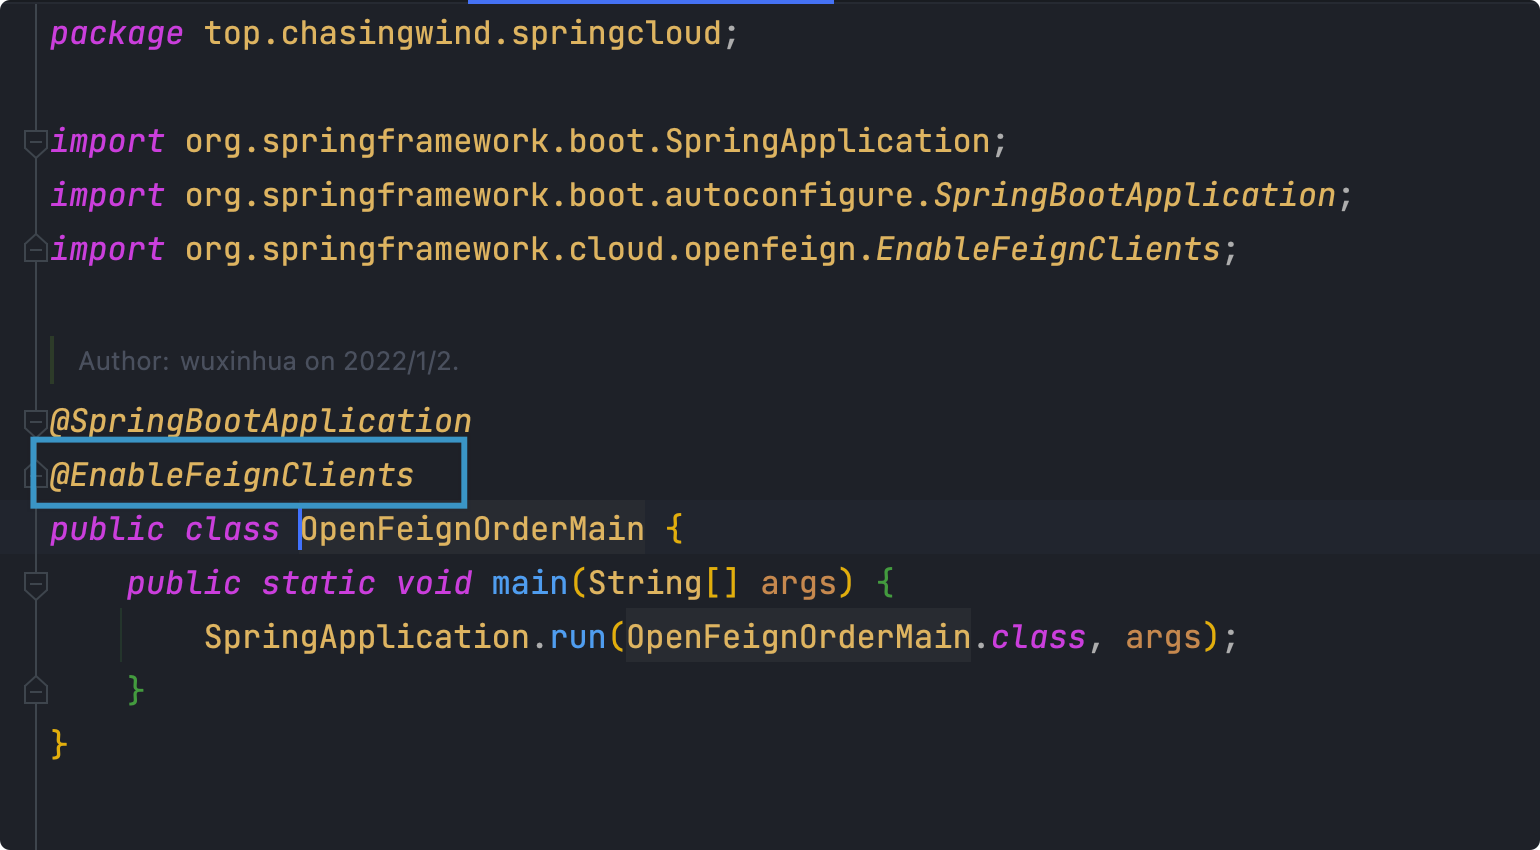
编写业务类
定义Service接口并新增注解
@FeignClient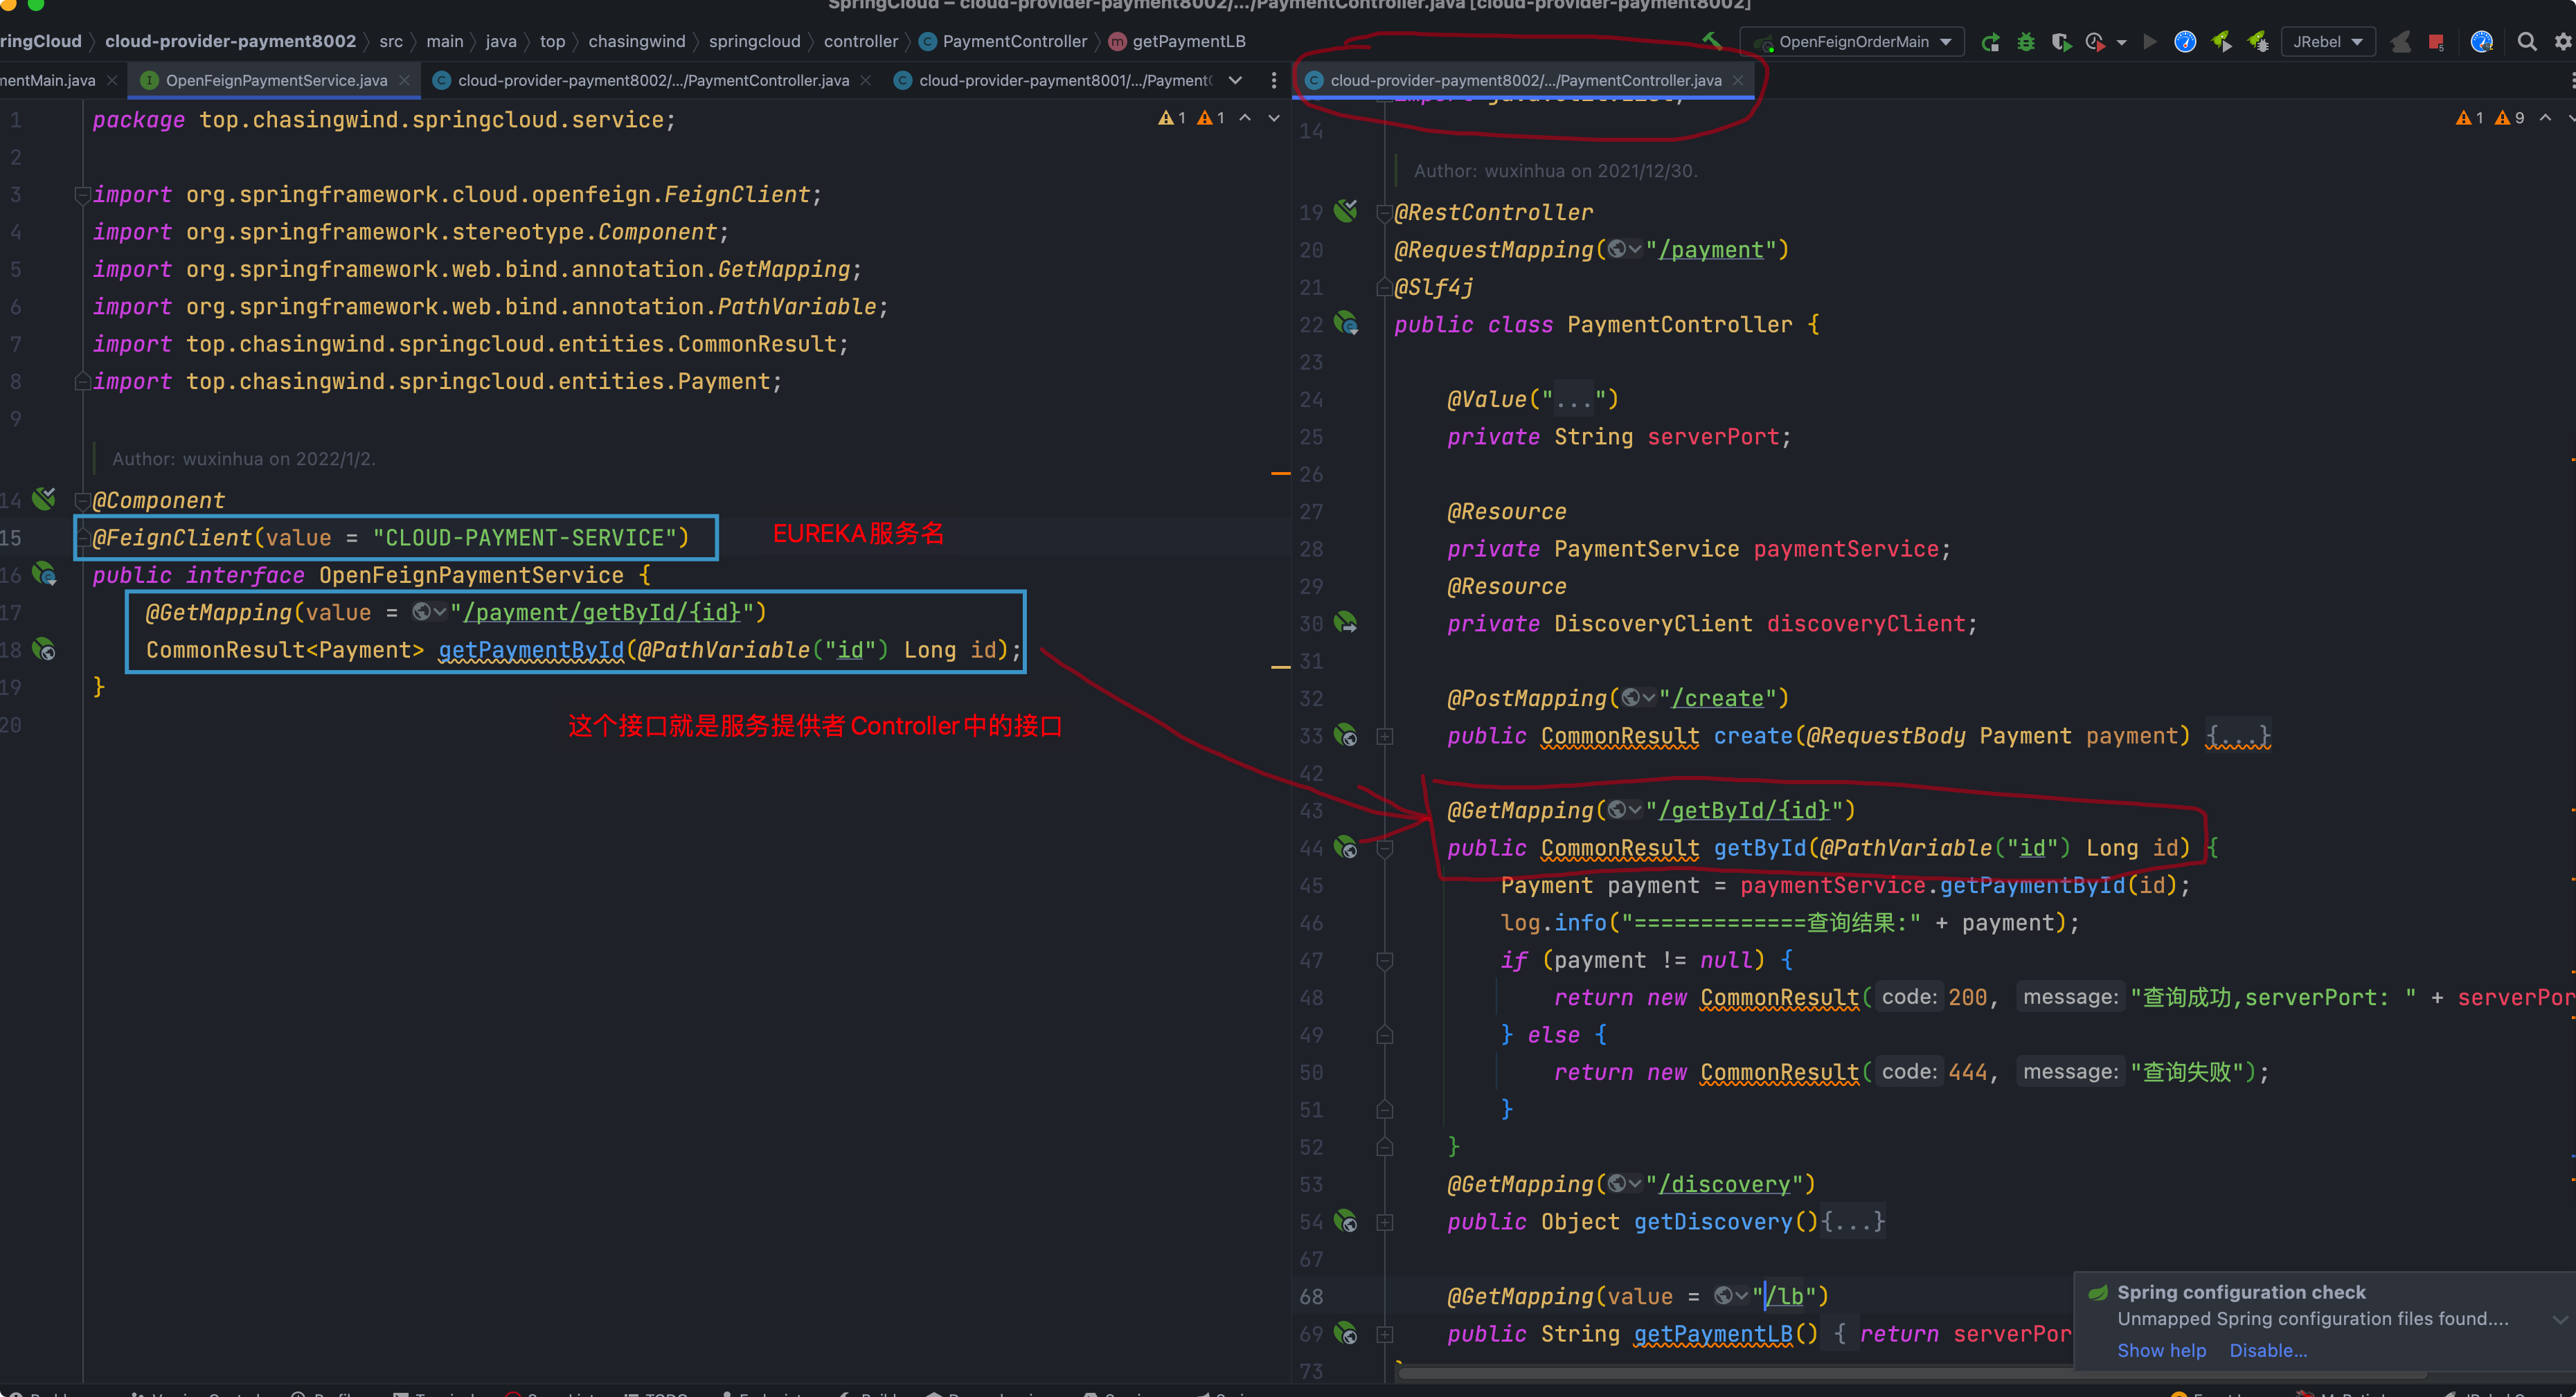
客户端Controller层直接调用客户端的Service,客户端的Service中记录的有服务端的Controller中的接口
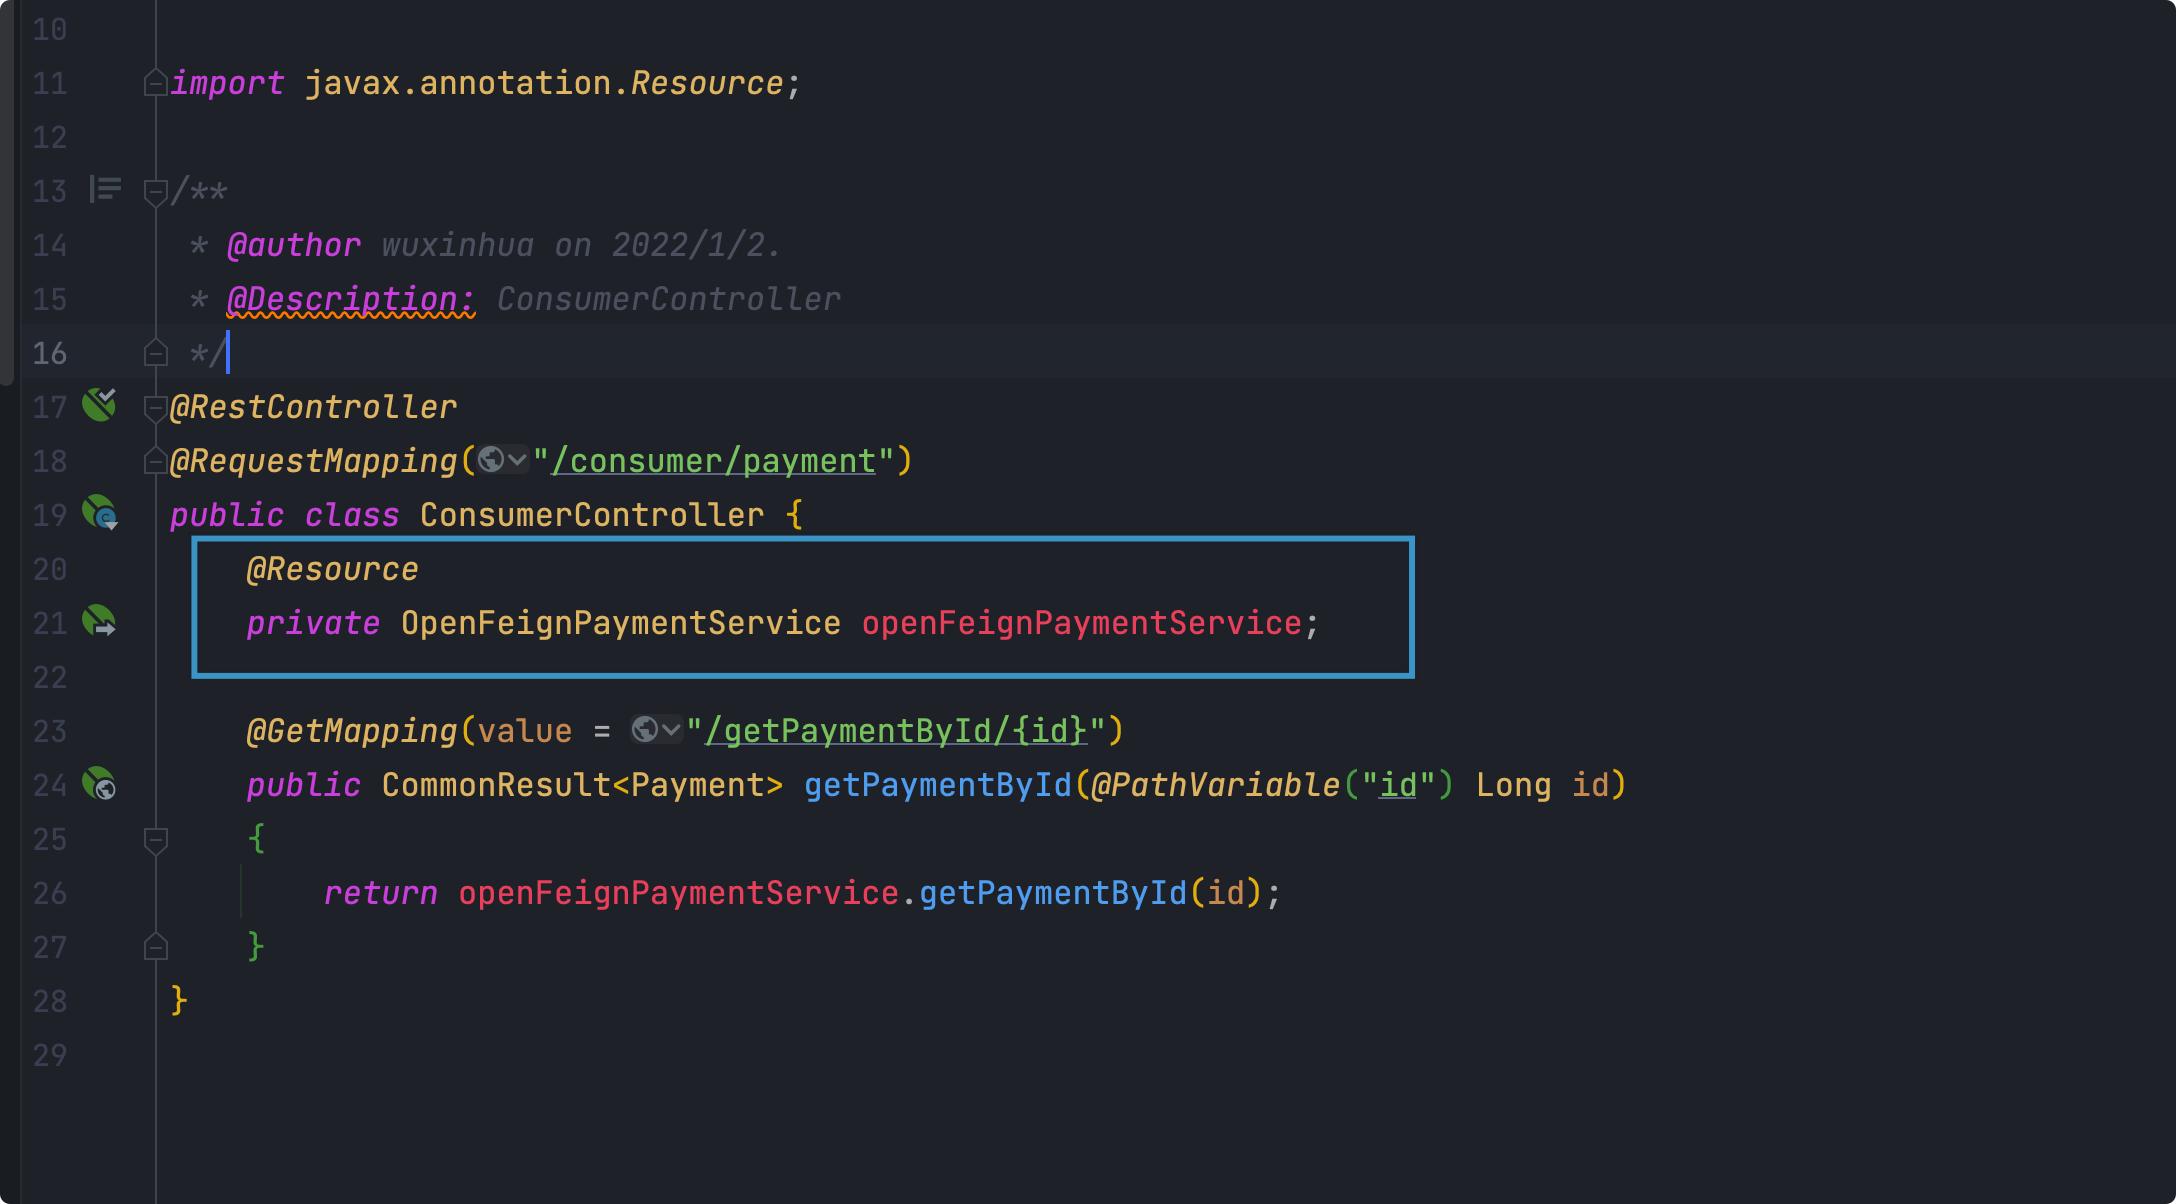
测试
客户端可以成功调用到服务端,并且实现了负载均衡
同时印证了OpenFeign自带Ribbon负载均衡的功能

总结
- 好处就是将服务端需要暴露的接口在客户端中的Service接口中进行记录,这样就避免了使用RestTemplate调用服务的时候每次都需要写接口地址
- 更加符合编码习惯,客户端的Controller调用客户端的Service
OpenFeign超时控制
- OpenFeign客户端在调用服务端的服务时,默认等待1s,超时未获取服务端的结果就报错
案例演示
服务端sleep3s
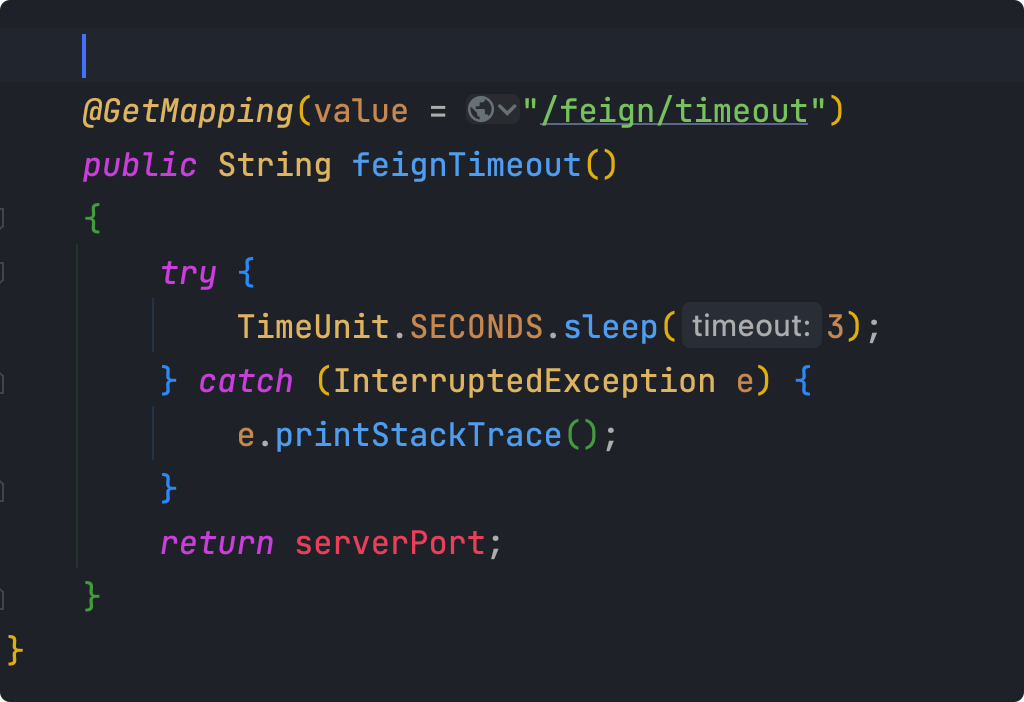
客户端通过OpenFeign的方式调用服务端
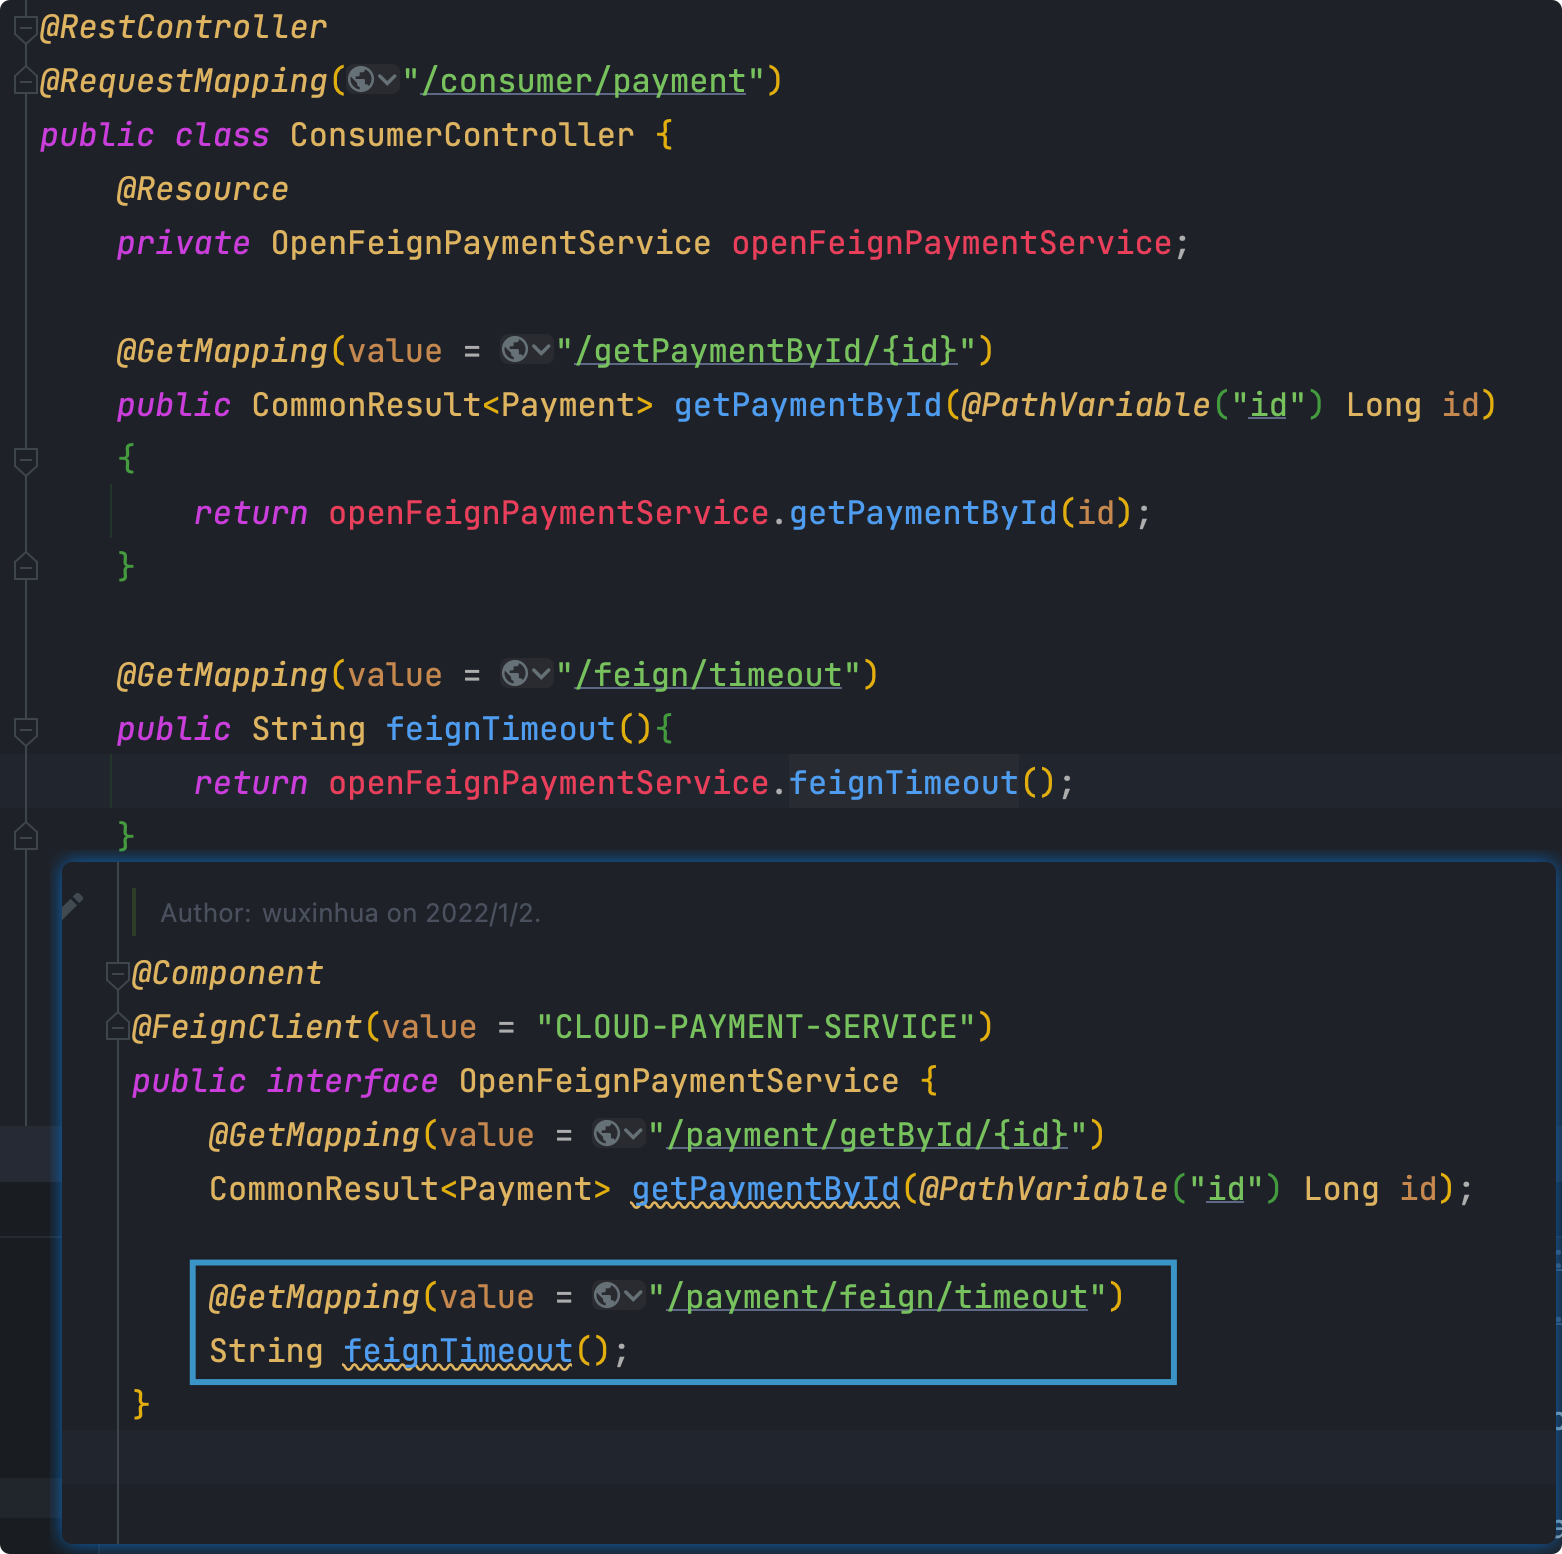
测试服务端可以访问并获取结果

测试客户端,报错500超时
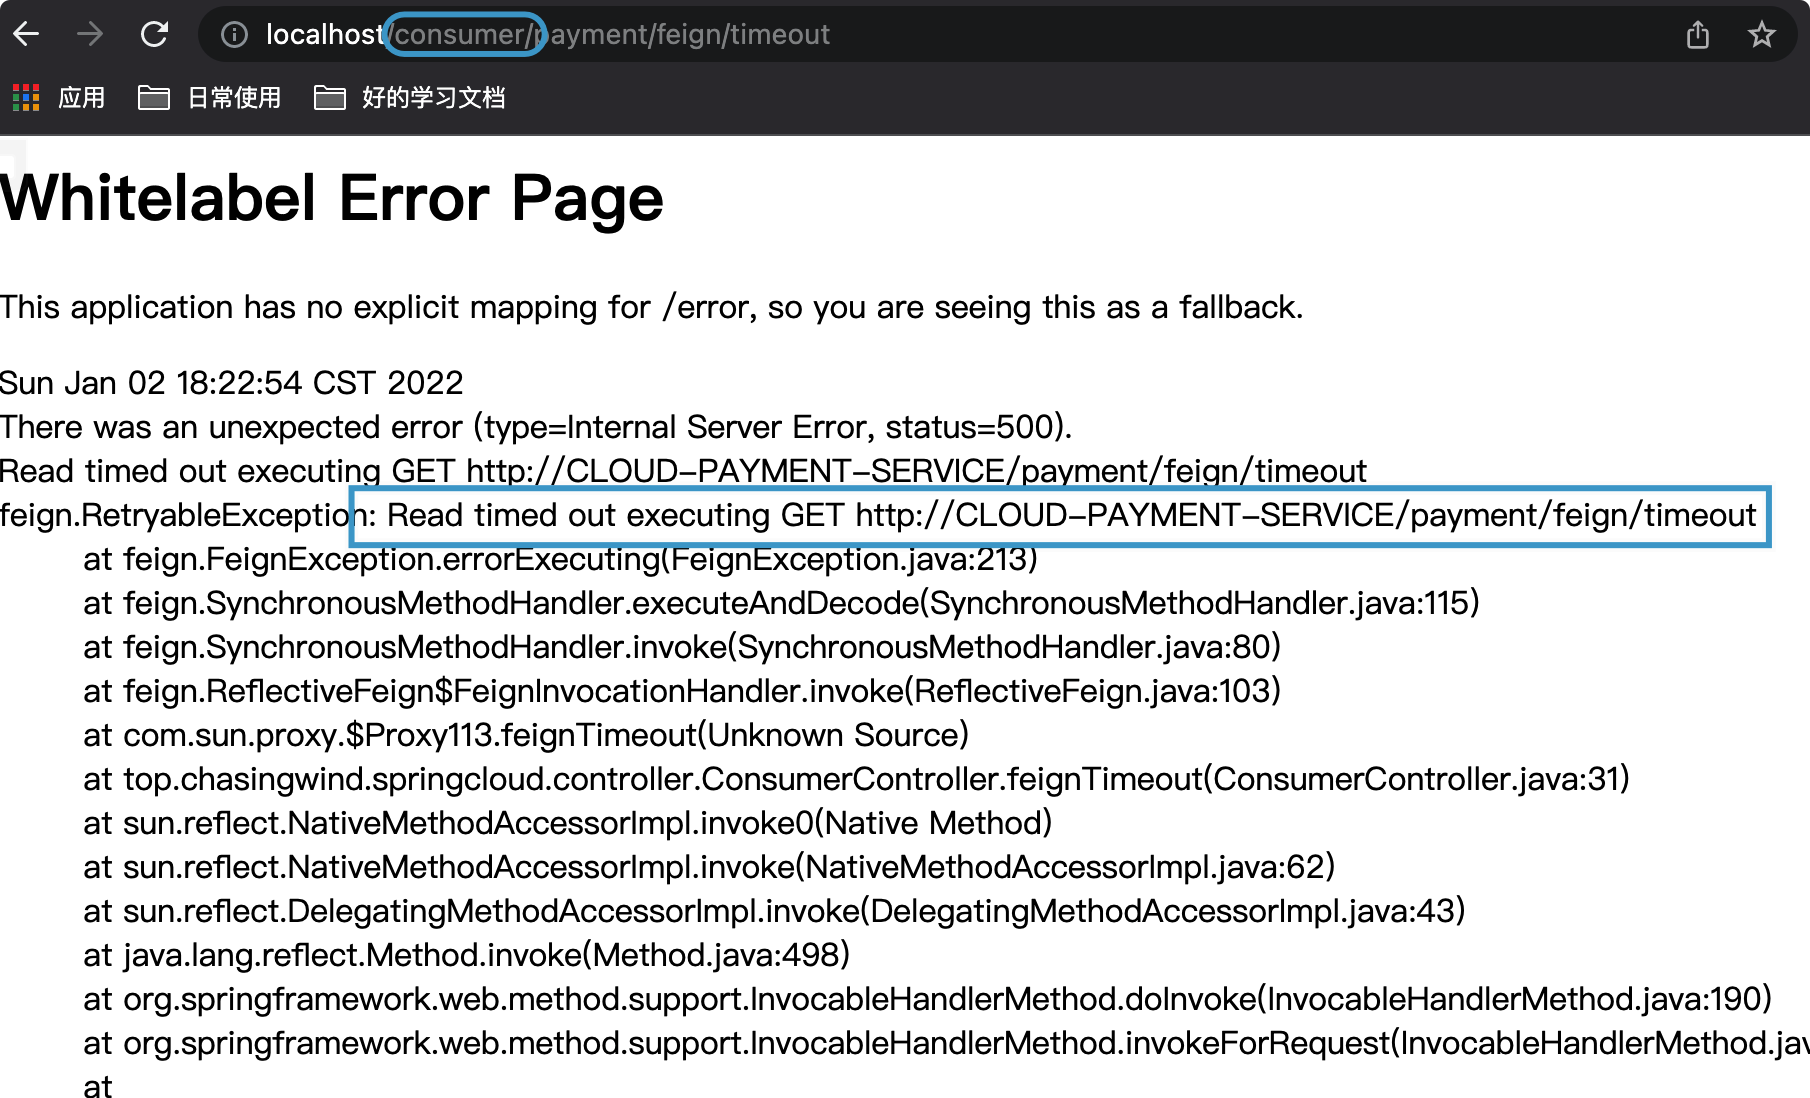
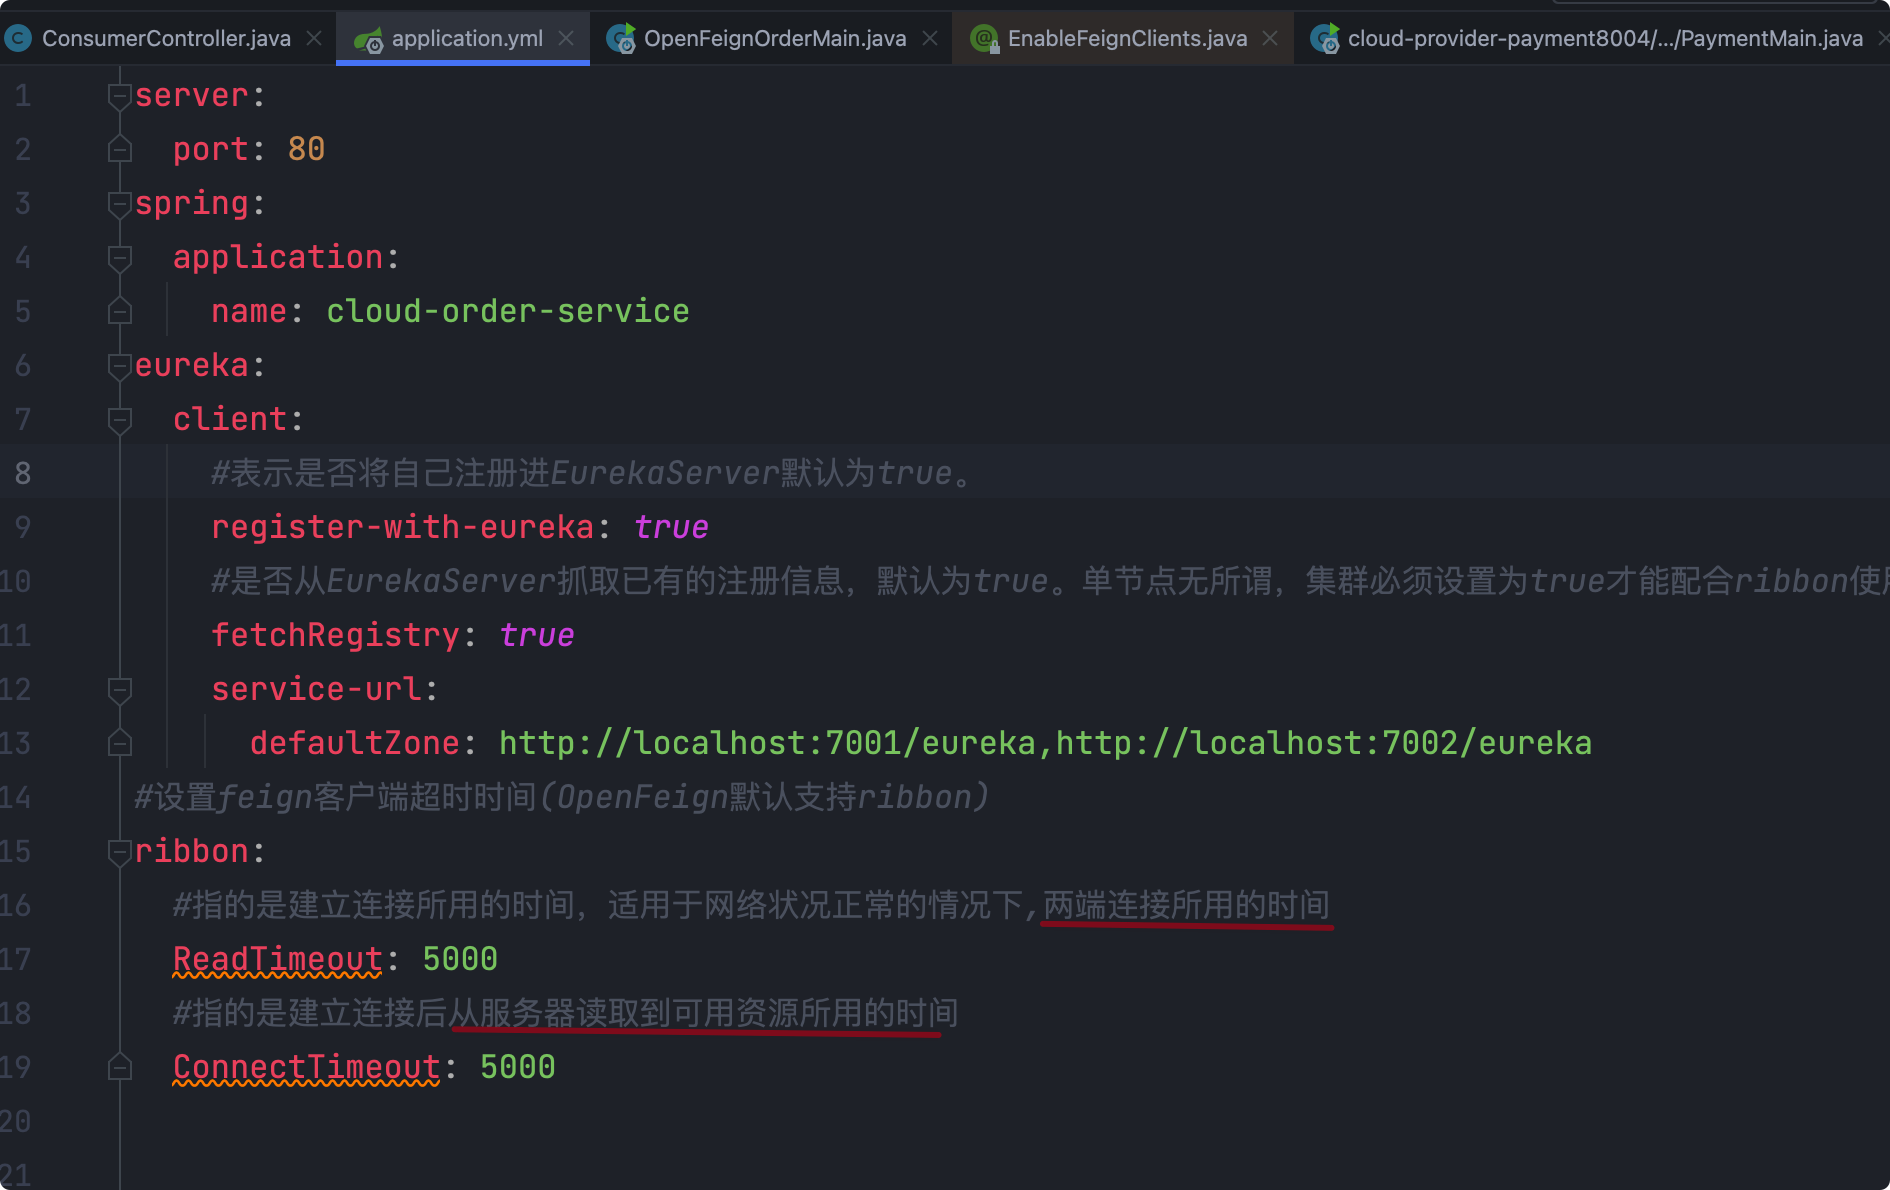
配置超时时间
OpenFeign的超时控制使用的是Ribbon实现的
所以在配置文件中可以通过Ribbon的ReadTimeout和ConnectTimeout来实现对超时时间的控制
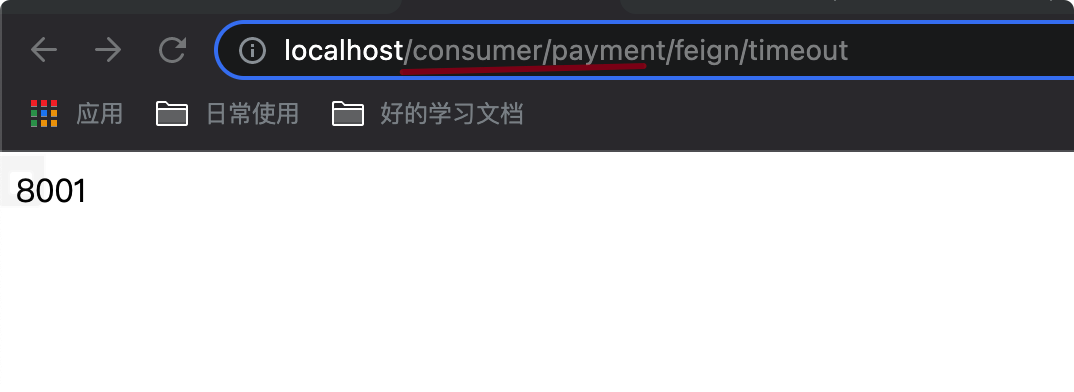
重启客户端之后进行测试,客户端调用sleep3s的服务端不再报错
OpenFeign日志打印功能
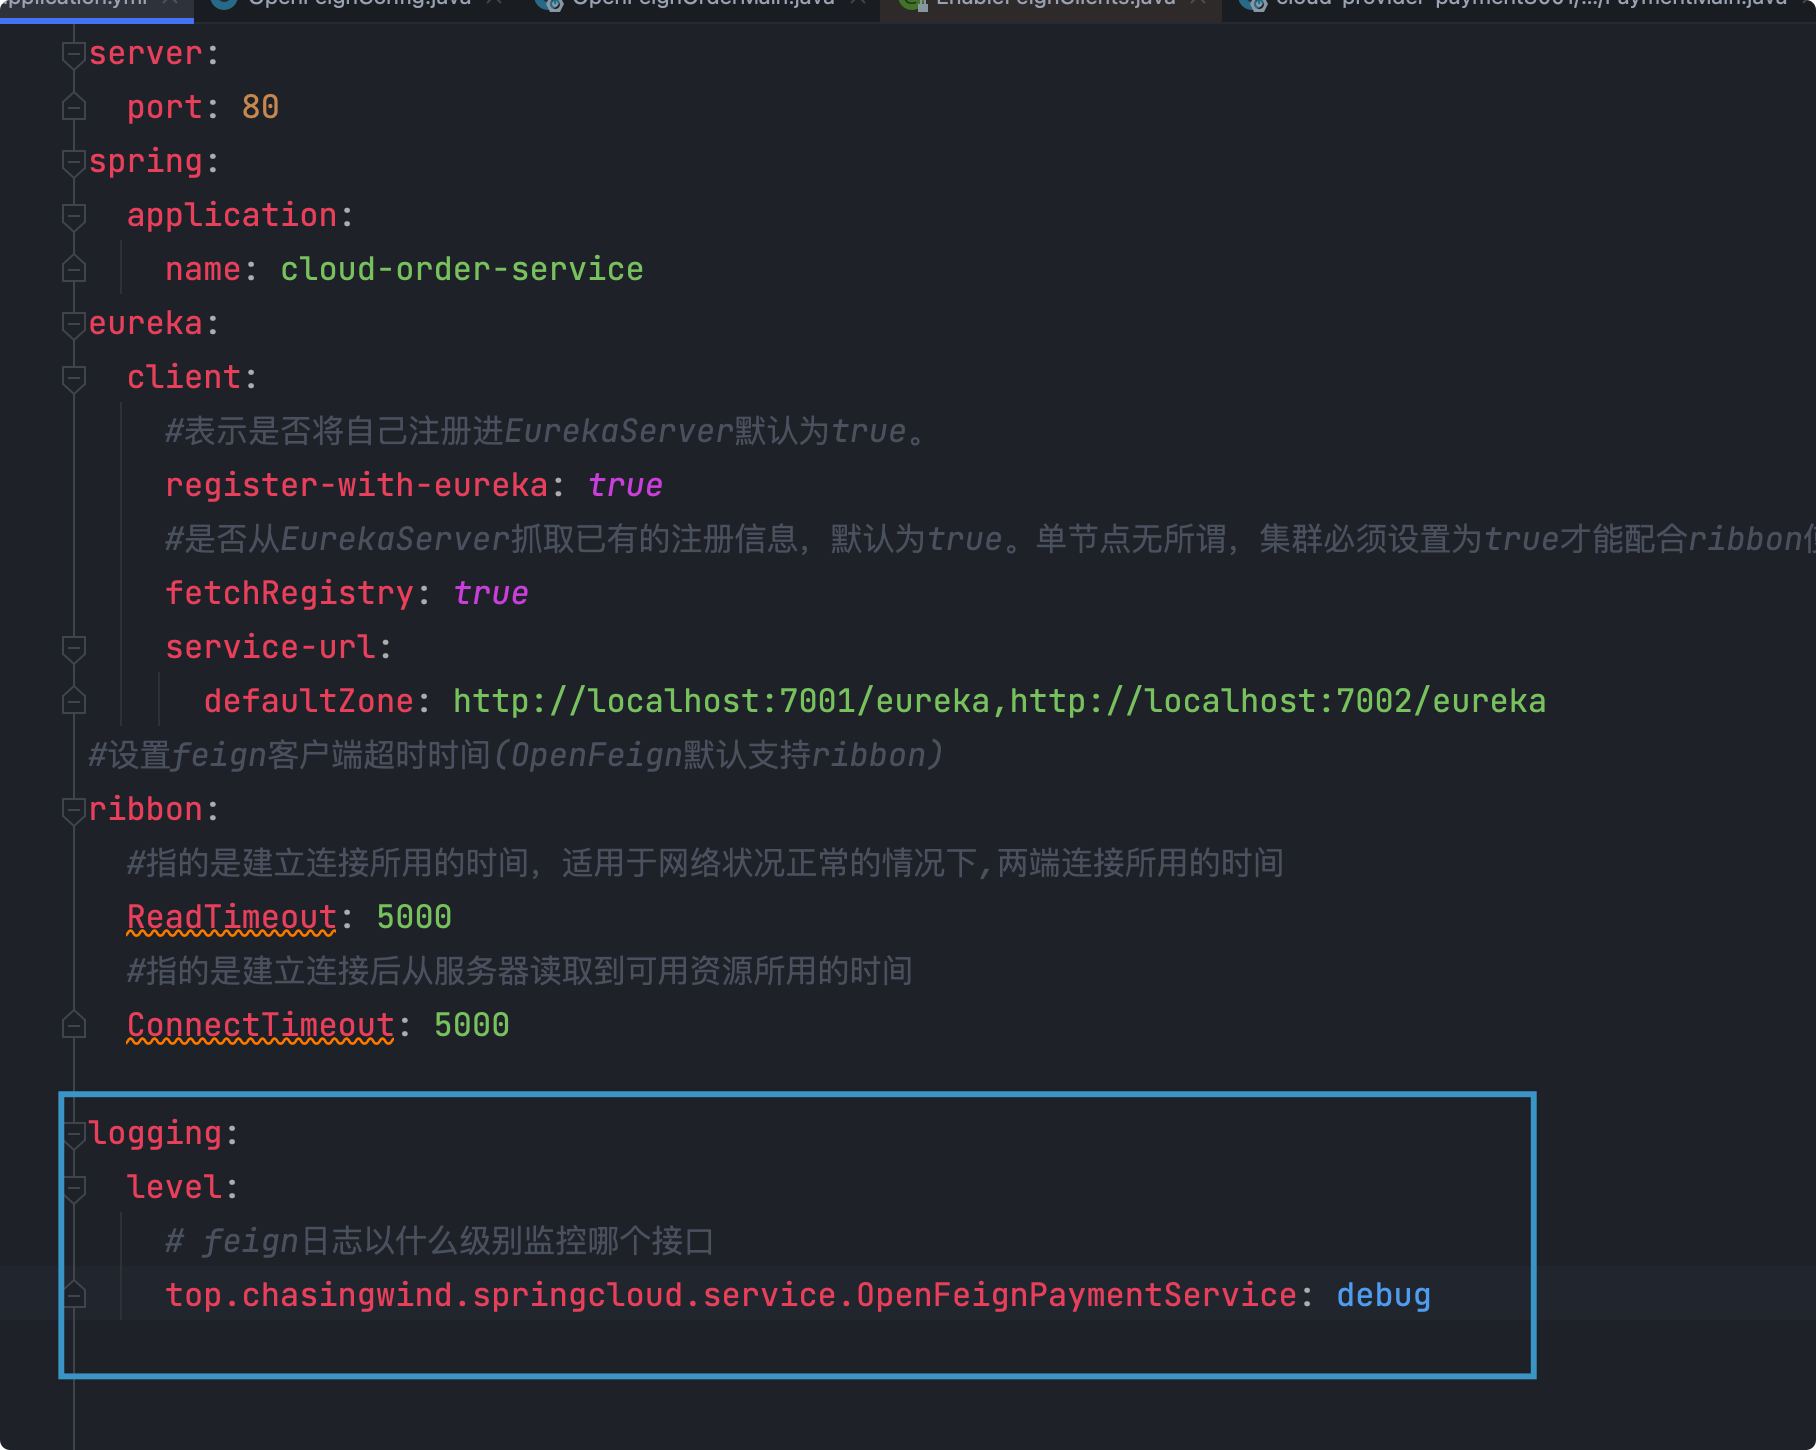
- Feign 提供了日志打印功能,我们可以通过配置来调整日志级别,从而了解 Feign 中 Http 请求的细节。也即对Feign接口的调用情况进行监控和输出
- 日志级别
- NONE:默认的,不显示任何日志;
- BASIC:仅记录请求方法、URL、响应状态码及执行时间;
- HEADERS:除了 BASIC 中定义的信息之外,还有请求和响应的头信息;
- FULL:除了 HEADERS 中定义的信息之外,还有请求和响应的正文及元数据。
- 使用
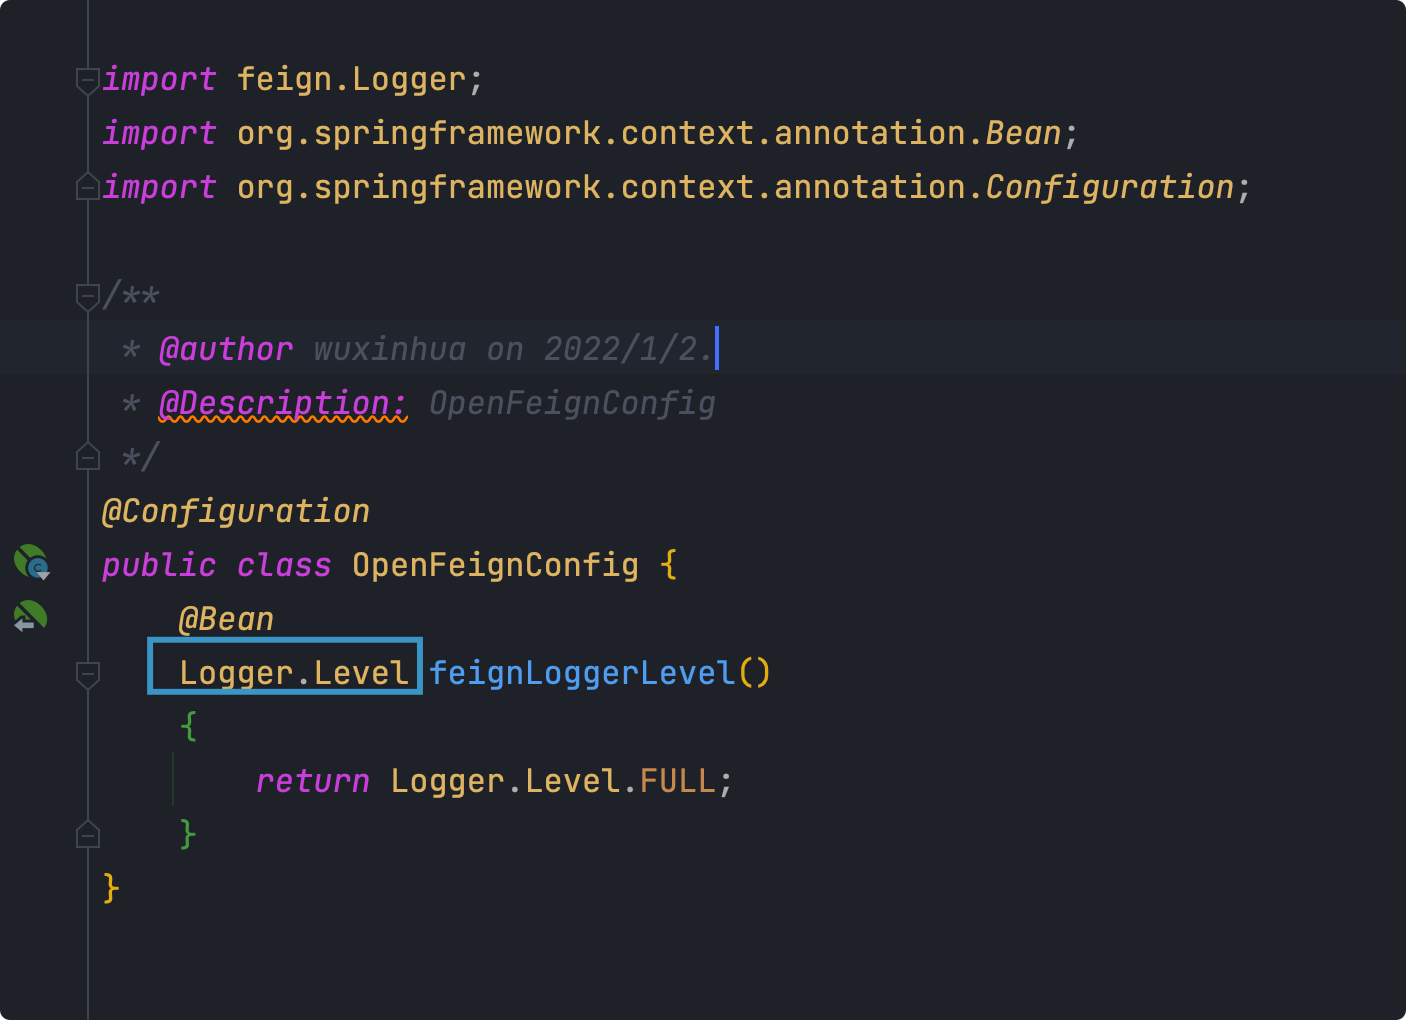
使用配置类将Logger.Level注入IOC容器
在配置文件中进行配置对哪一个服务进行监控以及监控级别
调用测试,控制台日志信息

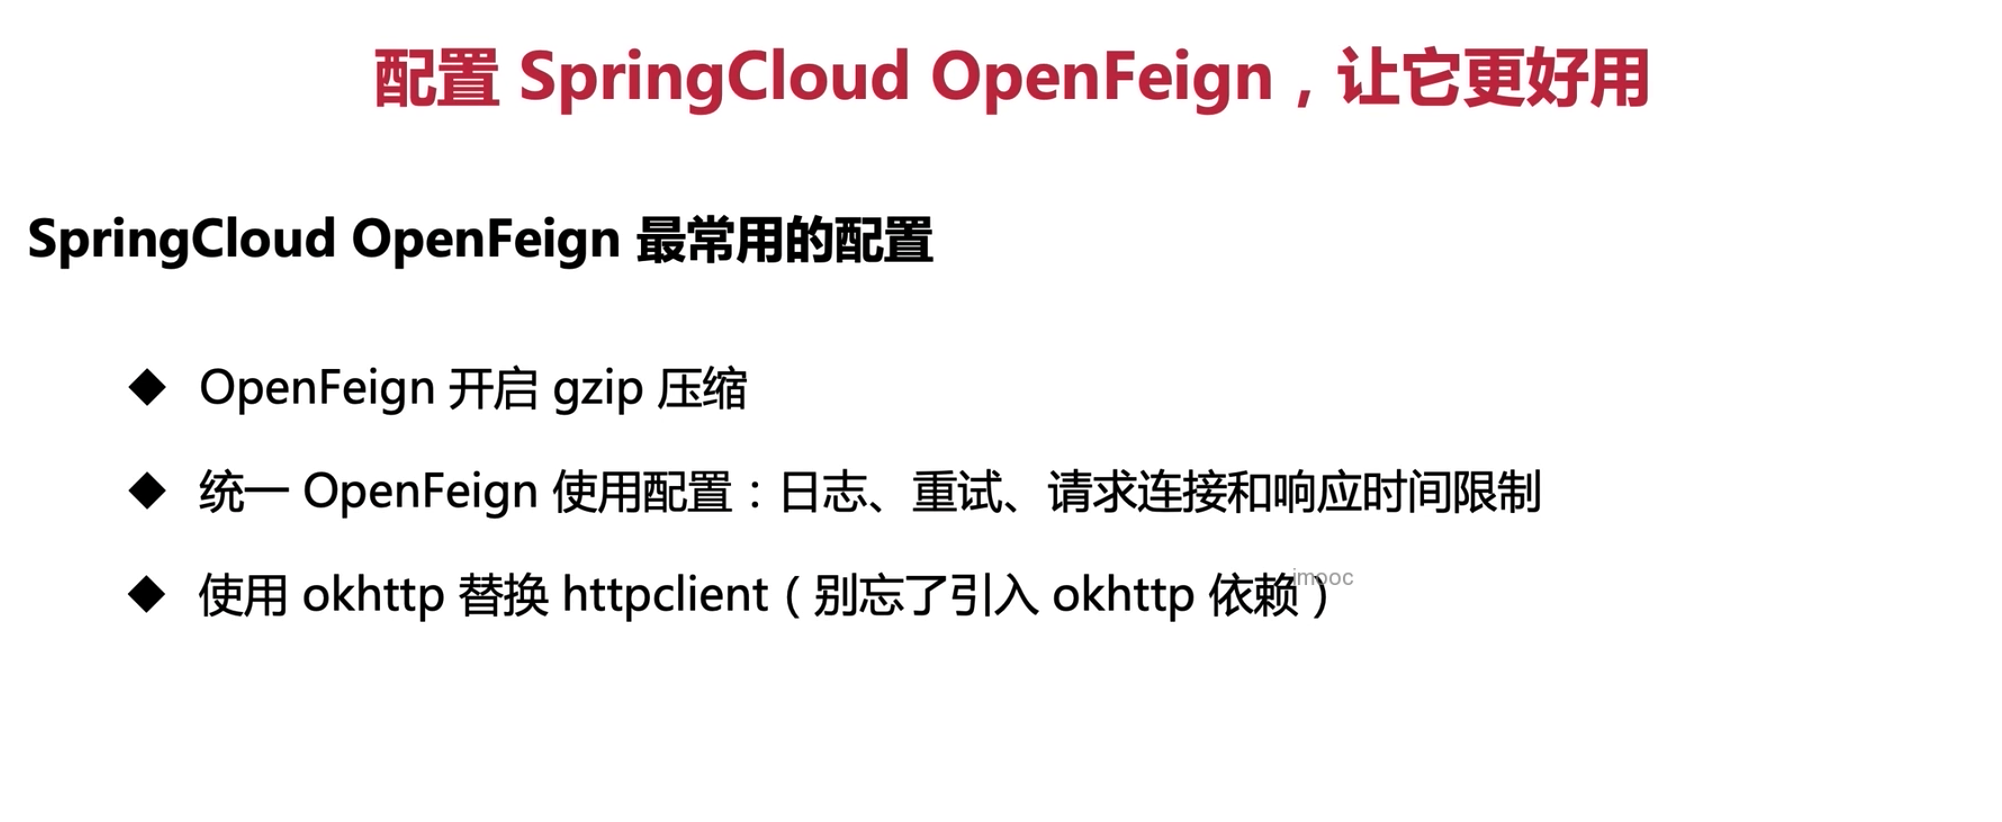
OpenFeign常用配置
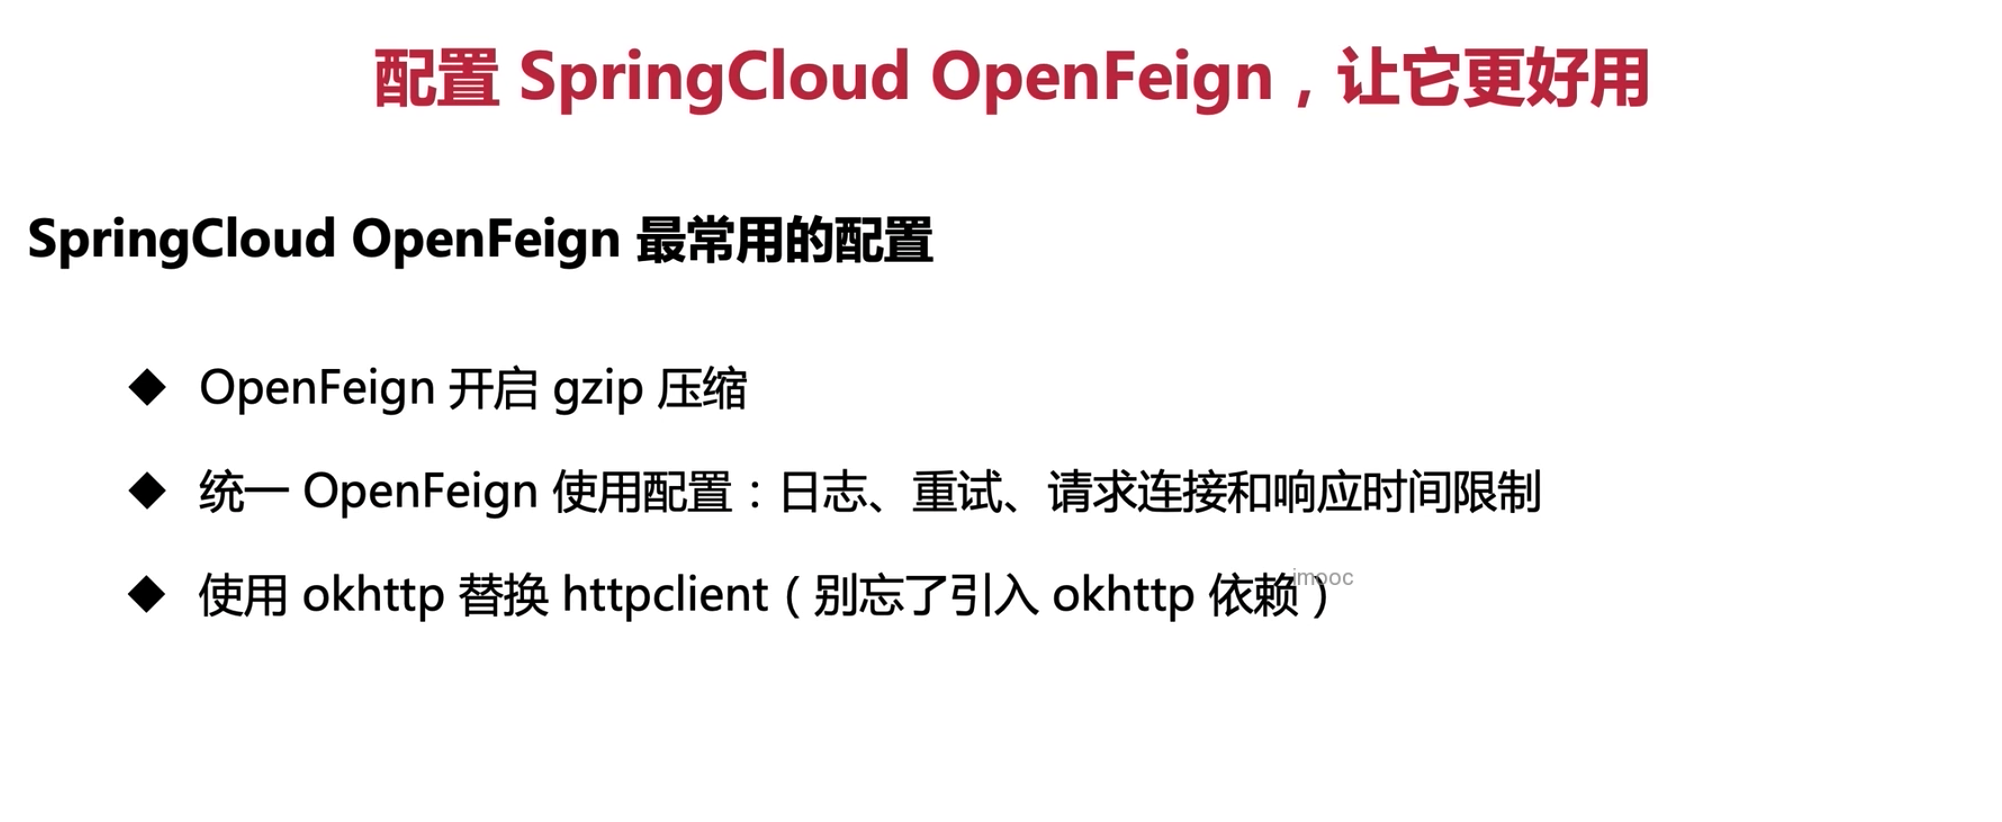
gzip压缩配置
feign:compression:request:enabled: truemime-types: text/xml,application/xml,application/jsonmin-request-size: 1024 # 大于1MB才开始压缩response:enabled: true
配置重试、请求连接和响应时间限制
@Configurationpublic class OpenFieConfig {/*** <h2>开启 OpenFeign 日志</h2>*/@Beanpublic Logger.Level feignLogger() {return Logger.Level.FULL; // 需要注意, 日志级别需要修改成 debug}/*** <h2>OpenFeign 开启重试</h2>* period = 100 发起当前请求的时间间隔, 单位是 ms* maxPeriod = 1000 发起当前请求的最大时间间隔, 单位是 ms* maxAttempts = 5 最多请求次数*/@Beanpublic Retryer feignRetryer() {return new Retryer.Default(100,SECONDS.toMillis(1),5);}public static final int CONNECT_TIMEOUT_MILLS = 5000;public static final int READ_TIMEOUT_MILLS = 5000;/*** <h2>对请求的连接和响应时间进行限制</h2>*/@Beanpublic Request.Options options() {return new Request.Options(CONNECT_TIMEOUT_MILLS,READ_TIMEOUT_MILLS,true);}}
替换okhttp
引入依赖
<!-- feign 替换 JDK 默认的 URLConnection 为 okhttp --><dependency><groupId>io.github.openfeign</groupId><artifactId>feign-okhttp</artifactId></dependency>
配置文件修改
feign:compression:request:enabled: truemime-types: text/xml,application/xml,application/jsonmin-request-size: 1024 # 大于1MB才开始压缩response:enabled: truehttpclient:enabled: falseokhttp:enabled: true
添加配置Bean
@Configuration@ConditionalOnClass(Feign.class)@AutoConfigureBefore(FeignAutoConfiguration.class)public class FeignOkHttpConfig {/*** <h2>注入 OkHttp, 并自定义配置</h2>* */@Beanpublic okhttp3.OkHttpClient okHttpClient() {return new OkHttpClient.Builder().connectTimeout(5, TimeUnit.SECONDS) // 设置连接超时.readTimeout(5, TimeUnit.SECONDS) // 设置读超时.writeTimeout(5, TimeUnit.SECONDS) // 设置写超时.retryOnConnectionFailure(true) // 是否自动重连// 配置连接池中的最大空闲线程个数为 10, 并保持 5 分钟.connectionPool(new ConnectionPool(10, 5L, TimeUnit.MINUTES)).build();}}
 概述
概述