1 Spring Cloud Config 简介
配置文件想必大家都不陌生。在Spring Boot项目中,默认会提供一个application.properties或者application.yml文件,我们可以把一些全局性的配置或者需要动态维护的配置写入改文件,例如数据库连接,功能开关,限流阈值,服务地址等。为了解决不同环境下服务连接配置等信息的差异,Spring Boot还提供了基于spring.profiles.active={profile}的机制来实现不同的环境的切换。
随着单体架构向微服务架构的演进,各个应用自己独立维护本地配置文件的方式开始显露出它的不足之处。主要有下面几点。
- 配置的动态更新:在实际应用会有动态更新位置的需求,比如修改服务连接地址、限流配置等。在传统模式下,需要手动修改配置文件并且重启应用才能生效,这种方式效率太低,重启也会导致服务暂时不可用。
- 配置多节点维护:在微服务架构中某些核心服务为了保证高性能会部署上百个节点,如果在每个节点中都维护一个配置文件,一旦配置文件中的某个属性需要修改,可想而知,工作量是巨大的。
- 不同部署环境下配置的管理:前面提到通过profile机制来管理不同环境下的配置,这种方式对于日常维护来说也比较繁琐。
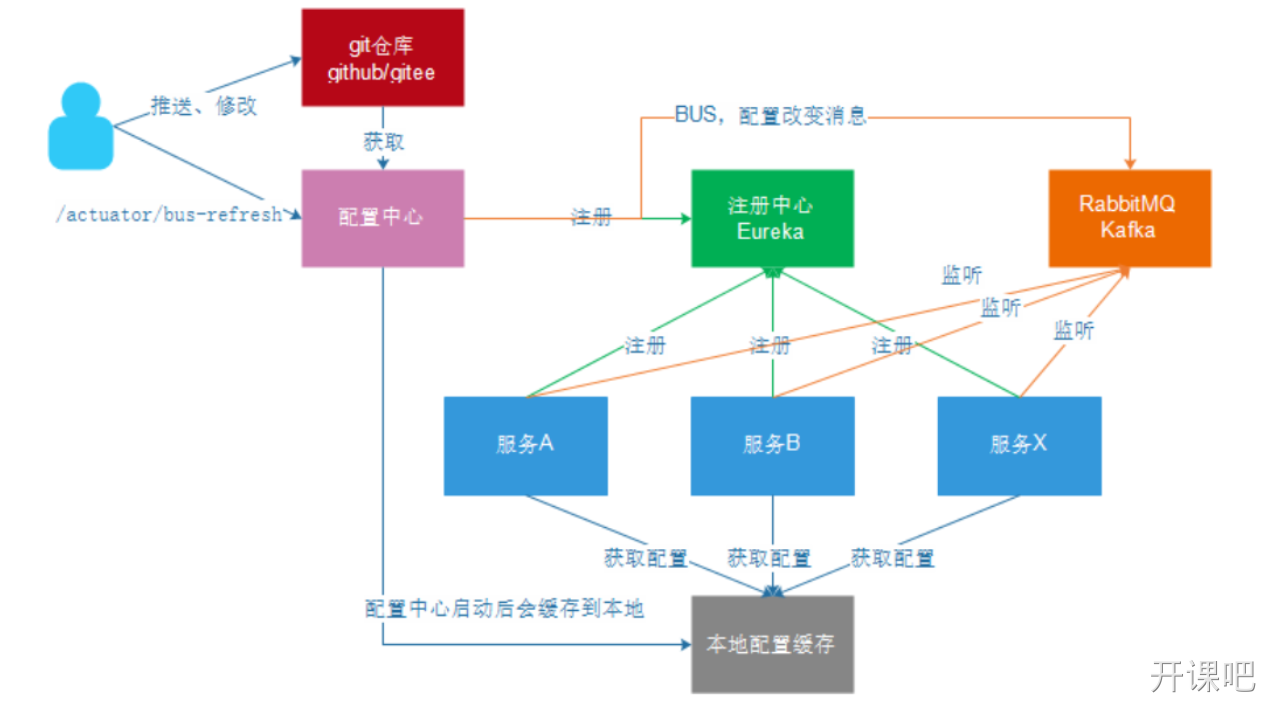
统一配置管理就是弥补上述不足的方法,简单说,最近本的方法是把各个应用系统中的某些配置放在一个第三方中间件上进行统一维护。然后,对于统一配置中心上的数据的变更需要推送到相应的服务节点实现动态跟新,所以微服务架构中,配置中心也是一个核心组件,而Spring Cloud Config就是一个配置中心组件,并且可以Git,SVN,本地文件等作为存储。如下图所示。
Spring Cloud Config架构
2 个人记账项目spring cloud config实战
1.创建新的项目
<?xml version="1.0" encoding="UTF-8"?><project xmlns="http://maven.apache.org/POM/4.0.0" xmlns:xsi="http://www.w3.org/2001/XMLSchema-instance"xsi:schemaLocation="http://maven.apache.org/POM/4.0.0 https://maven.apache.org/xsd/maven-4.0.0.xsd"><modelVersion>4.0.0</modelVersion><parent><groupId>org.springframework.boot</groupId><artifactId>spring-boot-starter-parent</artifactId><version>2.4.9</version><relativePath/> <!-- lookup parent from repository --></parent><groupId>com.csz</groupId><artifactId>bill-config</artifactId><version>0.0.1-SNAPSHOT</version><name>bill-config</name><description>bill-config</description><properties><java.version>1.8</java.version><spring-cloud.version>2020.0.3</spring-cloud.version></properties><dependencies><dependency><groupId>org.springframework.cloud</groupId><artifactId>spring-cloud-config-server</artifactId></dependency><dependency><groupId>org.projectlombok</groupId><artifactId>lombok</artifactId><optional>true</optional></dependency><dependency><groupId>org.springframework.boot</groupId><artifactId>spring-boot-starter-test</artifactId><scope>test</scope></dependency><dependency><groupId>org.springframework.cloud</groupId><artifactId>spring-cloud-starter-netflix-eureka-client</artifactId></dependency></dependencies><dependencyManagement><dependencies><dependency><groupId>org.springframework.cloud</groupId><artifactId>spring-cloud-dependencies</artifactId><version>${spring-cloud.version}</version><type>pom</type><scope>import</scope></dependency></dependencies></dependencyManagement><build><plugins><plugin><groupId>org.springframework.boot</groupId><artifactId>spring-boot-maven-plugin</artifactId><configuration><excludes><exclude><groupId>org.projectlombok</groupId><artifactId>lombok</artifactId></exclude></excludes></configuration></plugin></plugins></build></project>
2.启动类 添加@EnableConfigServer注解表示这个时configServer类
package com.csz.billconfig;import org.springframework.boot.SpringApplication;import org.springframework.boot.autoconfigure.SpringBootApplication;import org.springframework.cloud.config.server.EnableConfigServer;@SpringBootApplication@EnableConfigServerpublic class BillConfigApplication {public static void main(String[] args) {SpringApplication.run(BillConfigApplication.class, args);}}
3.配置文件
server:port: 9006spring:application:name: bill-configcloud:config:server:git:uri: https://gitee.com/tyson-chai/bill-config.gitsearch-paths: configdefault-label: mastereureka:client:service-url:defaultZone: http://127.0.0.1:9004/eureka
Config Server默认存储配置的方式是git,如果git仓库是公开仓库,username和password属性可以省略不配置,具体配置属性解释如下。
- spring.cloud.config.server.git.uri:配置文件所在的git仓库
- spring.cloud.config.server.git.search-paths:配置文件所在目录
- spring.cloud.config.server.git.default-label:配置文件分支
在git仓库https://gitee.com/tyson-chai/bill-config.git中,创建config目录,在config目录中创建bill-config-dev.yml配置文件,代码如下。
#mysql数据库连接池spring:datasource:driver-class-name: com.mysql.jdbc.Driverurl: jdbc:mysql://localhost:3306/bill-manager?useUnicode=true&characterEncoding=utf-8&useSSL=false&serverTimezone=GMTusername: rootpassword: csz981027thymeleaf:cache: false #关闭thymeleaf缓存application:name: bill-manager#mybatismybatis:type-aliases-package: com.csz.pojo #别名搜索mapper-locations: classpath:/mybatis/*.xmlserver:port: 9001eureka:client:service-url:defaultZone: http://127.0.0.1:9004/eurekafetch-registry: trueregister-with-eureka: true
先打开eureka在打开config服务。在网址上输入http://localhost:9006/bill-config-dev.yml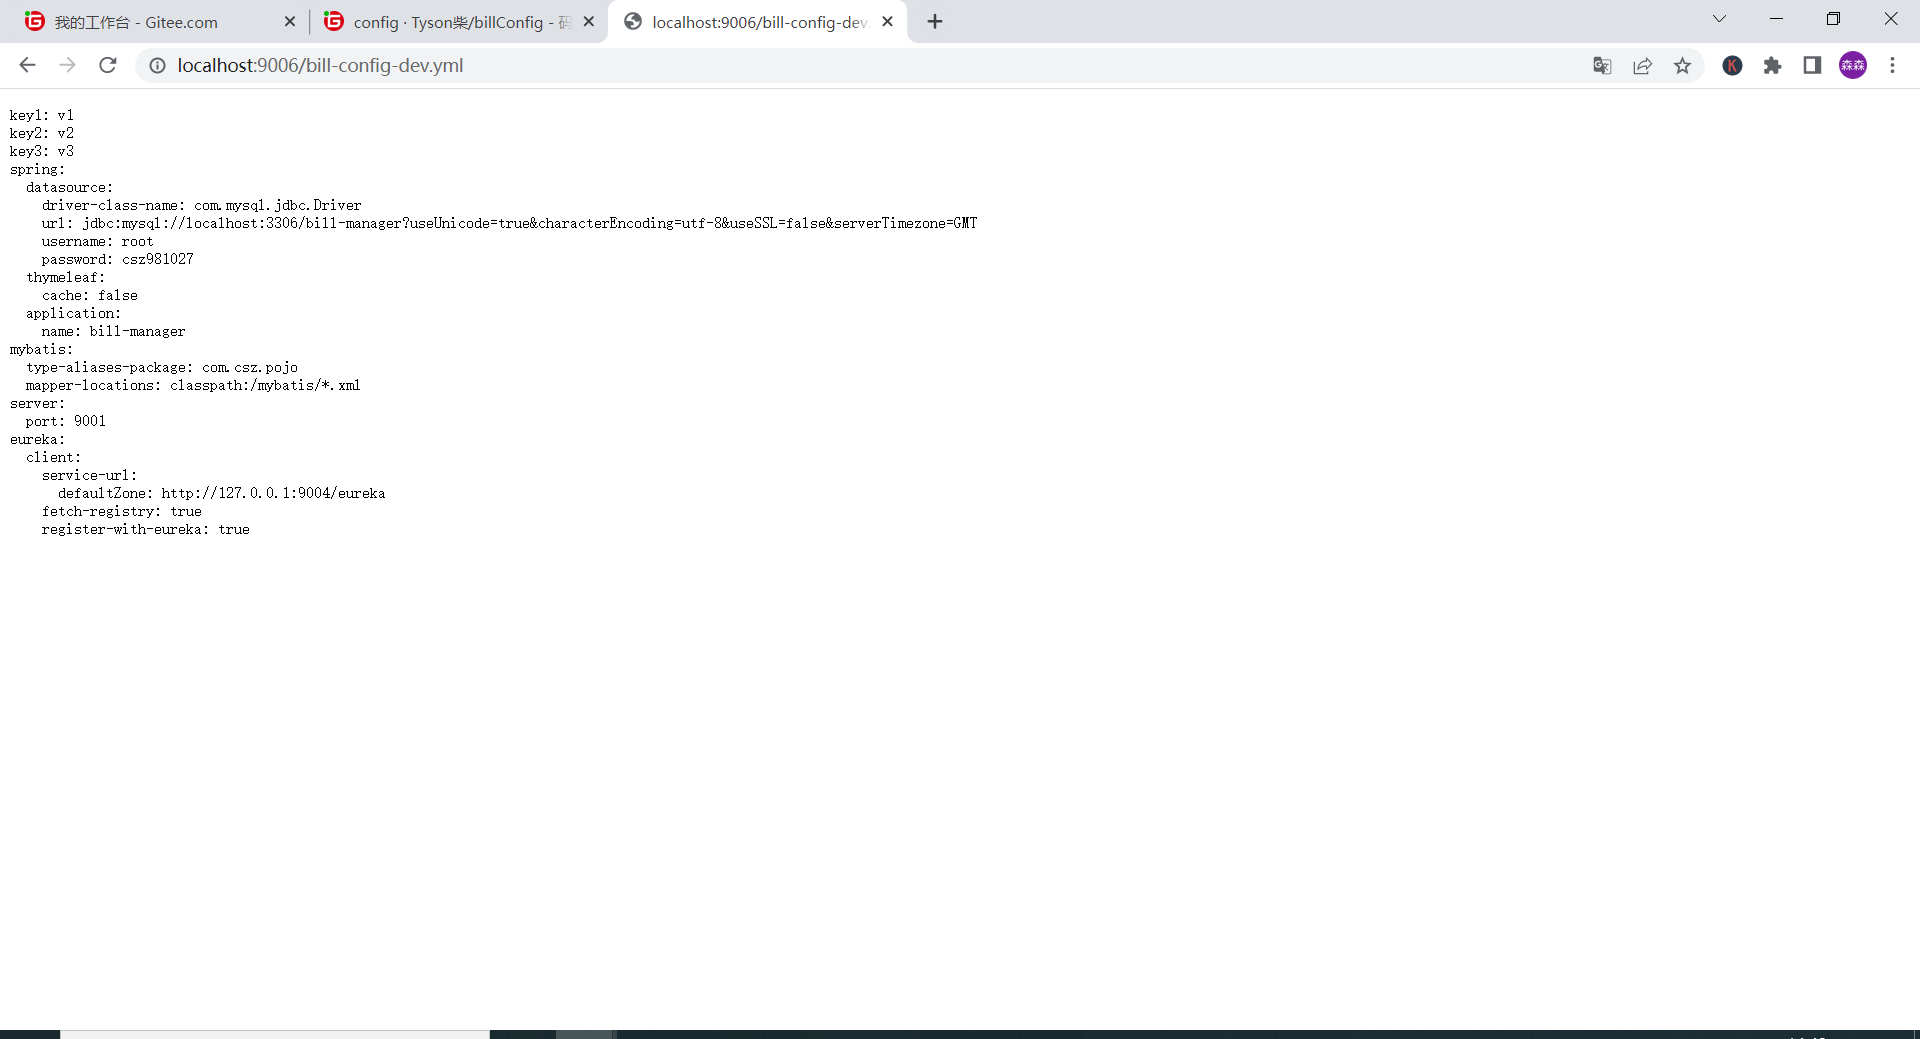
3 改造bill-manger服务,使用远程调用的方式
1.引入 配置
<dependency><groupId>org.springframework.cloud</groupId><artifactId>spring-cloud-starter-config</artifactId></dependency>
2.修改配置文件
spring:application:name: bill-managercloud:config:uri: http://localhost:9006profile: defaultlabel: masterconfig:import: optional:configserver:http://localhost:9006
在配置中,我们只配置了bill-manager这个服务去哪里调用我们git上的配置文件
- spring.config.import=optional:configserver:http://localhost:9006,指定Spring Boot项目从Config Server导入配置
- spring.cloud.config.url:Config Server地址,默认localhost:8888
- spring.cloud.config.profile:为git配置文件的后缀
- spring.cloud.config.label:为访问git的分支。
而且我们没有设置原来的端口号为9001,默认的就是8080,如果我们启动所有的服务,在网址上输入http://localhost:9001/bill/list-page 就说明已经读取到了远程的配置文件,且在服务启动的时候 已经显示地址为9001.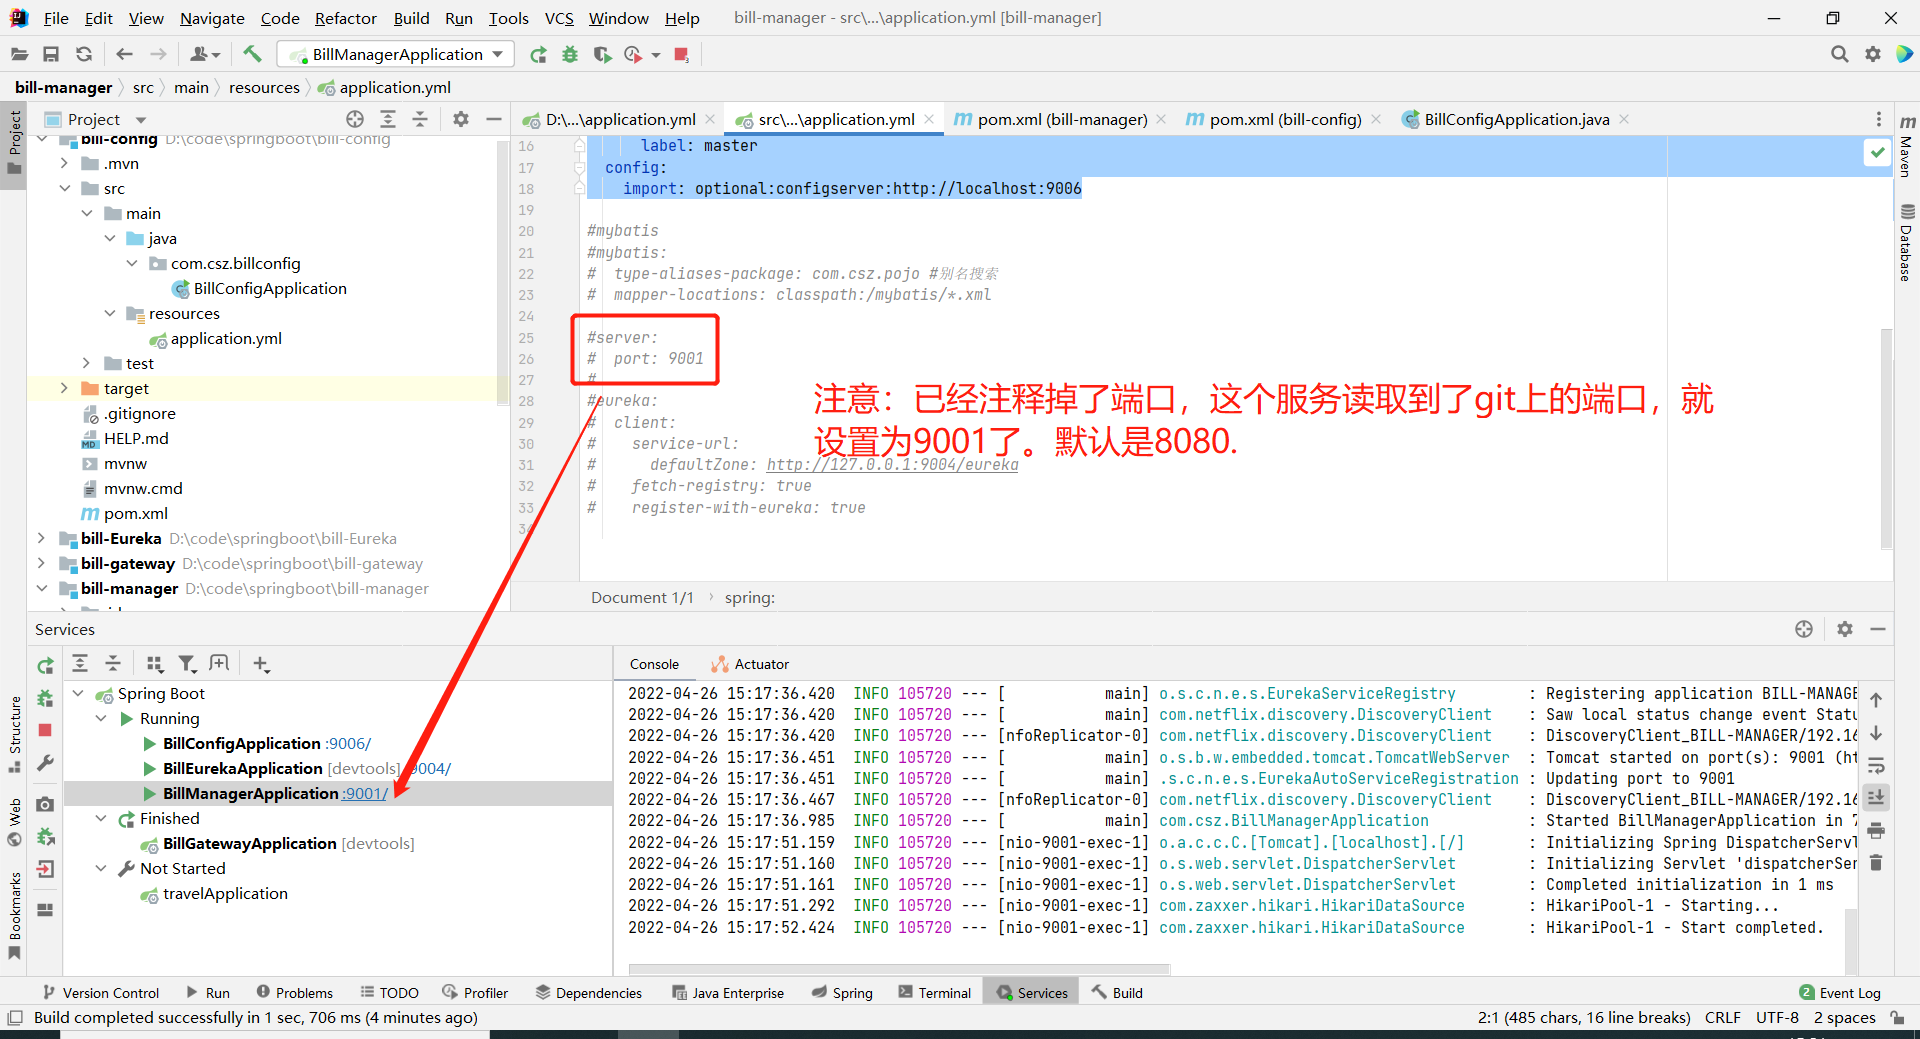
4 使用rabbitmq自动刷新配置文件
首先安装rabbitmq环境。本次使用windows安装环境。具体参考:
https://blog.csdn.net/tirster/article/details/121938987
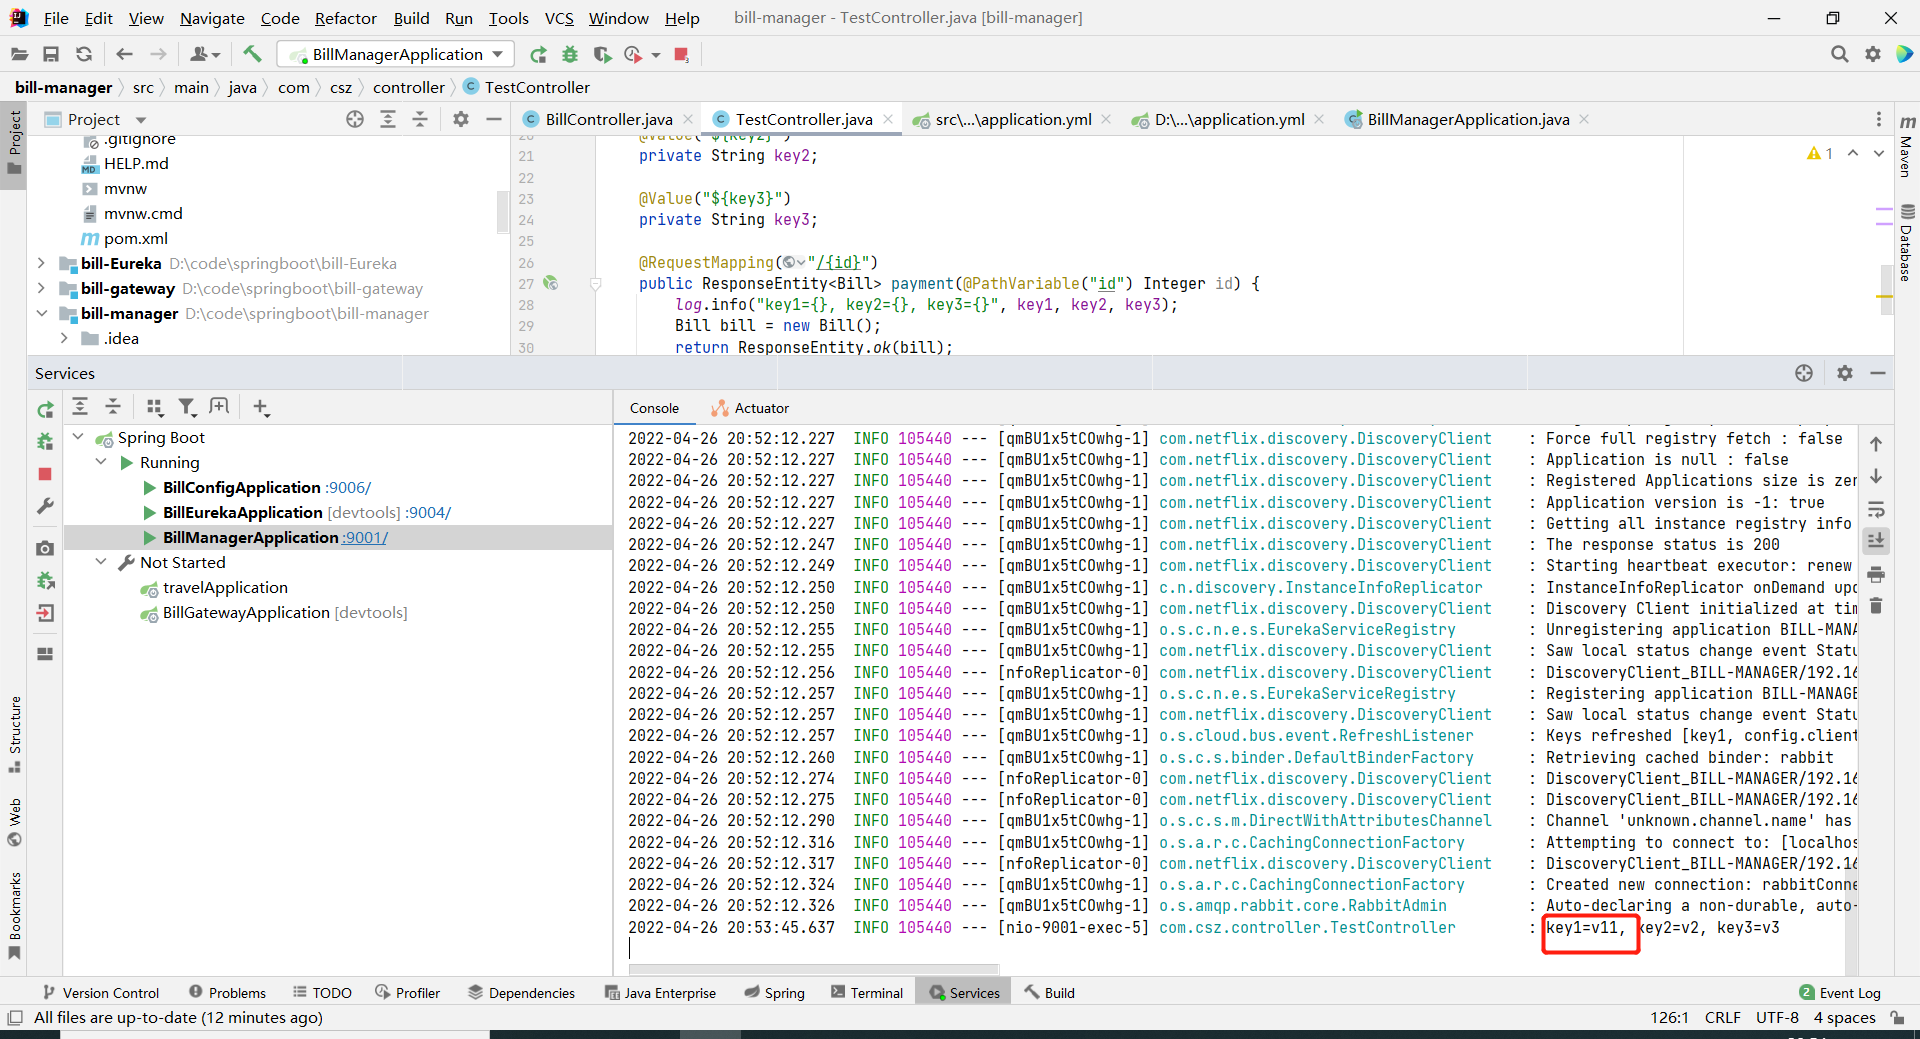
Spring Cloud Config在项目启动时自动加载配置内容这一机制,导致了他的一个缺陷,配置不能自动刷新,在上述案例中,修改git仓库中的key1的值”key1=v11”,发现支付服务得到的配置项key1的值还是旧的配置内容,新的内容不会自动刷新过来,在微服务架构中,动辄上百个节点如果都需要重启,这个问题非常麻烦。
我们可以使用Spring Cloud Bus和Spring Boot Actuator实现自动刷新
4.1.在bill-config服务中添加如下依赖
<dependency><groupId>org.springframework.cloud</groupId><artifactId>spring-cloud-starter-bus-amqp</artifactId></dependency><dependency><groupId>org.springframework.boot</groupId><artifactId>spring-boot-starter-actuator</artifactId></dependency>
在application.yml中配置连接RabbitMQ,同时配置暴露/actuator/bus-refresh端点,代码如下。
server:port: 9006spring:application:name: bill-configcloud:config:server:git:uri: https://gitee.com/tyson-chai/bill-config.gitsearch-paths: configdefault-label: masterrabbitmq:port: 15672username: guestpassword: guestmanagement:endpoints:web:exposure:include: bus-refreshendpoint:bus-refresh:enabled: trueeureka:client:service-url:defaultZone: http://127.0.0.1:9004/eureka
4.2.在bill-manger服务中添加如下依赖 作为监听rabbitmq的组件
<dependency><groupId>org.springframework.cloud</groupId><artifactId>spring-cloud-starter-bus-amqp</artifactId></dependency>
同时配置她的yml文件,配置rabbitmq相关的连接操作
rabbitmq:port: 15672username: guestpassword: guest
4.3使用@RefreshScope注解刷新更改的配置,测试代码如下。
package com.csz.controller;import com.csz.pojo.Bill;import lombok.extern.slf4j.Slf4j;import org.springframework.beans.factory.annotation.Value;import org.springframework.cloud.context.config.annotation.RefreshScope;import org.springframework.http.ResponseEntity;import org.springframework.web.bind.annotation.PathVariable;import org.springframework.web.bind.annotation.RequestMapping;@Slf4j@RefreshScope@RequestMapping("/bill")public class TestController {@Value("${key1}")private String key1;@Value("${key2}")private String key2;@Value("${key3}")private String key3;@RequestMapping("/{id}")public ResponseEntity<Bill> payment(@PathVariable("id") Integer id) {log.info("key1={}, key2={}, key3={}", key1, key2, key3);Bill bill = new Bill();return ResponseEntity.ok(bill);}}
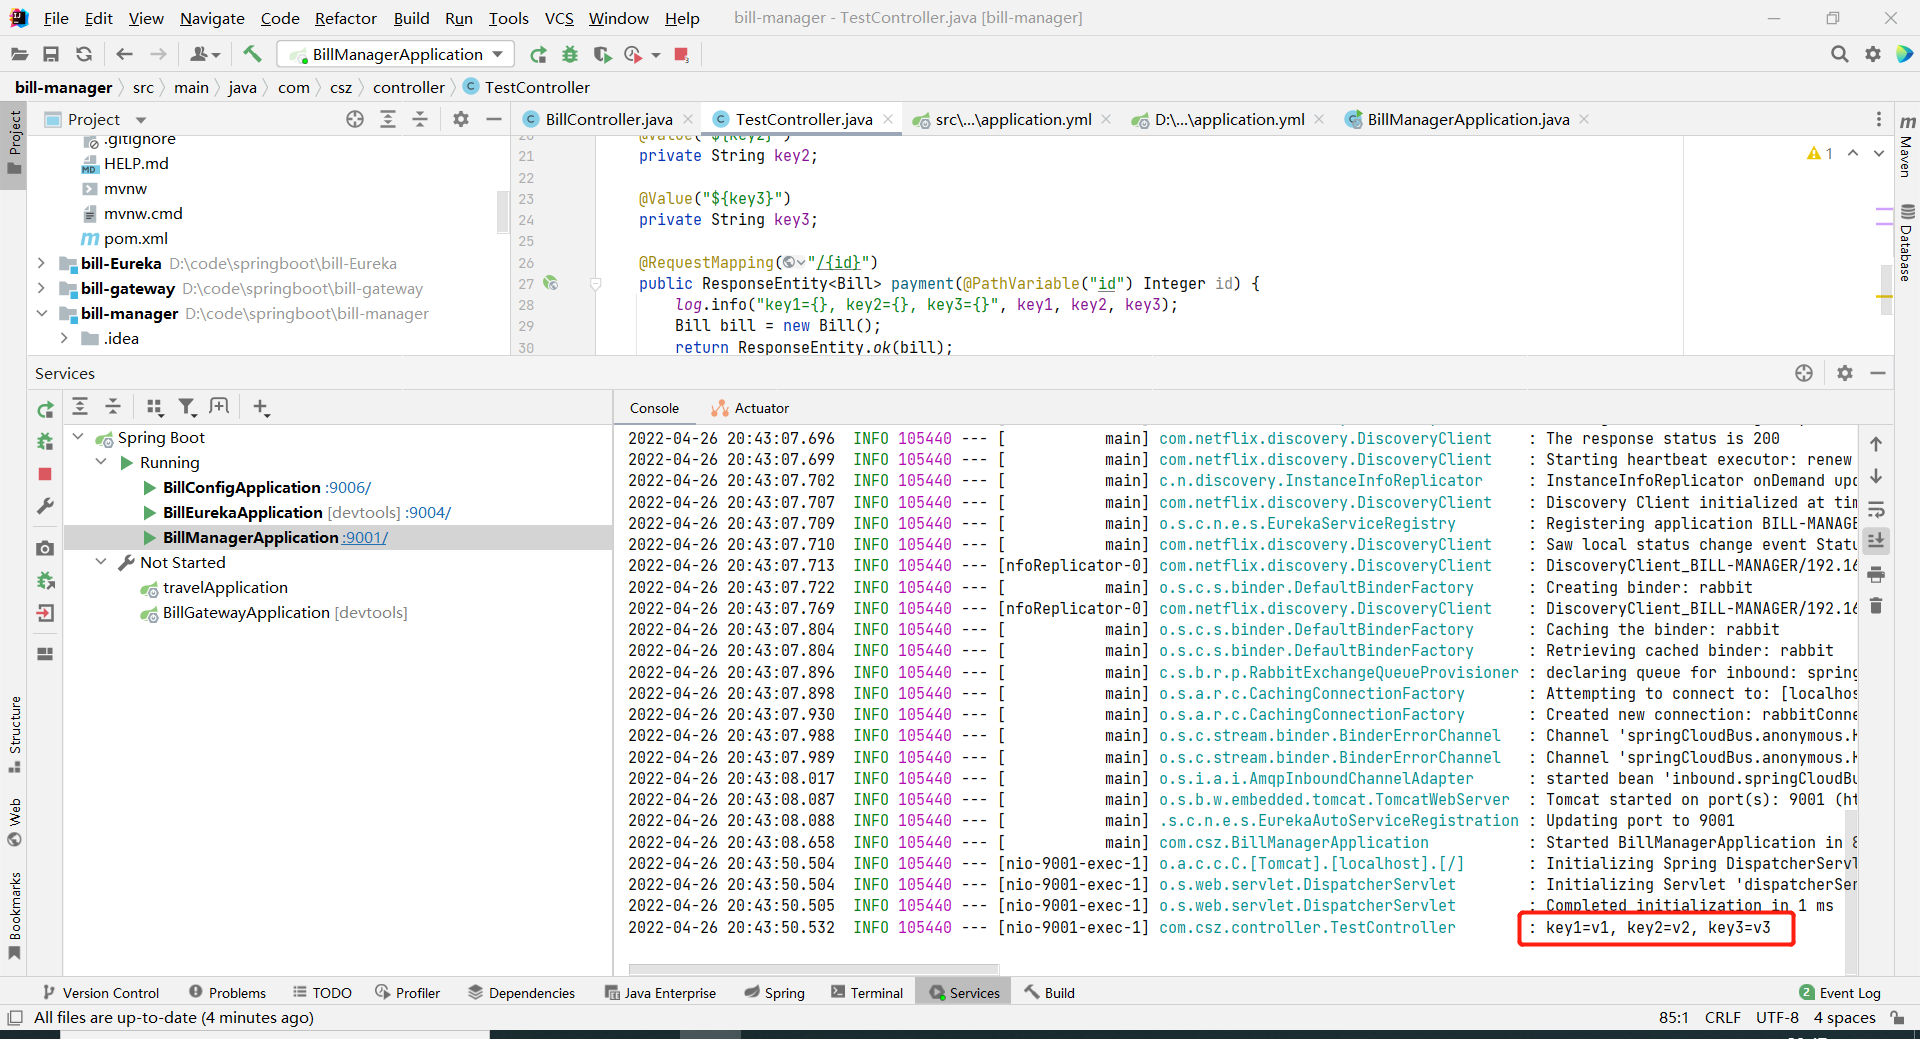
在远程仓库将key1的值修改为v11
并通过postman发送post请求http://localhost:9006/actuator/busrefresh 返回结果204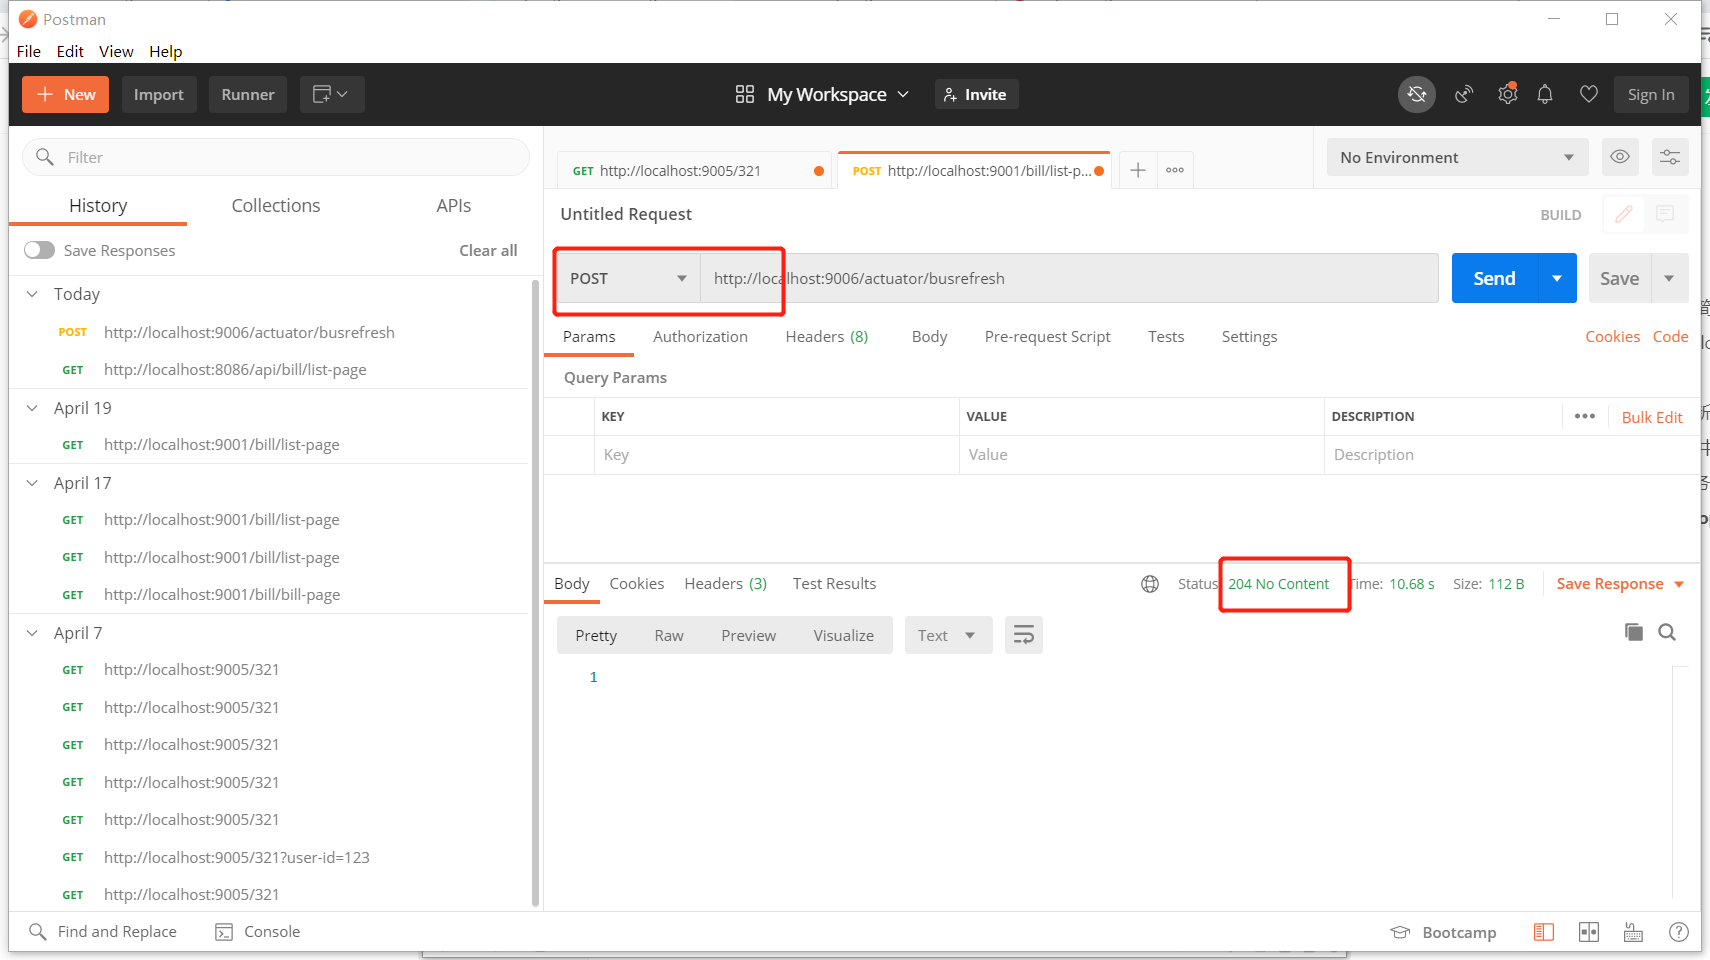
返回结果为: