从这里开始我们来讲语法
NgModule简介
declarations 数组 的规则
该模块想要正常工作,可能会依赖一些组件、指令和管道,那就必须将它们声明到declarations中,不过引入也有一些规则,以组件为例:
- 模块中不能使用未声明过(没有添加到declarations中)的组件
- 一个组件只能被一个模块声明
- 在declarations中的组件默认只能在当前模块中使用,要想让其他模块使用,必须exports出去(参考下文的exports)
以上规则同样适用于指令和管道
imports 数组规则
imports数组只会出现在@NgModule装饰器中,一个模块想要正常工作,除了本身的依赖项(declarations),还可能需要其他模块导出的依赖项。
只要是angular module,都可以导入imports数组中,比如自定义的模块,第三方或者ng内置的都可以
bootstrap 数组规则
应用是通过引导根模块 AppModule 来启动的,引导过程还会创建 bootstrap 数组中列出的组件,并把它们逐个插入到浏览器的 DOM 中。
该数组中的每个组件,都作为组件树的根(根组件),后续所有组件都是基于根组件的(如图)。
虽然也可以在宿主页面中放多个组件,但是大多数应用只有一个组件树,并且只从一个根组件开始引导。
这个根组件通常叫做 AppComponent,并且位于根模块的 bootstrap 数组中。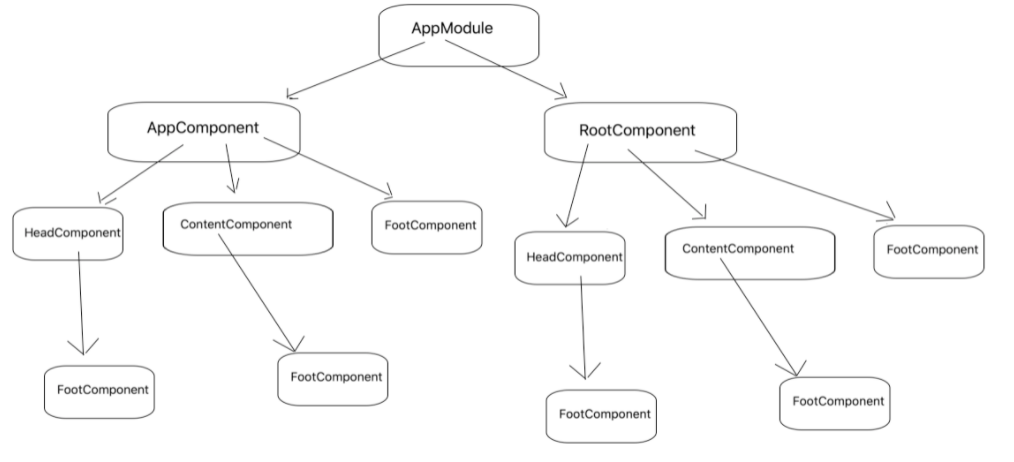
# app.module.tsimport { BrowserModule } from '@angular/platform-browser';import { NgModule } from '@angular/core';import { AppRoutingModule } from './app-routing.module';import { AppComponent } from './app.component';// 这是一个NgModule// angular module就是一个普通的类,但是这个类,一旦被@NgModule所装饰,那这个类就可以被称为angular module@NgModule({declarations: [AppComponent // 该模块的依赖项 需要显示的声明],imports: [BrowserModule, //导入其他的ngModuleAppRoutingModule],providers: [], // 这个是 给外界提供的 服务 service 提供各种服务。bootstrap: [AppComponent] // 这个属性一般只有根组件用到,在main中使用了它根组件,Angular 创建它并插入 index.html 宿主页面})export class AppModule { }# main.tsimport { enableProdMode } from '@angular/core';import { platformBrowserDynamic } from '@angular/platform-browser-dynamic';import { AppModule } from './app/app.module';import { environment } from './environments/environment';import 'bootstrap';if (environment.production) {enableProdMode();}platformBrowserDynamic().bootstrapModule(AppModule).catch(err => console.error(err));
那么我们如何创建一个Moduel? 使用cli就可以了 CLI地址
ng g module my-module# 如果你这样写 就会生成子文件ng g module my-module/chile-module
生成之后的样子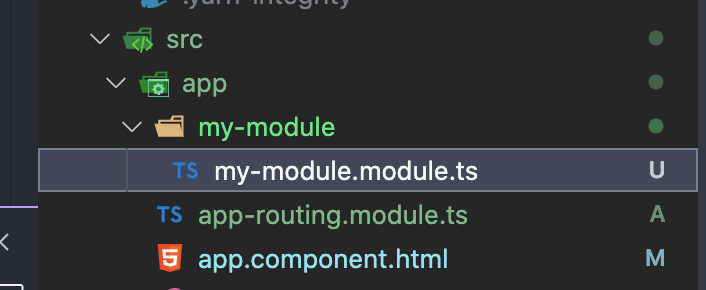
import { NgModule } from '@angular/core';import { CommonModule } from '@angular/common';@NgModule({declarations: [],imports: [CommonModule]})export class MyModuleModule { }
基础的展示数据
显示数据
ng的模版中,默认用双大括号{{}}绑定组件中的变量显示出来
import { Component } from '@angular/core';// @Component({// selector: 'app-root', // 选择器和dom的选择器保持一致的语法// template: `// <h1>{{title}}</h1>// <h2>My favorite hero is: {{myHero}}</h2>// `,// styles: [`h1 { color: red }`]// })// @Component({// selector: 'app-root',// templateUrl: './app.component.html',// styleUrls: ['./app.component.scss']// })export class AppComponent {title = 'myapp';}
模版表达式
import { Component } from '@angular/core';// @Component({// selector: 'app-root',// templateUrl: './app.component.html',// styleUrls: ['./app.component.scss']// })@Component({selector: 'app-root', // 选择器和dom的选择器保持一致的语法template: `<h1>{{title}}</h1><h2>My favorite hero is: {{myHero}}</h2><br/><h2>Fn:{{ getValue() }}</h2><br /><p>与方法结合 {{ price * 0.7 + getValue() }}.</p>`,styles: [`h1 { color: red }`]})export class AppComponent {// 绑定变量title = 'myapp';myHero = '666';price = 23;// 绑定方法getValue = () => {return "XXX"}// 注意: 使用模板表达的时候一定要注意 不能有副作用的变量!}
绑定属性
主要用来绑定html中的属性 比如img 的src a标签的href等…
import { Component } from '@angular/core';@Component({selector: 'app-root',template: `<div>// 一般的属性<br/><img src="../assets/01.png" alt="madao" /><img [src]="imgValue" alt="madao" /><img bind-src="imgValue" alt="madao" /><br><table class="table-bordered"><tr><th>name</th><th>phone</th><th>age</th></tr><tr><td>张三</td><td>13398490594</td><td>33</td></tr><tr><td [colSpan]="colSpan">李四</td><td>15079049984</td><td>22</td></tr></table><button class="btn btn-primary" [disabled]="isDisabled">click</button></div>// 自定义的属性 规范:虽然{{ 2 }}也能给属性绑定值 但是还是建议 写 [ ]<br /><span [attr.data-title]="customTitle">一行文字</span><span [attr.title]="customTitle">test title</span><span [title]="customTitle">test title</span>`,styles:[` img { width:200px; } `]})export class AppComponent {imgValue = '../assets/01.png';user = {name: 'madao',pic: this.imgValue};colSpan = 2;isDisabled = false;customTitle = '还是老李NB';}
绑定样式
实际上绑定样式也是非常的简单 需要注意的一点就是其的 优先级的问题 总结下来就是两点
- 某个类或样式绑定越具体,它的优先级就越高
- 绑定总是优先于静态属性 ```typescript import { Component } from ‘@angular/core’;
// @Component({ // selector: ‘app-root’, // templateUrl: ‘./app.component.html’, // styleUrls: [‘./app.component.scss’] // })
@Component({
selector: ‘app-root’, // 选择器和dom的选择器保持一致的语法
template: // 绑定class当个的
<hr />
<button type="button" class="btn" [class.btn-primary]="theme === 'primary'">Primary</button>
<button type="button" class="btn" [class.btn-secondary]="true">secondary</button>
<button type="button" class="btn" [class.btn-success]="isSuccess">success</button>
<button type="button" class="btn" [class.btn-danger]="'啦啦啦'">danger</button>
<button type="button" class="btn" [class.btn-danger]="0">danger</button>
<button type="button" class="btn" [class.btn-danger]="undefined">danger</button>
// 绑定class多个的
<hr />
<!-- 也可以用内置指令ngClass [ngClass]="btnCls" 等价于 class.btnCls -->
<button type="button" [ngClass]="btnCls">btnCls</button>
<button type="button" [ngClass]="btnCls2">btnCls2</button>
<button type="button" [ngClass]="btnCls3">btnCls3</button>
<br />
// 绑定Style
<hr />
<!-- 及其不推荐的写法!单个 style -->
<p [style.height]="'50px'" [style.border]="'1px solid'">设置高度</p>
<!-- 多个!style -->
<p [ngStyle]="style3">style3</p>,
styles:[
img { width:200px; }
]
})
export class AppComponent {
theme = ‘primary’;
isSuccess = true;
btnCls = 'btn btn-primary';btnCls2 = ['btn', 'btn-success'];btnCls3 = {btn: true,'btn-info': true};style3 = {width: '200px',height: '50px','text-align': 'center',border: '1px solid'}
}
<a name="cnUd5"></a>## 创建组件> 上面的东西我们观察了一下发现 实际上都放在了 app.component.ts 这一个组件中,那么我们如何自己创建自己的组件呢? [CLI文档](https://angular.cn/cli/generate#component)```shell# 下面的cli命令就能执行做到这件事ng g c comp1 (在src/app下创建名为comp1的组件)ng g c components/comp1 (在src/app/components下创建名为comp1的组件)# 生成之后会自动的在你的app.module中的import 中加入它 如果没有你需要加 要不然你的app.componet组件中 你就无法使用它
同样的 我们也有些指定的options ,具体在CLI文档中对这个 命令 有详细的描述
ng g c component1 --inline-style --inline-template --skip-tests
这条命令 之后 生成了一个组件 你需要这样去使用它
# app-component1 文件夹中,默认的 创建出来的组件 的 selector 都是以app- 开头 如何去修改它呢?# tslint.js++++"directive-selector": [true,"attribute","app", // 这个东西就是咯"camelCase"],++++# component1.component.tsimport { Component, OnInit } from '@angular/core';@Component({selector: 'app-component1',template: `<p>component1 works!</p>`,styles: []})export class Component1Component implements OnInit {constructor() { }ngOnInit(): void {}}# 在我们原来的app.components.ts中使用它import { Component } from '@angular/core';@Component({selector: 'app-root', // 选择器和dom的选择器保持一致的语法template: `<app-component1 > </app-component1>`,styles:[` img { width:200px; } `]})export class AppComponent {}
绑定事件
对于绑定事件来说也是非常的简单的
import { Component } from '@angular/core';@Component({selector: 'app-root',template: `<div *ngFor="let item of list"><buttontype="button"class="btn btn-primary"(click)="onClick($event, item )">{{ item.name }}</button></div>`,styleUrls: ['./app.component.scss']})export class AppComponent {list = [ {name:'老李',}, {name: '老王'}, ];onClick = ( e:MouseEvent, value ) => {console.log('value1', event.target);console.log(' value2', value);};}
这里用到了一个循环渲染列表的模板语法 我们暂时不用过多了解你只需要知道是怎么用的就完了
组件间的通信
我们一般在vue 和react 中都叫做什么 props 和 回调 但是在ng中换了个名字 叫做:“输入/输出 属性” 具体的语法如下
首先,我们为了演示这个语法 需要坐下面的工作, 先创建组件 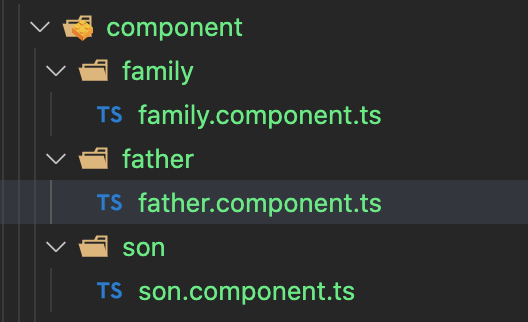
然后我们先看父子
# fatherimport { Component, OnInit } from '@angular/core';@Component({selector: 'app-father',template: `<!--正常的使用<app-son[item]=[item](newItemEvent)="addItem($event)"></app-son>--><div><!--别名--><app-son[aliasItem]=[item](newItem)="addItem($event)"></app-son></div>`,styles: []})export class FatherComponent implements OnInit {item = '2'addItem(newItem: string) {console.log('你来啦', newItem);}constructor() {}ngOnInit(): void {}}# sonimport { Component, OnInit, Input, Output, EventEmitter } from '@angular/core';@Component({selector: 'app-son',template: `<div>Today's item: {{item}}<hr />// 给父组件发射值<br /><label>Add an item: <input #newItem></label><button (click)="addNewItem(newItem.value)">Add to parent's list</button></div>`,styles: []})export class SonComponent implements OnInit {// @Input() item: string; // 接受属性 就想在vue中需要给props做点声明一样// @Output() newItemEvent = new EventEmitter<string>(); // 给父组件的回调// 如果你需要使用别名就这样就好了@Input('aliasItem') item: string; // 接受属性 就想在vue中需要给props做点声明一样@Output('newItem') newItemEvent = new EventEmitter<string>(); // 给父组件的回调addNewItem(value: string) {this.newItemEvent.emit(value);}constructor() {}ngOnInit(): void {console.log(this.item);}}
然后再回过头 想一下 不相干的组件怎么办? 实际上依然可以 采取 :“状态提升”的逻辑来搞事情,但是对于NG来说 通信有好多好多的方式 状态提升 可以作为一种,但绝不是 最好的方式在ng中

若有收获,就点个赞吧
0 人点赞
