由Netflix公司出品的负载均衡微服务组件,目前已进入维护阶段不再进行新功能的开发。
一、Ribbon中的负载均衡规则
1.1、轮询
当前请求次数对服务器数量进行取余,拿取余的结果当作数组下标去服务实例的数组找到对应具体的服务器,以达到负载均衡的效果。
1.2、源码
public Server choose(ILoadBalancer lb, Object key) {if (lb == null) {log.warn("no load balancer");return null;}Server server = null;int count = 0;while (server == null && count++ < 10) {List<Server> reachableServers = lb.getReachableServers();List<Server> allServers = lb.getAllServers();int upCount = reachableServers.size();int serverCount = allServers.size();if ((upCount == 0) || (serverCount == 0)) {log.warn("No up servers available from load balancer: " + lb);return null;}int nextServerIndex = incrementAndGetModulo(serverCount);server = allServers.get(nextServerIndex);if (server == null) {/* Transient. */Thread.yield();continue;}if (server.isAlive() && (server.isReadyToServe())) {return (server);}// Next.server = null;}if (count >= 10) {log.warn("No available alive servers after 10 tries from load balancer: "+ lb);}return server;}/*** 自旋锁+CAS 实现** Inspired by the implementation of {@link AtomicInteger#incrementAndGet()}.** @param modulo The modulo to bound the value of the counter.* @return The next value.*/private int incrementAndGetModulo(int modulo) {for (;;) {int current = nextServerCyclicCounter.get();int next = (current + 1) % modulo;if (nextServerCyclicCounter.compareAndSet(current, next))return next;}}
二、如何在代码中切换负载均衡规则
2.1、步骤一:创建自定义配置类
@Configuration
public class MySelfRule {

    @Bean
    public IRule myRule() {
        // 定义为随机
        return new RoundRobinRule();
    }
}
注意:自定义配置类需要放置在@ComponentScan注解扫描不到的地方,否则该配置将会对所有 Ribbon客户端所共享,将达不到特殊化定制的目的。
2.2、步骤二:在主启动类添加注解使配置生效
如下文的代码所示,添加
@RibbonClient注解。name属性用于指定服务注册中心的服务名称,具体可查看官方源码。configuration属性用于指定自定义的负载算法类,具体可查看官方源码。 ```java import com.atguigu.myrule.MySelfRule; import org.springframework.boot.SpringApplication; import org.springframework.boot.autoconfigure.SpringBootApplication; import org.springframework.cloud.netflix.eureka.EnableEurekaClient; import org.springframework.cloud.netflix.ribbon.RibbonClient;
@SpringBootApplication @EnableEurekaClient @RibbonClient(name = “CLOUD-PAYMENT-SERVICE”, configuration = MySelfRule.class) public class OrderMain80 { public static void main(String[] args) { SpringApplication.run(OrderMain80.class, args); } }
<a name="OouJc"></a>
# 三、手写一个负载均衡中的轮询算法
> 参考源码手写一个,加深记忆~

<a name="F7Ruv"></a>
### 3.1、步骤一:获取注册中心中的全部可用实例
```java
List<ServiceInstance> instances = discoveryClient.getInstances("CLOUD-PAYMENT-PROVIDER");
3.2、步骤二:自定义算法使得可以从可用实例中找到具体某一个服务实例
这里就不贴具体代码了,属于自定义内容部分,最终返回的结果是步骤一
instances集合中的某一个元素。
- 以Eureka为例,看一下服务实例
instance对象中包含哪些字段。
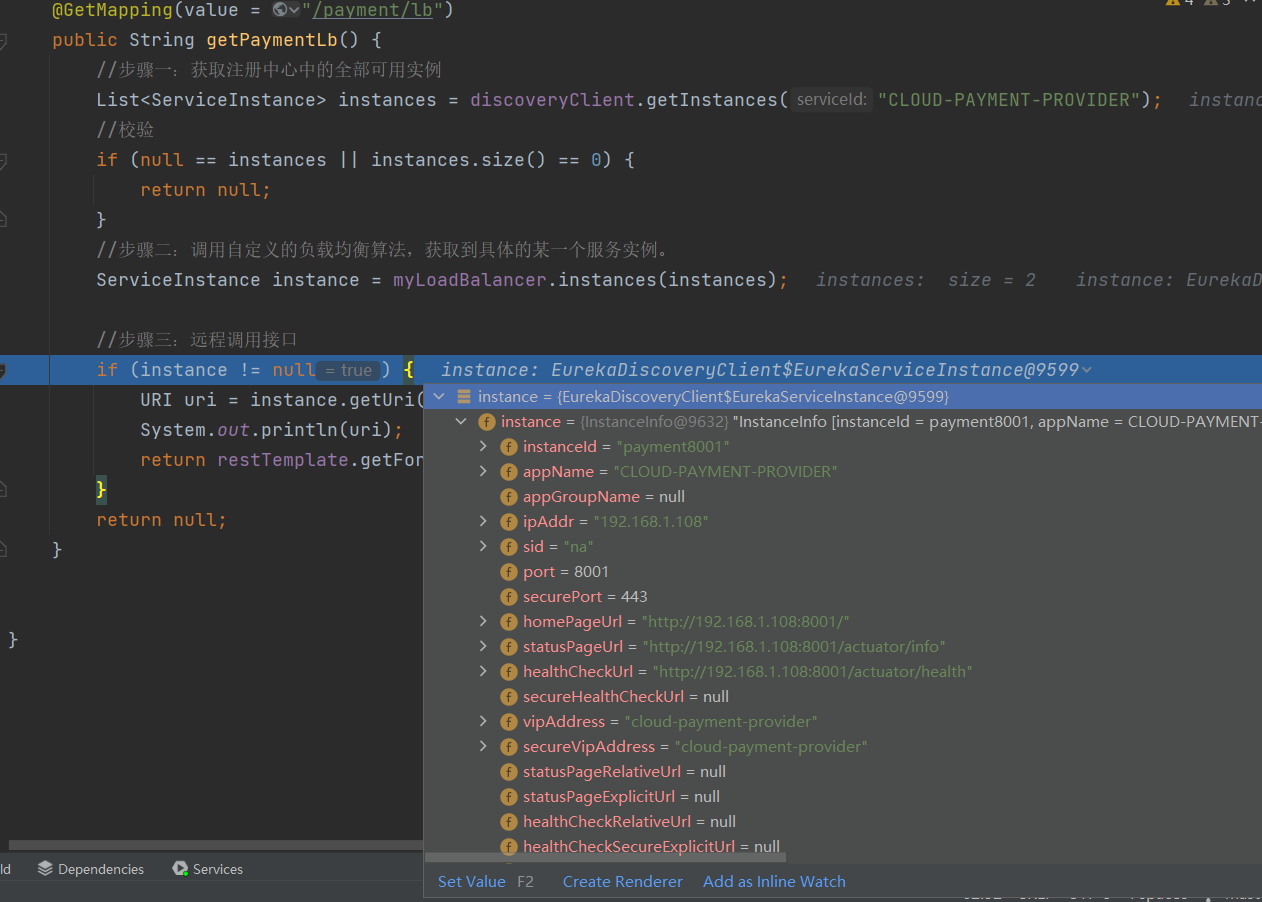
3.3、步骤三:使用步骤二得到的实例信息+RestTemplate远程调用接口
附一个完成的代码 😘
    @GetMapping(value = "/payment/lb")
    public String getPaymentLB() {
        //步骤一:获取注册中心中的全部可用实例
        List<ServiceInstance> instances = discoveryClient.getInstances("CLOUD-PAYMENT-PROVIDER");
        //校验
        if (null == instances || instances.size() == 0) {
            return null;
        }
        //步骤二:调用自定义的负载均衡算法,获取到具体的某一个服务实例。
        ServiceInstance instance = myLoadBalancer.instances(instances);

        //步骤三:远程调用接口
        if (instance != null) {
            URI uri = instance.getUri();
            System.out.println(uri);
            return restTemplate.getForObject(uri + "/payment/lb", String.class);
        }
        return null;
    }

若有收获,就点个赞吧
0 人点赞
