一、Nginx代理简述
正向代理:客户端<—>代理—>服务端 反向代理: 客户端—>代理<—>服务端
二、Nginx反向代理示例
测试环境:
| Proxy | 100.100.142.212 |
|---|---|
| Server | 100.100.142.213 |
两台服务器安装Nginx并启动:
yum install nginx -ysystemctl start nginx
1、Server配置服务端
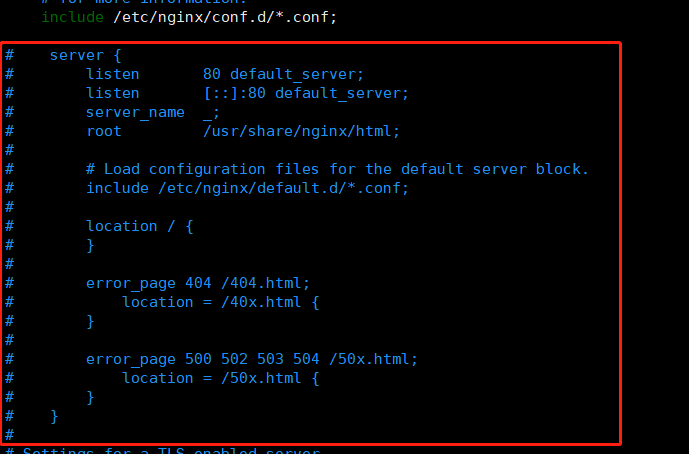
注释掉Nginx自带的配置
[root@server ~]# vim /etc/nginx/nginx.conf
编辑Nginx配置文件如下:
[root@server ~]# vim /etc/nginx/conf.d/server.confserver {listen 8000;server_name 100.100.142.213;location / {root /opt;index index.html;}}
编写测试HTML文件,并给web目录相对应的权限
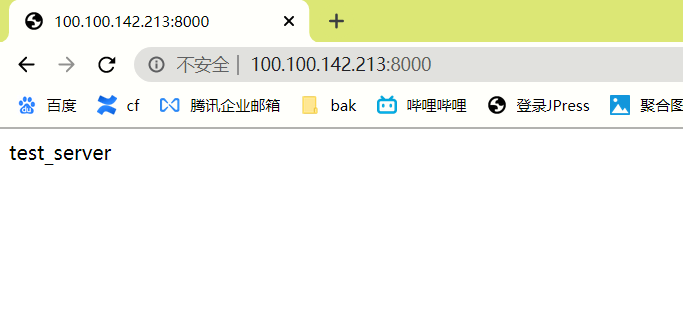
[root@server ~]# echo 'test_server' > /opt/index.html && chown -R nginx.nginx /opt
检测Nginx配置文件并重启
[root@server ~]# nginx -tnginx: the configuration file /etc/nginx/nginx.conf syntax is oknginx: configuration file /etc/nginx/nginx.conf test is successful[root@server ~]# systemctl restart nginx
2、Proxy代理配置
注释掉Nginx自带的配置
[root@proxy ~]# vim /etc/nginx/nginx.conf

编辑Nginx配置文件如下:
[root@proxy ~]# vim /etc/nginx/conf.d/proxy.confserver {listen 80;server_name 100.100.142.212;location / {proxy_pass http://100.100.142.213:8000;}}
检查Nginx配置文件并重启
[root@proxy ~]# nginx -tnginx: the configuration file /etc/nginx/nginx.conf syntax is oknginx: configuration file /etc/nginx/nginx.conf test is successful[root@proxy ~]# systemctl restart nginx
访问代理的IP即可看到的是server端的内容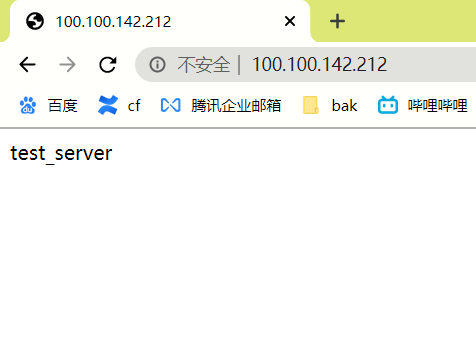

若有收获,就点个赞吧
0 人点赞
