https://www.bilibili.com/video/BV13p4y187Pn?p=11
SpringBoot
- 手动创建maven 空项目,配置pom.xml
- 利用IDEA创建,一路默认就可以 ,很好用
<?xml version="1.0" encoding="UTF-8"?><project xmlns="http://maven.apache.org/POM/4.0.0" xmlns:xsi="http://www.w3.org/2001/XMLSchema-instance"xsi:schemaLocation="http://maven.apache.org/POM/4.0.0 https://maven.apache.org/xsd/maven-4.0.0.xsd"><modelVersion>4.0.0</modelVersion><!-- 定义了各种版本 保证不会版本冲突--><parent><groupId>org.springframework.boot</groupId><artifactId>spring-boot-starter-parent</artifactId><version>2.5.3</version><relativePath/> <!-- lookup parent from repository --></parent><groupId>com.example</groupId><artifactId>SpringBoot-hello</artifactId><version>0.0.1-SNAPSHOT</version><name>SpringBoot-hello</name><description>SpringBoot-hello</description><properties><java.version>1.8</java.version></properties><dependencies><dependency><groupId>org.springframework.boot</groupId><artifactId>spring-boot-starter-web</artifactId></dependency><dependency><groupId>org.springframework.boot</groupId><artifactId>spring-boot-starter-test</artifactId><scope>test</scope></dependency></dependencies><build><plugins><plugin><groupId>org.springframework.boot</groupId><artifactId>spring-boot-maven-plugin</artifactId></plugin></plugins></build></project>
Hello Spring
主应用 启动类
package com.angyi.springboot;import org.springframework.boot.SpringApplication;import org.springframework.boot.autoconfigure.SpringBootApplication;@SpringBootApplicationpublic class Application {public static void main(String[] args) {SpringApplication.run(Application.class, args);}}
hello spring
package com.angyi.springboot.controller;import org.springframework.stereotype.Controller;import org.springframework.web.bind.annotation.RequestMapping;import org.springframework.web.bind.annotation.ResponseBody;@Controller //@ResController 方法不用ResponseBodypublic class Hello {@ResponseBody@RequestMapping("hello")public String test(){return "Hello Spring";}}
banner图标
可以在resources文件夹下创建banner.txt.自定义,也可以关闭
package com.angyi.springboot;import org.springframework.boot.Banner;import org.springframework.boot.SpringApplication;import org.springframework.boot.autoconfigure.SpringBootApplication;@SpringBootApplicationpublic class Application {public static void main(String[] args) {SpringApplication springApplication = new SpringApplication(Application.class);springApplication.setBannerMode(Banner.Mode.OFF);springApplication.run();}
配置文件
- application.properties
- SpringBoot 会默认读取全局配置文件
- src/main/resources 资源目录下
- 键值对
# 端口server.port=8080;# 设置项目的访问路径server.servlet.context-path=/sp
- application.yml
yaml格式
server:port:8989servlet:context-path: /sp
语法:
1、大小写敏感
2、使用缩进表示层级关系 数字前面需要有一个空格
3、禁止使用tab缩进,只能使用空格键
4、缩进长度没有限制,只要元素对齐就表示这些元素属于一个层级
5、使用#表示注释
6、字符串可以不用引号标注
优先级 properties>yml>yaml
获取配置文件属性值
@ValueEnvironment@ConfigurationProperties(prefix = "person")
package com.example.springboothello.Controller;import com.example.springboothello.Person;import org.springframework.beans.factory.annotation.Autowired;import org.springframework.web.bind.annotation.RequestMapping;import org.springframework.web.bind.annotation.RestController;@RestControllerpublic class Hello {@Autowiredprivate Person person;@RequestMapping("hello")public String hello(){System.out.println(person.getAge());return person.getName();}}
package com.example.springboothello;import org.springframework.beans.factory.annotation.Value;import org.springframework.boot.context.properties.ConfigurationProperties;import org.springframework.stereotype.Component;@Component@ConfigurationProperties(prefix = "person")public class Person {private String name;private int age;public String getName() {return name;}public int getAge() {return age;}public void setName(String name) {this.name = name;}public void setAge(int age) {this.age = age;}}
profile配置
application-{profile}.yml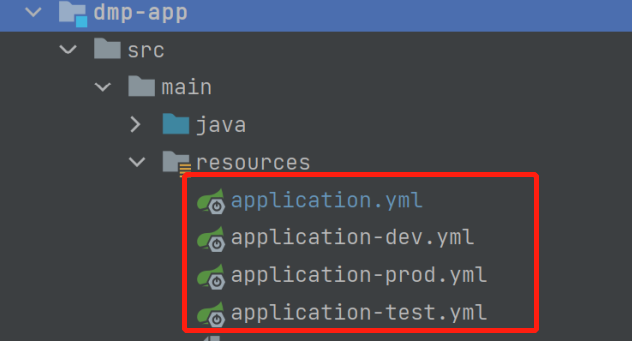 创建不同环境所使用的配置文件,然后在主application.yml中的
spring:application:name: dmpprofiles:active: test
active 可指定不同的配置文件,激活不同的环境。
可以在一个yml文件中定义不同的环境 用三个—-分割,spring.profile 起名字
日志
如果选择web创建环境,默认是logback日志依赖。
基本使用:
mport org.slf4j.Logger;import org.slf4j.LoggerFactory;import org.springframework.boot.SpringApplication;import org.springframework.boot.autoconfigure.SpringBootApplication;@SpringBootApplicationpublic class LogApplication {public static void main(String[] args) {Logger logger =LoggerFactory.getLogger(LogApplication.class);SpringApplication.run(LogApplication.class, args);logger.debug("This is a debug message");//注意 spring 默认日志输出级别为 info 所以默认情况下 这句不会打印到控制台logger.info("This is an info message");logger.warn("This is a warn message");logger.error("This is an error message");}}
基本配置:
logging:#level 日志等级 指定命名空间的日志输出level:com.fishpro.log: debug#file 指定输出文件的存储路径file: logs/app.log#pattern 指定输出场景的日志输出格式pattern:console: "%d %-5level %logger : %msg%n"file: "%d %-5level [%thread] %logger : %msg%n"

若有收获,就点个赞吧
0 人点赞
