找到ngxin的安装位置在里面有个conf文件夹,里面有一个ngxin.conf文件
Nginx配置文件里面有三个核心部分:
#user nobody;worker_processes 1;#error_log logs/error.log;#error_log logs/error.log notice;#error_log logs/error.log info;#pid logs/nginx.pid;这里是全局配置,可以指定用户,可以指定进程等信息
events {worker_connections 1024;}可以指定线程数量,可以监听事件 比如说现在是1024个进程
http {http里面还可以配置一些负载均衡include mime.types;default_type application/octet-stream;#log_format main '$remote_addr - $remote_user [$time_local] "$request" '# '$status $body_bytes_sent "$http_referer" '# '"$http_user_agent" "$http_x_forwarded_for"';#access_log logs/access.log main;sendfile on;#tcp_nopush on;#keepalive_timeout 0;keepalive_timeout 65;#gzip on; 这里这一部分是http的配置就是请求的--------------------------------------------------------------------upstream kuangsheng{这里配置的是负载均衡配置服务器的资源}server{listen 9001;server_name localhost;location / {这里是代理 代理9001端口root F:/cloud_ma/hm-mall-admin;}}server{listen 9002;server_name localhost;location / {root F:/cloud_ma/hm-mall-portal;}}server {listen 80;server_name localhost;#charset koi8-r;#access_log logs/host.access.log main;location / {root html;index index.html index.htm;}#error_page 404 /404.html;# redirect server error pages to the static page /50x.html#error_page 500 502 503 504 /50x.html;location = /50x.html {root html;}# proxy the PHP scripts to Apache listening on 127.0.0.1:80##location ~ \.php$ {# proxy_pass http://127.0.0.1;#}# pass the PHP scripts to FastCGI server listening on 127.0.0.1:9000##location ~ \.php$ {# root html;# fastcgi_pass 127.0.0.1:9000;# fastcgi_index index.php;# fastcgi_param SCRIPT_FILENAME /scripts$fastcgi_script_name;# include fastcgi_params;#}# deny access to .htaccess files, if Apache's document root# concurs with nginx's one##location ~ /\.ht {# deny all;#}}# another virtual host using mix of IP-, name-, and port-based configuration##server {# listen 8000;# listen somename:8080;# server_name somename alias another.alias;# location / {# root html;# index index.html index.htm;# }#}# HTTPS server##server {# listen 443 ssl;# server_name localhost;# ssl_certificate cert.pem;# ssl_certificate_key cert.key;# ssl_session_cache shared:SSL:1m;# ssl_session_timeout 5m;# ssl_ciphers HIGH:!aNULL:!MD5;# ssl_prefer_server_ciphers on;# location / {# root html;# index index.html index.htm;# }#}}
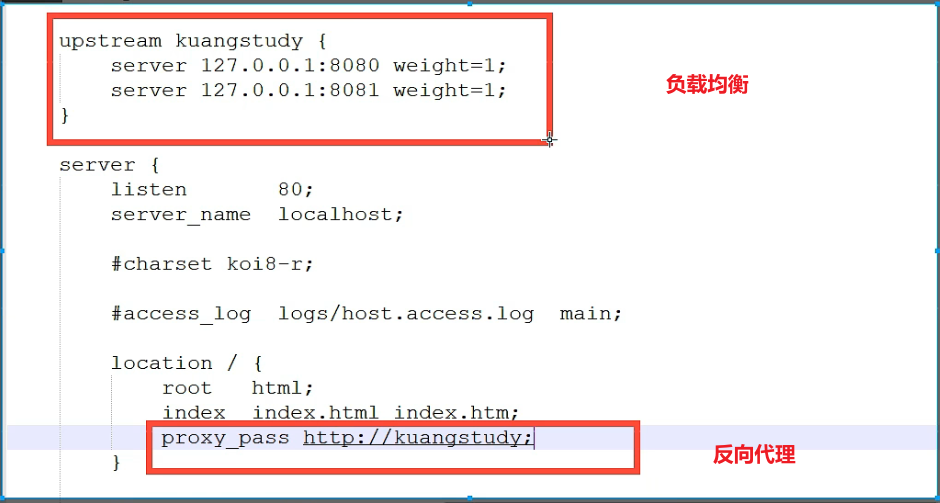
weight这里是权重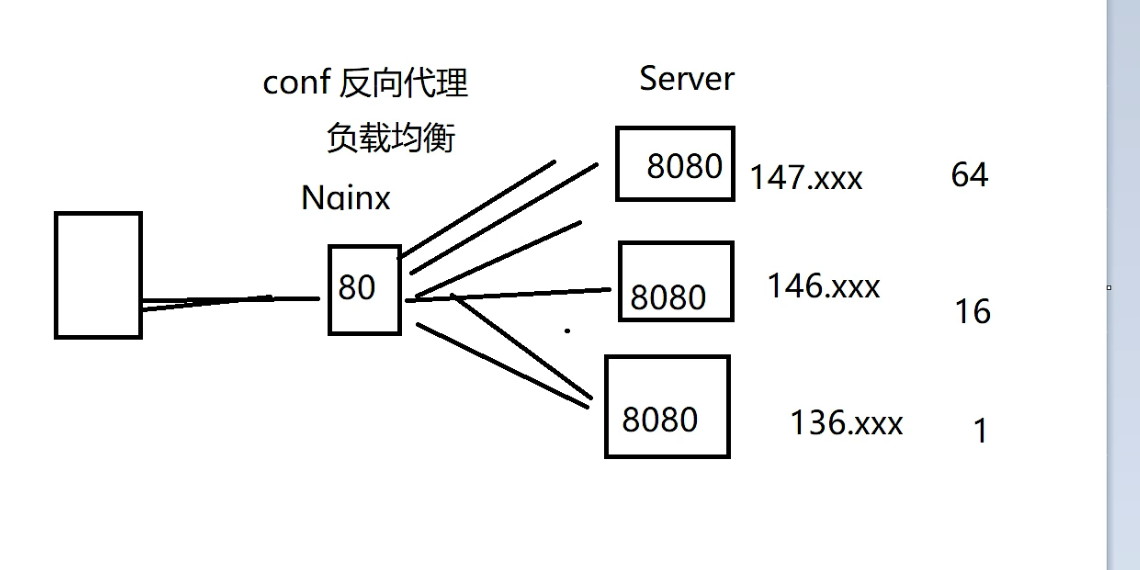
用户是无感知的喔
Nginx前端项目集成:静态服务器搭建:动静分离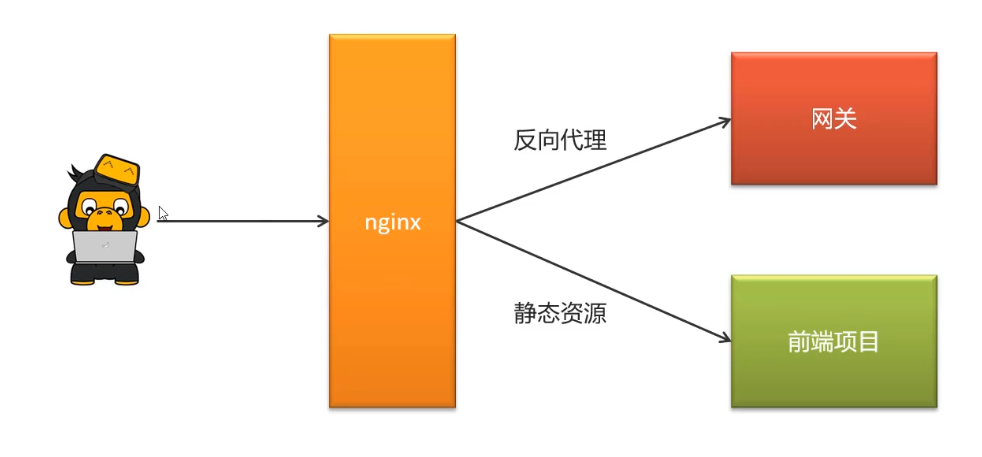
反向代理去访问动态的数据
把前端项目放在一个工作目录下,比如跟你的项目代码放在
一起但是他们是同级别的文件夹
需要去配置当前的nginx.conf文件
去配置:
反向代理的配置
静态资源的配置
步骤:
我们需要在conf文件夹下面去创建前端项目文件夹
比如我说leadnews.conf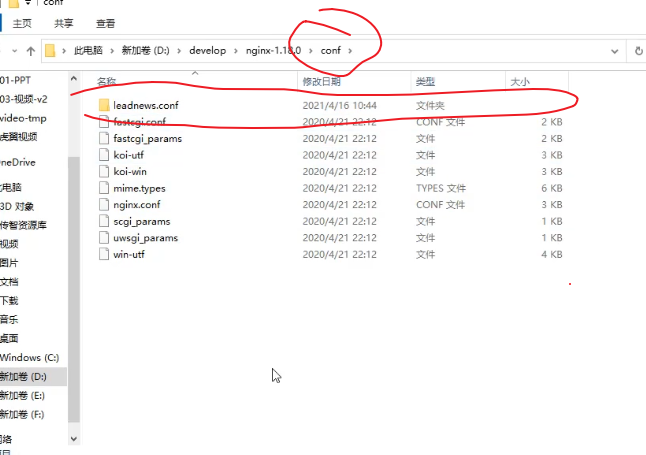
需要在这个文件夹里面去创建前端项目名.conf文件

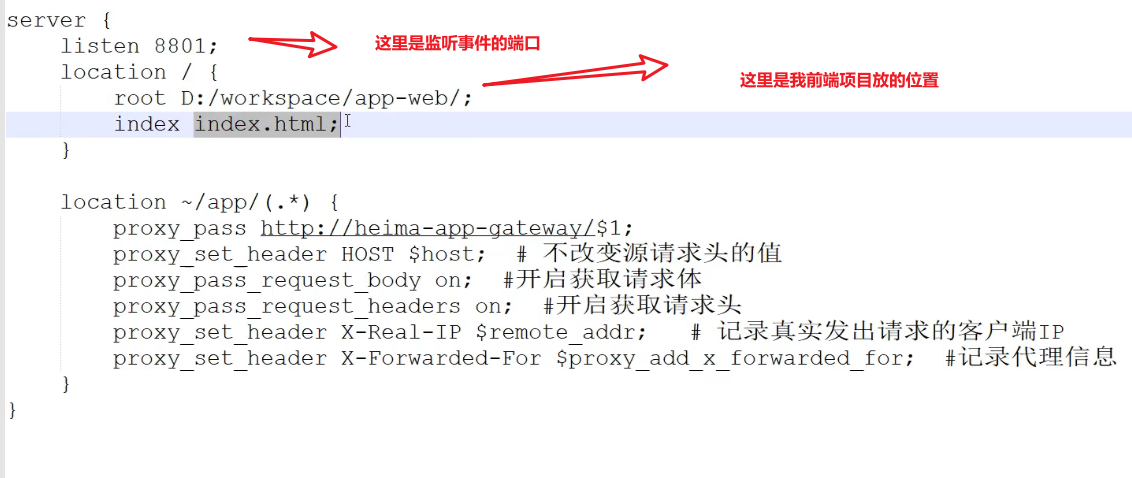
如果想要此配置生效那么我们就要去nginx.conf文件里面
去做引入
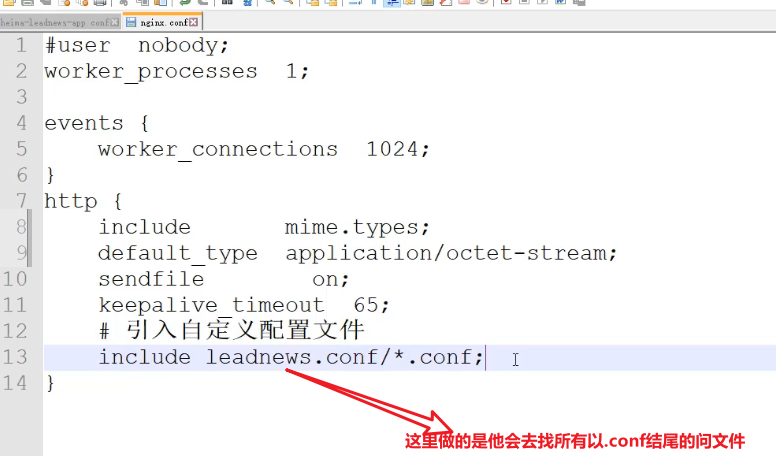
这个时候其实就可以去访问网关的位置,然后他就回去
路由我的其他的服务了
这个就是动静分离

若有收获,就点个赞吧
0 人点赞
