一、前言
- 如果需要使用 Passport,可以参考在下之前的教程: ‘Lumen5.7使用Passport【2019.02.13最新教程】,更新啦’ 。
本人之前出了 Lumen5.6使用JWT【最新教程】,亲身失败百次的总结 教程,收到不少读者的反馈,因而在前文的基础之上,赶忙跟进了最新 Lumen5.7 版本的JWT。
二、说明
不知不觉 Lumen 已经更新到 ‘5.7.x’ 版本,因此本文也紧跟脚步,使用最新版的 Lumen 进行讲解,最重要的是 Laravel/Lumen 5.7.x 版本只支持 ‘PHP7.1’ 及以上。
- 本文使用 ‘tymon/jwt-auth: ^1.0.0-rc.3’ 版本(Lumen5.4 之后,不再使用该扩展包的 0.5 版本)的扩展包,搭配 Laravel 开箱即用的 ‘Auth’ 组件实现 JWT 认证。
操作环境:‘Windows 7’ + ‘PHP7.2’ + ‘MariaDB10.3’。上述环境在下均已测试多次,现分享出本人至今 ‘Windows’ 下正常开发使用的 整合压缩包 。
三、准备部分
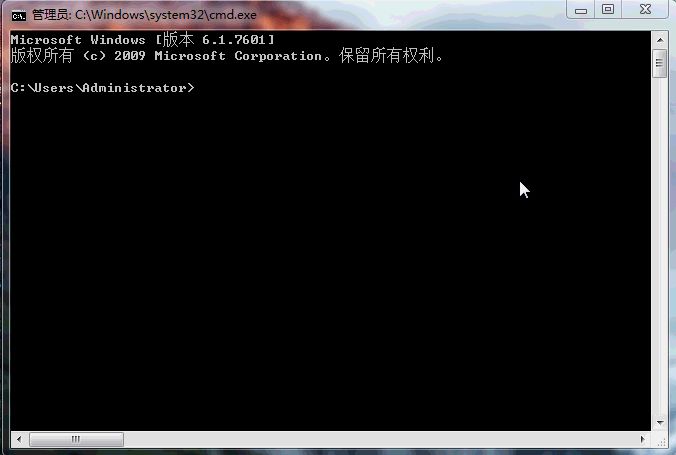
检查 ‘Windows’ 上的开发环境是否正常。
1.1. 查看 ‘PHP7.2’ 环境:
1.2. 查看 ‘MariaDB10.3’ 环境:
- 安装 ‘PostMan’ 以及 ‘Navicat Premium’ ,其他类似软件产品亦可,根据个人喜好就行。
操作之前查看 ‘JWT的介绍’ ,对理解后文大有裨益。
四、实现部分
使用 ‘Composer’ 安装最新的 Lumen 到本地。
composer create-project laravel/lumen jwt-test --prefer-dist- 进入项目 ‘jwt-test’ 中,安装 ‘tymon/jwt-auth: ^1.0.0-rc.3’ 到本地。
composer require tymon/jwt-auth ^1.0.0-rc.3 首先模拟 Laravel 目录结构,复制‘vender/laravel/lumen-framework’下的 ‘config 目录到 ‘jwt-test’ 根路径。复制完成以后 ‘jwt-test’ 的根目录结构如下:
/app......others......./config <<<<<< 配置文件目录/vendor......others.......
以后的配置文件,都只需要在根路径下的 ‘config’目录操作即可,修改根路径下的 ‘.env 文件:
......others.......APP_KEY=9TBF8FrZZgYBoM0AzKjkii/yb6TJVm11 #### Lumen默认没有设置APP_KEYCACHE_DRIVER=file #### 修改为文件缓存......others (包括MySQL的配置项) .......JWT_SECRET=Bi43uQQTHxLSnUaIOgTEUT1SkGHiOc1o #### JWT编码时需要的KeyJWT_TTL=1440 #### Token过期时间,这里的单位是minute
其中,上面的JWTSECRET字段值,可以通过以下 _Artisan 指令快捷设置:
php artisan jwt:secret
本文使用以下指令快速启动服务。php -S localhost:8000 public/index.php下面开始实现 JWT 功能。由于本人习惯在 ‘app’ 路径下新建一个 ‘Api’ 目录存放接口控制器类、 ‘Models’ 目录存放模型,因此之后的项目目录结构是:
......others......./app..........others.........../Api <<<<<< 接口控制器文件目录..../Models <<<<<< 模型文件目录/config <<<<<< 配置文件目录/vendor......others.......
5.1 修改 ‘bootstrap’ 文件夹下的 ‘app.php’ 如下所示,需要注意的是,我修改了最后一段代码,也即修改了 Lumen 默认的控制器命名空间和默认的路由文件:
```phpDir: @/bootstrap/app.php
<?php
requireonce _DIR.’/../vendor/autoload.php’;
try { (new Dotenv\Dotenv(DIR.’/../‘))->load(); } catch (Dotenv\Exception\InvalidPathException $e) { // }
$app = new Laravel\Lumen\Application( realpath(DIR.’/../‘) );
// 取消注释 $app->withFacades(); $app->withEloquent();
$app->singleton( Illuminate\Contracts\Debug\ExceptionHandler::class, App\Exceptions\Handler::class );
$app->singleton( Illuminate\Contracts\Console\Kernel::class, App\Console\Kernel::class );
注意!我已经修改了默认的认证中间件的路径!!
$app->routeMiddleware([ ‘auth’ => App\Api\Middlewares\Authenticate::class, ]);
// 取消注释 $app->register(App\Providers\AppServiceProvider::class); $app->register(App\Providers\AuthServiceProvider::class);
// 新增JWT的注册 $app->register(Tymon\JWTAuth\Providers\LumenServiceProvider::class);
注意!我已经修改了默认的命名空间!!
$app->router->group([ ‘namespace’ => ‘App\Api\Controllers’, ], function ($router) { require DIR . ‘/../routes/api.php’; # 注意!我已经修改了默认的路由文件!! });
return $app;
5.2. 修改 **'config'** 文件夹下的 **'auth.php'** 如下所示:<br />```php# Dir: @/config/auth.php<?phpreturn ['defaults' => ['guard' => env('AUTH_GUARD', 'api'),],'guards' => ['api' => ['driver' => 'jwt', 'provider' => 'jwt-provider'],],'providers' => ['jwt-provider' => ['driver' => 'eloquent','model' => \App\Models\UserModel::class]],'passwords' => [//],];
5.3. 修改 ‘app/Providers’ 文件夹下的 ‘AuthServiceProvider.php’ 如下所示:
# Dir: @/app/Providers/AuthServiceProvider.php<?phpnamespace App\Providers;use App\Models\User;use Illuminate\Support\Facades\Gate;use Illuminate\Support\ServiceProvider;class AuthServiceProvider extends ServiceProvider{/*** Register any application services.** @return void*/public function register(){//}/*** Boot the authentication services for the application.** @return void*/public function boot(){// 当使用auth中间件的api门卫的时候验证请求体$this->app['auth']->viaRequest('api', function ($request){return app('auth')->setRequest($request)->user();});}}
5.4. 修改 ‘app/Models’ 文件夹下的 ‘UserModel.php’ 如下所示:
# Dir: @/app/Models/UserModel.php<?phpnamespace App\Models;use Illuminate\Auth\Authenticatable;use Laravel\Lumen\Auth\Authorizable;use Illuminate\Database\Eloquent\Model;use Illuminate\Contracts\Auth\Authenticatable as AuthenticatableContract;use Illuminate\Contracts\Auth\Access\Authorizable as AuthorizableContract;use Tymon\JWTAuth\Contracts\JWTSubject;/*** @author AdamTyn* @description <用户>数据模型*/class UserModel extends Model implements AuthenticatableContract, AuthorizableContract, JWTSubject{use Authenticatable, Authorizable;/*** 绑定数据表* @var string*/protected $table = 'users';/*** 使用模型时可以访问的字段* @var array*/protected $fillable = ['user_name', 'password',];/*** 使用模型无法序列化为JSON时的字段* @var array*/protected $hidden = ['password',];/*** @author AdamTyn* @description 获取JWT中用户标识** @return mixed*/public function getJWTIdentifier(){return $this->getKey();}/*** @author AdamTyn* @description 获取JWT中用户自定义字段** @return array*/public function getJWTCustomClaims(){return [];}}
5.5. 在 ‘app/Api/Controllers’ 文件夹下新建 ‘AuthController.php’,内容如下所示:
# Dir: @/app/Api/Controllers/AuthController.php<?phpnamespace App\Api\Controllers;use Illuminate\Support\Facades\Log;use Laravel\Lumen\Routing\Controller;use Illuminate\Http\Request;/*** @author AdamTyn* @description <用户认证>控制器*/class AuthController extends Controller{/*** 用户模型* @var \App\Models\UserModel*/private static $userModel = null;/*** 认证器* @var mixed*/private $auth = null;/*** 当前时间戳* @var int|string*/protected $currentDateTime;/*** @author AdamTyn** AuthController constructor.*/public function __construct(){empty(self::$userModel) ? (self::$userModel = (new \App\Models\UserModel)) : true;$this->currentDateTime = time();}/*** @author AdamTyn* @description 用户登录** @param \Illuminate\Http\Request;* @return \Illuminate\Contracts\Routing\ResponseFactory|\Symfony\Component\HttpFoundation\Response*/public function login(Request $request){$response = array('status_code' => '2000');try {$user = (self::$userModel)->whereUserName($request->input('user_name'))# 魔术方法查询user_name字段->wherePassword($request->input('password'))# 魔术方法查询password字段->firstOrFail();$this->initialAuth(); # 数据库查询成功再初始化认证器if ($token = $this->auth->login($user)) {$response['data'] = ['user_id' => $user->id,'access_token' => $token,'expires_in' => $this->currentDateTime + 86400 # 24小时过期];} else {$response = ['status_code' => '5000','msg' => '系统错误,无法生成令牌'];}} catch (\Exception $exception) {$response = ['status_code' => '5002','msg' => '无法响应请求,服务端异常'];Log::error($exception->getMessage() . ' at' . $this->currentDateTime);}return response()->json($response);}/*** @author AdamTyn* @description 查询用户信息** @return \Illuminate\Contracts\Routing\ResponseFactory|\Symfony\Component\HttpFoundation\Response*/public function userInfo(){$response = array('status_code' => '2000');$this->initialAuth();if ($this->auth->check()) { # JWT同样可以使用Auth门面的check方法$response['data'] = $this->auth->user(); # JWT同样可以使用Auth门面的user方法} else {$response = ['status_code' => '4004','msg' => '系统错误,无法查询用户信息'];}return response()->json($response);}/*** @author AdamTyn* @description 用户退出** @return \Illuminate\Contracts\Routing\ResponseFactory|\Symfony\Component\HttpFoundation\Response*/public function logout(){$response = array('status_code' => '2000', 'msg' => '退出成功!');$this->initialAuth();$this->auth->invalidate(true);return response()->json($response);}/*** @author AdamTyn* @description 用户刷新Token** @return \Illuminate\Contracts\Routing\ResponseFactory|\Symfony\Component\HttpFoundation\Response*/public function refreshToken(){$response = array('status_code' => '2000');$this->initialAuth();if ($token = $this->auth->refresh(true, true)) {$response['data'] = ['access_token' => $token,'expires_in' => $this->currentDateTime + 86400 # 24小时过期];} else {$response = ['status_code' => '5000','msg' => '系统错误,无法生成令牌'];}return response()->json($response);}/*** @author AdamTyn* @description 初始化认证器** @return void*/private function initialAuth(){$this->auth = app('auth');return;}}
5.6. 最后,我们要利用 ‘auth’ 中间件的 ‘api’ 门卫,修改 ‘app/Api/Middlewares’ 文件夹下的 ‘Authenticate.php’,内容如下所示:
# Dir: @/app/Api/Middlewares/Authenticate.php<?phpnamespace App\Api\Middlewares;use Closure;use Illuminate\Contracts\Auth\Factory as Auth;class Authenticate{/*** The authentication guard factory instance.** @var \Illuminate\Contracts\Auth\Factory*/protected $auth;/*** Create a new middleware instance.** @param \Illuminate\Contracts\Auth\Factory $auth* @return void*/public function __construct(Auth $auth){$this->auth = $auth;}/*** 在进入控制器之前,判断并处理请求体** @param \Illuminate\Http\Request $request* @param \Closure $next* @param string|null $guard* @return mixed*/public function handle($request, Closure $next, $guard = null){if ($this->auth->guard($guard)->guest()) {$response['code'] = '4001';$response['errorMsg'] = '无效令牌,需要重新获取';return response()->json($response);}return $next($request);}}
5.7. 创建 ‘users’ 数据表,在数据库中简单填充一条数据。需要注意的是 Lumen 默认数据库使用 ‘utf8mb4’ 编码,如果数据库版本较低,需要修改‘app/Providers/AppServiceProvider.php’ 如下:
# Dir: @/app/Providers/AppServiceProvider.php<?phpnamespace App\Providers;use Illuminate\Support\Facades\Schema;use Illuminate\Support\ServiceProvider;class AppServiceProvider extends ServiceProvider{/*** Register any application services.** @return void*/public function register(){Schema::defaultStringLength(191);}}
$router->post(‘login’, ‘AuthController@login’); $router->group([‘prefix’ => ‘/‘, ‘middleware’ => ‘auth:api’], function () use ($router) { $router->post(‘logout’, ‘AuthController@logout’); $router->get(‘userInfo’, ‘AuthController@userInfo’); $router->post(‘refresh’, ‘AuthController@refreshToken’); });
最后,可以得出以下测试结果。<br />```phpHTTP/1.1 200 OK. POST http://127.0.0.1:8000/loginRequest: user_name='test', password='123456'{"status_code": "2000","data": {"user_id": 1,"access_token": "eyJ0eXAiOiJKV1QiLCJhbGciOiJIUzI1NgXOuXfn421r8","expires_in": 1549966383}}
HTTP/1.1 200 OK. GET http://127.0.0.1:8000/userInfoAuthorization: Bearer eyJ0eXAiOiJKV1QiLCJhbGciOiJIUzI1NgXOuXfn421r8{"status_code": "2000","data": {"id": 1,"user_name": "test","created_at": "2019-02-11 09:50:08","updated_at": null}}
HTTP/1.1 200 OK. POST http://127.0.0.1:8000/logoutAuthorization: Bearer eyJ0eXAiOiJKV1QiLCJhbGciOiJIUzI1NgXOuXfn421r8{"status_code": "2000","msg": "退出成功!"}
HTTP/1.1 200 OK. POST http://127.0.0.1:8000/refreshAuthorization: Bearer eyJ0eXAiOiJKV1QiLCJhbGciOiJIUzI1NgXOuXfn421r8{"status_code": "2000","data": {"access_token": "eyJ0eXAiOiJK8679704746ciOiJIUzI1fajsfg42louhnhtm","expires_in": 1549966383}}
放出参考的示例 Code。
五、结语
本教程面向新手,更多教程会在日后给出。
- 随着系统升级,软件更新,以后的配置可能有所变化,在下会第一时间测试并且更新教程;
- 欢迎联系在下,讨论建议都可以,之后会发布其它的教程。
- 如果读者使用的是旧版本 Lumen,可以参考本人之前出了 Lumen5.6使用JWT【最新教程】,亲身失败百次的总结 教程。
- 后面紧锣密鼓地将会推出 Laravel业务篇 系列的教程,敬请期待。

