- Chapter 3. 常见任务
- 3.1 理解并创建Layer
- 3.2. 定制化镜像
- 3.3 编写新Recipe
- 3.3.1 概述
- 3.3.2 手动/自动创建基本Recipe
- 3.3.3 保存并为recipe命名
- 3.3.4 使用Recipe运行构建
- 3.3.5. 获取代码
- 3.3.6 升级代码
- 3.3.7 打补丁
- 3.3.8 许可证书
- 3.3.9 依赖
- 3.3.10 配置recipe
- 3.3.11 使用Headers与设备连接
- 3.3.12 编译
- 3.3.13 安装
- 3.3.14 启用系统服务
- 3.3.15 打包
- 3.3.16 Recipe间共享文件
- 3.3.17 使用虚拟提供者
- 3.3.18 给待发布Recipe正确创建版本
- 3.3.19 Post-Installation Scripts
- 3.3.20 测试
- 3.3.21 示例
- 3.3.21.1 Single .c File Package (Hello World!)
- 3.3.21.2 Autotool构建的包
- 3.3.21.5 Packaging Externally Produced Binaries
- 3.3.22 Following Recipe Style Guidelines
- 3.3.23 Recipe语法
- 3.4 增加一个新的机器
- 3.5 升级Recipe
- 3.6 寻找临时源代码
- 3.7 在工作流中使用Quilt
- 3.8 使用devShell
- 3.9 使用
devpyshell - 3.10 构建
- 3.11 加速构建
- 3.12 使用库文件
- 3.13. 使用 x32 psABI
- 3.14 Enabling GObject Introspection Support
- 3.15 Optionally Using an External Toolchain
- 3.16 Creating Partitioned Images Using Wic
- 3.17 Flashing Images Using
bmaptool - 3.18 Making Images More Secure
- 3.19. Creating Your Own Distribution
- 3.20. Creating a Custom Template Configuration Directory
- 3.21. Conserving Disk Space During Builds
- 3.22. Working with Packages
- 3.23. Efficiently Fetching Source Files During a Build
- 3.24. Selecting an Initialization Manager
- 3.25. Selecting a Device Manager
- 3.26. Using an External SCM
- 3.27. Creating a Read-Only Root Filesystem
- 3.28. Maintaining Build Output Quality
- 3.29. Performing Automated Runtime Testing
- 3.30. Debugging Tools and Techniques
- 3.30.1. Viewing Logs from Failed Tasks
- 3.30.2. Viewing Variable Values
- 3.30.3. Viewing Package Information with oe-pkgdata-util
- 3.30.4. Viewing Dependencies Between Recipes and Tasks
- 3.30.5. Viewing Task Variable Dependencies
- 3.30.6. Viewing Metadata Used to Create the Input Signature of a Shared State Task
- 3.30.7. Invalidating Shared State to Force a Task to Run
- 3.30.8. Running Specific Tasks
- 3.30.9. General BitBake Problems
- 3.30.10. Building with No Dependencies
- 3.30.11. Recipe Logging Mechanisms
- 3.30.12. 调试并行Make冲突
- 3.30.13. Debugging With the GNU Project Debugger (GDB) Remotely
- 3.30.14. Debugging with the GNU Project Debugger (GDB) on the Target
- 3.30.15. Other Debugging Tips
- 3.31. Making Changes to the Yocto Project
- 3.32. Working With Licenses
- 3.33. Using the Error Reporting Tool
- 3.34. Using Wayland and Weston
Chapter 3. 常见任务
- 3.1 理解并创建Layer
- 3.2. 定制化镜像
- 3.3 编写新Recipe
- 3.3.1 概述
- 3.3.2 手动/自动创建基本Recipe
- 3.3.3 保存并为recipe命名
- 3.3.4 使用Recipe运行构建
- 3.3.5. 获取代码
- 3.3.6 升级代码
- 3.3.7 打补丁
- 3.3.8 许可证书
- 3.3.9 依赖
- 3.3.10 配置recipe
- 3.3.11 使用Headers与设备连接
- 3.3.12 编译
- 3.3.13 安装
- 3.3.14 启用系统服务
- 3.3.15 打包
- 3.3.16 Recipe间共享文件
- 3.3.17 使用虚拟提供者
- 3.3.18 给待发布Recipe正确创建版本
- 3.3.19 Post-Installation Scripts
- 3.3.20 测试
- 3.3.21 示例
- 3.3.21.1 Single .c File Package (Hello World!)
- 3.3.21.2 Autotool构建的包
- 3.3.21.5 Packaging Externally Produced Binaries
- 3.3.22 Following Recipe Style Guidelines
- 3.3.23 Recipe语法
- 3.4 增加一个新的机器
- 3.5 升级Recipe
- 3.6 寻找临时源代码
- 3.7 在工作流中使用Quilt
- 3.8 使用devShell
- 3.9 使用
devpyshell - 3.10 构建
- 3.11 加速构建
- 3.12 使用库文件
- 3.13. 使用 x32 psABI
- 3.14 Enabling GObject Introspection Support
- 3.15 Optionally Using an External Toolchain
- 3.16 Creating Partitioned Images Using Wic
- 3.17 Flashing Images Using
bmaptool - 3.18 Making Images More Secure
- 3.19. Creating Your Own Distribution
- 3.20. Creating a Custom Template Configuration Directory
- 3.21. Conserving Disk Space During Builds
- 3.22. Working with Packages
- 3.23. Efficiently Fetching Source Files During a Build
- 3.24. Selecting an Initialization Manager
- 3.25. Selecting a Device Manager
- 3.26. Using an External SCM
- 3.27. Creating a Read-Only Root Filesystem
- 3.28. Maintaining Build Output Quality
- 3.29. Performing Automated Runtime Testing
- 3.30. Debugging Tools and Techniques
- 3.30.1. Viewing Logs from Failed Tasks
- 3.30.2. Viewing Variable Values
- 3.30.3. Viewing Package Information with oe-pkgdata-util
- 3.30.4. Viewing Dependencies Between Recipes and Tasks
- 3.30.5. Viewing Task Variable Dependencies
- 3.30.6. Viewing Metadata Used to Create the Input Signature of a Shared State Task
- 3.30.7. Invalidating Shared State to Force a Task to Run
- 3.30.8. Running Specific Tasks
- 3.30.9. General BitBake Problems
- 3.30.10. Building with No Dependencies
- 3.30.11. Recipe Logging Mechanisms
- 3.30.12. 调试并行Make冲突
- 3.30.13. Debugging With the GNU Project Debugger (GDB) Remotely
- 3.30.14. Debugging with the GNU Project Debugger (GDB) on the Target
- 3.30.15. Other Debugging Tips
- 3.31. Making Changes to the Yocto Project
- 3.32. Working With Licenses
- 3.33. Using the Error Reporting Tool
- 3.34. Using Wayland and Weston
本章将介绍在使用Yocto Project时,需要经常处理的任务,例如创建layer,新加软件包,扩展/定制化镜像,移植到新硬件等基础功能。
3.1 理解并创建Layer
OpenEmbedded(译者注:后文以OE代替)构建系统支持管理多个layer的元数据(Metadata)。Layer允许你将不同类型的自定义设置独立开来。请阅读《Yocto Project Overview and Concepts Manual》的“The Yocto Project Layer Model”章节以获取Layer Model的介绍信息。
3.1.1 创建你自己的Layer
使用OE构建系统来创建你自己的Layer是很容易的一件事,Yocto Project还提供了工具让你更加快速地创建Layer。为了让你更好地理解Layer这个概念,本节将一步步的展示如何创建Layer。请阅读《Yocto Project Board Support Package (BSP) Developer’s Guide》的“Creating a New BSP Layer Using the bitbake-layers Script”章节和本文档的”使用bitbake-layers脚本创建通用Layer”章节以了解更多Layer创建工具。
参照以下步骤,在不使用工具地情况下来创建Layer:
查看已有Layer: 在创建一个新Layer之前,你需要确认下元数据并没有被包含于其他人创建的Layer中。你可以查看OE社区的OpenEmbedded MEtadata Index中可以被用在Yocto Project里的Layer索引。你可以找到你想要的或是差不多的一个Layer。
创建新目录: 为你的Layer创建目录。创建Layer时,确保目录和Yocto Project代码目录(例如克隆下来的poky仓库)无关。
尽管没有强制要求,最好在目录名前加上”meta-“前缀,例如:
meta-mylayermeta-GUI_xyzmeta-mymachine
除例外情况,Layer名方方式如下:
meta-root_name
遵守这样的命名规范,你就不会遇到因工具,模块或者变量默认你的Layer名是以”meta-“前缀开始而产生的困扰。相关配置文件示例在后续步骤中有所展示,不带”Meta-“前缀的Layer名会自动加上这个前缀赋值给配置中的几个变量。
创建Layer配置文件: 在新建的Layer文件夹中,你需要创建
conf/layer.conf文件。最简单的方式是拷贝一份已有配置到你的Layer配置目录中,然后根据需要改动它。Yocto Project代码仓库的
meta-yocto-bsp/conf/layer.conf文件说明了其语法。你需要在你的配置文件中,将”yoctobsp”替换成一个唯一标识(例如Layer “meta-machinexyz”的名字”machinexyz”):# We have a conf and classes directory, add to BBPATHBBPATH .= ":${LAYERDIR}"# We have recipes-* directories, add to BBFILESBBFILES += "${LAYERDIR}/recipes-*/*/*.bb \${LAYERDIR}/recipes-*/*/*.bbappend"BBFILE_COLLECTIONS += "yoctobsp"BBFILE_PATTERN_yoctobsp = "^${LAYERDIR}/"BBFILE_PRIORITY_yoctobsp = "5"LAYERVERSION_yoctobsp = "4"LAYERSERIES_COMPAT_yoctobsp = "warrior"
以下是Layer配置文件说明:
BBPATH: 将此Layer根目录添加到BitaBake搜索路径中。利用BBPATH变量,BitBake可以定位类文件(.bbclass),配置文件,和被include的文件。BitBake使用匹配BBPATH名字的第一个文件,这与给二进制文件使用的PATH变量类似。同样也推荐你为你的Layer中类文件和配置文件起一个唯一的名字。
BBFILES: 定义Layer中recipe的路径
BBFILE_COLLECTIONS: 创建唯一标识符以给OE构建系统参照。此示例中,标识符”yoctobsp”代表”meta-yocto-bsp”Layer。
BBFILE_PATTERN: 解析时提供Layer目录
BBFILE_PRIORITY: OE构建系统在不同Layer找到相同名字recipe时所参考的使用优先级
LAYERVERSION: Layer的版本号。你可以通过LAYERDEPENDS变量指定使用特定版本号的Layer
LAYERSERIES_COMPAT: Lists the Yocto Project releases for which the current version is compatible. This variable is a good way to indicate if your particular layer is current.列出当前版本兼容的Yocto Project释放版本。它可以表示Layer是否有效。
添加内容: 根据Layer类型添加内容。如果这个Layer支持某一设备,在
conf/machine/目录下的文件中添加此设备的配置。如果这个Layer新增发行版本策略,就在conf/distro/下文件添加发行版本配置。如果这个Layer引入新的recipe,把recipe放入recipes-*前缀的子目录中。注释
请参考《Yocto Project Board Support Package (BSP) Developer’s Guide》以阅读更多关于遵从Yocto Project的Layer层级的解释(可选)测试兼容性: 如果你希望获得许可,以便在你的Layer或使用了你的Layer的应用中使用Yocto Project Compatibility Logo,请阅读3.1.3 确保你的Layer兼容Yocto Project章节以获得更多信息。
3.1.2 创建Layer的最佳实践
T如果想创建易于维护并且不会影响其他设备的构建的Layer,你需要考虑一下列表的建议:
避免在你的配置中覆盖其他Layer的所有Recipe: 也就是说,不要拷贝整个recipe到你的Layer中然后修改它,而是应该使用
.bbappend文件去重写那些你需要修改的部分。避免重复include文件: 给使用include文件的recipe使用
.bbappend文件。或者,当你想要引入一个新的recipe而这个recipe需要include文件时,使用相对于原始Layer目录的路径去引入它。比如说,使用require recipes-core/package/file.inc这样的路径,而不是require file.inc。如果你发现你需要重写include文件,这可能意味着这个include文件是有问题的,这种情况下,你应该指出问题而不是直接重写它。例如,你可以与维护者取得联系,新加变量以使得可能被重写的部分更容易被修改。结构化Layer: 正确使用append文件进行重写并在Layer中放置设备相关文件,可以确保构建不会使用错误的元数据并影响其他设备的构建。以下时一些示例:
修改变量以支持不同机器: 假设你有一个为支持构建”one”设备的
meta-oneLayer,你创建了base-files.bbappend文件并以修改DEPENDS变量的方式创建了”foo”依赖项:DEPENDS = "foo"
每当构建包含
meta-oneLayer时这个依赖就会被创建。然而,你可能不希望为所有设备添加此依赖。比如,你想为”two”设备进行构建,但bblayers.conf却包含了meta-oneLayer,构建时,设备”two”的base-files也会有foo的依赖。为了确保你的修改仅仅应用于设备”one”,用设备重写
DEPENDS语句:DEPENDS_one = "foo"
使用
_append和_prepend操作时同样遵守此策略:DEPENDS_append_one = " foo"DEPENDS_prepend_one = "foo "
拿实际案例来说,如下是用
musl C库构建gnutls时,添加的”argp-standalone”依赖:DEPENDS_append_libc-musl = " argp-standalone"
注释
使用指定设备的_append和_prepend操作时避免使用”+=””=+”在指定机器特定路径的地方设置机器特定文件: When you have a base recipe, such as
base-files.bb, that contains a SRC_URI statement to a file, you can use an append file to cause the build to use your own version of the file. For example, an append file in your layer atmeta-one/recipes-core/base-files/base-files.bbappendcould extend FILESPATH using FILESEXTRAPATHS as follows:FILESEXTRAPATHS_prepend := "${THISDIR}/${BPN}:"
The build for machine “one” will pick up your machine-specific file as long as you have the file in
meta-one/recipes-core/base-files/base-files/. However, if you are building for a different machine and thebblayers.conffile includes themeta-onelayer and the location of your machine-specific file is the first location where that file is found according toFILESPATH, builds for all machines will also use that machine-specific file.You can make sure that a machine-specific file is used for a particular machine by putting the file in a subdirectory specific to the machine. For example, rather than placing the file in
meta-one/recipes-core/base-files/base-files/as shown above, put it inmeta-one/recipes-core/base-files/base-files/one/. Not only does this make sure the file is used only when building for machine “one”, but the build process locates the file more quickly.In summary, you need to place all files referenced from
SRC_URIin a machine-specific subdirectory within the layer in order to restrict those files to machine-specific builds.
兼容Yocto Project: If you want permission to use the Yocto Project Compatibility logo with your layer or application that uses your layer, perform the steps to apply for compatibility. 请阅读3.1.3 确保你的Layer兼容Yocto Project章节以获得更多信息。
遵守Layer命名约定: 使用
meta-layer_name的命名格式将自定义Layer存储在Git仓库本地将Layer成组: Clone your repository alongside other cloned meta directories from the Source Directory.
3.1.3 确保你的Layer兼容Yocto Project
When you create a layer used with the Yocto Project, it is advantageous to make sure that the layer interacts well with existing Yocto Project layers (i.e. the layer is compatible with the Yocto Project). Ensuring compatibility makes the layer easy to be consumed by others in the Yocto Project community and could allow you permission to use the Yocto Project Compatible Logo.
Note
Only Yocto Project member organizations are permitted to use the Yocto Project Compatible Logo. The logo is not available for general use. For information on how to become a Yocto Project member organization, see the Yocto Project Website.
The Yocto Project Compatibility Program consists of a layer application process that requests permission to use the Yocto Project Compatibility Logo for your layer and application. The process consists of two parts:
Successfully passing a script (
yocto-check-layer) that when run against your layer, tests it against constraints based on experiences of how layers have worked in the real world and where pitfalls have been found. Getting a “PASS” result from the script is required for successful compatibility registration.Completion of an application acceptance form, which you can find at https://www.yoctoproject.org/webform/yocto-project-compatible-registration.
To be granted permission to use the logo, you need to satisfy the following:
Be able to check the box indicating that you got a “PASS” when running the script against your layer.
Answer “Yes” to the questions on the form or have an acceptable explanation for any questions answered “No”.
Be a Yocto Project Member Organization.
The remainder of this section presents information on the registration form and on the yocto-check-layer script.
3.1.3.1 Yocto Project兼容程序应用
Use the form to apply for your layer’s approval. Upon successful application, you can use the Yocto Project Compatibility Logo with your layer and the application that uses your layer.
To access the form, use this link: https://www.yoctoproject.org/webform/yocto-project-compatible-registration. Follow the instructions on the form to complete your application.
The application consists of the following sections:
联系方式: Provide your contact information as the fields require. Along with your information, provide the released versions of the Yocto Project for which your layer is compatible.
验收标准: Provide “Yes” or “No” answers for each of the items in the checklist. Space exists at the bottom of the form for any explanations for items for which you answered “No”.
Recommendations: Provide answers for the questions regarding Linux kernel use and build success.
3.1.3.2 yocto-check-layer 脚本
The yocto-check-layer script provides you a way to assess how compatible your layer is with the Yocto Project. You should run this script prior to using the form to apply for compatibility as described in the previous section. You need to achieve a “PASS” result in order to have your application form successfully processed.
The script divides tests into three areas: COMMON, BSP, and DISTRO. For example, given a distribution layer (DISTRO), the layer must pass both the COMMON and DISTRO related tests. Furthermore, if your layer is a BSP layer, the layer must pass the COMMON and BSP set of tests.
To execute the script, enter the following commands from your build directory:
$ source oe-init-build-env$ yocto-check-layer your_layer_directory
Be sure to provide the actual directory for your layer as part of the command.
Entering the command causes the script to determine the type of layer and then to execute a set of specific tests against the layer. The following list overviews the test:
common.test_readme: Tests if a README file exists in the layer and the file is not empty.common.test_parse: Tests to make sure that BitBake can parse the files without error (i.e. bitbake -p).common.test_show_environment: Tests that the global or per-recipe environment is in order without errors (i.e. bitbake -e).common.test_signatures: Tests to be sure that BSP and DISTRO layers do not come with recipes that change signatures.bsp.test_bsp_defines_machines: Tests if a BSP layer has machine configurations.bsp.test_bsp_no_set_machine: Tests to ensure a BSP layer does not set the machine when the layer is added.distro.test_distro_defines_distros: Tests if a DISTRO layer has distro configurations.distro.test_distro_no_set_distro: Tests to ensure a DISTRO layer does not set the distribution when the layer is added.
3.1.4 启用你的Layer
B在OE构建系统能够使用你创建的新Layer前,你需要启用它。是需要将Layer路径添加到build目录下conf/bblayers.conf的BBLAYERS变量就能很容易的使它起效。以下时启用名为meta-mylayer的示例:
# POKY_BBLAYERS_CONF_VERSION is increased each time build/conf/`bblayers.conf`# changes incompatiblyPOKY_BBLAYERS_CONF_VERSION = "2"BBPATH = "${TOPDIR}"BBFILES ?= ""BBLAYERS ?= " \/home/user/poky/meta \/home/user/poky/meta-poky \/home/user/poky/meta-yocto-bsp \/home/user/poky/meta-mylayer \"
BitBake自上而下解析conf/bblayers.conf文件中BBLAYERS变量设定的每一个conf/layer.conf文件。处理conf/layer.conf文件期间,BitBake会添加recipes,类文件喝配置文件到源目录。
3.1.5 在Layer中使用.bbappend文件
在另外一个recipe上附加元数据的recipe被称为BitBake append文件。BitBake append文件使用.bbappend作为文件类型后缀,被附加元数据的recipe则使用.bb文件类型后缀。
使用.bbappend文件,你可以在无需拷贝另一个Layer的recipe到你的Layer中,就能增加或修改内容。.bbappend文件在你的Layer中,而被附加内容的.bb文件则在另一个Layer中。
附加信息不仅仅能避免重复,也能将不同的Layer的改动自动应用到你的Layer中。如果你是拷贝recipe,当改动发生时你需要手动合并。
创建append文件时,必须使用对应recipe相同的名字。例如someapp_2.7.bbappend必须应用于someapp_2.7.bb,这意味着这两个文件是版本特定的。如果对应的recipe重命名升级了版本,你也需要同时改动.bbappend文件名。如果检测到.bbappend文件没有所匹配的recipe,BitBake会显示错误。阅读BB_DANGLINGAPPENDS_WARNONLY以了解更多如何处理此错误的信息。
作为例子,以下是源目录formfactor的recipe和append文件。首先是”meta”Layer的meta/recipes-bsp/formfactor目录下的formfactor_0.0.bb文件:
SUMMARY = "Device formfactor information"SECTION = "base"LICENSE = "MIT"LIC_FILES_CHKSUM = "file://${COREBASE}/meta/COPYING.MIT;`md5`=3da9cfbcb788c80a0384361b4de20420"PR = "r45"SRC_URI = "file://config file://machconfig"S = "${WORKDIR}"PACKAGE_ARCH = "${MACHINE_ARCH}"INHIBIT_DEFAULT_DEPS = "1"do_install() {# Install file only if it has contentsinstall -d ${D}${sysconfdir}/formfactor/install -m 0644 ${S}/config ${D}${sysconfdir}/formfactor/if [ -s "${S}/machconfig" ]; theninstall -m 0644 ${S}/machconfig ${D}${sysconfdir}/formfactor/fi}
注意recipe中的SRC_URI变量,它告诉OE构建系统在构建时从哪里取得文件。
以下是从树莓派BSP Layerrecipes-bsp/formfactor下名为formfactor_0.0.bbappend的append文件:
FILESEXTRAPATHS_prepend := "${THISDIR}/`${PN}`:"
默认地,构建系统会使用FILESPATH变量去定位文件,这个append文件通过设定FILESEXTRAPATHS变量扩展了文件路径。通过这样的方式是最可靠,最为推荐的方式来为构建系统增加搜索文件的搜索目录。
The statement in this example extends the directories to include ${THISDIR}/${PN}, which resolves to a directory named formfactor in the same directory in which the append file resides (i.e. meta-raspberrypi/recipes-bsp/formfactor. This implies that you must have the supporting directory structure set up that will contain any files or patches you will be including from the layer.
示例中的语句,扩展了${THISDIR}/${PN}路径,这个路径解析为append文件所在目录(meta-raspberrypi/recipes-bsp/formfactor)。这表明你必须有对应的目录结构,存放着将会包含的文件或补丁。(译者注:待确认此段翻译)
因为指向THISDIR,使用立即展开赋值操作符:=很重要,它保证列表中仍是按冒号分隔的。
注释
BitBake自动定义THISDIR变量,你不应该给它设定任何值。”_prepend”保证在最终列表里路径会优先于其他路径。 不是所有的append文件都会追加文件,许多append文件仅仅用来添加构建选项(例如systemd)。这些情况下,你的append文件甚至都不需要用到FILESEXTRAPATHS语句。
3.1.6 设置优先级
每个Layer都设定了优先值,当多个Layer有同名recipe时,优先值决定了哪一个Layer拥有更高的优先级。数字越大,代表优先级越高。优先值同样影响了扩展同一recipe的多个.bbappend的顺序。你可以手动指定优先值,也可以让构建系统根据Layer的依赖关系自动计算优先级。
手动设定优先值,需要使用BBFILE_PRIORITY加上layer名:
BBFILE_PRIORITY_mylayer = "1"
注释
拥有低版本号PV但是更高优先级的recipe是可能存在的。 目前,Layer优先级不会影响conf或.bbclass文件的优先顺序,BitBake的未来版本可能会处理这一点。
3.1.7 管理Layers
在多Layer的项目中,你可以使用BitBake Layer管理工具bitbake-layers显示recipe结构。它能够输出报告以获取已配置Layer的路径和优先级,以及.bbappend文件和它们应用的recipe文件,这个能够帮助展现潜在问题。
使用以下命令以获取BitBake Layer管理工具的帮助信息:
$ bitbake-layers --helpNOTE: Starting bitbake server...usage: bitbake-layers [-d] [-q] [-F] [--color COLOR] [-h] <subcommand> ...BitBake layers utilityoptional arguments:-d, --debug Enable debug output-q, --quiet Print only errors-F, --force Force add without recipe parse verification--color COLOR Colorize output (where COLOR is auto, always, never)-h, --help show this help message and exitsubcommands:<subcommand>show-layers show current configured layers.show-overlayed list overlayed recipes (where the same recipe existsin another layer)show-recipes list available recipes, showing the layer they areprovided byshow-appends list bbappend files and recipe files they apply toshow-cross-depends Show dependencies between recipes that cross layerboundaries.add-layer Add one or more layers to `bblayers.conf`.remove-layer Remove one or more layers from `bblayers.conf`.flatten flatten layer configuration into a separate outputdirectory.layerindex-fetch Fetches a layer from a layer index along with itsdependent layers, and adds them to conf/`bblayers.conf`.layerindex-show-dependsFind layer dependencies from layer index.create-layer Create a basic layerUse bitbake-layers <subcommand> --help to get help on a specific command
下列列表介绍了可用的命令:
help: 显示通用帮助信息或者一个具体命令的帮助信息
show-layers: 显示当前配置的Layer
show-overlayed: 列出被覆盖的recipe(另外一个Layer中有同名recipe,但优先级更高)
show-recipes: 列出有效recipe和提供这些recipe的Layer
show-appends: 列出
.bbappend文件和它们所应用的recipe文件show-cross-depends: 列出跨Layer的recipe的依赖关系
add-layer: 添加Layer至
bblayers.conf.remove-layer: 从
bblayers.conf移除Layerflatten: Flattens the layer configuration into a separate output directory. Flattening your layer configuration builds a “flattened” directory that contains the contents of all layers, with any overlayed recipes removed and any
.bbappendfiles appended to the corresponding recipes. You might have to perform some manual cleanup of the flattened layer as follows:Non-recipe files (such as patches) are overwritten. The flatten command shows a warning for these files.
Anything beyond the normal layer setup has been added to the
layer.conffile. Only the lowest priority layer’slayer.confis used.Overridden and appended items from
.bbappendfiles need to be cleaned up. The contents of each .bbappend end up in the flattened recipe. However, if there are appended or changed variable values, you need to tidy these up yourself. Consider the following example. Here, thebitbake-layerscommand adds the line#### bbappended ...so that you know where the following lines originate:...DESCRIPTION = "A useful utility"...EXTRA_OECONF = "--enable-something"...#### bbappended from meta-anotherlayer ####DESCRIPTION = "Customized utility"EXTRA_OECONF += "--enable-somethingelse"
Ideally, you would tidy up these utilities as follows:
...DESCRIPTION = "Customized utility"...EXTRA_OECONF = "--enable-something --enable-somethingelse"...
layerindex-fetch: Fetches a layer from a layer index, along with its dependent layers, and adds the layers to the
conf/bblayers.conffile.layerindex-show-depends: Finds layer dependencies from the layer index.
create-layer: 创建一个基础Layer
3.1.8 使用bitbake-layers脚本创建Layer
bitbake-layers脚本配上create-layer子命令,可以很简单地创建一个新Layer:
注释
- 阅读《Yocto Project Board Specific (BSP) Developer’s Guide》“BSP Layers”章节以获得更多关于BSP Layer的信息
- 在OE构建系统中使用Layer,你需要添加至
bblayers.conf配置文件中。阅读3.1.9 使用bitbake-layers脚本添加Layer以获得更多信息
使用此命令,默认创建如下一个Layer:
Layer优先级为6
包含
layer.conf文件的conf子目录recipes-example子目录下名为example的子目录,并在其中有一个example.bbrecipe文件Layer的证书说明
COPYING.MIT文件。脚本假定你使用大多数Layer都使用的MIT证书README文件,描述这个Layer的内容
以如下最简单的形式,你可以在当前目录下创建名为your_layer_name的Layer:
$ bitbake-layers create-layer your_layer_name
作为示例,以下命令为你在home目录创建一个名为meta-scottrif的Layer:
$ cd /usr/home$ bitbake-layers create-layer meta-scottrifNOTE: Starting bitbake server...Add your new layer with 'bitbake-layers add-layer meta-scottrif'
如果你想自定义优先级,可以使用‐‐priority选项,或者创建后在conf/layer.conf里修改BBFILE_PRIORITY.你也可以通过‐‐example-recipe-name选项,给默认的example recipe起别名。
实际操作bitbake-layers create-layer命令可以更容易清楚它是如何工作的,你也可以通过以下方式查看使用帮助:
$ bitbake-layers create-layer --helpNOTE: Starting bitbake server...usage: bitbake-layers create-layer [-h] [--priority PRIORITY][--example-recipe-name EXAMPLERECIPE]layerdirCreate a basic layerpositional arguments:layerdir Layer directory to createoptional arguments:-h, --help show this help message and exit--priority PRIORITY, -p PRIORITYLayer directory to create--example-recipe-name EXAMPLERECIPE, -e EXAMPLERECIPEFilename of the example recipe
3.1.9 使用bitbake-layers脚本添加Layer
当你创建Layer后,你必须将它添加至bblayers.conf中,添加后才能使OE购进系统意识到它的存在,并检索元数据。
使用bitbake-layers add-layer命令添加:
$ bitbake-layers add-layer your_layer_name
这里为你展示添加meta-scottrifLayer的示例。紧跟的命令可以展示bblayers.conf里已有Layer的列表:
$ bitbake-layers add-layer meta-scottrifNOTE: Starting bitbake server...Parsing recipes: 100% |##########################################################| Time: 0:00:49Parsing of 1441 .bb files complete (0 cached, 1441 parsed). 2055 targets, 56 skipped, 0 masked, 0 errors.$ bitbake-layers show-layersNOTE: Starting bitbake server...layer path priority==========================================================================meta /home/scottrif/poky/meta 5meta-poky /home/scottrif/poky/meta-poky 5meta-yocto-bsp /home/scottrif/poky/meta-yocto-bsp 5workspace /home/scottrif/poky/build/workspace 99meta-scottrif /home/scottrif/poky/build/meta-scottrif 6
添加这个Layer可以使构建系统在构建时定位Layer。
注释
构建时,OE构建系统根据此列表自上而下查找Layer。
3.2. 定制化镜像
你可以定制化镜像以满足特定需求,本章将介绍几种方式以及每种方法的指导。
3.2.1 使用local.conf定制化镜像
可能最简单的方式去定制化镜像,就是修改local.conf添加包。因为这仅限于本地使用,这个方法只允许你添加包,且不足够灵活以创建属于你自己的镜像。当你通过本地变量添加包,这意味着这些变量的修改会体现在每一次构建中,所有镜像都会受到影响,你可能不希望这样。
使用本地配置文件添加包,你需要使用带_append操作符的IMAGE_INSTALL变量:
IMAGE_INSTALL_append = " strace"
使用这样的语法非常重要,尤其是引号和包strace名字中间的空格。_append操作符不会添加空格,因此这个空格在这里是必须的。
如果你希望避免产生顺序问题,你必须使用 _append 而不是+=操作符。这样做的理由是,无条件附加在变量后,避免因镜像recipe设定的变量和带例如?=操作符的.bbclass文件而导致的顺序问题。使用_append确保此操作生效。
如上所示,IMAGE_INSTALL_append会影响所有镜像。使用下列方式可以让变量只对特定镜像有效:
IMAGE_INSTALL_append_pn-core-image-minimal = " strace"
这个示例仅仅向core-image-minimal添加strace
你也可以通过CORE_IMAGE_EXTRA_INSTALL变量来添加包,如果使用的话,只有core-image-*镜像会有影响。
3.2.2 使用自定义IMAGE_FEATURES 和 EXTRA_IMAGE_FEATURES定制化镜像
另外一种定制化镜像的方式是使用IMAGE_FEATURES和EXTRA_IMAGE_FEATURES开启或关闭high-level镜像功能。尽管两个变量的功能几乎相同,最佳实践是,在recipe中使用IMAGE_FEATURES,在Build目录下的local.conf使用EXTRA_IMAGE_FEATURES。
想要理解它们是怎么起效的,最好的参考就是meta/classes/core-image.bbclass,这个类列出了可用的IMAGE_FEATURES,大多数是包集合,也有一些诸如debug-tweaks 和 read-only-rootfs的通用配置设定。
总之,这个文件会查看IMAGE_FEATURES变量的内容,然后映射或者配置功能。基于这个信息,构建系统自动添加合适的包或配置到IMAGE_INSTALL变量中。实际上,你是通过扩展类或创建自定义类的方式启用额外功能。
Use the EXTRA_IMAGE_FEATURES variable from within your local configuration file. Using a separate area from which to enable features with this variable helps you avoid overwriting the features in the image recipe that are enabled with IMAGE_FEATURES. The value of EXTRA_IMAGE_FEATURES is added to IMAGE_FEATURES within meta/conf/bitbake.conf.
为了解释你是如何使用这些变量修改镜像,思考选择SSH服务器这个例子。Yocto Project为你的镜像提供两个SSH服务器:Dropbear和OpenSSH,Dropbear合适作为资源有限环境的最小化SSH服务器,而OpenSSH是众所周知的标准SSH服务器实现。默认地,core-image-sato配置使用Dropbear,core-image-full-cmdline 和 core-image-lsb使用OpenSSH,而core-image-minimal则不包含SSH服务器。
你可以定制化你的镜像,修改默认值。在recipe中编辑IMAGE_FEATURES或者在local.conf使用EXTRA_IMAGE_FEATURES,如此你就可以让你地镜像包含ssh-server-dropbear 或 ssh-server-openssh
注释
阅读《Yocto Project Reference Manual》“Images”章节以获取Yocto Project提供地完整镜像功能列表。
3.2.3 使用自定义.bb文件定制化镜像
你也可以通过创建自定义recipe的方式为你的镜像添加额外的软件。以下为示例格式:
IMAGE_INSTALL = "packagegroup-core-x11-base package1 package2"inherit core-image
Defining the software using a custom recipe gives you total control over the contents of the image. It is important to use the correct names of packages in the IMAGE_INSTALL variable. You must use the OpenEmbedded notation and not the Debian notation for the names (例如 glibc-dev instead of libc6-dev).通过自定义recipe的方式定义软件有助于你完全掌控镜像的内容。在IMAGE_INSTALL变量中使用包的正确名字是非常重要的,你必须使用OE而不是Debian的命名方式(例如,使用 glibc-dev 而不是 libc6-dev)
另外一种方式就是基于已有镜像。比如说,如果你想在core-image-sato添加额外的strace包,复制meta/recipes-sato/images/core-image-sato.bb的内容到一个新的.bb文件中,然后将下方一行语句加到末尾:
IMAGE_INSTALL += "strace"
3.2.4 使用自定义包合集定制化镜像
对于复杂的定制化,最好的方式是创建包集合recipe用来构建镜像,示例可参考meta/recipes-core/packagegroups/packagegroup-base.bb。
如果你查看这个recipe,你会看到PACKAGES变量列出了要生产的包集合。inherit packagegroup语句设定合适的默认值,并且自动为PACKAGES语句列出的包加上-dev, -dbg, 和 -ptest补充包。
注释
inherit packages应该在recipe几乎起始位置,必须在PACKAGES`前面。
PACKAGES所列出的包,你可以使用RDEPENDS 和 RRECOMMENDS入口提供父任务包应该包含的包列表。你可以参考如下packagegroup-base.bb。
这里有一段简短的示例:
DESCRIPTION = "My Custom Package Groups"inherit packagegroupPACKAGES = "\packagegroup-custom-apps \packagegroup-custom-tools \"RDEPENDS_packagegroup-custom-apps = "\dropbear \portmap \psplash"RDEPENDS_packagegroup-custom-tools = "\oprofile \oprofileui-server \lttng-tools"RRECOMMENDS_packagegroup-custom-tools = "\kernel-module-oprofile"
示例中,packagegroup-custom-apps, and packagegroup-custom-tools两个包集合被创建,同时还有它们的依赖和推荐包依赖。构建时使用这些包集合,你需要将packagegroup-custom-apps 和/或 packagegroup-custom-tools加入到IMAGE_INSTALL变量。其他镜像依赖的格式,请参考本节其他部分。
3.2.5 自定义镜像主机名
默认地,配置的主机名(即 /etc/hostname)就是设备名,例如,MACHINE 设定为 “qemux86”,被写入/etc/hostname的就是”qemux86”。
你可以通过使用append文件或配置文件的方式修改base-filesrecipe中”hostname”变量值。append文件需如下使用:
hostname="myhostname"
配置文件需如下使用:
hostname_pn-base-files = "myhostname"
有些情况下,改变”hostname”默认值是很有用的,例如,假设你需要对镜像做大量测试,希望能轻易地在使用默认主机名的镜像中识别你要做测试的镜像,你可以把默认主机名改为”testme”,结果是镜像会使用”testme”这个名字。一旦测试完成,你不需要再次构建镜像作为测试,你可以重置主机名。
另外一点是,如果你unset这个变量,镜像文件系统中就会没有默认主机名。这里是一个示例:
hostname_pn-base-files = ""
文件系统没有默认主机名对于例如虚拟机使用动态主机名的环境,是适宜的。
3.3 编写新Recipe
Recipe(.bb文件)是Yocto Project环境基本组件,每一个OE构建系统构建的软件组件都需要recipe定义这个组件。本节描述如何创建,编写,测试一个新Recipe。
注释
更多recipe有用的变量和recipe命名问题,请阅读《Yocto Project Reference Manual》“Required”章节
3.3.1 概述
下图展示了创建新recipe的基本过程,后面的内容会详细介绍这些步骤。

3.3.2 手动/自动创建基本Recipe
你可以完全从零编写Recipe,然而,这些选择可以帮助你快速开始一个新的recipe:
devtool add: 帮助创建recipe和有助于开发的环境的命令recipetool create: Yocto Project提供,自动根据代码文件创建基本recipe的命令已有recipe: 定位并改造一个功能和你需要的类似的recipe
注释
阅读3.3.23 Recipe语法关于Recipe语法的信息。
3.3.2.1 使用devtool add创建基本Recipe
devtool add命令使用与recipetool create同样的逻辑自动创建recipe。此外,然而,devtool add准备了一套环境,当你新加recipe以构建时构建新软件,你可以更容易地为代码打补丁,或者修改recipe。
你可以再《Yocto Project Application Development and the Extensible Software Development Kit (eSDK)》“A Closer Look at devtool add”找到devtool add命令的完整描述。
3.3.2.2 使用recipetool create创建基本Recipe
recipetool create自动创建给定一组代码文件的基本recipe。只要你能解压或者指向源代码文件,这个工具会自动创建recipe并自动将所有pre-build信息配置再recipe中。例如,假定你使用Autotools构建一个应用,使用recipetool创建recipe,会让你得到配置好pre-build依赖,证书要求,校验码的recipe。
运行这个工具,你只需要在Build目录并运行构建环境搭建脚本(即oe-init-build-env)。更多帮助,请参考以下命令:
$ recipetool -hNOTE: Starting bitbake server...usage: recipetool [-d] [-q] [--color COLOR] [-h] <subcommand> ...OpenEmbedded recipe tooloptions:-d, --debug Enable debug output-q, --quiet Print only errors--color COLOR Colorize output (where COLOR is auto, always, never)-h, --help show this help message and exitsubcommands:create Create a new recipenewappend Create a bbappend for the specified target in the specifiedlayersetvar Set a variable within a recipeappendfile Create/update a bbappend to replace a target fileappendsrcfiles Create/update a bbappend to add or replace source filesappendsrcfile Create/update a bbappend to add or replace a source fileUse recipetool <subcommand> --help to get help on a specific command
recipetool create -o OUTFILE在包含你的代码文件的Layer创建一个基本recipe,以下是一些语法示例:
使用这个语法基于source生成recipe,一旦生成,recipe将存在于此代码Layer中。
recipetool create -o OUTFILE source
使用这个语法使用你从source解压的代码生成recipe,解压缩的代码路径由EXTERNALSRC定义:
recipetool create -o OUTFILE -x EXTERNALSRC source
使用这个语法基于source生成recipe,这个选项使recipetool生成调试信息,一旦生成,recipe存在于已有代码Layer:
recipetool create -d -o OUTFILE source
3.3.2.3 找到并使用近似的recipe
从零开始编写recipe前,寻找是否有一个已有且满足(或近似满足)需求的recipe是很有帮助的一件事。Yocto Project 和 OE 社区维护着很多可能你用得上的recipe。你可以在OpenEmbedded Layer Index找到索引。
基于已有recipe或recipe提纲开始工作是最有效的方式,这里有一些你需要注意的地方:
找到并修改近似于你想要的recipe: 如果你对当前的recipe空间很熟悉,这个方法会很有效,对于初学Yocto Project编写recipe的人来说可能不太友好。
这个方法的风险是,可能recipe中有完全无关的内容,亦或是有些部分你还是需要从零开始,等等。这些风险因对不熟悉已有recipe空间而产生。
使用并修改如下recipe提纲: 如果某些原因你不想使用
recipetool,你也找不到类似满足需求的recipe,你可以使用下方提供了基本结构的recipe开始:DESCRIPTION = ""HOMEPAGE = ""LICENSE = ""SECTION = ""DEPENDS = ""LIC_FILES_CHKSUM = ""SRC_URI = ""
3.3.3 保存并为recipe命名
当你有了基本recipe后,你应该放到你自己的layer中并为它命名。将它放置正确保证OE构建系统可以在你使用BitBake处理recipe时找得到它。
保存Recipe: OE构建系统通过Layer的
conf/layer.conf中BBFILES变量定位recipe,这里是典型的应用:BBFILES += "${LAYERDIR}/recipes-*/*/*.bb \${LAYERDIR}/recipes-*/*/*.bbappend"
因此,你需要保证你的recipe能被找到。
你可以在3.1 理解并创建Layer找到更多关于Layer结构的信息。
为Recipe命名: 你需要按照以下约定命名recipe:
basename_version.bb
使用小写字母,不要随意包含保留后缀
-native,-cross,-initial, or-devcasually (即,除非后缀适用,不要将它们作为recipe名字的一部分). 示例如下:cups_1.7.0.bbgawk_4.0.2.bbirssi_0.8.16-rc1.bb
3.3.4 使用Recipe运行构建
创建新recipe,通常是一个迭代的过程,需要使用BitBake多次处理这个recipe以逐渐发现并向recipe中加入更多信息。
假定你已经运行了构建环境搭建脚本(即oe-init-build-env)并且你在Build目录下,使用BitaBkae去处理你的recipe。你只需要提供前面章节介绍过的recipe的basename:
$ bitbake basename
构建时,OE构建系统为每个recipe创建一个临时工作目录(${WORKDIR})),保存解压缩后的源文件,日志文件,编译中间文件和打包文件等等。
临时工作目录取决于正在所处的构建环境,最快知晓它的方式是使用BitBake返回它的值:
$ bitbake -e basename | grep ^WORKDIR=
作为示例,假定代码目录最上层文件夹名为poky,默认构建目录是poky/build,设备目标系统是qemux86-poky-linux。假定你的recipe名叫foo_1.3.0.bb,这种情况下,构建系统使用的工作目录是:
poky/build/tmp/work/qemux86-poky-linux/foo/1.3.0-r0
这个目录下你可以找到诸如image,packages-split,temp等子文件夹,构建后,你可以通过检查它们了解构建是否正常。
注释
你可以在temp目录找到每一个任务的日志文件 (例如poky/build/tmp/work/qemux86-poky-linux/foo/1.3.0-r0/temp). 日志文件命名为log.taskname(例如log.do_configure,log.do_fetch, 和log.do_compile).
你可以在《Yocto Project Overview and Concepts Manual》“The Yocto Project Development Environment”阅读到更多构建过程的信息。
3.3.5. 获取代码
Recipe第一件必须做的事就是,说明如何获取代码文件。获取过程主要由SRC_URI控制,你的recipe必须有SRC_URI变量指出代码位置。阅读《Yocto Project Overview and Concepts Manual》“Sources”章节以获得图形说明。
do_fetch任务根据SRC_URI每个入口的前缀决定使用哪个fetcher获取源代码,SRC_URI变量触发fetcher。获取代码后,do_patch任务用这个变量应用补丁。OE构建系统使用FILESOVERRIDES检索SRC_URI中本地文件目录路径。
Recipe中SRC_URI变量必须为各源码文件定义唯一路径。最佳实践是不要在SRC_URI中使用硬代码路径,而应该使用${PV}让获取过程使用recipe文件名指定的版本。这样指定意味着,升级recipe到新版本时,匹配新版本简单地就像重命名recipe名字一样。
这里是meta/recipes-devtools/cdrtools/cdrtools-native_3.01a20.bb的示例,代码从一个tar包获取,留意PV这个变量:
SRC_URI = "ftp://ftp.berlios.de/pub/cdrecord/alpha/cdrtools-${PV}.tar.bz2"
SRC_URI里提及的以文件扩展名结尾的文件(例如.tar, .tar.gz, .tar.bz2, .zip等等),在do_unpack任务中会被自动解压。阅读3.3.21.2 Autotooled Package以了解更多关于这些类型文件的示例。
Another way of specifying source is from an SCM. For Git repositories, you must specify SRCREV and you should specify PV to include the revision with SRCPV. Here is an example from the recipe meta/recipes-kernel/blktrace/blktrace_git.bb:另一个指定代码的方式是通过SCM(代码控制管理)。对于Git仓库,你必须指定SRCREV
SRCREV = "d6918c8832793b4205ed3bfede78c2f915c23385"PR = "r6"PV = "1.0.5+git${SRCPV}"SRC_URI = "git://git.kernel.dk/blktrace.git \file://ldflags.patch"
如果SRC_URI包含指向非版本管理系统的远程服务器获取的独立文件,BitBake尝试使用recipe中设定的校验值确保recipe编写后它们没有被篡改,否则就是被更改过。被使用的两种校验值为:SRC_URI[md5sum] 和 SRC_URI[sha256sum]
如果SRC_URI指向多个URL(不包括SCM URL),你需要为每一个URL提供md5 and sha256,这种情况下,你需要为每个URL起名,在校验值语句中指向它们:
SRC_URI = "${DEBIAN_MIRROR}/main/a/apmd/apmd_3.2.2.orig.tar.gz;name=tarball \${DEBIAN_MIRROR}/main/a/apmd/apmd_${PV}.diff.gz;name=patch"SRC_URI[tarball.`md5`sum] = "b1e6309e8331e0f4e6efd311c2d97fa8"SRC_URI[tarball.`sha256`sum] = "7f7d9f60b7766b852881d40b8ff91d8e39fccb0d1d913102a5c75a2dbb52332d"SRC_URI[patch.`md5`sum] = "57e1b689264ea80f78353519eece0c92"SRC_URI[patch.`sha256`sum] = "7905ff96be93d725544d0040e425c42f9c05580db3c272f11cff75b9aa89d430"
正确的md5 and sha256值应该能在代码下载页面,和其他签名在一起能被找到(例如 md5, sha1, sha256, GPG,等等)。由于OE构建系统仅支持sha256sum and md5sum,你应该自行验证所有签名。
如果构建时没有提供SRC_URI校验值,或者提供的校验值是错的,会产生缺失或不正确校验值的错误。构建系统在错误信息中会提供获取文件对应的校验值,当你有了正确的校验值后,你可以将他们粘贴到recipe中,重新构建以继续。
注释
如果上游代码提供验证下载代码的签名,你应该在设置recipe前手动验证它们,然后再继续构建。
最后一个示例有点复杂,它来自meta/recipes-sato/rxvt-unicode/rxvt-unicode_9.20.bb,它包含了几种文件作为源文件:tar包,补丁文件,桌面文件,和一个图标。
SRC_URI = "http://dist.schmorp.de/rxvt-unicode/Attic/rxvt-unicode-${PV}.tar.bz2 \file://xwc.patch \file://rxvt.desktop \file://rxvt.png"
当你使用file://指定本地文件时,构建系统从本地获取文件。这个路径相对于FILESPATH变量值,根据特定顺序寻找文件:${BP}, ${BPN}, 和 files。目录默认时recipe或append文件所在目录的子目录。阅读[3.3.21.1 Single .c File Package (Hello World!)]关于指定这些类型的文件的示例。
上面这个示例也指定了补丁文件,补丁文件通常以.patch 或 .diff结尾,但也能以diff.gz 和 patch.bz2这样的压缩格式结尾。例如,构建系统可以自动应用补丁,请阅读3.3.7 打补丁。
3.3.6 升级代码
构建时,do_unpack将代码解包到${S}。
如果你是从上行代码tar包获取的代码,tar包内部结构匹配顶层子目录常用约定${BPN}-${PV},那么就不需要设定S。然而,如果SRC_URI指向的包不遵从此约定,或是从Git或Subversion这样的SCM获取的,你的recipe需要定义S。
如果BitBake解包过程顺利,你需要保证${S}指向的目录匹配代码结构。
3.3.7 打补丁
有时候,需要在代码获取后给它打补丁,在SRC_URI中提到的任何以.patch ,.diff结尾,或是压缩格式(例如diff.gz)结尾的文件,都会被当作补丁文件。do_patch任务自动应用这些补丁。
The build system should be able to apply patches with the “-p1” option (i.e. one directory level in the path will be stripped off). If your patch needs to have more directory levels stripped off, specify the number of levels using the “striplevel” option in the SRC_URI entry for the patch. Alternatively, if your patch needs to be applied in a specific subdirectory that is not specified in the patch file, use the “patchdir” option in the entry.
As with all local files referenced in SRC_URI using file://, you should place patch files in a directory next to the recipe either named the same as the base name of the recipe (BP and BPN) or “files”.
3.3.8 许可证书
Recipe需要有LICENSE和LIC_FILES_CHKSUM变量:
LICENSE: 这个变量指定软件证书。如果你不知道软件基于何种许可证书分发,你可以到源代码中找到更多信息。包含这类信息的典型文件包括
COPYING,LICENSE, 和README文件,你也可以在代码顶端找到这个信息。例如,对于一个基于GNU General Public License version 2许可的软件,你会这样设置LICENSE:LICENSE = "GPLv2"
如果不使用空格,LICENSE名字可以很长,空格用来作为不同license名字的分隔符。对于标准license,使用
meta/files/common-licenses/或meta/conf/licenses.conf中SPDXLICENSEMAP定义的名字。LIC_FILES_CHKSUM: OE构建系统使用这个变量确保license文本没有被改动。如果有改动,构建过程会产生错误,让你能够找出问题并改正他。
你需要为软件指明所有适用的许可文件。配置步骤的最后,构建过程会对比文件的校验值以确保内容没有被修改,阅读3.32.1. 跟踪LICENING改动更多关于LIC_FILES_CHKSUM的解释和示例。
你可以在LIC_FILES_CHKSUM变量中指定对应文件和一个错误的md5字符串,尝试构建,留意错误信息中报告的正确md5值,来决定正确的校验值。阅读3.3.5. 获取代码了解更多信息。
以下示例假定软件有COPYING文件:
LIC_FILES_CHKSUM = "file://COPYING;md5=xxx"
尝试构建软件时,构建系统会产生错误,给你正确值,你可以用它来替换进去,继续构建。
3.3.9 依赖
大多数软件包都有它们必须拥有的其他包的列表,被称之为依赖。依赖主要有两部分:软件构建时需要的构建时依赖,以及需要安装到目标上以便运行软件的运行时依赖。
在recipe中,使用DEPENDS变量指定构建时依赖。尽管有些细微差别,DEPENDS指定的项应该是其他recipe的名字。清楚地指明所有构建时依赖是非常重要的,如果不这么做,由于BitBake并行执行的特性,你可能会遇到这样的竞争情况,recipe中某一任务(例如do_configure)有依赖,然后执行下一个任务(例如do_compile)时没有了。
需要考虑的另外一点是,配置脚本可能会自动检查可选依赖,如果依赖存在,启用对应的功能。这意味着,想要确保确定的结果并避免冲突,你也需要显式指明这些依赖,或者显示告诉配置脚本不要开启这个功能。如果你想创建一个更通用的recipe(例如,发布Layer中的recipe给其他人用),而不是直接关闭这个功能,你可以使用PACKAGECONFIG变量来允许他人使用recipe时可以轻而易举地开启或关闭这个功能和对应地依赖。
和构建时依赖类似,你需要通过RDEPENDS变量指定基于包的运行时依赖。所有基于包的变量需要将包名字加到最后作为重写。因为recipe主包和recipe拥有相同名字,recipe的名字可以通过${PN}找到,因此你需要为主包设定RDEPENDS_${PN}指明依赖。如果包名为${PN}-tools,你可以设置为RDEPENDS_${PN}-tools。
有的运行时依赖在打包时会被自动设置,包括共享库依赖(例如”example”包包含”libexample”,另外一个”mypackage”包包含的二进制链接到了”libexample”,OE构建系统会自动添加”mypackage”对于”example”的依赖)。阅读《Yocto Project Overview and Concepts Manual》的“Automatically Added Runtime Dependencies”章节了解更多信息。
3.3.10 配置recipe
大多数软件提供编译前不同的设置构建时配置选项的方法,一般来说,设定这些选项通过运行带参数的配置脚本,或者修改构建配置文件来完成。
注释
As of Yocto Project Release 1.7, some of the core recipes that package binary configuration scripts now disable the scripts due to the scripts previously requiring error-prone path substitution. The OpenEmbedded build system usespkg-confignow, which is much more robust. You can find a list of the*-configscripts that are disabled list in the “Binary Configuration Scripts Disabled” section in the Yocto Project Reference Manual.
构建时配置的主要部分,就是检查构建时依赖,可能需要启用哪些可选功能。依据其他满足这些依赖的recipe,你需要在DEPENDS指定你构建的软件的构建时依赖。一般你可以在软件文档中找到构建时依赖和运行时依赖的说明。
以下列表根据软件构建方式提供配置项目:
- Autotools: 如果源文件有
configure.ac文件,那么你的软件是通过Autotools构建的,这种情况下,你只需要考虑修改配置。
使用Autotools时,recipe需要继承autotools类,也不需要包含do_configure任务。然而,你可能想做一些调整,比如,你可以设置EXTRA_OECONF或PACKAGECONFIG_CONFARGS来传递需要的配置选项。
- CMake: 如果源文件有
CMakeLists.txt文件,那么你的软件时使用CMake构建的,这种情况下,你只需要考虑修改配置。
使用CMake时,recipe需要继承cmake类,也不需要包含do_configure任务。你可以通过设定EXTRA_OECMAKE的方式传递必要的配置选项。
- Other: I如果源文件没有
configure.ac或CMakeLists.txt,你的软件是由其他方法构建的,这种情况下,你通常需要提供do_configure任务。当然,如果没什么需要配置的,就不需要了。
Even if your software is not being built by Autotools or CMake, you still might not need to deal with any configuration issues. You need to determine if configuration is even a required step. You might need to modify a Makefile or some configuration file used for the build to specify necessary build options. Or, perhaps you might need to run a provided, custom configure script with the appropriate options.
For the case involving a custom configure script, you would run ./configure --help and look for the options you need to set.
Once configuration succeeds, it is always good practice to look at the log.do_configure file to ensure that the appropriate options have been enabled and no additional build-time dependencies need to be added to DEPENDS. For example, if the configure script reports that it found something not mentioned in DEPENDS, or that it did not find something that it needed for some desired optional functionality, then you would need to add those to DEPENDS. Looking at the log might also reveal items being checked for, enabled, or both that you do not want, or items not being found that are in DEPENDS, in which case you would need to look at passing extra options to the configure script as needed. For reference information on configure options specific to the software you are building, you can consult the output of the ./configure --help command within ${S} or consult the software’s upstream documentation.
3.3.11 使用Headers与设备连接
如果recipe构建一个需要和设备通讯,或是需要API访问自定义kernel的应用,你需要提供适当的头文件。你不应当改动已有的meta/recipes-kernel/linux-libc-headers/linux-libc-headers.inc文件。这些头文件用来构建libc,不能被自定义或者设备特定的头文件信息改动。如果你通过修改头文件的方式改动了libc,所有其他用到libc的应用程序都会收到影响。
警告
不要复制或者修改libc头文件 (即meta/recipes-kernel/linux-libc-headers/linux-libc-headers.inc).
访问设备或自定义kernel的正确方式是,使用一个提供设备额外头文件或者接口的包。这么做的话,应用也需要建立特定提供者的依赖。
考虑以下事情:
不要改动
linux-libc-headers.inc. 这个文件是libc系统的一部分,不是你用来直接访问kernel的东西,你需要通过libc调用访问libc。需要直接访问设备的应用,需要提供必要的头文件,或者建立起基于特定设备头文件包的依赖。
For example, suppose you want to modify an existing header that adds I/O control or network support. If the modifications are used by a small number programs, providing a unique version of a header is easy and has little impact. When doing so, bear in mind the guidelines in the previous list.例如,你想修改已有头文件添加I/O控制或者网络支持的功能,如果这个修改被一小部分程序使用,提供一个专有版本的头文件是一个简单的方式,影响很小。这样做的时候,牢记上文提到的指南。
注释
If for some reason your changes need to modify the behavior of thelibc, and subsequently all other applications on the system, use a.bbappendto modify thelinux-kernel-headers.incfile. However, take care to not make the changes machine specific.
Consider a case where your kernel is older and you need an older libc ABI. The headers installed by your recipe should still be a standard mainline kernel, not your own custom one.
When you use custom kernel headers you need to get them from STAGING_KERNEL_DIR, which is the directory with kernel headers that are required to build out-of-tree modules. Your recipe will also need the following:
do_configure[depends] += "virtual/kernel:do_shared_workdir"
3.3.12 编译
构建时,获取代码,解包,配置后,开始执行do_compile任务。如果recipe成功执行do_compile,那么什么也不需要做。
然而,如果编译失败,你需要诊察失败,这里有一些普遍原因:
注释
配置文件中有不正确的路径,或是库/头文件无法找到,确保你使用的是更robust的pkg-config。阅读3.3.10 配置recipe获得更多信息。
- 并行构建失败: 这些失败表明它们是偶发性错误,或者错误报告应当由其他部分创建的文件或者目录无法找到。进一步检查,甚至会发现构建失败时这个文件或目录依旧不存在,这是因为构建过程执行顺序出了问题。
修复这类问题,你需要在Makefile或生成Makefile的脚本中添加缺失的依赖,或者(作为变通),将PARALLEL_MAKE设为空值:
PARALLEL_MAKE = ""
阅读3.30.12. 调试并行Make冲突以获取更多关于并行Makefile问题的信息。
- 错误使用主机路径: 这类失败仅在构建目标镜像或
nativesdk时出现,当错误使用主机系统的头文件,库文件或者其他文件而又为目标设备交叉编译时,编译过程会出现此类失败。
To fix the problem, examine the log.do_compile file to identify the host paths being used (例如 /usr/include, /usr/lib, and so forth) and then either add configure options, apply a patch, or do both.修复这类问题,检查log.do_compile是否存在使用主机路径的情况(例如/usr/include, /usr/lib等),然后添加配置选项和/或应用补丁。
- 无法找到需要的库/头文件: 如果构建时依赖因为没有定义在
DEPENDS中,或是构建过程使用的查询路径不正确,配置过程也没有检测到这点而导致构建时依赖缺失,编译过程会失败。无论哪种,编译过程都会提示文件无法找到。这种情况下,你需要在配置脚本中添加选项,也可能需要添加构建时依赖到DEPENDS中。
有些时候,也需要打补丁保证使用了正确路径。你需要指定路径已找到其他recipe stage到systoor中的文件,使用OE构建系统提供的变量(例如STAGING_BINDIR, STAGING_INCDIR, STAGING_DATADIR等)。
3.3.13 安装
do_install任务将构建好的文件以及它们的层级复制到它们在目标设备上的路径。安装过程将${S}, ${B}, and ${WORKDIR}的文件复制到${D}目录,创建出它们在目标系统上应该所有的结构。
软件是如何构建的,影响着你需要做些什么来保证软件被正确安装。以下列表描述了根据构建的软件所使用的构建系统的类型,你必须做的事情:
Autotools 和 CMake: 如果使用Autotools或CMake构建,OE构建系统知道如何安装。也就是说在recipe中你不需要有
do_install任务,你只需要保证构建过程的安装部分顺利完成。然而,如果你希望安装还没有被make install安装的额外文件,你应当使用do_install_append来完成安装命令,下文“手动”部分有介绍。其他 (使用 make install): 你需要在recipe中定义
do_install功能,这个功能会调用oe_runmake install,也需要传入目标目录。如何传入,依赖于运行的Makefile是如何写的(例如DESTDIR=${D},PREFIX=${D},INSTALLROOT=${D}等)
阅读3.3.21.3 Makefile-Based Package关于使用make install的示例。
- 手动: 你需要在recipe中定义
do_install功能。这个功能首先必须使用install -d在${D}下创建目录。一旦目录存在,这个功能可以使用install手动安装构建好的软件到目录中。
你可以在这里找到更多关于 install 的信息: http://www.gnu.org/software/coreutils/manual/html_node/install-invocation.html.
For the scenarios that do not use Autotools or CMake, you need to track the installation and diagnose and fix any issues until everything installs correctly. You need to look in the default location of ${D}, which is ${WORKDIR}/image, to be sure your files have been installed correctly.
注释
During the installation process, you might need to modify some of the installed files to suit the target layout. For example, you might need to replace hard-coded paths in an initscript with values of variables provided by the build system, such as replacing/usr/bin/with${bindir}. If you do perform such modifications duringdo_install, be sure to modify the destination file after copying rather than before copying. Modifying after copying ensures that the build system can re-executedo_installif needed.oe_runmake install, which can be run directly or can be run indirectly by theautotoolsandcmakeclasses, runsmake installin parallel. Sometimes, a Makefile can have missing dependencies between targets that can result in race conditions. If you experience intermittent failures duringdo_install, you might be able to work around them by disabling parallel Makefile installs by adding the following to the recipe:
PARALLEL_MAKEINST = ""See PARALLEL_MAKEINST for additional information.
3.3.14 启用系统服务
如果你想安装一个服务,即一般在启动时开启,后台运行的处理,那么你必须在recipe中增加一些定义。
如果你要添加服务,并且服务安装脚本或服务本身没有被安装,你需要在recipe中提供do_install_append功能。如果recipe已经有do_install功能,在末尾更新它,而不用添加do_install_append function。
当你为服务创建安装时,你需要完成通常make install需要完成的事情。也就是说,确保安装过程按照目标系统上的方式放置你的输出文件。
OE构建系统提供两种方式来支持启动服务:
- SysVinit: SysVinit是系统和服务管理器,管理着用来控制系统最基本功能的初始化系统。初始化程序是系统启动时被Linux内核最先自动的第一个程序,初始化后控制所有其他程序的启动,运行和关闭。
启用SysVinit服务,recipe需要继承update-rc.d类,这个类帮助安全在目标系统上安装包。
你需要设定 INITSCRIPT_PACKAGES, INITSCRIPT_NAME, 和 INITSCRIPT_PARAMS 变量。
- systemd: 系统管理守护进程(systemd)被设计用来取代SysVinit,提供加强的服务管理。阅读systemd主页获取更多信息。
启用systemd服务,recipe需要继承systemd类。在Source Directory中查看systemd.bbclass文件以获取更多信息。
3.3.15 打包
成功的打包,需要OE构建系统执行的自动步骤,和一些具体你自己需要采取的步骤一起完成。以下列表描述了这个过程:
分离文件:
do_package任务将recipe产生的文件分割为逻辑组件,记似软件只有一个二进制文件,仍可能要分离出有调试符号,文档,和其他逻辑组件。do_package任务确保文件正确地分离和打包。运行QA检查:
insane类在生成包的步骤增加了一步,OE构建系统生成输出质量保证检查。这个步骤执行一系列检查确保没有常见的运行时产生的问题。阅读《Yocto Project Reference Manual》的“QA Error and Warning Messages”和insane章节了解更多关于检查的信息。手动检查包: 构建软件后,你需要保证包是正确的。检查
${WORKDIR}/packages-split目录,确保是你期望的文件,如果你发现问题,你可以根据需要设定PACKAGES,FILES,do_install(_append)等。将应用分割成多个包: 如果你需要将应用分割成几个包,请参考3.3.21.4 将应用分割成多个包示例。
安装安装后脚本: 请阅读3.3.19 Post-Installation Scripts了解如何安装post-installation脚本的示例。
标识包架构: 依据recipe构建的内容以及如何配置的,将包标识为给特定机器生产的,或与特定机器或加构无关,可能是非常重要的。
默认地,包可以应用到与目标机器同样加构的机器上,当recipe构建的包是机器相关的(例如MACHINE的值传递给了配置脚本,或者补丁仅使用于特定机器),你应该将下方语句添加到recipe中:
PACKAGE_ARCH = "${MACHINE_ARCH}"
另一方面,如果recipe构建的包不包含任何特定机器或加构的东西(例如recipe仅仅打包脚本文件和配置文件),你应该使用allarch类:
inherit allarch
刚开始构建recipe时,确保包架构是否正确并不关键。然而,确保recipe重新构建(或者没有重建)对应于配置的修改,确保安装在目标机器上的时恰当的包,尤其当你给不同目标机器运行不同构建的时候。
3.3.16 Recipe间共享文件
Recipe经常需要使用构建主机上其他recipe提供的文件。例如,一个链接到常用库的应用需要访问库本身和对应的头文件,可以用将文件填充至sysroot的方式来完成。每个recipe在工作目录下有两个sysroot,一个给目标文件(recipe-sysroot),另一个给构建主机原生文件(recipe-sysroot-native)。
注释
你可以在Yocto Project中找到关于填充sysroots文件的”Staging”术语(例如STAGING_DIR变量)。
Recipe永远不应该直接填充sysroot(即向sysroot写文件),取而代之的是,在do_install任务时文件应该根据${D}目录被安装到标准路径。这样限制的原因是,几乎所有写入sysroot的文件都在manifest中分类,以便于当recipe被修改或删除时,文件可以被移除。因此,sysroot能够不受失效文件影响。
A subset of the files installed by the do_install task are used by the do_populate_sysroot task as defined by the the SYSROOT_DIRS variable to automatically populate the sysroot. It is possible to modify the list of directories that populate the sysroot. The following example shows how you could add the /opt directory to the list of directories within a recipe:
SYSROOT_DIRS += "/opt"
For a more complete description of the do_populate_sysroot task and its associated functions, see the staging class.
3.3.17 使用虚拟提供者
Prior to a build, if you know that several different recipes provide the same functionality, you can use a virtual provider (i.e. virtual/*) as a placeholder for the actual provider. The actual provider is determined at build-time.
A common scenario where a virtual provider is used would be for the kernel recipe. Suppose you have three kernel recipes whose PN values map to kernel-big, kernel-mid, and kernel-small. Furthermore, each of these recipes in some way uses a PROVIDES statement that essentially identifies itself as being able to provide virtual/kernel. Here is one way through the kernel class:
PROVIDES += "${@ "virtual/kernel" if (d.getVar("KERNEL_PACKAGE_NAME") == "kernel") else "" }"
Any recipe that inherits the kernel class is going to utilize a PROVIDES statement that identifies that recipe as being able to provide the virtual/kernel item.
Now comes the time to actually build an image and you need a kernel recipe, but which one? You can configure your build to call out the kernel recipe you want by using the PREFERRED_PROVIDER variable. As an example, consider the x86-base.inc include file, which is a machine (i.e. MACHINE) configuration file. This include file is the reason all x86-based machines use the linux-yocto kernel. Here are the relevant lines from the include file:
PREFERRED_PROVIDER_virtual/kernel ??= "linux-yocto"PREFERRED_VERSION_linux-yocto ??= "4.15%"
When you use a virtual provider, you do not have to “hard code” a recipe name as a build dependency. You can use the DEPENDS variable to state the build is dependent on virtual/kernel for example:
DEPENDS = "virtual/kernel"
During the build, the OpenEmbedded build system picks the correct recipe needed for the virtual/kernel dependency based on the PREFERRED_PROVIDER variable. If you want to use the small kernel mentioned at the beginning of this section, configure your build as follows:
PREFERRED_PROVIDER_virtual/kernel ??= "kernel-small"
Note
Any recipe thatPROVIDESavirtual/*item that is ultimately not selected throughPREFERRED_PROVIDERdoes not get built. Preventing these recipes from building is usually the desired behavior since this mechanism’s purpose is to select between mutually exclusive alternative providers.
The following lists specific examples of virtual providers:
virtual/kernel: Provides the name of the kernel recipe to use when building a kernel image.virtual/bootloader: Provides the name of the bootloader to use when building an image.virtual/mesa: Providesgbm.pc.virtual/egl: Providesegl.pcand possiblywayland-egl.pc.virtual/libgl: Providesgl.pc(i.e.libGL).virtual/libgles1: Providesglesv1_cm.pc(i.e.libGLESv1_CM).virtual/libgles2: Providesglesv2.pc(i.e.libGLESv2).
3.3.18 给待发布Recipe正确创建版本
有时候recipe升级到最终发布版本时,recipe的名字可能会引出问题。例如,3.3.3 保存并为recipe命名示例中的irssi_0.8.16-rc1.bb文件,这个reipe处在发布候选阶段(即”rc1”),当recipe发布后,文件名变成irssi_0.8.16.bb,版本由0.8.16-rc1 变为 0.8.16被构建系统和包管理器视为降级,所以导致包不会被正确升级。
为了保证版本被正确对比,推荐的约定时recipe中设置PV变量值为”上一个版本+当前版本“。你可以用额外的变量以便你可以在其他地方也能使用,如下是示例:
REALPV = "0.8.16-rc1"PV = "0.8.15+${REALPV}"
3.3.19 Post-Installation Scripts
Post-installation scripts run immediately after installing a package on the target or during image creation when a package is included in an image. To add a post-installation script to a package, add a pkg_postinst_PACKAGENAME() function to the recipe file (.bb) and replace PACKAGENAME with the name of the package you want to attach to the postinst script. To apply the post-installation script to the main package for the recipe, which is usually what is required, specify ${PN} in place of PACKAGENAME.
A post-installation function has the following structure:
pkg_postinst_PACKAGENAME() {# Commands to carry out}
The script defined in the post-installation function is called when the root filesystem is created. If the script succeeds, the package is marked as installed. If the script fails, the package is marked as unpacked and the script is executed when the image boots again.
Note
Any RPM post-installation script that runs on the target should return a 0 exit code. RPM does not allow non-zero exit codes for these scripts, and the RPM package manager will cause the package to fail installation on the target.
Sometimes it is necessary for the execution of a post-installation script to be delayed until the first boot. For example, the script might need to be executed on the device itself. To delay script execution until boot time, you must explicitly mark post installs to defer to the target. You can use pkg_postinst_ontarget() or call postinst-intercepts defer_to_first_boot from pkg_postinst(). Any failure of a pkg_postinst() script (including exit 1) triggers an error during the do_rootfs task.
If you have recipes that use pkg_postinst function and they require the use of non-standard native tools that have dependencies during rootfs construction, you need to use the PACKAGE_WRITE_DEPS variable in your recipe to list these tools. If you do not use this variable, the tools might be missing and execution of the post-installation script is deferred until first boot. Deferring the script to first boot is undesirable and for read-only rootfs impossible.
Note
Equivalent support for pre-install, pre-uninstall, and post-uninstall scripts exist by way ofpkg_preinst,pkg_prerm, andpkg_postrm, respectively. These scrips work in exactly the same way as doespkg_postinstwith the exception that they run at different times. Also, because of when they run, they are not applicable to being run at image creation time likepkg_postinst.
3.3.20 测试
完成recipe的最后一个是确保构建的软件正确运行,为了完成运行时测试,将构建输出的包添加到镜像中并在目标设备上测试。
阅读3.2. 定制化镜像以了解更多如何添加特定包自定义镜像的信息。
3.3.21 示例
为了总结如何写一个recipe,本节提供不同场景下的示例:
使用本地文件的recipe
使用Autotool的包
使用基于Makefile的包
将应用分割成多个包
将二进制文件加到镜像
3.3.21.1 Single .c File Package (Hello World!)
由本地的单文件(例如files目录下)构建应用,recipe需要将文件列在SRC_URI中,另外,你需要手动编写do_compile和do_install任务。S变量定义了包含源代码的目录,这个示例中是WORKDIR,也是BitBake用作构建的目录。
SUMMARY = "Simple helloworld application"SECTION = "examples"LICENSE = "MIT"LIC_FILES_CHKSUM = "file://${COMMON_LICENSE_DIR}/MIT;`md5`=0835ade698e0bcf8506ecda2f7b4f302"SRC_URI = "file://helloworld.c"S = "${WORKDIR}"do_compile() {${CC} helloworld.c -o helloworld}do_install() {install -d ${D}${bindir}install -m 0755 helloworld ${D}${bindir}}
默认地helloworld, helloworld-dbg, and helloworld-dev包被构建出来,关于更多如何自定义打包过程的信息,请阅读3.3.21.4 将应用分割成多个包。
3.3.21.2 Autotool构建的包
Applications that use Autotools such as autoconf and automake require a recipe that has a source archive listed in SRC_URI and also inherit the autotools class, which contains the definitions of all the steps needed to build an Autotool-based application. The result of the build is automatically packaged. And, if the application uses NLS for localization, packages with local information are generated (one package per language). Following is one example: (hello_2.3.bb)
SUMMARY = "GNU Helloworld application"SECTION = "examples"LICENSE = "GPLv2+"LIC_FILES_CHKSUM = "file://COPYING;`md5`=751419260aa954499f7abaabaa882bbe"SRC_URI = "${GNU_MIRROR}/hello/hello-${PV}.tar.gz"inherit autotools gettext
The variable LIC_FILES_CHKSUM is used to track source license changes as described in the “Tracking License Changes” section in the Yocto Project Overview and Concepts Manual. You can quickly create Autotool-based recipes in a manner similar to the previous example.
3.3.21.3 基于Makefile的包
Applications that use GNU make also require a recipe that has the source archive listed in SRC_URI. You do not need to add a do_compile step since by default BitBake starts the make command to compile the application. If you need additional make options, you should store them in the EXTRA_OEMAKE or PACKAGECONFIG_CONFARGS variables. BitBake passes these options into the GNU make invocation. Note that a do_install task is still required. Otherwise, BitBake runs an empty do_install task by default.
Some applications might require extra parameters to be passed to the compiler. For example, the application might need an additional header path. You can accomplish this by adding to the CFLAGS variable. The following example shows this:
CFLAGS_prepend = "-I ${S}/include "
In the following example, mtd-utils is a makefile-based package:
SUMMARY = "Tools for managing memory technology devices"SECTION = "base"DEPENDS = "zlib lzo e2fsprogs util-linux"HOMEPAGE = "http://www.linux-mtd.infradead.org/"LICENSE = "GPLv2+"LIC_FILES_CHKSUM = "file://COPYING;`md5`=0636e73ff0215e8d672dc4c32c317bb3 \file://include/common.h;beginline=1;endline=17;`md5`=ba05b07912a44ea2bf81ce409380049c"# Use the latest version at 26 Oct, 2013SRCREV = "9f107132a6a073cce37434ca9cda6917dd8d866b"SRC_URI = "git://git.infradead.org/mtd-utils.git \file://add-exclusion-to-mkfs-jffs2-git-2.patch \"PV = "1.5.1+git${SRCPV}"S = "${WORKDIR}/git"EXTRA_OEMAKE = "'CC=${CC}' 'RANLIB=${RANLIB}' 'AR=${AR}' 'CFLAGS=${CFLAGS} -I${S}/include -DWITHOUT_XATTR' 'BUILDDIR=${S}'"do_install () {oe_runmake install DESTDIR=${D} SBINDIR=${sbindir} MANDIR=${mandir} INCLUDEDIR=${includedir}}PACKAGES =+ "mtd-utils-jffs2 mtd-utils-ubifs mtd-utils-misc"FILES_mtd-utils-jffs2 = "${sbindir}/mkfs.jffs2 ${sbindir}/jffs2dump ${sbindir}/jffs2reader ${sbindir}/sumtool"FILES_mtd-utils-ubifs = "${sbindir}/mkfs.ubifs ${sbindir}/ubi*"FILES_mtd-utils-misc = "${sbindir}/nftl* ${sbindir}/ftl* ${sbindir}/rfd* ${sbindir}/doc* ${sbindir}/serve_image ${sbindir}/recv_image"PARALLEL_MAKE = ""BBCLASSEXTEND = "native"
3.3.21.4 将应用分割成多个包
You can use the variables PACKAGES and FILES to split an application into multiple packages.
Following is an example that uses the libxpm recipe. By default, this recipe generates a single package that contains the library along with a few binaries. You can modify the recipe to split the binaries into separate packages:
require xorg-lib-common.incSUMMARY = "Xpm: X Pixmap extension library"LICENSE = "BSD"LIC_FILES_CHKSUM = "file://COPYING;`md5`=51f4270b012ecd4ab1a164f5f4ed6cf7"DEPENDS += "libxext libsm libxt"PE = "1"XORG_PN = "libXpm"PACKAGES =+ "sxpm cxpm"FILES_cxpm = "${bindir}/cxpm"FILES_sxpm = "${bindir}/sxpm"
In the previous example, we want to ship the sxpm and cxpm binaries in separate packages. Since bindir would be packaged into the main PN package by default, we prepend the PACKAGES variable so additional package names are added to the start of list. This results in the extra FILES_* variables then containing information that define which files and directories go into which packages. Files included by earlier packages are skipped by latter packages. Thus, the main PN package does not include the above listed files.
3.3.21.5 Packaging Externally Produced Binaries
Sometimes, you need to add pre-compiled binaries to an image. For example, suppose that binaries for proprietary code exist, which are created by a particular division of a company. Your part of the company needs to use those binaries as part of an image that you are building using the OpenEmbedded build system. Since you only have the binaries and not the source code, you cannot use a typical recipe that expects to fetch the source specified in SRC_URI and then compile it.
One method is to package the binaries and then install them as part of the image. Generally, it is not a good idea to package binaries since, among other things, it can hinder the ability to reproduce builds and could lead to compatibility problems with ABI in the future. However, sometimes you have no choice.
The easiest solution is to create a recipe that uses the bin_package class and to be sure that you are using default locations for build artifacts. In most cases, the bin_package class handles “skipping” the configure and compile steps as well as sets things up to grab packages from the appropriate area. In particular, this class sets noexec on both the do_configure and do_compile tasks, sets FILES_${PN}` to "/" so that it picks up all files, and sets up ado_installtask, which effectively copies all files from${S}to${D}. Thebin_packageclass works well when the files extracted into${S}are already laid out in the way they should be laid out on the target. For more information on these variables, see theFILES,PN,S, andD` variables in the Yocto Project Reference Manual’s variable glossary.
Notes
UsingDEPENDSis a good idea even for components distributed in binary form, and is often necessary for shared libraries. For a shared library, listing the library dependencies in DEPENDS makes sure that the libraries are available in the staging sysroot when other recipes link against the library, which might be necessary for successful linking.
UsingDEPENDSalso allows runtime dependencies between packages to be added automatically. See the “Automatically Added Runtime Dependencies” section in the Yocto Project Overview and Concepts Manual for more information.
If you cannot use the bin_package class, you need to be sure you are doing the following:
- Create a recipe where the
do_configureanddo_compiletasks do nothing: It is usually sufficient to just not define these tasks in the recipe, because the default implementations do nothing unless a Makefile is found in${S}.
If ${S} might contain a Makefile, or if you inherit some class that replaces do_configure and do_compile with custom versions, then you can use the [noexec] flag to turn the tasks into no-ops, as follows:
do_configure[noexec] = "1"do_compile[noexec] = "1"
Unlike deleting the tasks, using the flag preserves the dependency chain from the do_fetch, do_unpack, and do_patch tasks to the do_install task.
Make sure your
do_installtask installs the binaries appropriately.Ensure that you set up
FILES(usuallyFILES_${PN}``) to point to the files you have installed, which of course depends on where you have installed them and whether those files are in different locations than the defaults.
3.3.22 Following Recipe Style Guidelines
When writing recipes, it is good to conform to existing style guidelines. The OpenEmbedded Styleguide wiki page provides rough guidelines for preferred recipe style.
It is common for existing recipes to deviate a bit from this style. However, aiming for at least a consistent style is a good idea. Some practices, such as omitting spaces around = operators in assignments or ordering recipe components in an erratic way, are widely seen as poor style.
3.3.23 Recipe语法
理解recipe文件语法对于编写recipe来说是很重要的,以下列表列举了组成BitBake recipe文件的基本项,阅读《BitBake User Manual》“Syntax and Operators”了解完整的BitBake语法描述。
- 变量的赋值与处理: 变量赋值允许给变量赋值,可以是静态文本或包含其他变量内容。额外地,也支持append和prepend操作。
下方示例展示了几种使用变量的方式:
S = "${WORKDIR}/postfix-${PV}"CFLAGS += "-DNO_ASM"SRC_URI_append = " file://fixup.patch"
- 函数: 函数提供一系列可执行的动作。一般使用函数重写默认任务函数的实现(即对已有函数的append或prepend)。标准函数使用sh shell语法,尽管访问OE变量和内部方法仍然是可行的。
下方是sedrecipe中的函数示例:
do_install () {autotools_do_installinstall -d ${D}${base_bindir}mv ${D}${bindir}/sed ${D}${base_bindir}/sedrmdir ${D}${bindir}/}
实现新函数调用已有任务也是可以的,只要没有替换或补足默认函数。你可以用python而不是shell实现函数,Both of these options are not seen in the majority of recipes.
- 关键字: BitBake recipe只使用几个关键字,
inherit用来包含常用函数,include和require用来加载其他文件recipe内容,export用来导出变量到环境中。
下方示例展示这些关键字的使用:
export POSTCONF = "${STAGING_BINDIR}/postconf"inherit autoconfrequire otherfile.inc
注释 (#):
#开头的行被视作为注释行,被忽略:# This is a comment
接下来的列表总结了最重要的和最常用的recipe语法,你可以参考《BitBake User Manual》Syntax and Operators了解更多语法信息。
行连接符 (
\): 使用反斜线\分割一条语句的多行,在需要接续下一行的行末尾加上斜线:VAR = "A really long \line"
注释
你不能在斜线后输入任何空格或tab使用变量 (
${VARNAME}): 使用 ${VARNAME} 语法获取变量内容:SRC_URI = "${SOURCEFORGE_MIRROR}/libpng/zlib-${PV}.tar.gz"
注释
It is important to understand that the value of a variable expressed in this form does not get substituted automatically.
The expansion of these expressions happens on-demand later (例如 usually when a function that makes reference to the variable executes). This behavior ensures that the values are most appropriate for the context in which they are finally used. On the rare occasion that you do need the variable expression to be expanded immediately, you can use the := operator instead of = when you make the assignment, but this is not generally needed.Quote All Assignments (“value”): Use double quotes around values in all variable assignments (例如 “value”). Following is an example:
VAR1 = “${OTHERVAR}” VAR2 = “The version is ${PV}”
条件赋值 (?=): 条件赋值用来给一个变量赋值,仅当变量还未被赋值时。使用
?=作为‘软’赋值用来条件复制,典型地,‘软’赋值在local.conf文件中给允许从外部环境传值得变量使用。
如果VAR1当前未被设值,就会被设值为”New value”:
VAR1 ?= "New value"
这个示例中,VAR1得值仍是”Original value”:
VAR1 = "Original value"VAR1 ?= "New value"
- 附加Appending (+=): 使用
+=符号将值附加到变量中:
注释
操作符会在已有内容和新内容之间增加一个空格
示例:
SRC_URI += "file://fix-makefile.patch"
- 预附加Prepending (=+): U使用
=+符号将值预附加到变量中。
注释
操作符在新内容和已有内容之间增加一个空格
示例:
VAR =+ "Starts"
- 附加Appending (_append): 使用
_append操作符将值附加到变量中,操作符不会添加空格。并且这个操作符实在所有+=,=+起效,所有=赋值发生后才执行。
下方是列展示内容最前方显示添加得空格,保证附加值不会合并到已有值上:
SRC_URI_append = " file://fix-makefile.patch"
你也可以这么使用,仅对特定目标或机器起效:
SRC_URI_append_sh4 = " file://fix-makefile.patch"
- 预附加Prepending (_prepend): 使用
_preppend操作符将值附加到变量中,操作符不会添加空格。并且这个操作符实在所有+=,=+起效,所有=赋值发生后才执行。
下方是列展示内容最后方显示添加得空格,保证附加值不会合并到已有值上:
CFLAGS_prepend = "-I${S}/myincludes "
你也可以这么使用,仅对特定目标或机器起效:
CFLAGS_prepend_sh4 = "-I${S}/myincludes "
重载Overrides: 你可以使用重载的方式根据recipe如果被构建地,按条件设值。例如,给
KBRANCH变量设值为”standard/base”,只有当qemuarm设备时被设值为”standard/arm-versatile-926ejs”:KBRANCH = "standard/base"KBRANCH_qemuarm = "standard/arm-versatile-926ejs"
Overrides are also used to separate alternate values of a variable in other situations. For example, when setting variables such as
FILESandRDEPENDSthat are specific to individual packages produced by a recipe, you should always use an override that specifies the name of the package.缩进: 使用空格,而不要使用tab进行缩进。对于shell函数,它们都没问题。然而,Yocto Project约定在shell函数中使用tab。需要意识到地是,有的layer只允许用空格。
复杂操作时使用Python: 对于更复杂地处理,可以用python代码进行赋值(例如,寻找并替换变量值)。
使用${@python_code}语法指明使用python代码进行变量赋值:
SRC_URI = "ftp://ftp.info-zip.org/pub/infozip/src/zip${@d.getVar('PV',1).replace('.', '')}.tgz
- Shell函数语法: 如当你描述一系列需要执行的动作时编写shell脚本一样,写shell函数。你应该保证脚本可以使用通用的sh,不必需要
bash或其他shell指定的功能。对于其他系统工具(例如sed,grep,awk, 等)来说同样需要考虑到这点。If in doubt, you should check with multiple implementations - including those from BusyBox.
3.4 增加一个新的机器
向Yocto Project中添加一个新的机器很简单,本节介绍如何添加与Yocto Project已经支持机器相近的机器。
注释
尽管Yocto Project完全有这个能力,增加一个全新架构可能需要修改gcc/glibc和site information,这个不在本手册讨论范围内。
如何增加一个新机器的完整示例,请阅读《Yocto Project Board Support Package (BSP) Developer’s Guide》的“Creating a New BSP Layer Using the bitbake-layers Script”章节。
3.4.1 新增机器配置文件
增加新机器,你需要在layer的conf/machine目录下增加机器配置文件。这个文件提供你新增设备的细节。
OE构建系统使用机器配置文件的根名字指向新机器。比如说,给定名为crownbay.conf的机器配置文件,构建系统将认为机器名为”crownbay”。
机器配置文件中最重要的变量,你需要设置或者从下层配置文件include进来:
TARGET_ARCH (例如 “arm”)
PREFERREDPROVIDER
virtual/kernelMACHINE_FEATURES (例如 “apm screen wifi”)
你也可能需要使用这些变量:
SERIAL_CONSOLES (例如 “115200;ttyS0 115200;ttyS1”)
KERNEL_IMAGETYPE (例如 “zImage”)
IMAGE_FSTYPES (例如 “tar.gz jffs2”)
你可以在参考章节找到变量的所有细节,你可以利用meta-yocto-bsp/conf/machine/的.conf文件。
3.4.2 为机器增加Kernel
OE构建系统需要能够为机器构建kernel。你可以为机器新建一个新kernel,或者扩展已有的kernel recipe。你可以在meta/recipes-kernel/linux目录找到几个recipe示例作为参考。
如果你准备新建一个kernel recipe,通常的规则同样使用于SRC_URI。因此,你需要指定必须的补丁文件,将S指向源代码,你需要创建do_configure任务使用defconfig文件配置解包好的kernel,你可以使用make defconfig命令,或者更常见地,拷贝一个合适地defconfg文件然后运行make oldconfig。利用inherit kernel和部分linux-*.inc文件,大多数其他功能都几种了起来,类默认提供地功能通常也能工作地很好。
如果你是扩展kernel recipe,通常就是需要新增一个合适地defconifg文件,这个文件需要添加的路径和其他已有的近似。一个可行的方式是在SRC_URI中列举这些文件,在COMPATIBLE_MACHINE中添加机器:
COMPATIBLE_MACHINE = '(qemux86|qemumips)'
更多有关defconfig文件的信息,请阅读《Yocto Project Linux Kernel Development Manual》的“Changing the Configuration”章节。
3.4.3 Adding a Formfactor Configuration File
A formfactor configuration file provides information about the target hardware for which the image is being built and information that the build system cannot obtain from other sources such as the kernel. Some examples of information contained in a formfactor configuration file include framebuffer orientation, whether or not the system has a keyboard, the positioning of the keyboard in relation to the screen, and the screen resolution.
The build system uses reasonable defaults in most cases. However, if customization is necessary, you need to create a machconfig file in the meta/recipes-bsp/formfactor/files directory. This directory contains directories for specific machines such as qemuarm and qemux86. For information about the settings available and the defaults, see the meta/recipes-bsp/formfactor/files/config file found in the same area.
Following is an example for “qemuarm” machine:
HAVE_TOUCHSCREEN=1HAVE_KEYBOARD=1DISPLAY_CAN_ROTATE=0DISPLAY_ORIENTATION=0#DISPLAY_WIDTH_PIXELS=640#DISPLAY_HEIGHT_PIXELS=480#DISPLAY_BPP=16DISPLAY_DPI=150DISPLAY_SUBPIXEL_ORDER=vrgb
3.5 升级Recipe
上游开发者将layer recipe构建的新版本软件发布出来。推荐你保持recipe更新至上游最新发布的版本。
当存在几种升级方式时,你可能会考虑先检查recipe升级状态,你可以使用devtool check-upgrade-status命令。阅读《Yocto Project Reference Manual》的“Checking on the Upgrade Status of a Recipe”以了解更多。
本节介绍三种升级recipe的方式,你可以使用Automated Upgrade Helper (AUH)配置自动升级,你也可以使用devtool upgrade的方式配置半自动升级,当然,你也可以通过编辑recipe手动升级。
3.5.1 使用 Auto Upgrade Helper (AUH)
AUH工具和OE构建系统共同工作,根据上游发布的新版本自动更新recipe。如果你想创建一个服务自动执行升级,使用AUH就可以了,你还可以选择是否将升级结果以邮件形式发送给你。
AUH允许你一次性升级多个recipe,你也可以选择执行构建并在硬件上做集成测试,并将结果邮件给recipe维护者。最后,AUH也可以为recipe地改动创建Git提交以及合适的提交信息。
注释
也存在你不应该使用AUH进行升级情况,这时候你应该使用devtool upgrade或者手动升级:
- AUH不能完成升级,这种情况通常是由于自定义补丁无法自动rebase到新版本。这时候
devtool upgrade允许你手动解决冲突。- 当你想完全控制升级过程时(例如你有特殊的测试安排)
搭建AUH工具步骤如下:
开发主机已搭建: 确保使用Yocto Project的开发主机已搭建。关于如何搭建,请阅读”Preparing the Build Host”
已配置: AUH使用Git保存升级,因此你必须设置Git用户和邮箱:
$ git config —list
如果还没有配置,用以下命令配置:
$ git config —global user.name some_name $ git config —global user.email username@domain.com
克隆AUH仓库: 使用以下命令用Git创建本地仓库拷贝:
$ git clone git://git.yoctoproject.org/auto-upgrade-helper Cloning into ‘auto-upgrade-helper’… remote: Counting objects: 768, done. remote: Compressing objects: 100% (300/300), done. remote: Total 768 (delta 499), reused 703 (delta 434) Receiving objects: 100% (768/768), 191.47 KiB | 98.00 KiB/s, done. Resolving deltas: 100% (499/499), done. Checking connectivity… done.
AUH不是OE-Core或Poky仓库的一部分。
创建专用构建目录 使用以下
oe-init-build-env脚本创建新的构建目录,给运行AUH工具使用:$ cd ~/poky $ source oe-init-build-env your_AUH_build_directory
不推荐使用已有的构建目录,其设定可能导致AUH失败或出现非预期现象。
配置本地配置文件: 刚刚创建的构建目录下修改
local.conf文件:如果你想启用可选择性的构建历史功能,需要在
conf/local.conf中增加以下配置:INHERIT =+ “buildhistory” BUILDHISTORY_COMMIT = “1”
使用这个配置成功升级后,构建历史”diff”文件会在构建目录下出现
upgrade-helper/work/recipe/buildhistory-diff.txt文件。- 如果你想启用可选择性的使用testimage类测试的功能,你需要在
conf/local.conf中增加以下配置:
INHERIT += “testimage”
注释
If your distro does not enable by default ptest, which Poky does, you need the following in yourlocal.conffile:DISTRO_FEATURES_append = " ptest"
- 如果你想启用可选择性的使用testimage类测试的功能,你需要在
(可选)启动vncserver: 如果你想运行一个没有X11的服务器,你需要启动vncserver:
$ vncserver :1 $ export DISPLAY=:1
创建并编辑AUH配置文件: You need to have the
upgrade-helper/upgrade-helper.confconfiguration file in your build directory. You can find a sample configuration file in the AUH source repository.Read through the sample file and make configurations as needed. For example, if you enabled build history in your
local.confas described earlier, you must enable it inupgrade-helper.conf.Also, if you are using the default
maintainers.incfile supplied with Poky and located inmeta-yoctoand you do not set a “maintainers_whitelist” or “global_maintainer_override” in theupgrade-helper.confconfiguration, and you specify “-e all” on the AUH command-line, the utility automatically sends out emails to all the default maintainers. Please avoid this.This next set of examples describes how to use the AUH:
升级特定的Recipe: To upgrade a specific recipe, use the following form:
$ upgrade-helper.py recipe_name
For example, this command upgrades the xmodmap recipe:
$ upgrade-helper.py xmodmap
将特定recipe升级到特定版本: To upgrade a specific recipe to a particular version, use the following form:
$ upgrade-helper.py recipe_name -t version
For example, this command upgrades the xmodmap recipe to version 1.2.3:
$ upgrade-helper.py xmodmap -t 1.2.3
升级所有recipe到最新版本,但不发送邮件提醒: To upgrade all recipes to their most recent versions and suppress the email notifications, use the following command:
$ upgrade-helper.py all
升级所有recipe到最新版本,并发送邮件提醒: To upgrade all recipes to their most recent versions and send email messages to maintainers for each attempted recipe as well as a status email, use the following command:
$ upgrade-helper.py -e all
Once you have run the AUH utility, you can find the results in the AUH build directory:
${BUILDDIR}/upgrade-helper/timestamp
The AUH utility also creates recipe update commits from successful upgrade attempts in the layer tree.
You can easily set up to run the AUH utility on a regular basis by using a cron job. See the weeklyjob.sh file distributed with the utility for an example.
3.5.2 使用 devtool upgrade
As mentioned earlier, an alternative method for upgrading recipes to newer versions is to use devtool upgrade. You can read about devtool upgrade in general in the “Use devtool upgrade to Create a Version of the Recipe that Supports a Newer Version of the Software” section in the Yocto Project Application Development and the Extensible Software Development Kit (eSDK) Manual.
To see all the command-line options available with devtool upgrade, use the following help command:
$ devtool upgrade -h
If you want to find out what version a recipe is currently at upstream without any attempt to upgrade your local version of the recipe, you can use the following command:
$ devtool latest-version recipe_name
As mentioned in the previous section describing AUH, devtool upgrade works in a less-automated manner than AUH. Specifically, devtool upgrade only works on a single recipe that you name on the command line, cannot perform build and integration testing using images, and does not automatically generate commits for changes in the source tree. Despite all these “limitations”, devtool upgrade updates the recipe file to the new upstream version and attempts to rebase custom patches contained by the recipe as needed.
Note
AUH uses much ofdevtool upgradebehind the scenes making AUH somewhat of a “wrapper” application fordevtool upgrade.
A typical scenario involves having used Git to clone an upstream repository that you use during build operations. Because you are (or have) built the recipe in the past, the layer is likely added to your configuration already. If for some reason, the layer is not added, you could add it easily using the bitbake-layers script. For example, suppose you use the nano.bb recipe from the meta-oe layer in the meta-openembedded repository. For this example, assume that the layer has been cloned into following area:
/home/scottrif/meta-openembedded
The following command from your Build Directory adds the layer to your build configuration (i.e. ${BUILDDIR}/conf/bblayers.conf``):
$ bitbake-layers add-layer /home/scottrif/meta-openembedded/meta-oeNOTE: Starting bitbake server...Parsing recipes: 100% |##########################################| Time: 0:00:55Parsing of 1431 .bb files complete (0 cached, 1431 parsed). 2040 targets, 56 skipped, 0 masked, 0 errors.Removing 12 recipes from the x86_64 sysroot: 100% |##############| Time: 0:00:00Removing 1 recipes from the x86_64_i586 sysroot: 100% |##########| Time: 0:00:00Removing 5 recipes from the i586 sysroot: 100% |#################| Time: 0:00:00Removing 5 recipes from the qemux86 sysroot: 100% |##############| Time: 0:00:00
For this example, assume that the nano.bb recipe that is upstream has a 2.9.3 version number. However, the version in the local repository is 2.7.4. The following command from your build directory automatically upgrades the recipe for you:
Note
Using the-Voption is not necessary. Omitting the version number causesdevtool upgradeto upgrade the recipe to the most recent version.
$ devtool upgrade nano -V 2.9.3NOTE: Starting bitbake server...NOTE: Creating workspace layer in /home/scottrif/poky/build/workspaceParsing recipes: 100% |##########################################| Time: 0:00:46Parsing of 1431 .bb files complete (0 cached, 1431 parsed). 2040 targets, 56 skipped, 0 masked, 0 errors.NOTE: Extracting current version source...NOTE: Resolving any missing task queue dependencies...NOTE: Executing SetScene TasksNOTE: Executing RunQueue TasksNOTE: Tasks Summary: Attempted 74 tasks of which 72 didn't need to be rerun and all succeeded.Adding changed files: 100% |#####################################| Time: 0:00:00NOTE: Upgraded source extracted to /home/scottrif/poky/build/workspace/sources/nanoNOTE: New recipe is /home/scottrif/poky/build/workspace/recipes/nano/nano_2.9.3.bb
Continuing with this example, you can use devtool build to build the newly upgraded recipe:
$ devtool build nanoNOTE: Starting bitbake server...Loading cache: 100% |################################################################################################| Time: 0:00:01Loaded 2040 entries from dependency cache.Parsing recipes: 100% |##############################################################################################| Time: 0:00:00Parsing of 1432 .bb files complete (1431 cached, 1 parsed). 2041 targets, 56 skipped, 0 masked, 0 errors.NOTE: Resolving any missing task queue dependencies...NOTE: Executing SetScene TasksNOTE: Executing RunQueue TasksNOTE: nano: compiling from external source tree /home/scottrif/poky/build/workspace/sources/nanoNOTE: Tasks Summary: Attempted 520 tasks of which 304 didn't need to be rerun and all succeeded.
Within the devtool upgrade workflow, opportunity exists to deploy and test your rebuilt software. For this example, however, running devtool finish cleans up the workspace once the source in your workspace is clean. This usually means using Git to stage and submit commits for the changes generated by the upgrade process.
Once the tree is clean, you can clean things up in this example with the following command from the ${BUILDDIR}/workspace/sources/nano directory:
$ devtool finish nano meta-oeNOTE: Starting bitbake server...Loading cache: 100% |################################################################################################| Time: 0:00:00Loaded 2040 entries from dependency cache.Parsing recipes: 100% |##############################################################################################| Time: 0:00:01Parsing of 1432 .bb files complete (1431 cached, 1 parsed). 2041 targets, 56 skipped, 0 masked, 0 errors.NOTE: Adding new patch 0001-nano.bb-Stuff-I-changed-when-upgrading-nano.bb.patchNOTE: Updating recipe nano_2.9.3.bbNOTE: Removing file /home/scottrif/meta-openembedded/meta-oe/recipes-support/nano/nano_2.7.4.bbNOTE: Moving recipe file to /home/scottrif/meta-openembedded/meta-oe/recipes-support/nanoNOTE: Leaving source tree /home/scottrif/poky/build/workspace/sources/nano as-is; if you no longer need it then please delete it manually
Using the devtool finish command cleans up the workspace and creates a patch file based on your commits. The tool puts all patch files back into the source directory in a sub-directory named nano in this case.
3.5.3 手动升级Recipe
If for some reason you choose not to upgrade recipes using the Auto Upgrade Helper (AUH) or by using devtool upgrade, you can manually edit the recipe files to upgrade the versions.
Caution
Manually updating multiple recipes scales poorly and involves many steps. The recommendation to upgrade recipe versions is through AUH ordevtool upgrade, both of which automate some steps and provide guidance for others needed for the manual process.
To manually upgrade recipe versions, follow these general steps:
Change the Version: Rename the recipe such that the version (i.e. the
PVpart of the recipe name) changes appropriately. If the version is not part of the recipe name, change the value as it is set forPVwithin the recipe itself.Update
SRCREVif Needed: If the source code your recipe builds is fetched from Git or some other version control system, updateSRCREVto point to the commit hash that matches the new version.Build the Software: Try to build the recipe using BitBake. Typical build failures include the following:
License statements were updated for the new version. For this case, you need to review any changes to the license and update the values of
LICENSEandLIC_FILES_CHKSUMas needed.Note
License changes are often inconsequential. For example, the license text’s copyright year might have changed.Custom patches carried by the older version of the recipe might fail to apply to the new version. For these cases, you need to review the failures. Patches might not be necessary for the new version of the software if the upgraded version has fixed those issues. If a patch is necessary and failing, you need to rebase it into the new version.
Optionally Attempt to Build for Several Architectures: Once you successfully build the new software for a given architecture, you could test the build for other architectures by changing the
MACHINEvariable and rebuilding the software. This optional step is especially important if the recipe is to be released publicly.Check the Upstream Change Log or Release Notes: Checking both these reveals if new features exist that could break backwards-compatibility. If so, you need to take steps to mitigate or eliminate that situation.
Optionally Create a Bootable Image and Test: If you want, you can test the new software by booting it onto actual hardware.
Create a Commit with the Change in the Layer Repository: After all builds work and any testing is successful, you can create commits for any changes in the layer holding your upgraded recipe.
3.6 寻找临时源代码
You might find it helpful during development to modify the temporary source code used by recipes to build packages. For example, suppose you are developing a patch and you need to experiment a bit to figure out your solution. After you have initially built the package, you can iteratively tweak the source code, which is located in the Build Directory, and then you can force a re-compile and quickly test your altered code. Once you settle on a solution, you can then preserve your changes in the form of patches.
During a build, the unpacked temporary source code used by recipes to build packages is available in the Build Directory as defined by the S variable. Below is the default value for the S variable as defined in the meta/conf/bitbake.conf configuration file in the Source Directory:
S = "${WORKDIR}/${BP}"
You should be aware that many recipes override the S variable. For example, recipes that fetch their source from Git usually set S to ${WORKDIR}/git.
Note
TheBPrepresents the base recipe name, which consists of the name and version:
BP = "${BPN}-${PV}"
The path to the work directory for the recipe (WORKDIR) is defined as follows:
${TMPDIR}/work/${MULTIMACH_TARGET_SYS}/`${PN}`/${EXTENDPE}${PV}-${PR}
The actual directory depends on several things:
TMPDIR: The top-level build output directory.MULTIMACH_TARGET_SYS: The target system identifier.PN: The recipe name.EXTENDPE: The epoch - (if PE is not specified, which is usually the case for most recipes, then EXTENDPE is blank).PV: The recipe version.PR: The recipe revision.
As an example, assume a Source Directory top-level folder named poky, a default Build Directory at poky/build, and a qemux86-poky-linux machine target system. Furthermore, suppose your recipe is named foo_1.3.0.bb. In this case, the work directory the build system uses to build the package would be as follows:
poky/build/tmp/work/qemux86-poky-linux/foo/1.3.0-r0
3.7 在工作流中使用Quilt
Quilt is a powerful tool that allows you to capture source code changes without having a clean source tree. This section outlines the typical workflow you can use to modify source code, test changes, and then preserve the changes in the form of a patch all using Quilt.
Tip
With regard to preserving changes to source files, if you clean a recipe or haverm_workenabled, thedevtoolworkflow as described in the Yocto Project Application Development and the Extensible Software Development Kit (eSDK) manual is a safer development flow than the flow that uses Quilt.
Follow these general steps:
Find the Source Code: Temporary source code used by the OpenEmbedded build system is kept in the Build Directory. See the “Finding Temporary Source Code” section to learn how to locate the directory that has the temporary source code for a particular package.
Change Your Working Directory: You need to be in the directory that has the temporary source code. That directory is defined by the S variable.
Create a New Patch: Before modifying source code, you need to create a new patch. To create a new patch file, use
quilt newas below:$ quilt new my_changes.patch
Notify Quilt and Add Files: After creating the patch, you need to notify Quilt about the files you plan to edit. You notify Quilt by adding the files to the patch you just created:
$ quilt add file1.c file2.c file3.c
Edit the Files: Make your changes in the source code to the files you added to the patch.
Test Your Changes: Once you have modified the source code, the easiest way to test your changes is by calling the
do_compiletask as shown in the following example:$ bitbake -c compile -f package
The
-for--forceoption forces the specified task to execute. If you find problems with your code, you can just keep editing and re-testing iteratively until things work as expected.Note
All the modifications you make to the temporary source code disappear once you run thedo_cleanordo_cleanalltasks using BitBake (i.e.bitbake -c clean packageandbitbake -c cleanall package). Modifications will also disappear if you use the rm_work feature as described in the “Conserving Disk Space During Builds” section.Generate the Patch: Once your changes work as expected, you need to use Quilt to generate the final patch that contains all your modifications.
$ quilt refresh
At this point, the
my_changes.patchfile has all your edits made to thefile1.c,file2.c, andfile3.cfiles.You can find the resulting patch file in the
patches/subdirectory of the source (S) directory.Copy the Patch File: For simplicity, copy the patch file into a directory named
files, which you can create in the same directory that holds the recipe (.bb) file or the append (.bbappend) file. Placing the patch here guarantees that the OpenEmbedded build system will find the patch. Next, add the patch into theSRC_URIof the recipe. Here is an example:SRC_URI += "file://my_changes.patch"
3.8 使用devShell
When debugging certain commands or even when just editing packages, devshell can be a useful tool. When you invoke devshell, all tasks up to and including do_patch are run for the specified target. Then, a new terminal is opened and you are placed in ${S}, the source directory. In the new terminal, all the OpenEmbedded build-related environment variables are still defined so you can use commands such as configure and make. The commands execute just as if the OpenEmbedded build system were executing them. Consequently, working this way can be helpful when debugging a build or preparing software to be used with the OpenEmbedded build system.
Following is an example that uses devshell on a target named matchbox-desktop:
$ bitbake matchbox-desktop -c devshell
This command spawns a terminal with a shell prompt within the OpenEmbedded build environment. The OE_TERMINAL variable controls what type of shell is opened.
For spawned terminals, the following occurs:
The
PATHvariable includes the cross-toolchain.The
pkgconfigvariables find the correct.pcfiles.The
configurecommand finds the Yocto Project site files as well as any other necessary files.
Within this environment, you can run configure or compile commands as if they were being run by the OpenEmbedded build system itself. As noted earlier, the working directory also automatically changes to the Source Directory (S).
To manually run a specific task using devshell, run the corresponding run.* script in the ${WORKDIR}/temp directory (例如, run.do_configure.pid). If a task’s script does not exist, which would be the case if the task was skipped by way of the sstate cache, you can create the task by first running it outside of the devshell:
$ bitbake -c task
Notes
- Execution of a task’s
run.*script and BitBake’s execution of a task are identical. In other words, running the script re-runs the task just as it would be run using thebitbake -ccommand.- Any
run.*file that does not have a.pidextension is a symbolic link (symlink) to the most recent version of that file.
Remember, that the devshell is a mechanism that allows you to get into the BitBake task execution environment. And as such, all commands must be called just as BitBake would call them. That means you need to provide the appropriate options for cross-compilation and so forth as applicable.
When you are finished using devshell, exit the shell or close the terminal window.
Notes
- It is worth remembering that when using
devshellyou need to use the full compiler name such asarm-poky-linux-gnueabi-gccinstead of just usinggcc. The same applies to other applications such asbinutils,libtooland so forth. BitBake sets up environment variables such asCCto assist applications, such asmaketo find the correct tools.- It is also worth noting that
devshellstill works over X11 forwarding and similar situations.
3.9 使用devpyshell
Similar to working within a development shell as described in the previous section, you can also spawn and work within an interactive Python development shell. When debugging certain commands or even when just editing packages, devpyshell can be a useful tool. When you invoke devpyshell, all tasks up to and including do_patch are run for the specified target. Then a new terminal is opened. Additionally, key Python objects and code are available in the same way they are to BitBake tasks, in particular, the data store ‘d’. So, commands such as the following are useful when exploring the data store and running functions:
pydevshell> d.getVar("STAGING_DIR")'/media/build1/poky/build/tmp/sysroots'pydevshell> d.getVar("STAGING_DIR")'${TMPDIR}/sysroots'pydevshell> d.setVar("FOO", "bar")pydevshell> d.getVar("FOO")'bar'pydevshell> d.delVar("FOO")pydevshell> d.getVar("FOO")pydevshell> bb.build.exec_func("do_unpack", d)pydevshell>
The commands execute just as if the OpenEmbedded build system were executing them. Consequently, working this way can be helpful when debugging a build or preparing software to be used with the OpenEmbedded build system.
Following is an example that uses devpyshell on a target named matchbox-desktop:
$ bitbake matchbox-desktop -c devpyshell
This command spawns a terminal and places you in an interactive Python interpreter within the OpenEmbedded build environment. The OE_TERMINAL variable controls what type of shell is opened.
When you are finished using devpyshell, you can exit the shell either by using Ctrl+d or closing the terminal window.
3.10 构建
This section describes various build procedures. For example, the steps needed for a simple build, a target that uses multiple configurations, building an image for more than one machine, and so forth.
3.10.1 构建一个简单的镜像
In the development environment, you need to build an image whenever you change hardware support, add or change system libraries, or add or change services that have dependencies. Several methods exist that allow you to build an image within the Yocto Project. This section presents the basic steps you need to build a simple image using BitBake from a build host running Linux.
Notes
For information on how to build an image using Toaster, see the Toaster User Manual.
For information on how to use devtool to build images, see the “Using devtool in Your SDK Workflow” section in the Yocto Project Application Development and the Extensible Software Development Kit (eSDK) manual.
For a quick example on how to build an image using the OpenEmbedded build system, see the Yocto Project Quick Build document.
The build process creates an entire Linux distribution from source and places it in your Build Directory under tmp/deploy/images. For detailed information on the build process using BitBake, see the “Images” section in the Yocto Project Overview and Concepts Manual.
The following figure and list overviews the build process:

Set up Your Host Development System to Support Development Using the Yocto Project: See the “Setting Up to Use the Yocto Project” section for options on how to get a build host ready to use the Yocto Project.
Initialize the Build Environment: Initialize the build environment by sourcing the build environment script (i.e.
oe-init-build-env):$ source oe-init-build-env [build_dir]
When you use the initialization script, the OpenEmbedded build system uses
buildas the default Build Directory in your current work directory. You can use abuild_dirargument with the script to specify a different build directory.Tip
A common practice is to use a different Build Directory for different targets. For example,~/build/x86for aqemux86target, and~/build/armfor aqemuarmtarget.Make Sure Your
local.confFile is Correct: Ensure theconf/local.conf` configuration file, which is found in the Build Directory, is set up how you want it. This file defines many aspects of the build environment including the target machine architecture through theMACHINEvariable, the packaging format used during the build (PACKAGE_CLASSES), and a centralized tarball download directory through theDL_DIR` variable.Build the Image: Build the image using the
bitbakecommand:$ bitbake target
Note
For information on BitBake, see the BitBake User Manual.The
targetis the name of the recipe you want to build. Common targets are the images inmeta/recipes-core/images,meta/recipes-sato/images, and so forth all found in the Source Directory. Or, the target can be the name of a recipe for a specific piece of software such as BusyBox. For more details about the images the OpenEmbedded build system supports, see the “Images” chapter in the Yocto Project Reference Manual.As an example, the following command builds the
core-image-minimalimage:$ bitbake core-image-minimal
Once an image has been built, it often needs to be installed. The images and kernels built by the OpenEmbedded build system are placed in the Build Directory in
tmp/deploy/images. For information on how to run pre-built images such asqemux86andqemuarm, see the Yocto Project Application Development and the Extensible Software Development Kit (eSDK) manual. For information about how to install these images, see the documentation for your particular board or machine.
3.10.2 使用多配置文件为多个目标设备构建镜像
You can use a single bitbake command to build multiple images or packages for different targets where each image or package requires a different configuration (multiple configuration builds). The builds, in this scenario, are sometimes referred to as “multiconfigs”, and this section uses that term throughout.
This section describes how to set up for multiple configuration builds and how to account for cross-build dependencies between the multiconfigs.
3.10.2.1 开始并运行多配置构建
To accomplish a multiple configuration build, you must define each target’s configuration separately using a parallel configuration file in the Build Directory, and you must follow a required file hierarchy. Additionally, you must enable the multiple configuration builds in your local.conf file.
Follow these steps to set up and execute multiple configuration builds:
Create Separate Configuration Files: You need to create a single configuration file for each build target (each multiconfig). Minimally, each configuration file must define the machine and the temporary directory BitBake uses for the build. Suggested practice dictates that you do not overlap the temporary directories used during the builds. However, it is possible that you can share the temporary directory (
TMPDIR). For example, consider a scenario with two different multiconfigs for the sameMACHINE: “qemux86” built for two distributions such as “poky” and “poky-lsb”. In this case, you might want to use the sameTMPDIR.Here is an example showing the minimal statements needed in a configuration file for a “qemux86” target whose temporary build directory is
tmpmultix86:MACHINE="qemux86"TMPDIR="${TOPDIR}/tmpmultix86"
The location for these multiconfig configuration files is specific. They must reside in the current build directory in a sub-directory of conf named multiconfig. Following is an example that defines two configuration files for the “x86” and “arm” multiconfigs:

The reason for this required file hierarchy is because the BBPATH variable is not constructed until the layers are parsed. Consequently, using the configuration file as a pre-configuration file is not possible unless it is located in the current working directory.
- Add the BitBake Multi-configuration Variable to the Local Configuration File: Use the
BBMULTICONFIGvariable in yourconf/local.conf` configuration file to specify each multiconfig. Continuing with the example from the previous figure, theBBMULTICONFIG` variable needs to enable two multiconfigs: “x86” and “arm” by specifying each configuration file:BBMULTICONFIG = "x86 arm"
Launch BitBake: Use the following BitBake command form to launch the multiple configuration build:
$ bitbake [multiconfig:multiconfigname:]target [[[multiconfig:multiconfigname:]target] ... ]
For the example in this section, the following command applies:
$ bitbake multiconfig:x86:core-image-minimal multiconfig:arm:core-image-sato
The previous BitBake command builds a
core-image-minimalimage that is configured through thex86.confconfiguration file and builds acore-image-satoimage that is configured through thearm.confconfiguration file.Note
Support for multiple configuration builds in the Yocto Project 2.7 (Warrior) Release does not include Shared State (sstate) optimizations. Consequently, if a build uses the same object twice in, for example, two differentTMPDIRdirectories, the build either loads from an existing sstate cache for that build at the start or builds the object fresh.
3.10.2.2 启用多配置构建依赖
Sometimes dependencies can exist between targets (multiconfigs) in a multiple configuration build. For example, suppose that in order to build a core-image-sato image for an “x86” multiconfig, the root filesystem of an “arm” multiconfig must exist. This dependency is essentially that the do_image task in the core-image-sato recipe depends on the completion of the do_rootfs task of the core-image-minimal recipe.
To enable dependencies in a multiple configuration build, you must declare the dependencies in the recipe using the following statement form:
task_or_package[mcdepends] = "multiconfig:from_multiconfig:to_multiconfig:recipe_name:task_on_which_to_depend"
To better show how to use this statement, consider the example scenario from the first paragraph of this section. The following statement needs to be added to the recipe that builds the core-image-sato image:
do_image[mcdepends] = "multiconfig:x86:arm:core-image-minimal:do_rootfs"
In this example, the from_multiconfig is “x86”. The to_multiconfig is “arm”. The task on which the do_image task in the recipe depends is the do_rootfs task from the core-image-minimal recipe associated with the “arm” multiconfig.
Once you set up this dependency, you can build the “x86” multiconfig using a BitBake command as follows:
$ bitbake multiconfig:x86:core-image-sato
This command executes all the tasks needed to create the core-image-sato image for the “x86” multiconfig. Because of the dependency, BitBake also executes through the do_rootfs task for the “arm” multiconfig build.
Having a recipe depend on the root filesystem of another build might not seem that useful. Consider this change to the statement in the core-image-sato recipe:
do_image[mcdepends] = "multiconfig:x86:arm:core-image-minimal:do_image"
In this case, BitBake must create the core-image-minimal image for the “arm” build since the “x86” build depends on it.
Because “x86” and “arm” are enabled for multiple configuration builds and have separate configuration files, BitBake places the artifacts for each build in the respective temporary build directories (i.e. TMPDIR).
3.10.3 构建初始化内存文件系统 (initramfs) 镜像
An initial RAM filesystem (initramfs) image provides a temporary root filesystem used for early system initialization (例如 loading of modules needed to locate and mount the “real” root filesystem).
Note
The initramfs image is the successor of initial RAM disk (initrd). It is a “copy in and out” (cpio) archive of the initial filesystem that gets loaded into memory during the Linux startup process. Because Linux uses the contents of the archive during initialization, the initramfs image needs to contain all of the device drivers and tools needed to mount the final root filesystem.
Follow these steps to create an initramfs image:
Create the initramfs Image Recipe: You can reference the
core-image-minimal-initramfs.bbrecipe found in themeta/recipes-coredirectory of the Source Directory as an example from which to work.Decide if You Need to Bundle the initramfs Image Into the Kernel Image: If you want the initramfs image that is built to be bundled in with the kernel image, set the
INITRAMFS_IMAGE_BUNDLEvariable to “1” in yourlocal.confconfiguration file and set theINITRAMFS_IMAGEvariable in the recipe that builds the kernel image.Tip
It is recommended that you do bundle the initramfs image with the kernel image to avoid circular dependencies between the kernel recipe and the initramfs recipe should the initramfs image include kernel modules.Setting the
INITRAMFS_IMAGE_BUNDLEflag causes the initramfs image to be unpacked into the${B}/usr/directory. The unpacked initramfs image is then passed to the kernel’sMakefileusing theCONFIG_INITRAMFS_SOURCEvariable, allowing the initramfs image to be built into the kernel normally.Note
If you choose to not bundle the initramfs image with the kernel image, you are essentially using an Initial RAM Disk (initrd). Creating an initrd is handled primarily through theINITRD_IMAGE,INITRD_LIVE, andINITRD_IMAGE_LIVEvariables. For more information, see theimage-live.bbclassfile.Optionally Add Items to the initramfs Image Through the initramfs Image Recipe: If you add items to the initramfs image by way of its recipe, you should use
PACKAGE_INSTALLrather thanIMAGE_INSTALL.PACKAGE_INSTALLgives more direct control of what is added to the image as compared to the defaults you might not necessarily want that are set by theimageorcore-imageclasses.Build the Kernel Image and the initramfs Image: Build your kernel image using BitBake. Because the initramfs image recipe is a dependency of the kernel image, the initramfs image is built as well and bundled with the kernel image if you used the
INITRAMFS_IMAGE_BUNDLEvariable described earlier.
3.10.4 构建一个小的系统
Very small distributions have some significant advantages such as requiring less on-die or in-package memory (cheaper), better performance through efficient cache usage, lower power requirements due to less memory, faster boot times, and reduced development overhead. Some real-world examples where a very small distribution gives you distinct advantages are digital cameras, medical devices, and small headless systems.
This section presents information that shows you how you can trim your distribution to even smaller sizes than the poky-tiny distribution, which is around 5 Mbytes, that can be built out-of-the-box using the Yocto Project.
3.10.4.1. 概述
The following list presents the overall steps you need to consider and perform to create distributions with smaller root filesystems, achieve faster boot times, maintain your critical functionality, and avoid initial RAM disks:
3.10.4.2 目标和指导原则
Before you can reach your destination, you need to know where you are going. Here is an example list that you can use as a guide when creating very small distributions:
Determine how much space you need (例如 a kernel that is 1 Mbyte or less and a root filesystem that is 3 Mbytes or less).
Find the areas that are currently taking 90% of the space and concentrate on reducing those areas.
Do not create any difficult “hacks” to achieve your goals.
Leverage the device-specific options.
Work in a separate layer so that you keep changes isolated. For information on how to create layers, see the “Understanding and Creating Layers” section.
3.10.4.3 理解镜像大小的构成
It is easiest to have something to start with when creating your own distribution. You can use the Yocto Project out-of-the-box to create the poky-tiny distribution. Ultimately, you will want to make changes in your own distribution that are likely modeled after poky-tiny.
Note
To usepoky-tinyin your build, set theDISTROvariable in yourlocal.conffile to “poky-tiny” as described in the “Creating Your Own Distribution” section.
Understanding some memory concepts will help you reduce the system size. Memory consists of static, dynamic, and temporary memory. Static memory is the TEXT (code), DATA (initialized data in the code), and BSS (uninitialized data) sections. Dynamic memory represents memory that is allocated at runtime: stacks, hash tables, and so forth. Temporary memory is recovered after the boot process. This memory consists of memory used for decompressing the kernel and for the __init__ functions.
To help you see where you currently are with kernel and root filesystem sizes, you can use two tools found in the Source Directory in the scripts/tiny/ directory:
ksize.py: Reports component sizes for the kernel build objects.dirsize.py: Reports component sizes for the root filesystem.
This next tool and command help you organize configuration fragments and view file dependencies in a human-readable form:
merge_config.sh: Helps you manage configuration files and fragments within the kernel. With this tool, you can merge individual configuration fragments together. The tool allows you to make overrides and warns you of any missing configuration options. The tool is ideal for allowing you to iterate on configurations, create minimal configurations, and create configuration files for different machines without having to duplicate your process.The
merge_config.shscript is part of the Linux Yocto kernel Git repositories (i.e.linux-yocto-3.14,linux-yocto-3.10,linux-yocto-3.8, and so forth) in thescripts/kconfigdirectory.
For more information on configuration fragments, see the “Creating Configuration Fragments” section in the Yocto Project Linux Kernel Development Manual.
bitbake -u taskexp -g bitbake_target: Using the BitBake command with these options brings up a Dependency Explorer from which you can view file dependencies. Understanding these dependencies allows you to make informed decisions when cutting out various pieces of the kernel and root filesystem.
3.10.4.4 调整根文件系统
The root filesystem is made up of packages for booting, libraries, and applications. To change things, you can configure how the packaging happens, which changes the way you build them. You can also modify the filesystem itself or select a different filesystem.
First, find out what is hogging your root filesystem by running the dirsize.py script from your root directory:
$ cd root-directory-of-image$ dirsize.py 100000 > dirsize-100k.log$ cat dirsize-100k.log
You can apply a filter to the script to ignore files under a certain size. The previous example filters out any files below 100 Kbytes. The sizes reported by the tool are uncompressed, and thus will be smaller by a relatively constant factor in a compressed root filesystem. When you examine your log file, you can focus on areas of the root filesystem that take up large amounts of memory.
You need to be sure that what you eliminate does not cripple the functionality you need. One way to see how packages relate to each other is by using the Dependency Explorer UI with the BitBake command:
$ cd image-directory$ bitbake -u taskexp -g image
Use the interface to select potential packages you wish to eliminate and see their dependency relationships.
When deciding how to reduce the size, get rid of packages that result in minimal impact on the feature set. For example, you might not need a VGA display. Or, you might be able to get by with devtmpfs and mdev instead of udev.
Use your local.conf file to make changes. For example, to eliminate udev and glib, set the following in the local configuration file:
VIRTUAL-RUNTIME_dev_manager = ""
Finally, you should consider exactly the type of root filesystem you need to meet your needs while also reducing its size. For example, consider cramfs, squashfs, ubifs, ext2, or an initramfs using initramfs. Be aware that ext3 requires a 1 Mbyte journal. If you are okay with running read-only, you do not need this journal.
Note
After each round of elimination, you need to rebuild your system and then use the tools to see the effects of your reductions.
3.10.4.5 调整Kernel
The kernel is built by including policies for hardware-independent aspects. What subsystems do you enable? For what architecture are you building? Which drivers do you build by default?
Note
You can modify the kernel source if you want to help with boot time.
Run the ksize.py script from the top-level Linux build directory to get an idea of what is making up the kernel:
$ cd top-level-linux-build-directory$ ksize.py > ksize.log$ cat ksize.log
When you examine the log, you will see how much space is taken up with the built-in .o files for drivers, networking, core kernel files, filesystem, sound, and so forth. The sizes reported by the tool are uncompressed, and thus will be smaller by a relatively constant factor in a compressed kernel image. Look to reduce the areas that are large and taking up around the “90% rule.”
To examine, or drill down, into any particular area, use the -d option with the script:
$ ksize.py -d > ksize.log
Using this option breaks out the individual file information for each area of the kernel (例如 drivers, networking, and so forth).
Use your log file to see what you can eliminate from the kernel based on features you can let go. For example, if you are not going to need sound, you do not need any drivers that support sound.
After figuring out what to eliminate, you need to reconfigure the kernel to reflect those changes during the next build. You could run menuconfig and make all your changes at once. However, that makes it difficult to see the effects of your individual eliminations and also makes it difficult to replicate the changes for perhaps another target device. A better method is to start with no configurations using allnoconfig, create configuration fragments for individual changes, and then manage the fragments into a single configuration file using merge_config.sh. The tool makes it easy for you to iterate using the configuration change and build cycle.
Each time you make configuration changes, you need to rebuild the kernel and check to see what impact your changes had on the overall size.
3.10.4.6 移除包管理需求
Packaging requirements add size to the image. One way to reduce the size of the image is to remove all the packaging requirements from the image. This reduction includes both removing the package manager and its unique dependencies as well as removing the package management data itself.
To eliminate all the packaging requirements for an image, be sure that “package-management” is not part of your IMAGE_FEATURES statement for the image. When you remove this feature, you are removing the package manager as well as its dependencies from the root filesystem.
3.10.4.7 其他减小体积的办法
Depending on your particular circumstances, other areas that you can trim likely exist. The key to finding these areas is through tools and methods described here combined with experimentation and iteration. Here are a couple of areas to experiment with:
glibc: In general, follow this process:Remove
glibcfeatures fromDISTRO_FEATURESthat you think you do not need.Build your distribution.
If the build fails due to missing symbols in a package, determine if you can reconfigure the package to not need those features. For example, change the configuration to not support wide character support as is done for
ncurses. Or, if support for those characters is needed, determine whatglibcfeatures provide the support and restore the configuration.Rebuild and repeat the process.
busybox: For BusyBox, use a process similar as described forglibc. A difference is you will need to boot the resulting system to see if you are able to do everything you expect from the running system. You need to be sure to integrate configuration fragments into Busybox because BusyBox handles its own core features and then allows you to add configuration fragments on top.
3.10.4.8 重复步骤
If you have not reached your goals on system size, you need to iterate on the process. The process is the same. Use the tools and see just what is taking up 90% of the root filesystem and the kernel. Decide what you can eliminate without limiting your device beyond what you need.
Depending on your system, a good place to look might be Busybox, which provides a stripped down version of Unix tools in a single, executable file. You might be able to drop virtual terminal services or perhaps ipv6.
3.10.5 为多设备构建镜像
A common scenario developers face is creating images for several different machines that use the same software environment. In this situation, it is tempting to set the tunings and optimization flags for each build specifically for the targeted hardware (i.e. “maxing out” the tunings). Doing so can considerably add to build times and package feed maintenance collectively for the machines. For example, selecting tunes that are extremely specific to a CPU core used in a system might enable some micro optimizations in GCC for that particular system but would otherwise not gain you much of a performance difference across the other systems as compared to using a more general tuning across all the builds (例如 setting DEFAULTTUNE specifically for each machine’s build). Rather than “max out” each build’s tunings, you can take steps that cause the OpenEmbedded build system to reuse software across the various machines where it makes sense.
If build speed and package feed maintenance are considerations, you should consider the points in this section that can help you optimize your tunings to best consider build times and package feed maintenance.
Share the Build Directory: If at all possible, share the
TMPDIRacross builds. The Yocto Project supports switching between differentMACHINEvalues in the sameTMPDIR. This practice is well supported and regularly used by developers when building for multiple machines. When you use the sameTMPDIRfor multiple machine builds, the OpenEmbedded build system can reuse the existing native and often cross-recipes for multiple machines. Thus, build time decreases.Note
IfDISTROsettings change or fundamental configuration settings such as the filesystem layout, you need to work with a cleanTMPDIR. SharingTMPDIRunder these circumstances might work but since it is not guaranteed, you should use a cleanTMPDIR.Enable the Appropriate Package Architecture: By default, the OpenEmbedded build system enables three levels of package architectures: “all”, “tune” or “package”, and “machine”. Any given recipe usually selects one of these package architectures (types) for its output. Depending for what a given recipe creates packages, making sure you enable the appropriate package architecture can directly impact the build time.
A recipe that just generates scripts can enable “all” architecture because there are no binaries to build. To specifically enable “all” architecture, be sure your recipe inherits the
allarchclass. This class is useful for “all” architectures because it configures many variables so packages can be used across multiple architectures.If your recipe needs to generate packages that are machine-specific or when one of the build or runtime dependencies is already machine-architecture dependent, which makes your recipe also machine-architecture dependent, make sure your recipe enables the “machine” package architecture through the
MACHINE_ARCHvariable:PACKAGE_ARCH = "${MACHINE_ARCH}"
When you do not specifically enable a package architecture through the PACKAGE_ARCH, The OpenEmbedded build system defaults to the
TUNE_PKGARCHsetting:PACKAGE_ARCH = "${TUNE_PKGARCH}"
Choose a Generic Tuning File if Possible: Some tunes are more generic and can run on multiple targets (例如 an
armv5set of packages could run onarmv6andarmv7processors in most cases). Similarly,i486binaries could work oni586and higher processors. You should realize, however, that advances on newer processor versions would not be used.If you select the same tune for several different machines, the OpenEmbedded build system reuses software previously built, thus speeding up the overall build time. Realize that even though a new sysroot for each machine is generated, the software is not recompiled and only one package feed exists.
Manage Granular Level Packaging: Sometimes cases exist where injecting another level of package architecture beyond the three higher levels noted earlier can be useful. For example, consider how NXP (formerly Freescale) allows for the easy reuse of binary packages in their layer
meta-freescale. In this example, thefsl-dynamic-packagearchclass shares GPU packages for i.MX53 boards because all boards share the AMD GPU. The i.MX6-based boards can do the same because all boards share the Vivante GPU. This class inspects the BitBake datastore to identify if the package provides or depends on one of the sub-architecture values. If so, the class sets thePACKAGE_ARCHvalue based on theMACHINE_SUBARCHvalue. If the package does not provide or depend on one of the sub-architecture values but it matches a value in the machine-specific filter, it setsMACHINE_ARCH. This behavior reduces the number of packages built and saves build time by reusing binaries.Use Tools to Debug Issues: Sometimes you can run into situations where software is being rebuilt when you think it should not be. For example, the OpenEmbedded build system might not be using shared state between machines when you think it should be. These types of situations are usually due to references to machine-specific variables such as
MACHINE,SERIAL_CONSOLES,XSERVER,MACHINE_FEATURES, and so forth in code that is supposed to only be tune-specific or when the recipe depends (DEPENDS,RDEPENDS,RRECOMMENDS,RSUGGESTS, and so forth) on some other recipe that already hasPACKAGE_ARCHdefined as “${MACHINE_ARCH}”.Note
Patches to fix any issues identified are most welcome as these issues occasionally do occur.For such cases, you can use some tools to help you sort out the situation:
sstate-diff-machines.sh: You can find this tool in the
scriptsdirectory of the Source Repositories. See the comments in the script for information on how to use the tool.BitBake’s “-S printdiff” Option: Using this option causes BitBake to try to establish the closest signature match it can (例如 in the shared state cache) and then run
bitbake-diffsigsover the matches to determine the stamps and delta where these two stamp trees diverge.
3.10.6 构建外部代码的软件
By default, the OpenEmbedded build system uses the Build Directory when building source code. The build process involves fetching the source files, unpacking them, and then patching them if necessary before the build takes place.
Situations exist where you might want to build software from source files that are external to and thus outside of the OpenEmbedded build system. For example, suppose you have a project that includes a new BSP with a heavily customized kernel. And, you want to minimize exposing the build system to the development team so that they can focus on their project and maintain everyone’s workflow as much as possible. In this case, you want a kernel source directory on the development machine where the development occurs. You want the recipe’s SRC_URI variable to point to the external directory and use it as is, not copy it.
To build from software that comes from an external source, all you need to do is inherit the externalsrc class and then set the EXTERNALSRC variable to point to your external source code. Here are the statements to put in your local.conf file:
INHERIT += "externalsrc"EXTERNALSRC_pn-myrecipe = "path-to-your-source-tree"
This next example shows how to accomplish the same thing by setting EXTERNALSRC in the recipe itself or in the recipe’s append file:
EXTERNALSRC = "path"EXTERNALSRC_BUILD = "path"
Note
In order for these settings to take effect, you must globally or locally inherit theexternalsrcclass.
By default, externalsrc.bbclass builds the source code in a directory separate from the external source directory as specified by EXTERNALSRC. If you need to have the source built in the same directory in which it resides, or some other nominated directory, you can set EXTERNALSRC_BUILD to point to that directory:
EXTERNALSRC_BUILD_pn-myrecipe = "path-to-your-source-tree"
3.10.7 离线重复构建
It can be useful to take a “snapshot” of upstream sources used in a build and then use that “snapshot” later to replicate the build offline. To do so, you need to first prepare and populate your downloads directory your “snapshot” of files. Once your downloads directory is ready, you can use it at any time and from any machine to replicate your build.
Follow these steps to populate your Downloads directory:
Create a Clean Downloads Directory: Start with an empty downloads directory (
DL_DIR). You start with an empty downloads directory by either removing the files in the existing directory or by settingDL_DIRto point to either an empty location or one that does not yet exist.Generate Tarballs of the Source Git Repositories: Edit your
local.confconfiguration file as follows:DL_DIR = “/home/your-download-dir/“ BB_GENERATE_MIRROR_TARBALLS = “1”
During the fetch process in the next step, BitBake gathers the source files and creates tarballs in the directory pointed to by
DL_DIR. See theBB_GENERATE_MIRROR_TARBALLSvariable for more information.Populate Your Downloads Directory Without Building: Use BitBake to fetch your sources but inhibit the build:
$ bitbake target —runonly=fetch
The downloads directory (i.e.
${DL_DIR}) now has a “snapshot” of the source files in the form of tarballs, which can be used for the build.Optionally Remove Any Git or other SCM Subdirectories From the Downloads Directory: If you want, you can clean up your downloads directory by removing any Git or other Source Control Management (SCM) subdirectories such as
${DL_DIR}/git2/*. The tarballs already contain these subdirectories.
Once your downloads directory has everything it needs regarding source files, you can create your “own-mirror” and build your target. Understand that you can use the files to build the target offline from any machine and at any time.
Follow these steps to build your target using the files in the downloads directory:
Using Local Files Only: Inside your
local.conffile, add theSOURCE_MIRROR_URLvariable, inherit theown-mirrorsclass, and use theBB_NO_NETWORKvariable to yourlocal.conf.SOURCE_MIRROR_URL ?= “file:///home/your-download-dir/“ INHERIT += “own-mirrors” BB_NO_NETWORK = “1”
The SOURCE_MIRROR_URL and own-mirror class set up the system to use the downloads directory as your “own mirror”. Using the BB_NO_NETWORK variable makes sure that BitBake’s fetching process in step 3 stays local, which means files from your “own-mirror” are used.
Start With a Clean Build: You can start with a clean build by removing the
${TMPDIR}directory or using a new Build Directory.Build Your Target: Use BitBake to build your target:
$ bitbake target
The build completes using the known local “snapshot” of source files from your mirror. The resulting tarballs for your “snapshot” of source files are in the downloads directory.
Note
The offline build does not work if recipes attempt to find the latest version of software by settingSRCREVto${AUTOREV}:SRCREV = "${AUTOREV}"
When a recipe sets
SRCREVto${AUTOREV}, the build system accesses the network in an attempt to determine the latest version of software from the SCM. Typically, recipes that useAUTOREVare custom or modified recipes. Recipes that reside in public repositories usually do not useAUTOREV.
If you do have recipes that useAUTOREV, you can take steps to still use the recipes in an offline build. Do the following:
a. Use a configuration generated by enabling build history.
b. Use thebuildhistory-collect-srcrevscommand to collect the storedSRCREVvalues from the build’s history. For more information on collecting these values, see the “Build History Package Information” section.
c. Once you have the correct source revisions, you can modify those recipes to to setSRCREVto specific versions of the software.
3.11 加速构建
Build time can be an issue. By default, the build system uses simple controls to try and maximize build efficiency. In general, the default settings for all the following variables result in the most efficient build times when dealing with single socket systems (i.e. a single CPU). If you have multiple CPUs, you might try increasing the default values to gain more speed. See the descriptions in the glossary for each variable for more information:
BB_NUMBER_THREADS: The maximum number of threads BitBake simultaneously executes.BB_NUMBER_PARSE_THREADS: The number of threads BitBake uses during parsing.PARALLEL_MAKE: Extra options passed to the make command during thedo_compiletask in order to specify parallel compilation on the local build host.PARALLEL_MAKEINST: Extra options passed to the make command during thedo_installtask in order to specify parallel installation on the local build host.
As mentioned, these variables all scale to the number of processor cores available on the build system. For single socket systems, this auto-scaling ensures that the build system fundamentally takes advantage of potential parallel operations during the build based on the build machine’s capabilities.
Following are additional factors that can affect build speed:
File system type: The file system type that the build is being performed on can also influence performance. Using ext4 is recommended as compared to
ext2andext3due toext4improved features such as extents.Disabling the updating of access time using
noatime: Thenoatimemount option prevents the build system from updating file and directory access times.Setting a longer commit: Using the “commit=” mount option increases the interval in seconds between disk cache writes. Changing this interval from the five second default to something longer increases the risk of data loss but decreases the need to write to the disk, thus increasing the build performance.
Choosing the packaging backend: Of the available packaging backends, IPK is the fastest. Additionally, selecting a singular packaging backend also helps.
Using
tmpfsforTMPDIRas a temporary file system: While this can help speed up the build, the benefits are limited due to the compiler using -pipe. The build system goes to some lengths to avoidsync() calls into the file system on the principle that if there was a significant failure, the Build Directory contents could easily be rebuilt.Inheriting the
rm_workclass: Inheriting this class has shown to speed up builds due to significantly lower amounts of data stored in the data cache as well as on disk. Inheriting this class also makes cleanup ofTMPDIRfaster, at the expense of being easily able to dive into the source code. File system maintainers have recommended that the fastest way to clean up large numbers of files is to reformat partitions rather than delete files due to the linear nature of partitions. This, of course, assumes you structure the disk partitions and file systems in a way that this is practical.
Aside from the previous list, you should keep some trade offs in mind that can help you speed up the build:
Remove items from
DISTRO_FEATURESthat you might not need.Exclude debug symbols and other debug information: If you do not need these symbols and other debug information, disabling the
*-dbgpackage generation can speed up the build. You can disable this generation by setting theINHIBIT_PACKAGE_DEBUG_SPLITvariable to “1”.Disable static library generation for recipes derived from
autoconforlibtool: Following is an example showing how to disable static libraries and still provide an override to handle exceptions:STATICLIBCONF = "--disable-static"STATICLIBCONF_sqlite3-native = ""EXTRA_OECONF += "${STATICLIBCONF}"
Notes
Some recipes need static libraries in order to work correctly (例如pseudo-nativeneedssqlite3-native). Overrides, as in the previous example, account for these kinds of exceptions.
Some packages have packaging code that assumes the presence of the static libraries. If so, you might need to exclude them as well.
3.12 使用库文件
Libraries are an integral part of your system. This section describes some common practices you might find helpful when working with libraries to build your system:
How to use the Multilib feature to combine multiple versions of library files into a single image
How to install multiple versions of the same library in parallel on the same system
3.12.1 包含静态库文件
If you are building a library and the library offers static linking, you can control which static library files (*.a files) get included in the built library.
The PACKAGES and FILES_* variables in the meta/conf/bitbake.conf configuration file define how files installed by the do_install task are packaged. By default, the PACKAGES variable includes `${PN}-staticdev`, which represents all static library files.
Note
Some previously released versions of the Yocto Project defined the static library files through`${PN}-dev`.
Following is part of the BitBake configuration file, where you can see how the static library files are defined:
PACKAGE_BEFORE_PN ?= ""PACKAGES = "`${PN}`-dbg `${PN}`-staticdev `${PN}`-dev `${PN}`-doc `${PN}`-locale ${PACKAGE_BEFORE_PN} `${PN}`"PACKAGES_DYNAMIC = "^`${PN}`-locale-.*"FILES = ""FILES_`${PN}` = "${bindir}/* ${sbindir}/* ${libexecdir}/* ${libdir}/lib*${SOLIBS} \${sysconfdir} ${sharedstatedir} ${localstatedir} \${base_bindir}/* ${base_sbindir}/* \${base_libdir}/*${SOLIBS} \${base_prefix}/lib/udev/rules.d ${prefix}/lib/udev/rules.d \${datadir}/${BPN} ${libdir}/${BPN}/* \${datadir}/pixmaps ${datadir}/applications \${datadir}/idl ${datadir}/omf ${datadir}/sounds \${libdir}/bonobo/servers"FILES_`${PN}`-bin = "${bindir}/* ${sbindir}/*"FILES_`${PN}`-doc = "${docdir} ${mandir} ${infodir} ${datadir}/gtk-doc \${datadir}/gnome/help"SECTION_`${PN}`-doc = "doc"FILES_SOLIBSDEV ?= "${base_libdir}/lib*${SOLIBSDEV} ${libdir}/lib*${SOLIBSDEV}"FILES_`${PN}`-dev = "${includedir} ${FILES_SOLIBSDEV} ${libdir}/*.la \${libdir}/*.o ${libdir}/pkgconfig ${datadir}/pkgconfig \${datadir}/aclocal ${base_libdir}/*.o \${libdir}/${BPN}/*.la ${base_libdir}/*.la"SECTION_`${PN}`-dev = "devel"ALLOW_EMPTY_`${PN}`-dev = "1"RDEPENDS_`${PN}`-dev = "`${PN}` (= ${EXTENDPKGV})"FILES_`${PN}`-staticdev = "${libdir}/*.a ${base_libdir}/*.a ${libdir}/${BPN}/*.a"SECTION_`${PN}`-staticdev = "devel"RDEPENDS_`${PN}`-staticdev = "`${PN}`-dev (= ${EXTENDPKGV})"
3.12.2 将不同版本的库文件组合到一个镜像中
The build system offers the ability to build libraries with different target optimizations or architecture formats and combine these together into one system image. You can link different binaries in the image against the different libraries as needed for specific use cases. This feature is called “Multilib.”
An example would be where you have most of a system compiled in 32-bit mode using 32-bit libraries, but you have something large, like a database engine, that needs to be a 64-bit application and uses 64-bit libraries. Multilib allows you to get the best of both 32-bit and 64-bit libraries.
While the Multilib feature is most commonly used for 32 and 64-bit differences, the approach the build system uses facilitates different target optimizations. You could compile some binaries to use one set of libraries and other binaries to use a different set of libraries. The libraries could differ in architecture, compiler options, or other optimizations.
Several examples exist in the meta-skeleton layer found in the Source Directory:
conf/multilib-example.confconfiguration fileconf/multilib-example2.confconfiguration filerecipes-multilib/images/core-image-multilib-example.bbrecipe
3.12.2.1 准备使用Multilib
User-specific requirements drive the Multilib feature. Consequently, there is no one “out-of-the-box” configuration that likely exists to meet your needs.
In order to enable Multilib, you first need to ensure your recipe is extended to support multiple libraries. Many standard recipes are already extended and support multiple libraries. You can check in the meta/conf/multilib.conf configuration file in the Source Directory to see how this is done using the BBCLASSEXTEND variable. Eventually, all recipes will be covered and this list will not be needed.
For the most part, the Multilib class extension works automatically to extend the package name from ${PN} to ${MLPREFIX}${PN}`, whereMLPREFIXis the particular multilib (例如 "lib32-" or "lib64-"). Standard variables such asDEPENDS,RDEPENDS,RPROVIDES,RRECOMMENDS,PACKAGES, andPACKAGES_DYNAMICare automatically extended by the system. If you are extending any manual code in the recipe, you can use the${MLPREFIX}variable to ensure those names are extended correctly. This automatic extension code resides inmultilib.bbclass`.
3.12.2.2 使用Multilib
After you have set up the recipes, you need to define the actual combination of multiple libraries you want to build. You accomplish this through your local.conf configuration file in the Build Directory. An example configuration would be as follows:
MACHINE = "qemux86-64"require conf/multilib.confMULTILIBS = "multilib:lib32"DEFAULTTUNE_virtclass-multilib-lib32 = "x86"IMAGE_INSTALL_append = " lib32-glib-2.0"
This example enables an additional library named lib32 alongside the normal target packages. When combining these “lib32” alternatives, the example uses “x86” for tuning. For information on this particular tuning, see meta/conf/machine/include/ia32/arch-ia32.inc.
The example then includes lib32-glib-2.0 in all the images, which illustrates one method of including a multiple library dependency. You can use a normal image build to include this dependency, for example:
$ bitbake core-image-sato
You can also build Multilib packages specifically with a command like this:
$ bitbake lib32-glib-2.0
3.12.2.3 其他实现细节
Generic implementation details as well as details that are specific to package management systems exist. Following are implementation details that exist regardless of the package management system:
The typical convention used for the class extension code as used by Multilib assumes that all package names specified in
PACKAGESthat contain${PN}have${PN}at the start of the name. When that convention is not followed and${PN}appears at the middle or the end of a name, problems occur.The
TARGET_VENDORvalue under Multilib will be extended to “-vendormlmultilib” (例如 “-pokymllib32” for a “lib32” Multilib with Poky). The reason for this slightly unwieldy contraction is that any “-“ characters in the vendor string presently break Autoconf’sconfig.sub, and other separators are problematic for different reasons.
For the RPM Package Management System, the following implementation details exist:
A unique architecture is defined for the Multilib packages, along with creating a unique deploy folder under
tmp/deploy/rpmin the Build Directory. For example, considerlib32in aqemux86-64image. The possible architectures in the system are “all”, “qemux86_64”, “lib32_qemux86_64”, and “lib32_x86”.The
${MLPREFIX}variable is stripped from${PN}during RPM packaging. The naming for a normal RPM package and a Multilib RPM package in aqemux86-64system resolves to something similar tobash-4.1-r2.x86_64.rpmandbash-4.1.r2.lib32_x86.rpm, respectively.When installing a Multilib image, the RPM backend first installs the base image and then installs the Multilib libraries.
The build system relies on RPM to resolve the identical files in the two (or more) Multilib packages.
For the IPK Package Management System, the following implementation details exist:
The
${MLPREFIX}is not stripped from${PN}during IPK packaging. The naming for a normal RPM package and a Multilib IPK package in aqemux86-64system resolves to something likebash_4.1-r2.x86_64.ipkandlib32-bash_4.1-rw_x86.ipk, respectively.The IPK deploy folder is not modified with
${MLPREFIX}because packages with and without the Multilib feature can exist in the same folder due to the${PN}differences.IPK defines a sanity check for Multilib installation using certain rules for file comparison, overridden, etc.
3.12.3 安装同一库的多个版本
Situations can exist where you need to install and use multiple versions of the same library on the same system at the same time. These situations almost always exist when a library API changes and you have multiple pieces of software that depend on the separate versions of the library. To accommodate these situations, you can install multiple versions of the same library in parallel on the same system.
The process is straightforward as long as the libraries use proper versioning. With properly versioned libraries, all you need to do to individually specify the libraries is create separate, appropriately named recipes where the PN part of the name includes a portion that differentiates each library version (例如the major part of the version number). Thus, instead of having a single recipe that loads one version of a library (例如 clutter), you provide multiple recipes that result in different versions of the libraries you want. As an example, the following two recipes would allow the two separate versions of the clutter library to co-exist on the same system:
clutter-1.6_1.6.20.bbclutter-1.8_1.8.4.bb
Additionally, if you have other recipes that depend on a given library, you need to use the DEPENDS variable to create the dependency. Continuing with the same example, if you want to have a recipe depend on the 1.8 version of the clutter library, use the following in your recipe:
DEPENDS = "clutter-1.8"
3.13. 使用 x32 psABI
x32 processor-specific Application Binary Interface (x32 psABI) is a native 32-bit processor-specific ABI for Intel® 64 (x86-64) architectures. An ABI defines the calling conventions between functions in a processing environment. The interface determines what registers are used and what the sizes are for various C data types.
Some processing environments prefer using 32-bit applications even when running on Intel 64-bit platforms. Consider the i386 psABI, which is a very old 32-bit ABI for Intel 64-bit platforms. The i386 psABI does not provide efficient use and access of the Intel 64-bit processor resources, leaving the system underutilized. Now consider the x86_64 psABI. This ABI is newer and uses 64-bits for data sizes and program pointers. The extra bits increase the footprint size of the programs, libraries, and also increases the memory and file system size requirements. Executing under the x32 psABI enables user programs to utilize CPU and system resources more efficiently while keeping the memory footprint of the applications low. Extra bits are used for registers but not for addressing mechanisms.
The Yocto Project supports the final specifications of x32 psABI as follows:
You can create packages and images in x32 psABI format on x86_64 architecture targets.
You can successfully build recipes with the x32 toolchain.
You can create and boot
core-image-minimalandcore-image-satoimages.RPM Package Manager (RPM) support exists for x32 binaries.
Support for large images exists.
To use the x32 psABI, you need to edit your conf/local.conf`` configuration file as follows:
MACHINE = "qemux86-64"DEFAULTTUNE = "x86-64-x32"baselib = "${@d.getVar('BASE_LIB_tune-' + (d.getVar('DEFAULTTUNE') \or 'INVALID')) or 'lib'}"
Once you have set up your configuration file, use BitBake to build an image that supports the x32 psABI. Here is an example:
$ bitbake core-image-sato
3.14 Enabling GObject Introspection Support
GObject introspection is the standard mechanism for accessing GObject-based software from runtime environments. GObject is a feature of the GLib library that provides an object framework for the GNOME desktop and related software. GObject Introspection adds information to GObject that allows objects created within it to be represented across different programming languages. If you want to construct GStreamer pipelines using Python, or control UPnP infrastructure using Javascript and GUPnP, GObject introspection is the only way to do it.
This section describes the Yocto Project support for generating and packaging GObject introspection data. GObject introspection data is a description of the API provided by libraries built on top of GLib framework, and, in particular, that framework’s GObject mechanism. GObject Introspection Repository (GIR) files go to -dev packages, typelib files go to main packages as they are packaged together with libraries that are introspected.
The data is generated when building such a library, by linking the library with a small executable binary that asks the library to describe itself, and then executing the binary and processing its output.
Generating this data in a cross-compilation environment is difficult because the library is produced for the target architecture, but its code needs to be executed on the build host. This problem is solved with the OpenEmbedded build system by running the code through QEMU, which allows precisely that. Unfortunately, QEMU does not always work perfectly as mentioned in the xxx section.
3.14.1 Enabling the Generation of Introspection Data
Enabling the generation of introspection data (GIR files) in your library package involves the following:
Inherit the
gobject-introspectionclass.Make sure introspection is not disabled anywhere in the recipe or from anything the recipe includes. Also, make sure that “gobject-introspection-data” is not in
DISTRO_FEATURES_BACKFILL_CONSIDEREDand that “qemu-usermode” is not inMACHINE_FEATURES_BACKFILL_CONSIDERED. If either of these conditions exist, nothing will happen.Try to build the recipe. If you encounter build errors that look like something is unable to find
.solibraries, check where these libraries are located in the source tree and add the following to the recipe:GIR_EXTRA_LIBS_PATH = "${B}/something/.libs"
Note
See recipes in theoe-corerepository that use thatGIR_EXTRA_LIBS_PATHvariable as an example.Look for any other errors, which probably mean that introspection support in a package is not entirely standard, and thus breaks down in a cross-compilation environment. For such cases, custom-made fixes are needed. A good place to ask and receive help in these cases is the Yocto Project mailing lists.
Note Using a library that no longer builds against the latest Yocto Project release and prints introspection related errors is a good candidate for the previous procedure.
3.14.2 Disabling the Generation of Introspection Data
You might find that you do not want to generate introspection data. Or, perhaps QEMU does not work on your build host and target architecture combination. If so, you can use either of the following methods to disable GIR file generations:
Add the following to your distro configuration:
DISTRO_FEATURES_BACKFILL_CONSIDERED = “gobject-introspection-data”
Adding this statement disables generating introspection data using QEMU but will still enable building introspection tools and libraries (i.e. building them does not require the use of QEMU).
Add the following to your machine configuration:
MACHINE_FEATURES_BACKFILL_CONSIDERED = “qemu-usermode”
Adding this statement disables the use of QEMU when building packages for your machine. Currently, this feature is used only by introspection recipes and has the same effect as the previously described option.
Note
Future releases of the Yocto Project might have other features affected by this option.
If you disable introspection data, you can still obtain it through other means such as copying the data from a suitable sysroot, or by generating it on the target hardware. The OpenEmbedded build system does not currently provide specific support for these techniques.
3.14.3 Testing that Introspection Works in an Image
Use the following procedure to test if generating introspection data is working in an image:
Make sure that “gobject-introspection-data” is not in
DISTRO_FEATURES_BACKFILL_CONSIDEREDand that “qemu-usermode” is not inMACHINE_FEATURES_BACKFILL_CONSIDERED.Build
core-image-sato.Launch a Terminal and then start Python in the terminal.
Enter the following in the terminal:
>>> from gi.repository import GLib>>> GLib.get_host_name()
For something a little more advanced, enter the following:
http://python-gtk-3-tutorial.readthedocs.org/en/latest/introduction.html
3.14.4 Known Issues
The following know issues exist for GObject Introspection Support:
qemu-ppc64immediately crashes. Consequently, you cannot build introspection data on that architecture.x32 is not supported by QEMU. Consequently, introspection data is disabled.
musl causes transient GLib binaries to crash on assertion failures. Consequently, generating introspection data is disabled.
Because QEMU is not able to run the binaries correctly, introspection is disabled for some specific packages under specific architectures (例如
gcr,libsecret, andwebkit).QEMU usermode might not work properly when running 64-bit binaries under 32-bit host machines. In particular, “qemumips64” is known to not work under i686.
3.15 Optionally Using an External Toolchain
You might want to use an external toolchain as part of your development. If this is the case, the fundamental steps you need to accomplish are as follows:
Understand where the installed toolchain resides. For cases where you need to build the external toolchain, you would need to take separate steps to build and install the toolchain.
Make sure you add the layer that contains the toolchain to your
bblayers.conffile through the BBLAYERS variable.Set the
EXTERNAL_TOOLCHAINvariable in yourlocal.conffile to the location in which you installed the toolchain.
A good example of an external toolchain used with the Yocto Project is Mentor Graphics® Sourcery G++ Toolchain. You can see information on how to use that particular layer in the README file at http://github.com/MentorEmbedded/meta-sourcery/. You can find further information by reading about the TCMODE variable in the Yocto Project Reference Manual’s variable glossary.
3.16 Creating Partitioned Images Using Wic
Creating an image for a particular hardware target using the OpenEmbedded build system does not necessarily mean you can boot that image as is on your device. Physical devices accept and boot images in various ways depending on the specifics of the device. Usually, information about the hardware can tell you what image format the device requires. Should your device require multiple partitions on an SD card, flash, or an HDD, you can use the OpenEmbedded Image Creator, Wic, to create the properly partitioned image.
The wic command generates partitioned images from existing OpenEmbedded build artifacts. Image generation is driven by partitioning commands contained in an Openembedded kickstart file (.wks) specified either directly on the command line or as one of a selection of canned kickstart files as shown with the wic list images command in the “Using an Existing Kickstart File” section. When you apply the command to a given set of build artifacts, the result is an image or set of images that can be directly written onto media and used on a particular system.
Note
For a kickstart file reference, see the “OpenEmbedded Kickstart (.wks) Reference” Chapter in the Yocto Project Reference Manual.
The wic command and the infrastructure it is based on is by definition incomplete. The purpose of the command is to allow the generation of customized images, and as such, was designed to be completely extensible through a plug-in interface. See the “Using the Wic Plug-Ins Interface” section for information on these plug-ins.
This section provides some background information on Wic, describes what you need to have in place to run the tool, provides instruction on how to use the Wic utility, provides information on using the Wic plug-ins interface, and provides several examples that show how to use Wic.
3.16.1 背景
This section provides some background on the Wic utility. While none of this information is required to use Wic, you might find it interesting.
The name “Wic” is derived from OpenEmbedded Image Creator (oeic). The “oe” diphthong in “oeic” was promoted to the letter “w”, because “oeic” is both difficult to remember and to pronounce.
Wic is loosely based on the Meego Image Creator (
mic) framework. The Wic implementation has been heavily modified to make direct use of OpenEmbedded build artifacts instead of package installation and configuration, which are already incorporated within the OpenEmbedded artifacts.Wic is a completely independent standalone utility that initially provides easier-to-use and more flexible replacements for an existing functionality in OE-Core’s
image-liveclass. The difference between Wic and those examples is that with Wic the functionality of those scripts is implemented by a general-purpose partitioning language, which is based on Redhat kickstart syntax.
3.16.2 需求
In order to use the Wic utility with the OpenEmbedded Build system, your system needs to meet the following requirements:
The Linux distribution on your development host must support the Yocto Project. See the “Supported Linux Distributions” section in the Yocto Project Reference Manual for the list of distributions that support the Yocto Project.
The standard system utilities, such as
cp, must be installed on your development host system.You must have sourced the build environment setup script (i.e.
oe-init-build-env) found in the Build Directory.You need to have the build artifacts already available, which typically means that you must have already created an image using the Openembedded build system (例如
core-image-minimal). While it might seem redundant to generate an image in order to create an image using Wic, the current version of Wic requires the artifacts in the form generated by the OpenEmbedded build system.You must build several native tools, which are built to run on the build system:
$ bitbake parted-native dosfstools-native mtools-native
Include “wic” as part of the
IMAGE_FSTYPESvariable.Include the name of the wic kickstart file as part of the
WKS_FILEvariable
3.16.3 获取帮助
You can get general help for the wic command by entering the wic command by itself or by entering the command with a help argument as follows:
$ wic -h$ wic --help$ wic help
Currently, Wic supports seven commands: cp, create, help, list, ls, rm, and write. You can get help for all these commands except “help” by using the following form:
$ wic help command
For example, the following command returns help for the write command:
$ wic help write
Wic supports help for three topics: overview, plugins, and kickstart. You can get help for any topic using the following form:
$ wic help topic
For example, the following returns overview help for Wic:
$ wic help overview
One additional level of help exists for Wic. You can get help on individual images through the list command. You can use the list command to return the available Wic images as follows:
$ wic list imagesmpc8315e-rdb Create SD card image for MPC8315E-RDBgenericx86 Create an EFI disk image for genericx86*beaglebone-yocto Create SD card image for Beagleboneedgerouter Create SD card image for Edgerouterqemux86-directdisk Create a qemu machine 'pcbios' direct disk imagedirectdisk-gpt Create a 'pcbios' direct disk imagemkefidisk Create an EFI disk imagedirectdisk Create a 'pcbios' direct disk imagesystemd-bootdisk Create an EFI disk image with systemd-bootmkhybridiso Create a hybrid ISO imagesdimage-bootpart Create SD card image with a boot partitiondirectdisk-multi-rootfs Create multi rootfs image using rootfs plugindirectdisk-bootloader-config Create a 'pcbios' direct disk image with custom bootloader config
Once you know the list of available Wic images, you can use help with the command to get help on a particular image. For example, the following command returns help on the “beaglebone-yocto” image:
$ wic list beaglebone-yocto helpCreates a partitioned SD card image for Beaglebone.Boot files are located in the first vfat partition.
3.16.4 操作模式
You can use Wic in two different modes, depending on how much control you need for specifying the Openembedded build artifacts that are used for creating the image: Raw and Cooked:
Raw Mode: You explicitly specify build artifacts through Wic command-line arguments.
Cooked Mode: The current
MACHINEsetting and image name are used to automatically locate and provide the build artifacts. You just supply a kickstart file and the name of the image from which to use artifacts.
Regardless of the mode you use, you need to have the build artifacts ready and available.
3.16.4.1 Raw Mode
Running Wic in raw mode allows you to specify all the partitions through the wic command line. The primary use for raw mode is if you have built your kernel outside of the Yocto Project Build Directory. In other words, you can point to arbitrary kernel, root filesystem locations, and so forth. Contrast this behavior with cooked mode where Wic looks in the Build Directory (例如 tmp/deploy/images/machine).
The general form of the wic command in raw mode is:
$ wic create wks_file options ...Where:wks_file:An OpenEmbedded kickstart file. You can provideyour own custom file or use a file from a set ofexisting files as described by further options.optional arguments:-h, --help show this help message and exit-o OUTDIR, --outdir OUTDIRname of directory to create image in-e IMAGE_NAME, --image-name IMAGE_NAMEname of the image to use the artifacts from 例如 core-image-sato-r ROOTFS_DIR, --rootfs-dir ROOTFS_DIRpath to the /rootfs dir to use as the .wks rootfssource-b BOOTIMG_DIR, --bootimg-dir BOOTIMG_DIRpath to the dir containing the boot artifacts (例如/EFI or /syslinux dirs) to use as the .wks bootimgsource-k KERNEL_DIR, --kernel-dir KERNEL_DIRpath to the dir containing the kernel to use in the.wks bootimg-n NATIVE_SYSROOT, --native-sysroot NATIVE_SYSROOTpath to the native sysroot containing the tools to useto build the image-s, --skip-build-checkskip the build check-f, --build-rootfs build rootfs-c {gzip,bzip2,xz}, --compress-with {gzip,bzip2,xz}compress image with specified compressor-m, --bmap generate .bmap--no-fstab-update Do not change fstab file.-v VARS_DIR, --vars VARS_DIRdirectory with <image>.env files that store bitbakevariables-D, --debug output debug information
Note
You do not need root privileges to run Wic. In fact, you should not run as root when using the utility.
3.16.4.2 Cooked Mode
Running Wic in cooked mode leverages off artifacts in the Build Directory. In other words, you do not have to specify kernel or root filesystem locations as part of the command. All you need to provide is a kickstart file and the name of the image from which to use artifacts by using the “-e” option. Wic looks in the Build Directory (例如 tmp/deploy/images/machine) for artifacts.
The general form of the wic command using Cooked Mode is as follows:
$ wic create wks_file -e IMAGE_NAMEWhere:wks_file:An OpenEmbedded kickstart file. You can provideyour own custom file or use a file from a set ofexisting files provided with the Yocto Projectrelease.required argument:-e IMAGE_NAME, --image-name IMAGE_NAMEname of the image to use the artifacts from 例如 core-image-sato
3.16.5 Using an Existing Kickstart File
If you do not want to create your own kickstart file, you can use an existing file provided by the Wic installation. As shipped, kickstart files can be found in the Yocto Project Source Repositories in the following two locations:
poky/meta-yocto-bsp/wicpoky/scripts/lib/wic/canned-wks
Use the following command to list the available kickstart files:
$ wic list imagesmpc8315e-rdb Create SD card image for MPC8315E-RDBgenericx86 Create an EFI disk image for genericx86*beaglebone-yocto Create SD card image for Beagleboneedgerouter Create SD card image for Edgerouterqemux86-directdisk Create a qemu machine 'pcbios' direct disk imagedirectdisk-gpt Create a 'pcbios' direct disk imagemkefidisk Create an EFI disk imagedirectdisk Create a 'pcbios' direct disk imagesystemd-bootdisk Create an EFI disk image with systemd-bootmkhybridiso Create a hybrid ISO imagesdimage-bootpart Create SD card image with a boot partitiondirectdisk-multi-rootfs Create multi rootfs image using rootfs plugindirectdisk-bootloader-config Create a 'pcbios' direct disk image with custom bootloader config
When you use an existing file, you do not have to use the .wks extension. Here is an example in Raw Mode that uses the directdisk file:
$ wic create directdisk -r rootfs_dir -b bootimg_dir \-k kernel_dir -n native_sysroot
Here are the actual partition language commands used in the genericx86.wks file to generate an image:
# short-description: Create an EFI disk image for genericx86*# long-description: Creates a partitioned EFI disk image for genericx86* machinespart /boot --source bootimg-efi --sourceparams="loader=grub-efi" --ondisk sda --label msdos --active --align 1024part / --source rootfs --ondisk sda --fstype=ext4 --label platform --align 1024 --use-uuidpart swap --ondisk sda --size 44 --label swap1 --fstype=swapbootloader --ptable gpt --timeout=5 --append="rootfstype=ext4 console=ttyS0,115200 console=tty0"
3.16.6 Using the Wic Plug-Ins Interface
You can extend and specialize Wic functionality by using Wic plug-ins. This section explains the Wic plug-in interface.
Note
Wic plug-ins consist of “source” and “imager” plug-ins. Imager plug-ins are beyond the scope of this section.
Source plug-ins provide a mechanism to customize partition content during the Wic image generation process. You can use source plug-ins to map values that you specify using --source commands in kickstart files (i.e. *.wks) to a plug-in implementation used to populate a given partition.
Note
If you use plug-ins that have build-time dependencies (例如 native tools, bootloaders, and so forth) when building a Wic image, you need to specify those dependencies using the WKS_FILE_DEPENDS variable.
Source plug-ins are subclasses defined in plug-in files. As shipped, the Yocto Project provides several plug-in files. You can see the source plug-in files that ship with the Yocto Project here. Each of these plug-in files contains source plug-ins that are designed to populate a specific Wic image partition.
Source plug-ins are subclasses of the SourcePlugin class, which is defined in the poky/scripts/lib/wic/pluginbase.pyfile. For example, the `BootimgEFIPlugin` source plug-in found in the `bootimg-efi.py` file is a subclass of theSourcePluginclass, which is found in thepluginbase.py`` file.
You can also implement source plug-ins in a layer outside of the Source Repositories (external layer). To do so, be sure that your plug-in files are located in a directory whose path is scripts/lib/wic/plugins/source/ within your external layer. When the plug-in files are located there, the source plug-ins they contain are made available to Wic.
When the Wic implementation needs to invoke a partition-specific implementation, it looks for the plug-in with the same name as the --source parameter used in the kickstart file given to that partition. For example, if the partition is set up using the following command in a kickstart file:
part /boot --source bootimg-pcbios --ondisk sda --label boot --active --align 1024
The methods defined as class members of the matching source plug-in (i.e. bootimg-pcbios) in the bootimg-pcbios.py plug-in file are used.
To be more concrete, here is the corresponding plug-in definition from the bootimg-pcbios.py file for the previous command along with an example method called by the Wic implementation when it needs to prepare a partition using an implementation-specific function:
...class BootimgPcbiosPlugin(`SourcePlugin`):"""Create MBR boot partition and install syslinux on it."""name = 'bootimg-pcbios'...@classmethoddef do_prepare_partition(cls, part, source_params, creator, cr_workdir,oe_builddir, bootimg_dir, kernel_dir,rootfs_dir, native_sysroot):"""Called to do the actual content population for a partition i.e. it'prepares' the partition to be incorporated into the image.In this case, prepare content for legacy bios boot partition."""...
If a subclass (plug-in) itself does not implement a particular function, Wic locates and uses the default version in the superclass. It is for this reason that all source plug-ins are derived from the SourcePlugin class.
The SourcePlugin class defined in the pluginbase.py file defines a set of methods that source plug-ins can implement or override. Any plug-ins (subclass of SourcePlugin) that do not implement a particular method inherit the implementation of the method from the SourcePlugin class. For more information, see the SourcePlugin class in the pluginbase.py file for details:
The following list describes the methods implemented in the SourcePlugin class:
do_prepare_partition(): Called to populate a partition with actual content. In other words, the method prepares the final partition image that is incorporated into the disk image.
do_configure_partition(): Called before
do_prepare_partition()to create custom configuration files for a partition (例如 syslinux or grub configuration files).do_install_disk(): Called after all partitions have been prepared and assembled into a disk image. This method provides a hook to allow finalization of a disk image (例如 writing an MBR).
do_stage_partition(): Special content-staging hook called before
do_prepare_partition(). This method is normally empty.
Typically, a partition just uses the passed-in parameters (例如 the unmodified value of bootimg_dir). However, in some cases, things might need to be more tailored. As an example, certain files might additionally need to be taken from bootimg_dir + /boot. This hook allows those files to be staged in a customized fashion.
Note
get_bitbake_var()allows you to access non-standard variables that you might want to use for this behavior.
You can extend the source plug-in mechanism. To add more hooks, create more source plug-in methods within SourcePlugin and the corresponding derived subclasses. The code that calls the plug-in methods uses the plugin.get_source_plugin_methods() function to find the method or methods needed by the call. Retrieval of those methods is accomplished by filling up a dict with keys that contain the method names of interest. On success, these will be filled in with the actual methods. See the Wic implementation for examples and details.
3.16.7 示例
This section provides several examples that show how to use the Wic utility. All the examples assume the list of requirements in the “Requirements” section have been met. The examples assume the previously generated image is core-image-minimal.
3.16.7.1 Generate an Image using an Existing Kickstart File
This example runs in Cooked Mode and uses the mkefidisk kickstart file:
$ wic create mkefidisk -e core-image-minimalINFO: Building wic-tools......INFO: The new image(s) can be found here:./mkefidisk-201804191017-sda.directThe following build artifacts were used to create the image(s):ROOTFS_DIR: /home/stephano/build/master/build/tmp-glibc/work/qemux86-oe-linux/core-image-minimal/1.0-r0/rootfsBOOTIMG_DIR: /home/stephano/build/master/build/tmp-glibc/work/qemux86-oe-linux/core-image-minimal/1.0-r0/recipe-sysroot/usr/shareKERNEL_DIR: /home/stephano/build/master/build/tmp-glibc/deploy/images/qemux86NATIVE_SYSROOT: /home/stephano/build/master/build/tmp-glibc/work/i586-oe-linux/wic-tools/1.0-r0/recipe-sysroot-nativeINFO: The image(s) were created using OE kickstart file:/home/stephano/build/master/openembedded-core/scripts/lib/wic/canned-wks/mkefidisk.wks
The previous example shows the easiest way to create an image by running in cooked mode and supplying a kickstart file and the “-e” option to point to the existing build artifacts. Your local.conf file needs to have the MACHINE variable set to the machine you are using, which is “qemux86” in this example.
Once the image builds, the output provides image location, artifact use, and kickstart file information.
Note
You should always verify the details provided in the output to make sure that the image was indeed created exactly as expected.
Continuing with the example, you can now write the image from the Build Directory onto a USB stick, or whatever media for which you built your image, and boot from the media. You can write the image by using bmaptool or dd:
$ oe-run-native bmaptool copy mkefidisk-201804191017-sda.direct /dev/sdX
or
$ sudo dd if=mkefidisk-201804191017-sda.direct of=/dev/sdX
Note
For more information on how to use thebmaptoolto flash a device with an image, see the “Flashing Images Using bmaptool” section.
3.16.7.2 Using a Modified Kickstart File
Because partitioned image creation is driven by the kickstart file, it is easy to affect image creation by changing the parameters in the file. This next example demonstrates that through modification of the directdisk-gpt kickstart file.
As mentioned earlier, you can use the command wic list images to show the list of existing kickstart files. The directory in which the directdisk-gpt.wks file resides is scripts/lib/image/canned-wks/, which is located in the Source Directory (例如 poky). Because available files reside in this directory, you can create and add your own custom files to the directory. Subsequent use of the wic list images command would then include your kickstart files.
In this example, the existing directdisk-gpt file already does most of what is needed. However, for the hardware in this example, the image will need to boot from sdb instead of sda, which is what the directdisk-gpt kickstart file uses.
The example begins by making a copy of the directdisk-gpt.wks file in the scripts/lib/image/canned-wks directory and then by changing the lines that specify the target disk from which to boot.
$ cp /home/stephano/poky/scripts/lib/wic/canned-wks/directdisk-gpt.wks \/home/stephano/poky/scripts/lib/wic/canned-wks/directdisksdb-gpt.wks
Next, the example modifies the directdisksdb-gpt.wks file and changes all instances of “--ondisk sda“ to “--ondisk sdb“. The example changes the following two lines and leaves the remaining lines untouched:
part /boot --source bootimg-pcbios --ondisk sdb --label boot --active --align 1024part / --source rootfs --ondisk sdb --fstype=ext4 --label platform --align 1024 --use-uuid
Once the lines are changed, the example generates the directdisksdb-gpt image. The command points the process at the core-image-minimal artifacts for the Next Unit of Computing (nuc) MACHINE the local.conf.
$ wic create directdisksdb-gpt -e core-image-minimalINFO: Building wic-tools......Initialising tasks: 100% |#######################################| Time: 0:00:01NOTE: Executing SetScene TasksNOTE: Executing RunQueue TasksNOTE: Tasks Summary: Attempted 1161 tasks of which 1157 didn't need to be rerun and all succeeded.INFO: Creating image(s)...INFO: The new image(s) can be found here:./directdisksdb-gpt-201710090938-sdb.directThe following build artifacts were used to create the image(s):ROOTFS_DIR: /home/stephano/build/master/build/tmp-glibc/work/qemux86-oe-linux/core-image-minimal/1.0-r0/rootfsBOOTIMG_DIR: /home/stephano/build/master/build/tmp-glibc/work/qemux86-oe-linux/core-image-minimal/1.0-r0/recipe-sysroot/usr/shareKERNEL_DIR: /home/stephano/build/master/build/tmp-glibc/deploy/images/qemux86NATIVE_SYSROOT: /home/stephano/build/master/build/tmp-glibc/work/i586-oe-linux/wic-tools/1.0-r0/recipe-sysroot-nativeINFO: The image(s) were created using OE kickstart file:/home/stephano/poky/scripts/lib/wic/canned-wks/directdisksdb-gpt.wks
Continuing with the example, you can now directly dd the image to a USB stick, or whatever media for which you built your image, and boot the resulting media:
$ sudo dd if=directdisksdb-gpt-201710090938-sdb.direct of=/dev/sdb140966+0 records in140966+0 records out72174592 bytes (72 MB, 69 MiB) copied, 78.0282 s, 925 kB/s$ sudo eject /dev/sdb
3.16.7.3 Using a Modified Kickstart File and Running in Raw Mode
This next example manually specifies each build artifact (runs in Raw Mode) and uses a modified kickstart file. The example also uses the -o option to cause Wic to create the output somewhere other than the default output directory, which is the current directory:
$ wic create /home/stephano/my_yocto/test.wks -o /home/stephano/testwic \--rootfs-dir /home/stephano/build/master/build/tmp/work/qemux86-poky-linux/core-image-minimal/1.0-r0/rootfs \--bootimg-dir /home/stephano/build/master/build/tmp/work/qemux86-poky-linux/core-image-minimal/1.0-r0/recipe-sysroot/usr/share \--kernel-dir /home/stephano/build/master/build/tmp/deploy/images/qemux86 \--native-sysroot /home/stephano/build/master/build/tmp/work/i586-poky-linux/wic-tools/1.0-r0/recipe-sysroot-nativeINFO: Creating image(s)...INFO: The new image(s) can be found here:/home/stephano/testwic/test-201710091445-sdb.directThe following build artifacts were used to create the image(s):ROOTFS_DIR: /home/stephano/build/master/build/tmp-glibc/work/qemux86-oe-linux/core-image-minimal/1.0-r0/rootfsBOOTIMG_DIR: /home/stephano/build/master/build/tmp-glibc/work/qemux86-oe-linux/core-image-minimal/1.0-r0/recipe-sysroot/usr/shareKERNEL_DIR: /home/stephano/build/master/build/tmp-glibc/deploy/images/qemux86NATIVE_SYSROOT: /home/stephano/build/master/build/tmp-glibc/work/i586-oe-linux/wic-tools/1.0-r0/recipe-sysroot-nativeINFO: The image(s) were created using OE kickstart file:/home/stephano/my_yocto/test.wks
For this example, MACHINE did not have to be specified in the local.conf file since the artifact is manually specified.
3.16.7.4. Using Wic to Manipulate an Image
Wic image manipulation allows you to shorten turnaround time during image development. For example, you can use Wic to delete the kernel partition of a Wic image and then insert a newly built kernel. This saves you time from having to rebuild the entire image each time you modify the kernel.
Note
In order to use Wic to manipulate a Wic image as in this example, your development machine must have the mtools package installed.
The following example examines the contents of the Wic image, deletes the existing kernel, and then inserts a new kernel:
List the Partitions: Use the wic ls command to list all the partitions in the Wic image:
$ wic ls tmp/deploy/images/qemux86/core-image-minimal-qemux86.wicNum Start End Size Fstype1 1048576 25041919 23993344 fat162 25165824 72157183 46991360 ext4
The previous output shows two partitions in the
core-image-minimal-qemux86.wicimage.Examine a Particular Partition: Use the
wic lscommand again but in a different form to examine a particular partition.
Note
You can get command usage on any Wic command using the following form:
$ wic help commandFor example, the following command shows you the various ways to use the
wic lscommand:
$ wic help lsThe following command shows what is in Partition one: ``` $ wic ls tmp/deploy/images/qemux86/core-image-minimal-qemux86.wic:1 Volume in drive : is boot Volume Serial Number is E894-1809 Directory for ::/
libcom32 c32 186500 2017-10-09 16:06libutil c32 24148 2017-10-09 16:06syslinux cfg 220 2017-10-09 16:06vesamenu c32 27104 2017-10-09 16:06vmlinuz 6904608 2017-10-09 16:065 files 7 142 580 bytes16 582 656 bytes free
The previous output shows five files, with the `vmlinuz` being the kernel.> Note> If you see the following error, you need to update or create a ~/.mtoolsrc file and be sure to have the line “mtools_skip_check=1“ in the file. Then, run the Wic command again:>
ERROR: _exec_cmd: /usr/bin/mdir -i /tmp/wic-parttfokuwra ::/ returned '1' instead of 0output: Total number of sectors (47824) not a multiple of sectors per track (32)!Add mtools_skip_check=1 to your .mtoolsrc file to skip this test```
- Remove the Old Kernel: Use the
wic rmcommand to remove thevmlinuzfile (kernel):$ wic rm tmp/deploy/images/qemux86/core-image-minimal-qemux86.wic:1/vmlinuz
- Add In the New Kernel: Use the
wic cpcommand to add the updated kernel to the Wic image. Depending on how you built your kernel, it could be in different places. If you useddevtooland an SDK to build your kernel, it resides in thetmp/workdirectory of the extensible SDK. If you used make to build the kernel, the kernel will be in theworkspace/sourcesarea.
The following example assumes devtool was used to build the kernel:
cp ~/poky_sdk/tmp/work/qemux86-poky-linux/linux-yocto/4.12.12+git999-r0/linux-yocto-4.12.12+git999/arch/x86/boot/bzImage \~/poky/build/tmp/deploy/images/qemux86/core-image-minimal-qemux86.wic:1/vmlinuz
Once the new kernel is added back into the image, you can use the dd command or bmaptool to flash your wic image onto an SD card or USB stick and test your target.
Note
Usingbmaptoolis generally 10 to 20 times faster than usingdd.
3.17 Flashing Images Using bmaptool
A fast and easy way to flash an image to a bootable device is to use Bmaptool, which is integrated into the OpenEmbedded build system. Bmaptool is a generic tool that creates a file’s block map (bmap) and then uses that map to copy the file. As compared to traditional tools such as dd or cp, Bmaptool can copy (or flash) large files like raw system image files much faster.
Notes
If you are using Ubuntu or Debian distributions, you can install thebmap-toolspackage using the following command and then use the tool without specifyingPATHeven from the root account:
$ sudo apt-get install bmap-toolsIf you are unable to install the bmap-tools package, you will need to build Bmaptool before using it. Use the following command:
$ bitbake bmap-tools-nativeFollowing, is an example that shows how to flash a Wic image. Realize that while this example uses a Wic image, you can use Bmaptool to flash any type of image. Use these steps to flash an image using Bmaptool:
- Update your
local.confFile: You need to have the following set in yourlocal.conffile before building your image:IMAGE_FSTYPES += "wic wic.bmap"
Get Your Image: Either have your image ready (pre-built with the
IMAGE_FSTYPESsetting previously mentioned) or take the step to build the image:$ bitbake image
Flash the Device: Flash the device with the image by using Bmaptool depending on your particular setup. The following commands assume the image resides in the Build Directory’s
deploy/images/area:- If you have write access to the media, use this command form:
$ oe-run-native bmap-tools-native bmaptool copy build-directory/tmp/deploy/images/machine/image.wic /dev/sdX
- If you do not have write access to the media, set your permissions first and then use the same command form:
For help on the$ sudo chmod 666 /dev/sdX$ oe-run-native bmap-tools-native bmaptool copy build-directory/tmp/deploy/images/machine/image.wic /dev/sdX
bmaptoolcommand, use the following command:$ bmaptool --help
3.18 Making Images More Secure
Security is of increasing concern for embedded devices. Consider the issues and problems discussed in just this sampling of work found across the Internet:
- If you have write access to the media, use this command form:
“Security Risks of Embedded Systems” by Bruce Schneier
“Internet Census 2012” by Carna Botnet
“Security Issues for Embedded Devices” by Jake Edge
When securing your image is of concern, there are steps, tools, and variables that you can consider to help you reach the security goals you need for your particular device. Not all situations are identical when it comes to making an image secure. Consequently, this section provides some guidance and suggestions for consideration when you want to make your image more secure.
Note
Because the security requirements and risks are different for every type of device, this section cannot provide a complete reference on securing your custom OS. It is strongly recommended that you also consult other sources of information on embedded Linux system hardening and on security.
3.18.1 General Considerations
General considerations exist that help you create more secure images. You should consider the following suggestions to help make your device more secure:
Scan additional code you are adding to the system (例如 application code) by using static analysis tools. Look for buffer overflows and other potential security problems.
Pay particular attention to the security for any web-based administration interface.
Web interfaces typically need to perform administrative functions and tend to need to run with elevated privileges. Thus, the consequences resulting from the interface’s security becoming compromised can be serious. Look for common web vulnerabilities such as cross-site-scripting (XSS), unvalidated inputs, and so forth.
As with system passwords, the default credentials for accessing a web-based interface should not be the same across all devices. This is particularly true if the interface is enabled by default as it can be assumed that many end-users will not change the credentials.
Ensure you can update the software on the device to mitigate vulnerabilities discovered in the future. This consideration especially applies when your device is network-enabled.
Ensure you remove or disable debugging functionality before producing the final image. For information on how to do this, see the “Considerations Specific to the OpenEmbedded Build System” section.
Ensure you have no network services listening that are not needed.
Remove any software from the image that is not needed.
Enable hardware support for secure boot functionality when your device supports this functionality.
3.18.2. Security Flags
The Yocto Project has security flags that you can enable that help make your build output more secure. The security flags are in the meta/conf/distro/include/security_flags.inc file in your Source Directory (例如 poky).
Note
Depending on the recipe, certain security flags are enabled and disabled by default.
Use the following line in your local.conf file or in your custom distribution configuration file to enable the security compiler and linker flags for your build:
require conf/distro/include/security_flags.inc
3.18.3. Considerations Specific to the OpenEmbedded Build System
You can take some steps that are specific to the OpenEmbedded build system to make your images more secure:
Ensure “debug-tweaks” is not one of your selected
IMAGE_FEATURES. When creating a new project, the default is to provide you with an initiallocal.conffile that enables this feature using theEXTRA_IMAGE_FEATURESvariable with the line:EXTRA_IMAGE_FEATURES = "debug-tweaks"
To disable that feature, simply comment out that line in your
local.conffile, or make sureIMAGE_FEATURESdoes not contain “debug-tweaks” before producing your final image. Among other things, leaving this in place sets the root password as blank, which makes logging in for debugging or inspection easy during development but also means anyone can easily log in during production.It is possible to set a root password for the image and also to set passwords for any extra users you might add (例如 administrative or service type users). When you set up passwords for multiple images or users, you should not duplicate passwords.
To set up passwords, use the
extrausersclass, which is the preferred method. For an example on how to set up both root and user passwords, see the “extrausers.bbclass“ section.Note
When adding extra user accounts or setting a root password, be cautious about setting the same password on every device. If you do this, and the password you have set is exposed, then every device is now potentially compromised. If you need this access but want to ensure security, consider setting a different, random password for each device. Typically, you do this as a separate step after you deploy the image onto the device.Consider enabling a Mandatory Access Control (MAC) framework such as SMACK or SELinux and tuning it appropriately for your device’s usage. You can find more information in the
meta-selinuxlayer.
3.18.4. Tools for Hardening Your Image
The Yocto Project provides tools for making your image more secure. You can find these tools in the meta-security layer of the Yocto Project Source Repositories.
3.19. Creating Your Own Distribution
When you build an image using the Yocto Project and do not alter any distribution Metadata, you are creating a Poky distribution. If you wish to gain more control over package alternative selections, compile-time options, and other low-level configurations, you can create your own distribution.
To create your own distribution, the basic steps consist of creating your own distribution layer, creating your own distribution configuration file, and then adding any needed code and Metadata to the layer. The following steps provide some more detail:
Create a layer for your new distro: Create your distribution layer so that you can keep your Metadata and code for the distribution separate. It is strongly recommended that you create and use your own layer for configuration and code. Using your own layer as compared to just placing configurations in a
local.confconfiguration file makes it easier to reproduce the same build configuration when using multiple build machines. See the “使用bitbake-layers脚本创建通用Layer” section for information on how to quickly set up a layer.Create the distribution configuration file: The distribution configuration file needs to be created in the
conf/distrodirectory of your layer. You need to name it using your distribution name (例如mydistro.conf).Note
The DISTRO variable in yourlocal.conffile determines the name of your distribution.You can split out parts of your configuration file into include files and then “require” them from within your distribution configuration file. Be sure to place the include files in the conf/distro/include directory of your layer. A common example usage of include files would be to separate out the selection of desired version and revisions for individual recipes.
Your configuration file needs to set the following required variables:
DISTRO_NAMEDISTRO_VERSION
These following variables are optional and you typically set them from the distribution configuration file:
DISTRO_FEATURESDISTRO_EXTRA_RDEPENDSDISTRO_EXTRA_RRECOMMENDSTCLIBC
Tip
If you want to base your distribution configuration file on the very basic configuration from OE-Core, you can useconf/distro/defaultsetup.confas a reference and just include variables that differ as compared todefaultsetup.conf. Alternatively, you can create a distribution configuration file from scratch using thedefaultsetup.conffile or configuration files from other distributions such as Poky or Angstrom as references.Provide miscellaneous variables: Be sure to define any other variables for which you want to create a default or enforce as part of the distribution configuration. You can include nearly any variable from the
local.conffile. The variables you use are not limited to the list in the previous bulleted item.Point to Your distribution configuration file: In your
local.conffile in the Build Directory, set yourDISTROvariable to point to your distribution’s configuration file. For example, if your distribution’s configuration file is namedmydistro.conf, then you point to it as follows:DISTRO = "mydistro"
Add more to the layer if necessary: Use your layer to hold other information needed for the distribution:
Add recipes for installing distro-specific configuration files that are not already installed by another recipe. If you have distro-specific configuration files that are included by an existing recipe, you should add an append file (.bbappend) for those. For general information and recommendations on how to add recipes to your layer, see the “Creating Your Own Layer” and “Following Best Practices When Creating Layers” sections.
Add any image recipes that are specific to your distribution.
Add a
psplashappend file for a branded splash screen. For information on append files, see the “Using.bbappendfiles in Your Layer” section.Add any other append files to make custom changes that are specific to individual recipes.
3.20. Creating a Custom Template Configuration Directory
If you are producing your own customized version of the build system for use by other users, you might want to customize the message shown by the setup script or you might want to change the template configuration files (i.e. local.conf and bblayers.conf) that are created in a new build directory.
The OpenEmbedded build system uses the environment variable TEMPLATECONF to locate the directory from which it gathers configuration information that ultimately ends up in the Build Directory conf directory. By default, TEMPLATECONF is set as follows in the poky repository:
TEMPLATECONF=${TEMPLATECONF:-meta-poky/conf}
This is the directory used by the build system to find templates from which to build some key configuration files. If you look at this directory, you will see the bblayers.conf.sample, local.conf.sample, and conf-notes.txt files. The build system uses these files to form the respective bblayers.conf file, local.conf file, and display the list of BitBake targets when running the setup script.
To override these default configuration files with configurations you want used within every new Build Directory, simply set the TEMPLATECONF variable to your directory. The TEMPLATECONF variable is set in the .templateconf file, which is in the top-level Source Directory folder (例如 poky). Edit the .templateconf so that it can locate your directory.
Best practices dictate that you should keep your template configuration directory in your custom distribution layer. For example, suppose you have a layer named meta-mylayer located in your home directory and you want your template configuration directory named myconf. Changing the .templateconf as follows causes the OpenEmbedded build system to look in your directory and base its configuration files on the *.sample configuration files it finds. The final configuration files (i.e. local.conf and bblayers.conf ultimately still end up in your Build Directory, but they are based on your *.sample files.
TEMPLATECONF=${TEMPLATECONF:-meta-mylayer/myconf}
Aside from the *.sample configuration files, the conf-notes.txt also resides in the default meta-poky/conf directory. The script that sets up the build environment (i.e. oe-init-build-env) uses this file to display BitBake targets as part of the script output. Customizing this conf-notes.txt file is a good way to make sure your list of custom targets appears as part of the script’s output.
Here is the default list of targets displayed as a result of running either of the setup scripts:
You can now run 'bitbake <target>'Common targets are:core-image-minimalcore-image-satometa-toolchainmeta-ide-support
Changing the listed common targets is as easy as editing your version of conf-notes.txt in your custom template configuration directory and making sure you have TEMPLATECONF set to your directory.
3.21. Conserving Disk Space During Builds
To help conserve disk space during builds, you can add the following statement to your project’s local.conf configuration file found in the Build Directory:
INHERIT += "rm_work"
Adding this statement deletes the work directory used for building a recipe once the recipe is built. For more information on “rm_work“, see the rm_work class in the Yocto Project Reference Manual.
3.22. Working with Packages
This section describes a few tasks that involve packages:
3.22.1. Excluding Packages from an Image
You might find it necessary to prevent specific packages from being installed into an image. If so, you can use several variables to direct the build system to essentially ignore installing recommended packages or to not install a package at all.
The following list introduces variables you can use to prevent packages from being installed into your image. Each of these variables only works with IPK and RPM package types. Support for Debian packages does not exist. Also, you can use these variables from your local.conf file or attach them to a specific image recipe by using a recipe name override. For more detail on the variables, see the descriptions in the Yocto Project Reference Manual’s glossary chapter.
BAD_RECOMMENDATIONS: Use this variable to specify “recommended-only” packages that you do not want installed.
NO_RECOMMENDATIONS: Use this variable to prevent all “recommended-only” packages from being installed.
PACKAGE_EXCLUDE: Use this variable to prevent specific packages from being installed regardless of whether they are “recommended-only” or not. You need to realize that the build process could fail with an error when you prevent the installation of a package whose presence is required by an installed package.
3.22.2. Incrementing a Package Version
This section provides some background on how binary package versioning is accomplished and presents some of the services, variables, and terminology involved.
In order to understand binary package versioning, you need to consider the following:
Binary Package: The binary package that is eventually built and installed into an image.
Binary Package Version: The binary package version is composed of two components - a version and a revision.
Note
Technically, a third component, the “epoch” (i.e. PE) is involved but this discussion for the most part ignores PE.The version and revision are taken from the PV and PR variables, respectively.
PV: The recipe version. PV represents the version of the software being packaged. Do not confuse PV with the binary package version.PR: The recipe revision.SRCPV: The OpenEmbedded build system uses this string to help define the value of PV when the source code revision needs to be included in it.PR Service: A network-based service that helps automate keeping package feeds compatible with existing package manager applications such as RPM, APT, and OPKG.
Whenever the binary package content changes, the binary package version must change. Changing the binary package version is accomplished by changing or “bumping” the PR and/or PV values. Increasing these values occurs one of two ways:
Automatically using a Package Revision Service (PR Service).
Manually incrementing the
PRand/orPVvariables.
Given a primary challenge of any build system and its users is how to maintain a package feed that is compatible with existing package manager applications such as RPM, APT, and OPKG, using an automated system is much preferred over a manual system. In either system, the main requirement is that binary package version numbering increases in a linear fashion and that a number of version components exist that support that linear progression. For information on how to ensure package revisioning remains linear, see the “Automatically Incrementing a Binary Package Revision Number” section.
The following three sections provide related information on the PR Service, the manual method for “bumping” PR and/or PV, and on how to ensure binary package revisioning remains linear.
3.22.2.1. Working With a PR Service
As mentioned, attempting to maintain revision numbers in the Metadata is error prone, inaccurate, and causes problems for people submitting recipes. Conversely, the PR Service automatically generates increasing numbers, particularly the revision field, which removes the human element.
Note
For additional information on using a PR Service, you can see the PR Service wiki page.
The Yocto Project uses variables in order of decreasing priority to facilitate revision numbering (i.e. PE, PV, and PR for epoch, version, and revision, respectively). The values are highly dependent on the policies and procedures of a given distribution and package feed.
Because the OpenEmbedded build system uses “signatures”, which are unique to a given build, the build system knows when to rebuild packages. All the inputs into a given task are represented by a signature, which can trigger a rebuild when different. Thus, the build system itself does not rely on the PR, PV, and PE numbers to trigger a rebuild. The signatures, however, can be used to generate these values.
The PR Service works with both OEBasic and OEBasicHash generators. The value of PR bumps when the checksum changes and the different generator mechanisms change signatures under different circumstances.
As implemented, the build system includes values from the PR Service into the PR field as an addition using the form “.x“ so r0 becomes r0.1, r0.2 and so forth. This scheme allows existing PR values to be used for whatever reasons, which include manual PR bumps, should it be necessary.
By default, the PR Service is not enabled or running. Thus, the packages generated are just “self consistent”. The build system adds and removes packages and there are no guarantees about upgrade paths but images will be consistent and correct with the latest changes.
The simplest form for a PR Service is for it to exist for a single host development system that builds the package feed (building system). For this scenario, you can enable a local PR Service by setting PRSERV_HOST in your local.conf file in the Build Directory:
PRSERV_HOST = "localhost:0"
Once the service is started, packages will automatically get increasing PR values and BitBake takes care of starting and stopping the server.
If you have a more complex setup where multiple host development systems work against a common, shared package feed, you have a single PR Service running and it is connected to each building system. For this scenario, you need to start the PR Service using the bitbake-prserv command:
bitbake-prserv --host ip --port port --start
In addition to hand-starting the service, you need to update the local.conf file of each building system as described earlier so each system points to the server and port.
It is also recommended you use build history, which adds some sanity checks to binary package versions, in conjunction with the server that is running the PR Service. To enable build history, add the following to each building system’s local.conf file:
# It is recommended to activate "buildhistory" for testing the PR serviceINHERIT += "buildhistory"BUILDHISTORY_COMMIT = "1"
For information on build history, see the “Maintaining Build Output Quality” section.
Note
The OpenEmbedded build system does not maintain PR information as part of the shared state (sstate) packages. If you maintain an sstate feed, its expected that either all your building systems that contribute to the sstate feed use a shared PR Service, or you do not run a PR Service on any of your building systems. Having some systems use a PR Service while others do not leads to obvious problems.
For more information on shared state, see the “Shared State Cache” section in the Yocto Project Overview and Concepts Manual.
3.22.2.2. Manually Bumping PR
The alternative to setting up a PR Service is to manually “bump” the PR variable.
If a committed change results in changing the package output, then the value of the PR variable needs to be increased (or “bumped”) as part of that commit. For new recipes you should add the PR variable and set its initial value equal to “r0”, which is the default. Even though the default value is “r0”, the practice of adding it to a new recipe makes it harder to forget to bump the variable when you make changes to the recipe in future.
If you are sharing a common .inc file with multiple recipes, you can also use the INC_PR variable to ensure that the recipes sharing the .inc file are rebuilt when the .inc file itself is changed. The .inc file must set INC_PR (initially to “r0”), and all recipes referring to it should set PR to “${INC_PR}.0” initially, incrementing the last number when the recipe is changed. If the .inc file is changed then its INC_PR should be incremented.
When upgrading the version of a binary package, assuming the PV changes, the PR variable should be reset to “r0” (or “${INC_PR}.0” if you are using INC_PR).
Usually, version increases occur only to binary packages. However, if for some reason PV changes but does not increase, you can increase the PE variable (Package Epoch). The PE variable defaults to “0”.
Binary package version numbering strives to follow the Debian Version Field Policy Guidelines. These guidelines define how versions are compared and what “increasing” a version means.
3.22.2.3. Automatically Incrementing a Package Version Number
When fetching a repository, BitBake uses the SRCREV variable to determine the specific source code revision from which to build. You set the SRCREV variable to AUTOREV to cause the OpenEmbedded build system to automatically use the latest revision of the software:
SRCREV = "${AUTOREV}"
Furthermore, you need to reference SRCPV in PV in order to automatically update the version whenever the revision of the source code changes. Here is an example:
PV = "1.0+git${SRCPV}"
The OpenEmbedded build system substitutes SRCPV with the following:
AUTOINC+source_code_revision
The build system replaces the AUTOINC with a number. The number used depends on the state of the PR Service:
If PR Service is enabled, the build system increments the number, which is similar to the behavior of PR. This behavior results in linearly increasing package versions, which is desirable. Here is an example:
hello-world-git_0.0+git0+b6558dd387-r0.0_armv7a-neon.ipkhello-world-git_0.0+git1+dd2f5c3565-r0.0_armv7a-neon.ipk
If PR Service is not enabled, the build system replaces the AUTOINC placeholder with zero (i.e. “0”). This results in changing the package version since the source revision is included. However, package versions are not increased linearly. Here is an example:
hello-world-git_0.0+git0+b6558dd387-r0.0_armv7a-neon.ipkhello-world-git_0.0+git0+dd2f5c3565-r0.0_armv7a-neon.ipk
In summary, the OpenEmbedded build system does not track the history of binary package versions for this purpose. AUTOINC, in this case, is comparable to PR. If PR server is not enabled, AUTOINC in the package version is simply replaced by “0”. If PR server is enabled, the build system keeps track of the package versions and bumps the number when the package revision changes.
3.22.3. Handling Optional Module Packaging
Many pieces of software split functionality into optional modules (or plug-ins) and the plug-ins that are built might depend on configuration options. To avoid having to duplicate the logic that determines what modules are available in your recipe or to avoid having to package each module by hand, the OpenEmbedded build system provides functionality to handle module packaging dynamically.
To handle optional module packaging, you need to do two things:
Ensure the module packaging is actually done.
Ensure that any dependencies on optional modules from other recipes are satisfied by your recipe.
3.22.3.1. Making Sure the Packaging is Done
To ensure the module packaging actually gets done, you use the do_split_packages function within the populate_packages Python function in your recipe. The do_split_packages function searches for a pattern of files or directories under a specified path and creates a package for each one it finds by appending to the PACKAGES variable and setting the appropriate values for FILES_packagename, RDEPENDS_packagename, DESCRIPTION_packagename, and so forth. Here is an example from the lighttpd recipe:
python populate_packages_prepend () {lighttpd_libdir = d.expand('${libdir}')do_split_packages(d, lighttpd_libdir, '^mod_(.*)\.so$','lighttpd-module-%s', 'Lighttpd module for %s',extra_depends='')}
The previous example specifies a number of things in the call to do_split_packages.
A directory within the files installed by your recipe through do_install in which to search.
A regular expression used to match module files in that directory. In the example, note the parentheses () that mark the part of the expression from which the module name should be derived.
A pattern to use for the package names.
A description for each package.
An empty string for
extra_depends, which disables the default dependency on the mainlighttpdpackage. Thus, if a file in${libdir}calledmod_alias.sois found, a package calledlighttpd-module-aliasis created for it and the DESCRIPTION is set to “Lighttpd module for alias”.
Often, packaging modules is as simple as the previous example. However, more advanced options exist that you can use within do_split_packages to modify its behavior. And, if you need to, you can add more logic by specifying a hook function that is called for each package. It is also perfectly acceptable to call do_split_packages multiple times if you have more than one set of modules to package.
For more examples that show how to use do_split_packages, see the connman.inc file in the meta/recipes-connectivity/connman/ directory of the poky source repository. You can also find examples in meta/classes/kernel.bbclass.
Following is a reference that shows do_split_packages mandatory and optional arguments:
Mandatory argumentsrootThe path in which to searchfile_regexRegular expression to match searched files.Use parentheses () to mark the part of thisexpression that should be used to derive themodule name (to be substituted where %s isused in other function arguments as noted below)output_patternPattern to use for the package names. Mustinclude %s.descriptionDescription to set for each package. Mustinclude %s.Optional argumentspostinstPostinstall script to use for all packages(as a string)recursiveTrue to perform a recursive search - defaultFalsehookA hook function to be called for every match.The function will be called with the followingarguments (in the order listed):fFull path to the file/directory matchpkgThe package namefile_regexAs aboveoutput_patternAs abovemodulenameThe module name derived using file_regexextra_dependsExtra runtime dependencies (RDEPENDS) to beset for all packages. The default value of Nonecauses a dependency on the main package(`${PN}`) - if you do not want this, pass emptystring '' for this parameter.aux_files_patternExtra item(s) to be added to FILES for eachpackage. Can be a single string item or a listof strings for multiple items. Must include %s.postrmpostrm script to use for all packages (as astring)allow_dirsTrue to allow directories to be matched -default FalseprependIf True, prepend created packages to PACKAGESinstead of the default False which appends themmatch_pathmatch file_regex on the whole relative path tothe root rather than just the file nameaux_files_pattern_verbatimExtra item(s) to be added to FILES for eachpackage, using the actual derived module namerather than converting it to something legalfor a package name. Can be a single string itemor a list of strings for multiple items. Mustinclude %s.allow_linksTrue to allow symlinks to be matched - defaultFalsesummarySummary to set for each package. Must include %s;defaults to description if not set.
3.22.3.2. Satisfying Dependencies
The second part for handling optional module packaging is to ensure that any dependencies on optional modules from other recipes are satisfied by your recipe. You can be sure these dependencies are satisfied by using the PACKAGES_DYNAMIC variable. Here is an example that continues with the lighttpd recipe shown earlier:
PACKAGES_DYNAMIC = "lighttpd-module-.*"
The name specified in the regular expression can of course be anything. In this example, it is lighttpd-module- and is specified as the prefix to ensure that any RDEPENDS and RRECOMMENDS on a package name starting with the prefix are satisfied during build time. If you are using do_split_packages as described in the previous section, the value you put in PACKAGES_DYNAMIC should correspond to the name pattern specified in the call to do_split_packages.
3.22.4. Using Runtime Package Management
During a build, BitBake always transforms a recipe into one or more packages. For example, BitBake takes the bash recipe and produces a number of packages (例如 bash, bash-bashbug, bash-completion, bash-completion-dbg, bash-completion-dev, bash-completion-extra, bash-dbg, and so forth). Not all generated packages are included in an image.
In several situations, you might need to update, add, remove, or query the packages on a target device at runtime (i.e. without having to generate a new image). Examples of such situations include:
You want to provide in-the-field updates to deployed devices (例如 security updates).
You want to have a fast turn-around development cycle for one or more applications that run on your device.
You want to temporarily install the “debug” packages of various applications on your device so that debugging can be greatly improved by allowing access to symbols and source debugging.
You want to deploy a more minimal package selection of your device but allow in-the-field updates to add a larger selection for customization.
In all these situations, you have something similar to a more traditional Linux distribution in that in-field devices are able to receive pre-compiled packages from a server for installation or update. Being able to install these packages on a running, in-field device is what is termed “runtime package management”.
In order to use runtime package management, you need a host or server machine that serves up the pre-compiled packages plus the required metadata. You also need package manipulation tools on the target. The build machine is a likely candidate to act as the server. However, that machine does not necessarily have to be the package server. The build machine could push its artifacts to another machine that acts as the server (例如 Internet-facing). In fact, doing so is advantageous for a production environment as getting the packages away from the development system’s build directory prevents accidental overwrites.
A simple build that targets just one device produces more than one package database. In other words, the packages produced by a build are separated out into a couple of different package groupings based on criteria such as the target’s CPU architecture, the target board, or the C library used on the target. For example, a build targeting the qemux86 device produces the following three package databases: noarch, i586, and qemux86. If you wanted your qemux86 device to be aware of all the packages that were available to it, you would need to point it to each of these databases individually. In a similar way, a traditional Linux distribution usually is configured to be aware of a number of software repositories from which it retrieves packages.
Using runtime package management is completely optional and not required for a successful build or deployment in any way. But if you want to make use of runtime package management, you need to do a couple things above and beyond the basics. The remainder of this section describes what you need to do.
3.22.4.1. Build Considerations
This section describes build considerations of which you need to be aware in order to provide support for runtime package management.
When BitBake generates packages, it needs to know what format or formats to use. In your configuration, you use the PACKAGE_CLASSES variable to specify the format:
Open the
local.conffile inside your Build Directory (例如~/poky/build/conf/local.conf).Select the desired package format as follows:
PACKAGE_CLASSES ?= “package_packageformat”
where packageformat can be “ipk”, “rpm”, “deb”, or “tar” which are the supported package formats.
Note
Because the Yocto Project supports four different package formats, you can set the variable with more than one argument. However, the OpenEmbedded build system only uses the first argument when creating an image or Software Development Kit (SDK).
If you would like your image to start off with a basic package database containing the packages in your current build as well as to have the relevant tools available on the target for runtime package management, you can include “package-management” in the IMAGE_FEATURES variable. Including “package-management” in this configuration variable ensures that when the image is assembled for your target, the image includes the currently-known package databases as well as the target-specific tools required for runtime package management to be performed on the target. However, this is not strictly necessary. You could start your image off without any databases but only include the required on-target package tool(s). As an example, you could include “opkg” in your IMAGE_INSTALL variable if you are using the IPK package format. You can then initialize your target’s package database(s) later once your image is up and running.
Whenever you perform any sort of build step that can potentially generate a package or modify existing package, it is always a good idea to re-generate the package index after the build by using the following command:
$ bitbake package-index
It might be tempting to build the package and the package index at the same time with a command such as the following:
$ bitbake some-package package-index
Do not do this as BitBake does not schedule the package index for after the completion of the package you are building. Consequently, you cannot be sure of the package index including information for the package you just built. Thus, be sure to run the package update step separately after building any packages.
You can use the PACKAGE_FEED_ARCHS, PACKAGE_FEED_BASE_PATHS, and PACKAGE_FEED_URIS variables to pre-configure target images to use a package feed. If you do not define these variables, then manual steps as described in the subsequent sections are necessary to configure the target. You should set these variables before building the image in order to produce a correctly configured image.
When your build is complete, your packages reside in the ${TMPDIR}/deploy/packageformat directory. For example, if ${TMPDIR} is tmp and your selected package type is RPM, then your RPM packages are available in tmp/deploy/rpm.
3.22.4.2. Host or Server Machine Setup
Although other protocols are possible, a server using HTTP typically serves packages. If you want to use HTTP, then set up and configure a web server such as Apache 2, lighttpd, or SimpleHTTPServer on the machine serving the packages.
To keep things simple, this section describes how to set up a SimpleHTTPServer web server to share package feeds from the developer’s machine. Although this server might not be the best for a production environment, the setup is simple and straight forward. Should you want to use a different server more suited for production (例如 Apache 2, Lighttpd, or Nginx), take the appropriate steps to do so.
From within the build directory where you have built an image based on your packaging choice (i.e. the PACKAGE_CLASSES setting), simply start the server. The following example assumes a build directory of ~/poky/build/tmp/deploy/rpm and a PACKAGE_CLASSES setting of “package_rpm”:
$ cd ~/poky/build/tmp/deploy/rpm$ python -m SimpleHTTPServer
3.22.4.3. Target Setup
Setting up the target differs depending on the package management system. This section provides information for RPM, IPK, and DEB.
3.22.4.3.1. Using RPM
The Dandified Packaging Tool (DNF) performs runtime package management of RPM packages. In order to use DNF for runtime package management, you must perform an initial setup on the target machine for cases where the PACKAGE_FEED_* variables were not set as part of the image that is running on the target. This means if you built your image and did not not use these variables as part of the build and your image is now running on the target, you need to perform the steps in this section if you want to use runtime package management.
Note
For information on the PACKAGEFEED* variables, see PACKAGE_FEED_ARCHS, PACKAGE_FEED_BASE_PATHS, and PACKAGE_FEED_URIS in the Yocto Project Reference Manual variables glossary.
On the target, you must inform DNF that package databases are available. You do this by creating a file named /etc/yum.repos.d/oe-packages.repo and defining the oe-packages.
As an example, assume the target is able to use the following package databases: all, i586, and qemux86 from a server named my.server. The specifics for setting up the web server are up to you. The critical requirement is that the URIs in the target repository configuration point to the correct remote location for the feeds.
Tip
For development purposes, you can point the web server to the build system’sdeploydirectory. However, for production use, it is better to copy the package directories to a location outside of the build area and use that location. Doing so avoids situations where the build system overwrites or changes thedeploydirectory.
When telling DNF where to look for the package databases, you must declare individual locations per architecture or a single location used for all architectures. You cannot do both:
Create an Explicit List of Architectures: Define individual base URLs to identify where each package database is located:
[oe-packages]baseurl=http://my.server/rpm/i586 http://my.server/rpm/qemux86 http://my.server/rpm/all
This example informs DNF about individual package databases for all three architectures.
Create a Single (Full) Package Index: Define a single base URL that identifies where a full package database is located:
[oe-packages]baseurl=http://my.server/rpm
This example informs DNF about a single package database that contains all the package index information for all supported architectures.
Once you have informed DNF where to find the package databases, you need to fetch them:
# dnf makecache
DNF is now able to find, install, and upgrade packages from the specified repository or repositories.
Note See the DNF documentation for additional information.
3.22.4.3.2. Using IPK
The opkg application performs runtime package management of IPK packages. You must perform an initial setup for opkg on the target machine if the PACKAGE_FEED_ARCHS, PACKAGE_FEED_BASE_PATHS, and PACKAGE_FEED_URIS variables have not been set or the target image was built before the variables were set.
The opkg application uses configuration files to find available package databases. Thus, you need to create a configuration file inside the /etc/opkg/ direction, which informs opkg of any repository you want to use.
As an example, suppose you are serving packages from a ipk/ directory containing the i586, all, and qemux86 databases through an HTTP server named my.server. On the target, create a configuration file (例如 my_repo.conf) inside the /etc/opkg/ directory containing the following:
src/gz all http://my.server/ipk/allsrc/gz i586 http://my.server/ipk/i586src/gz qemux86 http://my.server/ipk/qemux86
Next, instruct opkg to fetch the repository information:
# opkg update
The opkg application is now able to find, install, and upgrade packages from the specified repository.
3.22.4.3.3. Using DEB
The apt application performs runtime package management of DEB packages. This application uses a source list file to find available package databases. You must perform an initial setup for apt on the target machine if the PACKAGE_FEED_ARCHS, PACKAGE_FEED_BASE_PATHS, and PACKAGE_FEED_URIS variables have not been set or the target image was built before the variables were set.
To inform apt of the repository you want to use, you might create a list file (例如 my_repo.list) inside the /etc/apt/sources.list.d/ directory. As an example, suppose you are serving packages from a deb/ directory containing the i586, all, and qemux86 databases through an HTTP server named my.server. The list file should contain:
deb http://my.server/deb/all ./deb http://my.server/deb/i586 ./deb http://my.server/deb/qemux86 ./
Next, instruct the apt application to fetch the repository information:
# apt-get update
After this step, apt is able to find, install, and upgrade packages from the specified repository.
3.22.5. Generating and Using Signed Packages
In order to add security to RPM packages used during a build, you can take steps to securely sign them. Once a signature is verified, the OpenEmbedded build system can use the package in the build. If security fails for a signed package, the build system aborts the build.
This section describes how to sign RPM packages during a build and how to use signed package feeds (repositories) when doing a build.
3.22.5.1. Signing RPM Packages
To enable signing RPM packages, you must set up the following configurations in either your local.config or distro.config file:
# Inherit sign_rpm.bbclass to enable signing functionalityINHERIT += " sign_rpm"# Define the GPG key that will be used for signing.RPM_GPG_NAME = "key_name"# Provide passphrase for the keyRPM_GPG_PASSPHRASE = "passphrase"
Note
Be sure to supply appropriate values for both key_name and passphrase
Aside from the RPM_GPG_NAME and RPM_GPG_PASSPHRASE variables in the previous example, two optional variables related to signing exist:
GPG_BIN: Specifies a
gpgbinary/wrapper that is executed when the package is signed.GPG_PATH: Specifies the
gpghome directory used when the package is signed.
3.22.5.2. Processing Package Feeds
In addition to being able to sign RPM packages, you can also enable signed package feeds for IPK and RPM packages.
The steps you need to take to enable signed package feed use are similar to the steps used to sign RPM packages. You must define the following in your local.config or distro.config file:
INHERIT += "sign_package_feed"PACKAGE_FEED_GPG_NAME = "key_name"PACKAGE_FEED_GPG_PASSPHRASE_FILE = "path_to_file_containing_passphrase"
For signed package feeds, the passphrase must exist in a separate file, which is pointed to by the PACKAGE_FEED_GPG_PASSPHRASE_FILE variable. Regarding security, keeping a plain text passphrase out of the configuration is more secure.
Aside from the PACKAGE_FEED_GPG_NAME and PACKAGE_FEED_GPG_PASSPHRASE_FILE variables, three optional variables related to signed package feeds exist:
GPG_BIN: Specifies a
gpgbinary/wrapper that is executed when the package is signed.GPG_PATH: Specifies the
gpghome directory used when the package is signed.PACKAGE_FEED_GPG_SIGNATURE_TYPE: Specifies the type of
gpgsignature. This variable applies only to RPM and IPK package feeds. Allowable values for thePACKAGE_FEED_GPG_SIGNATURE_TYPEare “ASC”, which is the default and specifies ascii armored, and “BIN”, which specifies binary.
3.22.6. Testing Packages With ptest
A Package Test (ptest) runs tests against packages built by the OpenEmbedded build system on the target machine. A ptest contains at least two items: the actual test, and a shell script (run-ptest) that starts the test. The shell script that starts the test must not contain the actual test - the script only starts the test. On the other hand, the test can be anything from a simple shell script that runs a binary and checks the output to an elaborate system of test binaries and data files.
The test generates output in the format used by Automake:
result: testname
where the result can be PASS, FAIL, or SKIP, and the testname can be any identifying string.
For a list of Yocto Project recipes that are already enabled with ptest, see the Ptest wiki page.
Note
A recipe is “ptest-enabled” if it inherits the ‘ptest’ class.
3.22.6.1. Adding ptest to Your Build
To add package testing to your build, add the DISTRO_FEATURES and EXTRA_IMAGE_FEATURES variables to your local.conf file, which is found in the Build Directory:
DISTRO_FEATURES_append = " ptest"EXTRA_IMAGE_FEATURES += "ptest-pkgs"
Once your build is complete, the ptest files are installed into the /usr/lib/package/ptest directory within the image, where package is the name of the package.
3.22.6.2. Running ptest
The ptest-runner package installs a shell script that loops through all installed ptest test suites and runs them in sequence. Consequently, you might want to add this package to your image.
3.22.6.3. Getting Your Package Ready
In order to enable a recipe to run installed ptests on target hardware, you need to prepare the recipes that build the packages you want to test. Here is what you have to do for each recipe:
- Be sure the recipe inherits the
ptestclass: Include the following line in each recipe:inherit ptest
- Create run-ptest: This script starts your test. Locate the script where you will refer to it using SRC_URI. Here is an example that starts a test for dbus:
#!/bin/shcd testmake -k runtest-TESTS
- Ensure dependencies are met: If the test adds build or runtime dependencies that normally do not exist for the package (such as requiring “make” to run the test suite), use the DEPENDS and RDEPENDS variables in your recipe in order for the package to meet the dependencies. Here is an example where the package has a runtime dependency on “make”:
RDEPENDS_`${PN}`-ptest += "make"
- Add a function to build the test suite: Not many packages support cross-compilation of their test suites. Consequently, you usually need to add a cross-compilation function to the package.
Many packages based on Automake compile and run the test suite by using a single command such as make check. However, the host make check builds and runs on the same computer, while cross-compiling requires that the package is built on the host but executed for the target architecture (though often, as in the case for ptest, the execution occurs on the host). The built version of Automake that ships with the Yocto Project includes a patch that separates building and execution. Consequently, packages that use the unaltered, patched version of make check automatically cross-compiles.
Regardless, you still must add a do_compile_ptest function to build the test suite. Add a function similar to the following to your recipe:
do_compile_ptest() {oe_runmake buildtest-TESTS}
Ensure special configurations are set: If the package requires special configurations prior to compiling the test code, you must insert a
do_configure_ptestfunction into the recipe.Install the test suite: The
ptestclass automatically copies the filerun-ptestto the target and then runsmake install-ptestto run the tests. If this is not enough, you need to create ado_install_ptestfunction and make sure it gets called after the “make install-ptest” completes.
3.22.7. Creating Node Package Manager (NPM) Packages
NPM is a package manager for the JavaScript programming language. The Yocto Project supports the NPM fetcher. You can use this fetcher in combination with devtool to create recipes that produce NPM packages.
Two workflows exist that allow you to create NPM packages using devtool: the NPM registry modules method and the NPM project code method.
Note
While it is possible to create NPM recipes manually, using devtool is far simpler.
Additionally, some requirements and caveats exist.
3.22.7.1. Requirements and Caveats
You need to be aware of the following before using devtool to create NPM packages:
Of the two methods that you can use
devtoolto create NPM packages, the registry approach is slightly simpler. However, you might consider the project approach because you do not have to publish your module in the NPM registry (npm-registry), which is NPM’s public registry.Be familiar with devtool.
The NPM host tools need the native nodejs-npm package, which is part of the OpenEmbedded environment. You need to get the package by cloning the https://github.com/openembedded/meta-openembedded repository out of GitHub. Be sure to add the path to your local copy to your
bblayers.conffile.devtool cannot detect native libraries in module dependencies. Consequently, you must manually add packages to your recipe.
While deploying NPM packages,
devtoolcannot determine which dependent packages are missing on the target (例如 the node runtime nodejs). Consequently, you need to find out what files are missing and be sure they are on the target.Although you might not need NPM to run your node package, it is useful to have NPM on your target. The NPM package name is nodejs-npm.
3.22.7.2. Using the Registry Modules Method
This section presents an example that uses the cute-files module, which is a file browser web application.
Note
You must know the cute-files module version.
The first thing you need to do is use devtool and the NPM fetcher to create the recipe:
$ devtool add "npm://registry.npmjs.org;name=cute-files;version=1.0.2"
The devtool add command runs recipetool create and uses the same fetch URI to download each dependency and capture license details where possible. The result is a generated recipe.
The recipe file is fairly simple and contains every license that recipetool finds and includes the licenses in the recipe’s LIC_FILES_CHKSUM variables. You need to examine the variables and look for those with “unknown” in the LICENSE field. You need to track down the license information for “unknown” modules and manually add the information to the recipe.
recipetool creates “shrinkwrap” and “lockdown” files for your recipe. Shrinkwrap files capture the version of all dependent modules. Many packages do not provide shrinkwrap files. recipetool create a shrinkwrap file as it runs. You can replace the shrinkwrap file with your own file by setting the NPM_SHRINKWRAP variable.
Lockdown files contain the checksum for each module to determine if your users download the same files when building with a recipe. Lockdown files ensure that dependencies have not been changed and that your NPM registry is still providing the same file.
Note
A package is created for each sub-module. This policy is the only practical way to have the licenses for all of the dependencies represented in the license manifest of the image.
The devtool edit-recipe command lets you take a look at the recipe:
$ devtool edit-recipe cute-filesSUMMARY = "Turn any folder on your computer into a cute file browser, available on the local network."LICENSE = "BSD-3-Clause & Unknown & MIT & ISC"LIC_FILES_CHKSUM = "file://LICENSE;`md5`=71d98c0a1db42956787b1909c74a86ca \file://node_modules/content-disposition/LICENSE;`md5`=c6e0ce1e688c5ff16db06b7259e9cd20 \file://node_modules/express/LICENSE;`md5`=5513c00a5c36cd361da863dd9aa8875d \...SRC_URI = "npm://registry.npmjs.org;name=cute-files;version=${PV}"NPM_SHRINKWRAP := "${THISDIR}/`${PN}`/npm-shrinkwrap.json"NPM_LOCKDOWN := "${THISDIR}/`${PN}`/lockdown.json"inherit npm# Must be set after inherit npm since that itself sets SS = "${WORKDIR}/npmpkg"LICENSE_`${PN}`-content-disposition = "MIT"...LICENSE_`${PN}`-express = "MIT"LICENSE_`${PN}` = "MIT"
Three key points exist in the previous example:
SRC_URI uses the NPM scheme so that the NPM fetcher is used.
recipetool collects all the license information. If a sub-module’s license is unavailable, the sub-module’s name appears in the comments.
The inherit npm statement causes the npm class to package up all the modules.
You can run the following command to build the cute-files package:
$ devtool build cute-files
Remember that nodejs must be installed on the target before your package.
Assuming 192.168.7.2 for the target’s IP address, use the following command to deploy your package:
$ devtool deploy-target -s cute-files root@192.168.7.2
Once the package is installed on the target, you can test the application:
Note
Because of a know issue, you cannot simply runcute-filesas you would if you had runnpm install.
$ cd /usr/lib/node_modules/cute-files$ node cute-files.jsOn a browser, go to http://192.168.7.2:3000 and you see the following:

You can find the recipe in workspace/recipes/cute-files. You can use the recipe in any layer you choose.
3.22.7.3. Using the NPM Projects Code Method
Although it is useful to package modules already in the NPM registry, adding node.js projects under development is a more common developer use case.
This section covers the NPM projects code method, which is very similar to the “registry” approach described in the previous section. In the NPM projects method, you provide devtool with an URL that points to the source files.
Replicating the same example, (i.e. cute-files) use the following command:
$ devtool add https://github.com/martinaglv/cute-files.git
The recipe this command generates is very similar to the recipe created in the previous section. However, the SRC_URI looks like the following:
SRC_URI = "git://github.com/martinaglv/cute-files.git;protocol=https \npm://registry.npmjs.org;name=commander;version=2.9.0;subdir=node_modules/commander \npm://registry.npmjs.org;name=express;version=4.14.0;subdir=node_modules/express \npm://registry.npmjs.org;name=content-disposition;version=0.3.0;subdir=node_modules/content-disposition \"
In this example, the main module is taken from the Git repository and dependents are taken from the NPM registry. Other than those differences, the recipe is basically the same between the two methods. You can build and deploy the package exactly as described in the previous section that uses the registry modules method.
3.23. Efficiently Fetching Source Files During a Build
The OpenEmbedded build system works with source files located through the SRC_URI variable. When you build something using BitBake, a big part of the operation is locating and downloading all the source tarballs. For images, downloading all the source for various packages can take a significant amount of time.
This section shows you how you can use mirrors to speed up fetching source files and how you can pre-fetch files all of which leads to more efficient use of resources and time.
3.23.1. Setting up Effective Mirrors
A good deal that goes into a Yocto Project build is simply downloading all of the source tarballs. Maybe you have been working with another build system (OpenEmbedded or Angstrom) for which you have built up a sizable directory of source tarballs. Or, perhaps someone else has such a directory for which you have read access. If so, you can save time by adding statements to your configuration file so that the build process checks local directories first for existing tarballs before checking the Internet.
Here is an efficient way to set it up in your local.conf file:
SOURCE_MIRROR_URL ?= "file:///home/you/your-download-dir/"INHERIT += "own-mirrors"BB_GENERATE_MIRROR_TARBALLS = "1"# BB_NO_NETWORK = "1"
In the previous example, the BB_GENERATE_MIRROR_TARBALLS variable causes the OpenEmbedded build system to generate tarballs of the Git repositories and store them in the DL_DIR directory. Due to performance reasons, generating and storing these tarballs is not the build system’s default behavior.
You can also use the PREMIRRORS variable. For an example, see the variable’s glossary entry in the Yocto Project Reference Manual.
3.23.2. Getting Source Files and Suppressing the Build
Another technique you can use to ready yourself for a successive string of build operations, is to pre-fetch all the source files without actually starting a build. This technique lets you work through any download issues and ultimately gathers all the source files into your download directory build/downloads, which is located with DL_DIR.
Use the following BitBake command form to fetch all the necessary sources without starting the build:
$ bitbake -c target runall="fetch"
This variation of the BitBake command guarantees that you have all the sources for that BitBake target should you disconnect from the Internet and want to do the build later offline.
3.24. Selecting an Initialization Manager
By default, the Yocto Project uses SysVinit as the initialization manager. However, support also exists for systemd, which is a full replacement for init with parallel starting of services, reduced shell overhead and other features that are used by many distributions.
If you want to use SysVinit, you do not have to do anything. But, if you want to use systemd, you must take some steps as described in the following sections.
3.24.1. Using systemd Exclusively
Set these variables in your distribution configuration file as follows:
DISTRO_FEATURES_append = " systemd"VIRTUAL-RUNTIME_init_manager = "systemd"
You can also prevent the SysVinit distribution feature from being automatically enabled as follows:
DISTRO_FEATURES_BACKFILL_CONSIDERED = "sysvinit"
Doing so removes any redundant SysVinit scripts.
To remove initscripts from your image altogether, set this variable also:
VIRTUAL-RUNTIME_initscripts = ""
For information on the backfill variable, see DISTRO_FEATURES_BACKFILL_CONSIDERED.
3.24.2. Using systemd for the Main Image and Using SysVinit for the Rescue Image
Set these variables in your distribution configuration file as follows:
DISTRO_FEATURES_append = " systemd"VIRTUAL-RUNTIME_init_manager = "systemd"
Doing so causes your main image to use the packagegroup-core-boot.bb recipe and systemd. The rescue/minimal image cannot use this package group. However, it can install SysVinit and the appropriate packages will have support for both systemd and SysVinit.
3.25. Selecting a Device Manager
The Yocto Project provides multiple ways to manage the device manager (/dev):
Persistent and Pre-Populated/dev: For this case, the
/devdirectory is persistent and the required device nodes are created during the build.Use devtmpfs with a Device Manager: For this case, the
/devdirectory is provided by the kernel as an in-memory file system and is automatically populated by the kernel at runtime. Additional configuration of device nodes is done in user space by a device manager likeudevorbusybox-mdev.
3.25.1. Using Persistent and Pre-Populated/dev
To use the static method for device population, you need to set the USE_DEVFS variable to “0” as follows:
USE_DEVFS = "0"
The content of the resulting /dev directory is defined in a Device Table file. The IMAGE_DEVICE_TABLES variable defines the Device Table to use and should be set in the machine or distro configuration file. Alternatively, you can set this variable in your local.conf configuration file.
If you do not define the IMAGE_DEVICE_TABLES variable, the default device_table-minimal.txt is used:
IMAGE_DEVICE_TABLES = "device_table-mymachine.txt"
The population is handled by the makedevs utility during image creation:
3.25.2. Using devtmpfs and a Device Manager
To use the dynamic method for device population, you need to use (or be sure to set) the USE_DEVFS variable to “1”, which is the default:
USE_DEVFS = "1"
With this setting, the resulting /dev directory is populated by the kernel using devtmpfs. Make sure the corresponding kernel configuration variable CONFIG_DEVTMPFS is set when building you build a Linux kernel.
All devices created by devtmpfs will be owned by root and have permissions 0600.
To have more control over the device nodes, you can use a device manager like udev or busybox-mdev. You choose the device manager by defining the VIRTUAL-RUNTIME_dev_manager variable in your machine or distro configuration file. Alternatively, you can set this variable in your local.conf configuration file:
VIRTUAL-RUNTIME_dev_manager = "udev"# Some alternative values# VIRTUAL-RUNTIME_dev_manager = "busybox-mdev"# VIRTUAL-RUNTIME_dev_manager = "systemd"
3.26. Using an External SCM
If you’re working on a recipe that pulls from an external Source Code Manager (SCM), it is possible to have the OpenEmbedded build system notice new recipe changes added to the SCM and then build the resulting packages that depend on the new recipes by using the latest versions. This only works for SCMs from which it is possible to get a sensible revision number for changes. Currently, you can do this with Apache Subversion (SVN), Git, and Bazaar (BZR) repositories.
To enable this behavior, the PV of the recipe needs to reference SRCPV. Here is an example:
PV = "1.2.3+git${SRCPV}"
Then, you can add the following to your local.conf:
SRCREV_pn-PN = "${AUTOREV}"
PN is the name of the recipe for which you want to enable automatic source revision updating.
If you do not want to update your local configuration file, you can add the following directly to the recipe to finish enabling the feature:
SRCREV = "${AUTOREV}"
The Yocto Project provides a distribution named poky-bleeding, whose configuration file contains the line:
require conf/distro/include/poky-floating-revisions.inc
This line pulls in the listed include file that contains numerous lines of exactly that form:
#SRCREV_pn-opkg-native ?= "${AUTOREV}"#SRCREV_pn-opkg-sdk ?= "${AUTOREV}"#SRCREV_pn-opkg ?= "${AUTOREV}"#SRCREV_pn-opkg-utils-native ?= "${AUTOREV}"#SRCREV_pn-opkg-utils ?= "${AUTOREV}"SRCREV_pn-gconf-dbus ?= "${AUTOREV}"SRCREV_pn-matchbox-common ?= "${AUTOREV}"SRCREV_pn-matchbox-config-gtk ?= "${AUTOREV}"SRCREV_pn-matchbox-desktop ?= "${AUTOREV}"SRCREV_pn-matchbox-keyboard ?= "${AUTOREV}"SRCREV_pn-matchbox-panel-2 ?= "${AUTOREV}"SRCREV_pn-matchbox-themes-extra ?= "${AUTOREV}"SRCREV_pn-matchbox-terminal ?= "${AUTOREV}"SRCREV_pn-matchbox-wm ?= "${AUTOREV}"SRCREV_pn-settings-daemon ?= "${AUTOREV}"SRCREV_pn-screenshot ?= "${AUTOREV}"...
These lines allow you to experiment with building a distribution that tracks the latest development source for numerous packages.
Caution
Thepoky-bleedingdistribution is not tested on a regular basis. Keep this in mind if you use it.
3.27. Creating a Read-Only Root Filesystem
Suppose, for security reasons, you need to disable your target device’s root filesystem’s write permissions (i.e. you need a read-only root filesystem). Or, perhaps you are running the device’s operating system from a read-only storage device. For either case, you can customize your image for that behavior.
Note
Supporting a read-only root filesystem requires that the system and applications do not try to write to the root filesystem. You must configure all parts of the target system to write elsewhere, or to gracefully fail in the event of attempting to write to the root filesystem.
3.27.1. Creating the Root Filesystem
To create the read-only root filesystem, simply add the “read-only-rootfs” feature to your image. Using either of the following statements in your image recipe or from within the local.conf file found in the Build Directory causes the build system to create a read-only root filesystem:
IMAGE_FEATURES = "read-only-rootfs"
or
EXTRA_IMAGE_FEATURES += "read-only-rootfs"
For more information on how to use these variables, see the “Customizing Images Using Custom IMAGE_FEATURES and EXTRA_IMAGE_FEATURES” section. For information on the variables, see IMAGE_FEATURES and EXTRA_IMAGE_FEATURES.
3.27.2. Post-Installation Scripts
It is very important that you make sure all post-Installation (pkg_postinst) scripts for packages that are installed into the image can be run at the time when the root filesystem is created during the build on the host system. These scripts cannot attempt to run during first-boot on the target device. With the “read-only-rootfs” feature enabled, the build system checks during root filesystem creation to make sure all post-installation scripts succeed. If any of these scripts still need to be run after the root filesystem is created, the build immediately fails. These build-time checks ensure that the build fails rather than the target device fails later during its initial boot operation.
Most of the common post-installation scripts generated by the build system for the out-of-the-box Yocto Project are engineered so that they can run during root filesystem creation (例如 post-installation scripts for caching fonts). However, if you create and add custom scripts, you need to be sure they can be run during this file system creation.
Here are some common problems that prevent post-installation scripts from running during root filesystem creation:
Not using
$Din front of absolute paths: The build system defines$Dwhen the root filesystem is created. Furthermore,$Dis blank when the script is run on the target device. This implies two purposes for $D: ensuring paths are valid in both the host and target environments, and checking to determine which environment is being used as a method for taking appropriate actions.Attempting to run processes that are specific to or dependent on the target architecture: You can work around these attempts by using native tools, which run on the host system, to accomplish the same tasks, or by alternatively running the processes under QEMU, which has the
qemu_run_binaryfunction. For more information, see theqemuclass.
3.27.3. Areas With Write Access
With the “read-only-rootfs” feature enabled, any attempt by the target to write to the root filesystem at runtime fails. Consequently, you must make sure that you configure processes and applications that attempt these types of writes do so to directories with write access (例如 /tmp or /var/run).
3.28. Maintaining Build Output Quality
Many factors can influence the quality of a build. For example, if you upgrade a recipe to use a new version of an upstream software package or you experiment with some new configuration options, subtle changes can occur that you might not detect until later. Consider the case where your recipe is using a newer version of an upstream package. In this case, a new version of a piece of software might introduce an optional dependency on another library, which is auto-detected. If that library has already been built when the software is building, the software will link to the built library and that library will be pulled into your image along with the new software even if you did not want the library.
The buildhistory class exists to help you maintain the quality of your build output. You can use the class to highlight unexpected and possibly unwanted changes in the build output. When you enable build history, it records information about the contents of each package and image and then commits that information to a local Git repository where you can examine the information.
The remainder of this section describes the following:
How you can enable and disable build history
How to understand what the build history contains
How to limit the information used for build history
How to examine the build history from both a command-line and web interface
3.28.1. Enabling and Disabling Build History
Build history is disabled by default. To enable it, add the following INHERIT statement and set the BUILDHISTORY_COMMIT variable to “1” at the end of your conf/local.conf file found in the Build Directory:
INHERIT += "buildhistory"BUILDHISTORY_COMMIT = "1"
Enabling build history as previously described causes the OpenEmbedded build system to collect build output information and commit it as a single commit to a local Git repository.
Note
Enabling build history increases your build times slightly, particularly for images, and increases the amount of disk space used during the build.
You can disable build history by removing the previous statements from your conf/local.conf file.
3.28.2. Understanding What the Build History Contains
Build history information is kept in ${TOPDIR}/buildhistory in the Build Directory as defined by the BUILDHISTORY_DIR variable. The following is an example abbreviated listing:
At the top level, a metadata-revs file exists that lists the revisions of the repositories for the enabled layers when the build was produced. The rest of the data splits into separate packages, images and sdk directories, the contents of which are described as follows.
3.28.2.1. Build History Package Information
The history for each package contains a text file that has name-value pairs with information about the package. For example, buildhistory/packages/i586-poky-linux/busybox/busybox/latest contains the following:
PV = 1.22.1PR = r32RPROVIDES =RDEPENDS = glibc (>= 2.20) update-alternatives-opkgRRECOMMENDS = busybox-syslog busybox-udhcpc update-rc.dPKGSIZE = 540168FILES = /usr/bin/* /usr/sbin/* /usr/lib/busybox/* /usr/lib/lib*.so.* \/etc /com /var /bin/* /sbin/* /lib/*.so.* /lib/udev/rules.d \/usr/lib/udev/rules.d /usr/share/busybox /usr/lib/busybox/* \/usr/share/pixmaps /usr/share/applications /usr/share/idl \/usr/share/omf /usr/share/sounds /usr/lib/bonobo/serversFILELIST = /bin/busybox /bin/busybox.nosuid /bin/busybox.suid /bin/sh \/etc/busybox.links.nosuid /etc/busybox.links.suid
Most of these name-value pairs correspond to variables used to produce the package. The exceptions are FILELIST, which is the actual list of files in the package, and PKGSIZE, which is the total size of files in the package in bytes.
A file also exists that corresponds to the recipe from which the package came (例如 buildhistory/packages/i586-poky-linux/busybox/latest):
PV = 1.22.1PR = r32DEPENDS = initscripts kern-tools-native update-rc.d-native \virtual/i586-poky-linux-compilerlibs virtual/i586-poky-linux-gcc \virtual/libc virtual/update-alternativesPACKAGES = busybox-ptest busybox-httpd busybox-udhcpd busybox-udhcpc \busybox-syslog busybox-mdev busybox-hwclock busybox-dbg \busybox-staticdev busybox-dev busybox-doc busybox-locale busybox
Finally, for those recipes fetched from a version control system (例如, Git), a file exists that lists source revisions that are specified in the recipe and lists the actual revisions used during the build. Listed and actual revisions might differ when SRCREV is set to ${AUTOREV}. Here is an example assuming buildhistory/packages/qemux86-poky-linux/linux-yocto/latest_srcrev):
# SRCREV_machine = "38cd560d5022ed2dbd1ab0dca9642e47c98a0aa1"SRCREV_machine = "38cd560d5022ed2dbd1ab0dca9642e47c98a0aa1"# SRCREV_meta = "a227f20eff056e511d504b2e490f3774ab260d6f"SRCREV_meta = "a227f20eff056e511d504b2e490f3774ab260d6f"
You can use the buildhistory-collect-srcrevs command with the -a option to collect the stored SRCREV values from build history and report them in a format suitable for use in global configuration (例如, local.conf or a distro include file) to override floating AUTOREV values to a fixed set of revisions. Here is some example output from this command:
$ buildhistory-collect-srcrevs -a# i586-poky-linuxSRCREV_pn-glibc = "b8079dd0d360648e4e8de48656c5c38972621072"SRCREV_pn-glibc-initial = "b8079dd0d360648e4e8de48656c5c38972621072"SRCREV_pn-opkg-utils = "53274f087565fd45d8452c5367997ba6a682a37a"SRCREV_pn-kmod = "fd56638aed3fe147015bfa10ed4a5f7491303cb4"# x86_64-linuxSRCREV_pn-gtk-doc-stub-native = "1dea266593edb766d6d898c79451ef193eb17cfa"SRCREV_pn-dtc-native = "65cc4d2748a2c2e6f27f1cf39e07a5dbabd80ebf"SRCREV_pn-update-rc.d-native = "eca680ddf28d024954895f59a241a622dd575c11"SRCREV_glibc_pn-cross-localedef-native = "b8079dd0d360648e4e8de48656c5c38972621072"SRCREV_localedef_pn-cross-localedef-native = "c833367348d39dad7ba018990bfdaffaec8e9ed3"SRCREV_pn-prelink-native = "faa069deec99bf61418d0bab831c83d7c1b797ca"SRCREV_pn-opkg-utils-native = "53274f087565fd45d8452c5367997ba6a682a37a"SRCREV_pn-kern-tools-native = "23345b8846fe4bd167efdf1bd8a1224b2ba9a5ff"SRCREV_pn-kmod-native = "fd56638aed3fe147015bfa10ed4a5f7491303cb4"# qemux86-poky-linuxSRCREV_machine_pn-linux-yocto = "38cd560d5022ed2dbd1ab0dca9642e47c98a0aa1"SRCREV_meta_pn-linux-yocto = "a227f20eff056e511d504b2e490f3774ab260d6f"# all-poky-linuxSRCREV_pn-update-rc.d = "eca680ddf28d024954895f59a241a622dd575c11"
Note
Here are some notes on using the buildhistory-collect-srcrevs command:
By default, only values where the SRCREV was not hardcoded (usually when AUTOREV is used) are reported. Use the -a option to see all SRCREV values.
The output statements might not have any effect if overrides are applied elsewhere in the build system configuration. Use the -f option to add the forcevariable override to each output line if you need to work around this restriction.
The script does apply special handling when building for multiple machines. However, the script does place a comment before each set of values that specifies which triplet to which they belong as previously shown (例如, i586-poky-linux).
3.28.2.2. Build History Image Information
The files produced for each image are as follows:
image-files: A directory containing selected files from the root filesystem. The files are defined by BUILDHISTORY_IMAGE_FILES.build-id.txt: Human-readable information about the build configuration and metadata source revisions. This file contains the full build header as printed by BitBake.*.dot: Dependency graphs for the image that are compatible with graphviz.files-in-image.txt: A list of files in the image with permissions, owner, group, size, and symlink information.image-info.txt: A text file containing name-value pairs with information about the image. See the following listing example for more information.installed-package-names.txt: A list of installed packages by name only.installed-package-sizes.txt: A list of installed packages ordered by size.installed-packages.txt: A list of installed packages with full package filenames.
Note
Installed package information is able to be gathered and produced even if package management is disabled for the final image.
Here is an example of image-info.txt:
DISTRO = pokyDISTRO_VERSION = 1.7USER_CLASSES = buildstats image-mklibs image-prelinkIMAGE_CLASSES = image_typesIMAGE_FEATURES = debug-tweaksIMAGE_LINGUAS =IMAGE_INSTALL = packagegroup-core-boot run-postinstsBAD_RECOMMENDATIONS =NO_RECOMMENDATIONS =PACKAGE_EXCLUDE =ROOTFS_POSTPROCESS_COMMAND = write_package_manifest; license_create_manifest; \write_image_manifest ; buildhistory_list_installed_image ; \buildhistory_get_image_installed ; ssh_allow_empty_password; \postinst_enable_logging; rootfs_update_timestamp ; ssh_disable_dns_lookup ;IMAGE_POSTPROCESS_COMMAND = buildhistory_get_imageinfo ;IMAGESIZE = 6900
Other than IMAGESIZE, which is the total size of the files in the image in Kbytes, the name-value pairs are variables that may have influenced the content of the image. This information is often useful when you are trying to determine why a change in the package or file listings has occurred.
3.28.2.3. Using Build History to Gather Image Information Only
As you can see, build history produces image information, including dependency graphs, so you can see why something was pulled into the image. If you are just interested in this information and not interested in collecting specific package or SDK information, you can enable writing only image information without any history by adding the following to your conf/local.conf file found in the Build Directory:
INHERIT += "buildhistory"BUILDHISTORY_COMMIT = "0"BUILDHISTORY_FEATURES = "image"
Here, you set the BUILDHISTORY_FEATURES variable to use the image feature only.
3.28.2.4. Build History SDK Information
Build history collects similar information on the contents of SDKs (例如 bitbake -c populate_sdk imagename) as compared to information it collects for images. Furthermore, this information differs depending on whether an extensible or standard SDK is being produced.
The following list shows the files produced for SDKs:
files-in-sdk.txt: A list of files in the SDK with permissions, owner, group, size, and symlink information. This list includes both the host and target parts of the SDK.sdk-info.txt: A text file containing name-value pairs with information about the SDK. See the following listing example for more information.sstate-task-sizes.txt: A text file containing name-value pairs with information about task group sizes (例如 do_populate_sysroot tasks have a total size). The sstate-task-sizes.txt file exists only when an extensible SDK is created.sstate-package-sizes.txt: A text file containing name-value pairs with information for the shared-state packages and sizes in the SDK. The sstate-package-sizes.txt file exists only when an extensible SDK is created.sdk-files: A folder that contains copies of the files mentioned in BUILDHISTORY_SDK_FILES if the files are present in the output. Additionally, the default value of BUILDHISTORY_SDK_FILES is specific to the extensible SDK although you can set it differently if you would like to pull in specific files from the standard SDK.The default files are conf/
local.conf, conf/bblayers.conf, conf/auto.conf, conf/locked-sigs.inc, and conf/devtool.conf. Thus, for an extensible SDK, these files get copied into the sdk-files directory.The following information appears under each of the host and target directories for the portions of the SDK that run on the host and on the target, respectively:
Note
The following files for the most part are empty when producing an extensible SDK because this type of SDK is not constructed from packages as is the standard SDK.depends.dot: Dependency graph for the SDK that is compatible with graphviz.installed-package-names.txt: A list of installed packages by name only.installed-package-sizes.txt: A list of installed packages ordered by size.installed-packages.txt: A list of installed packages with full package filenames.
Here is an example of sdk-info.txt:
DISTRO = pokyDISTRO_VERSION = 1.3+snapshot-20130327SDK_NAME = poky-glibc-i686-armSDK_VERSION = 1.3+snapshotSDKMACHINE =SDKIMAGE_FEATURES = dev-pkgs dbg-pkgsBAD_RECOMMENDATIONS =SDKSIZE = 352712
Other than SDKSIZE, which is the total size of the files in the SDK in Kbytes, the name-value pairs are variables that might have influenced the content of the SDK. This information is often useful when you are trying to determine why a change in the package or file listings has occurred.
3.28.2.5. Examining Build History Information
You can examine build history output from the command line or from a web interface.
To see any changes that have occurred (assuming you have BUILDHISTORY_COMMIT = “1”), you can simply use any Git command that allows you to view the history of a repository. Here is one method:
$ git log -p
You need to realize, however, that this method does show changes that are not significant (例如 a package’s size changing by a few bytes).
A command-line tool called buildhistory-diff does exist, though, that queries the Git repository and prints just the differences that might be significant in human-readable form. Here is an example:
$ ~/poky/poky/scripts/buildhistory-diff . HEAD^Changes to images/qemux86_64/glibc/core-image-minimal (files-in-image.txt):/etc/anotherpkg.conf was added/sbin/anotherpkg was added* (installed-package-names.txt):* anotherpkg was addedChanges to images/qemux86_64/glibc/core-image-minimal (installed-package-names.txt):anotherpkg was addedpackages/qemux86_64-poky-linux/v86d: PACKAGES: added "v86d-extras"* PR changed from "r0" to "r1"* PV changed from "0.1.10" to "0.1.12"packages/qemux86_64-poky-linux/v86d/v86d: PKGSIZE changed from 110579 to 144381 (+30%)* PR changed from "r0" to "r1"* PV changed from "0.1.10" to "0.1.12"
Note
Thebuildhistory-difftool requires theGitPythonpackage. Be sure to install it using Pip3 as follows:
$ pip3 install GitPython --userAlternatively, you can install
python3-gitusing the appropriate distribution package manager (例如apt-get,dnf, orzipper).
To see changes to the build history using a web interface, follow the instruction in the README file here. http://git.yoctoproject.org/cgit/cgit.cgi/buildhistory-web/.
Here is a sample screenshot of the interface:
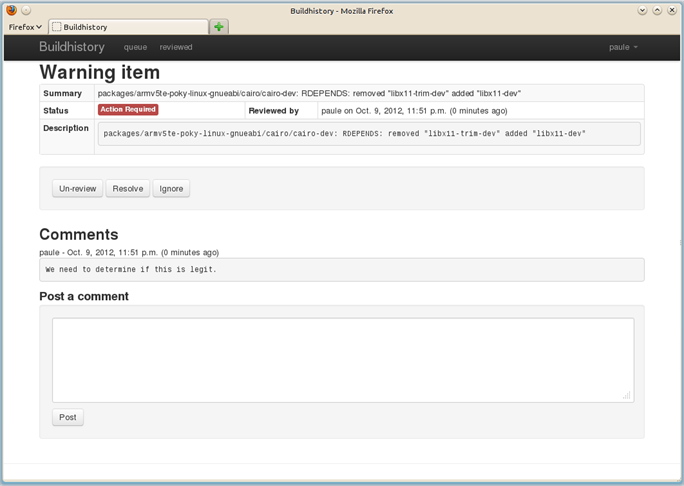
3.29. Performing Automated Runtime Testing
The OpenEmbedded build system makes available a series of automated tests for images to verify runtime functionality. You can run these tests on either QEMU or actual target hardware. Tests are written in Python making use of the unittest module, and the majority of them run commands on the target system over SSH. This section describes how you set up the environment to use these tests, run available tests, and write and add your own tests.
For information on the test and QA infrastructure available within the Yocto Project, see the “Testing and Quality Assurance” section in the Yocto Project Reference Manual.
3.29.1. Enabling Tests
Depending on whether you are planning to run tests using QEMU or on the hardware, you have to take different steps to enable the tests. See the following subsections for information on how to enable both types of tests.
3.29.1.1. Enabling Runtime Tests on QEMU
In order to run tests, you need to do the following:
Set up to avoid interaction with sudo for networking: To accomplish this, you must do one of the following:
Add NOPASSWD for your user in /etc/sudoers either for all commands or just for runqemu-ifup. You must provide the full path as that can change if you are using multiple clones of the source repository.
Note
On some distributions, you also need to comment out “Defaults requiretty” in /etc/sudoers.Manually configure a tap interface for your system.
Run as root the script in scripts/runqemu-gen-tapdevs, which should generate a list of tap devices. This is the option typically chosen for Autobuilder-type environments.
Notes
Be sure to use an absolute path when calling this script with sudo.The package recipe qemu-helper-native is required to run this script. Build the package using the following command:
$ bitbake qemu-helper-native
Set the DISPLAY variable: You need to set this variable so that you have an X server available (例如 start vncserver for a headless machine).
Be sure your host’s firewall accepts incoming connections from 192.168.7.0/24: Some of the tests (in particular DNF tests) start an HTTP server on a random high number port, which is used to serve files to the target. The DNF module serves ${WORKDIR}/oe-rootfs-repo so it can run DNF channel commands. That means your host’s firewall must accept incoming connections from 192.168.7.0/24, which is the default IP range used for tap devices by runqemu.
Be sure your host has the correct packages installed: Depending your host’s distribution, you need to have the following packages installed:
Ubuntu and Debian:
sysstatandiproute2OpenSUSE:
sysstatandiproute2Fedora:
sysstatandiprouteCentOS:
sysstatandiproute
Once you start running the tests, the following happens:
A copy of the root filesystem is written to
${WORKDIR}/testimage.The image is booted under QEMU using the standard
runqemuscript.A default timeout of 500 seconds occurs to allow for the boot process to reach the login prompt. You can change the timeout period by setting TEST_QEMUBOOT_TIMEOUT in the
local.conffile.Once the boot process is reached and the login prompt appears, the tests run. The full boot log is written to
${WORKDIR}/testimage/qemu_boot_log.Each test module loads in the order found in TEST_SUITES. You can find the full output of the commands run over SSH in
${WORKDIR}/testimgage/ssh_target_log.If no failures occur, the task running the tests ends successfully. You can find the output from the unittest in the task log at
${WORKDIR}/temp/log.do_testimage.
3.29.1.2. Enabling Runtime Tests on Hardware
The OpenEmbedded build system can run tests on real hardware, and for certain devices it can also deploy the image to be tested onto the device beforehand.
For automated deployment, a “master image” is installed onto the hardware once as part of setup. Then, each time tests are to be run, the following occurs:
The master image is booted into and used to write the image to be tested to a second partition.
The device is then rebooted using an external script that you need to provide.
The device boots into the image to be tested.
When running tests (independent of whether the image has been deployed automatically or not), the device is expected to be connected to a network on a pre-determined IP address. You can either use static IP addresses written into the image, or set the image to use DHCP and have your DHCP server on the test network assign a known IP address based on the MAC address of the device.
In order to run tests on hardware, you need to set TEST_TARGET to an appropriate value. For QEMU, you do not have to change anything, the default value is “QemuTarget”. For running tests on hardware, the following options exist:
“SimpleRemoteTarget“: Choose “SimpleRemoteTarget” if you are going to run tests on a target system that is already running the image to be tested and is available on the network. You can use “SimpleRemoteTarget” in conjunction with either real hardware or an image running within a separately started QEMU or any other virtual machine manager.
“SystemdbootTarget“: Choose “SystemdbootTarget” if your hardware is an EFI-based machine with systemd-boot as bootloader and core-image-testmaster (or something similar) is installed. Also, your hardware under test must be in a DHCP-enabled network that gives it the same IP address for each reboot.
If you choose “SystemdbootTarget”, there are additional requirements and considerations. See the “Selecting SystemdbootTarget” section, which follows, for more information.
“BeagleBoneTarget“: Choose “BeagleBoneTarget” if you are deploying images and running tests on the BeagleBone “Black” or original “White” hardware. For information on how to use these tests, see the comments at the top of the BeagleBoneTarget meta-yocto-bsp/lib/oeqa/controllers/beaglebonetarget.py file.
“EdgeRouterTarget“: Choose “EdgeRouterTarget” is you are deploying images and running tests on the Ubiquiti Networks EdgeRouter Lite. For information on how to use these tests, see the comments at the top of the EdgeRouterTarget meta-yocto-bsp/lib/oeqa/controllers/edgeroutertarget.py file.
“GrubTarget“: Choose the “supports deploying images and running tests on any generic PC that boots using GRUB. For information on how to use these tests, see the comments at the top of the GrubTarget meta-yocto-bsp/lib/oeqa/controllers/grubtarget.py file.
“your-target”: Create your own custom target if you want to run tests when you are deploying images and running tests on a custom machine within your BSP layer. To do this, you need to add a Python unit that defines the target class under lib/oeqa/controllers/ within your layer. You must also provide an empty init.py. For examples, see files in meta-yocto-bsp/lib/oeqa/controllers/.
3.29.1.3. Selecting SystemdbootTarget
If you did not set TEST_TARGET to “SystemdbootTarget”, then you do not need any information in this section. You can skip down to the “Running Tests” section.
If you did set TEST_TARGET to “SystemdbootTarget”, you also need to perform a one-time setup of your master image by doing the following:
- Set EFI_PROVIDER: Be sure that EFI_PROVIDER is as follows:
EFI_PROVIDER = "systemd-boot"
Build the master image: Build the core-image-testmaster image. The core-image-testmaster recipe is provided as an example for a “master” image and you can customize the image recipe as you would any other recipe.
Here are the image recipe requirements:
Inherits core-image so that kernel modules are installed.
Installs normal linux utilities not busybox ones (例如 bash, coreutils, tar, gzip, and kmod).
Uses a custom Initial RAM Disk (initramfs) image with a custom installer. A normal image that you can install usually creates a single rootfs partition. This image uses another installer that creates a specific partition layout. Not all Board Support Packages (BSPs) can use an installer. For such cases, you need to manually create the following partition layout on the target:
+ First partition mounted under /boot, labeled "boot".+ The main rootfs partition where this image gets installed, which is mounted under /.+ Another partition labeled "testrootfs" where test images get deployed.
Install image: Install the image that you just built on the target system.
The final thing you need to do when setting TEST_TARGET to “SystemdbootTarget” is to set up the test image:
- Set up your
local.conffile: Make sure you have the following statements in yourlocal.conffile:IMAGE_FSTYPES += "tar.gz"INHERIT += "testimage"TEST_TARGET = "SystemdbootTarget"TEST_TARGET_IP = "192.168.2.3"
- Build your test image: Use BitBake to build the image:
$ bitbake core-image-sato
3.29.1.4. Power Control
For most hardware targets other than SimpleRemoteTarget, you can control power:
You can use TEST_POWERCONTROL_CMD together with TEST_POWERCONTROL_EXTRA_ARGS as a command that runs on the host and does power cycling. The test code passes one argument to that command: off, on or cycle (off then on). Here is an example that could appear in your
local.conffile:TEST_POWERCONTROL_CMD = "powercontrol.exp test 10.11.12.1 nuc1"
In this example, the expect script does the following:
ssh test@10.11.12.1 "pyctl nuc1 arg"
It then runs a Python script that controls power for a label called nuc1.
Note
You need to customize TEST_POWERCONTROL_CMD and TEST_POWERCONTROL_EXTRA_ARGS for your own setup. The one requirement is that it accepts “on”, “off”, and “cycle” as the last argument.When no command is defined, it connects to the device over SSH and uses the classic reboot command to reboot the device. Classic reboot is fine as long as the machine actually reboots (i.e. the SSH test has not failed). It is useful for scenarios where you have a simple setup, typically with a single board, and where some manual interaction is okay from time to time.
If you have no hardware to automatically perform power control but still wish to experiment with automated hardware testing, you can use the dialog-power-control script that shows a dialog prompting you to perform the required power action. This script requires either KDialog or Zenity to be installed. To use this script, set the TEST_POWERCONTROL_CMD variable as follows:
TEST_POWERCONTROL_CMD = "${COREBASE}/scripts/contrib/dialog-power-control"
3.29.1.5. Serial Console Connection
For test target classes requiring a serial console to interact with the bootloader (例如 BeagleBoneTarget, EdgeRouterTarget, and GrubTarget), you need to specify a command to use to connect to the serial console of the target machine by using the TEST_SERIALCONTROL_CMD variable and optionally the TEST_SERIALCONTROL_EXTRA_ARGS variable.
These cases could be a serial terminal program if the machine is connected to a local serial port, or a telnet or ssh command connecting to a remote console server. Regardless of the case, the command simply needs to connect to the serial console and forward that connection to standard input and output as any normal terminal program does. For example, to use the picocom terminal program on serial device /dev/ttyUSB0 at 115200bps, you would set the variable as follows:
TEST_SERIALCONTROL_CMD = "picocom /dev/ttyUSB0 -b 115200"
For local devices where the serial port device disappears when the device reboots, an additional “serdevtry” wrapper script is provided. To use this wrapper, simply prefix the terminal command with ${COREBASE}/scripts/contrib/serdevtry:
TEST_SERIALCONTROL_CMD = "${COREBASE}/scripts/contrib/serdevtry picocom -b115200 /dev/ttyUSB0"
3.29.2. Running Tests
You can start the tests automatically or manually:
- Automatically running tests: To run the tests automatically after the OpenEmbedded build system successfully creates an image, first set the TESTIMAGE_AUTO variable to “1” in your
local.conffile in the Build Directory:
Next, build your image. If the image successfully builds, the tests run:TESTIMAGE_AUTO = "1"
bitbake core-image-sato
- Manually running tests: To manually run the tests, first globally inherit the testimage class by editing your
local.conffile:
Next, use BitBake to run the tests:INHERIT += "testimage"
All test files reside inbitbake -c testimage image
meta/lib/oeqa/runtimein the Source Directory. A test name maps directly to a Python module. Each test module may contain a number of individual tests. Tests are usually grouped together by the area tested (e.g tests for systemd reside inmeta/lib/oeqa/runtime/systemd.py).
You can add tests to any layer provided you place them in the proper area and you extend BBPATH in the local.conf file as normal. Be sure that tests reside in layer/lib/oeqa/runtime.
Note
Be sure that module names do not collide with module names used in the default set of test modules inmeta/lib/oeqa/runtime.
You can change the set of tests run by appending or overriding TEST_SUITES variable in local.conf. Each name in TEST_SUITES represents a required test for the image. Test modules named within TEST_SUITES cannot be skipped even if a test is not suitable for an image (例如 running the RPM tests on an image without rpm). Appending “auto” to TEST_SUITES causes the build system to try to run all tests that are suitable for the image (i.e. each test module may elect to skip itself).
The order you list tests in TEST_SUITES is important and influences test dependencies. Consequently, tests that depend on other tests should be added after the test on which they depend. For example, since the ssh test depends on the ping test, “ssh” needs to come after “ping” in the list. The test class provides no re-ordering or dependency handling.
Note
Each module can have multiple classes with multiple test methods. And, Python unittest rules apply.
Here are some things to keep in mind when running tests:
- The default tests for the image are defined as:
DEFAULT_TEST_SUITES_pn-image = "ping ssh df connman syslog xorg scp vnc date rpm dnf dmesg"
- Add your own test to the list of the by using the following:
TEST_SUITES_append = " mytest"
- Run a specific list of tests as follows:
Remember, order is important. Be sure to place a test that is dependent on another test later in the order.TEST_SUITES = "test1 test2 test3"
3.29.3. Exporting Tests
You can export tests so that they can run independently of the build system. Exporting tests is required if you want to be able to hand the test execution off to a scheduler. You can only export tests that are defined in TEST_SUITES.
If your image is already built, make sure the following are set in your local.conf file:
INHERIT +="testexport"TEST_TARGET_IP = "IP-address-for-the-test-target"TEST_SERVER_IP = "IP-address-for-the-test-server"
You can then export the tests with the following BitBake command form:
$ bitbake image -c testexport
Exporting the tests places them in the Build Directory in tmp/testexport/image, which is controlled by the TEST_EXPORT_DIR variable.
You can now run the tests outside of the build environment:
$ cd tmp/testexport/image$ ./runexported.py testdata.json
Here is a complete example that shows IP addresses and uses the core-image-sato image:
INHERIT +="testexport"TEST_TARGET_IP = "192.168.7.2"TEST_SERVER_IP = "192.168.7.1"
Use BitBake to export the tests:
$ bitbake core-image-sato -c testexport
Run the tests outside of the build environment using the following:
$ cd tmp/testexport/core-image-sato$ ./runexported.py testdata.json
3.29.4. Writing New Tests
As mentioned previously, all new test files need to be in the proper place for the build system to find them. New tests for additional functionality outside of the core should be added to the layer that adds the functionality, in layer/lib/oeqa/runtime (as long as BBPATH is extended in the layer’s layer.conf file as normal). Just remember the following:
Filenames need to map directly to test (module) names.
Do not use module names that collide with existing core tests.
Minimally, an empty
__init__.pyfile must exist in the runtime directory.
To create a new test, start by copying an existing module (例如 syslog.py or gcc.py are good ones to use). Test modules can use code from meta/lib/oeqa/utils, which are helper classes.
Note
Structure shell commands such that you rely on them and they return a single code for success. Be aware that sometimes you will need to parse the output. See thedf.pyanddate.pymodules for examples.
You will notice that all test classes inherit oeRuntimeTest, which is found in meta/lib/oetest.py. This base class offers some helper attributes, which are described in the following sections:
3.29.4.1. Class Methods
Class methods are as follows:
hasPackage(pkg): Returns “True” if
pkgis in the installed package list of the image, which is based on the manifest file that is generated during thedo_rootfstask.hasFeature(feature): Returns “True” if the feature is in IMAGE_FEATURES or DISTRO_FEATURES.
3.29.4.2. Class Attributes
Class attributes are as follows:
pscmd: Equals “ps -ef” if procps is installed in the image. Otherwise, pscmd equals “ps” (busybox).
tc: The called test context, which gives access to the following attributes:
d: The BitBake datastore, which allows you to use stuff such as oeRuntimeTest.tc.d.getVar(“VIRTUAL-RUNTIME_init_manager”).
testslist and testsrequired: Used internally. The tests do not need these.
filesdir: The absolute path to
meta/lib/oeqa/runtime/files, which contains helper files for tests meant for copying on the target such as small files written in C for compilation.target: The target controller object used to deploy and start an image on a particular target (例如 QemuTarget, SimpleRemote, and SystemdbootTarget). Tests usually use the following:
ip: The target’s IP address.
server_ip: The host’s IP address, which is usually used by the DNF test suite.
run(cmd, timeout=None): The single, most used method. This command is a wrapper for: ssh root@host “cmd”. The command returns a tuple: (status, output), which are what their names imply - the return code of “cmd” and whatever output it produces. The optional timeout argument represents the number of seconds the test should wait for “cmd” to return. If the argument is “None”, the test uses the default instance’s timeout period, which is 300 seconds. If the argument is “0”, the test runs until the command returns.
copy_to(localpath, remotepath):
scp localpath root@ip:remotepath.copy_from(remotepath, localpath):
scp root@host:remotepath localpath.
3.29.4.3. Instance Attributes
A single instance attribute exists, which is target. The target instance attribute is identical to the class attribute of the same name, which is described in the previous section. This attribute exists as both an instance and class attribute so tests can use self.target.run(cmd) in instance methods instead of oeRuntimeTest.tc.target.run(cmd).
3.29.5. Installing Packages in the DUT Without the Package Manager
When a test requires a package built by BitBake, it is possible to install that package. Installing the package does not require a package manager be installed in the device under test (DUT). It does, however, require an SSH connection and the target must be using the sshcontrol class.
Note
This method usesscpto copy files from the host to the target, which causes permissions and special attributes to be lost.
A JSON file is used to define the packages needed by a test. This file must be in the same path as the file used to define the tests. Furthermore, the filename must map directly to the test module name with a .json extension.
The JSON file must include an object with the test name as keys of an object or an array. This object (or array of objects) uses the following data:
“pkg” - A mandatory string that is the name of the package to be installed.
“rm” - An optional boolean, which defaults to “false”, that specifies to remove the package after the test.
“extract” - An optional boolean, which defaults to “false”, that specifies if the package must be extracted from the package format. When set to “true”, the package is not automatically installed into the DUT.
Following is an example JSON file that handles test “foo” installing package “bar” and test “foobar” installing packages “foo” and “bar”. Once the test is complete, the packages are removed from the DUT.
{"foo": {"pkg": "bar"},"foobar": [{"pkg": "foo","rm": true},{"pkg": "bar","rm": true}]}
3.30. Debugging Tools and Techniques
The exact method for debugging build failures depends on the nature of the problem and on the system’s area from which the bug originates. Standard debugging practices such as comparison against the last known working version with examination of the changes and the re-application of steps to identify the one causing the problem are valid for the Yocto Project just as they are for any other system. Even though it is impossible to detail every possible potential failure, this section provides some general tips to aid in debugging given a variety of situations.
Tip
A useful feature for debugging is the error reporting tool. Configuring the Yocto Project to use this tool causes the OpenEmbedded build system to produce error reporting commands as part of the console output. You can enter the commands after the build completes to log error information into a common database, that can help you figure out what might be going wrong. For information on how to enable and use this feature, see the “Using the Error Reporting Tool” section.
The following list shows the debugging topics in the remainder of this section:
“Viewing Logs from Failed Tasks” describes how to find and view logs from tasks that failed during the build process.
“Viewing Variable Values” describes how to use the BitBake -e option to examine variable values after a recipe has been parsed.
“Viewing Package Information with oe-pkgdata-util” describes how to use the oe-pkgdata-util utility to query PKGDATA_DIR and display package-related information for built packages.
“Viewing Dependencies Between Recipes and Tasks” describes how to use the BitBake -g option to display recipe dependency information used during the build.
“Viewing Task Variable Dependencies” describes how to use the bitbake-dumpsig command in conjunction with key subdirectories in the Build Directory to determine variable dependencies.
“Running Specific Tasks” describes how to use several BitBake options (例如 -c, -C, and -f) to run specific tasks in the build chain. It can be useful to run tasks “out-of-order” when trying isolate build issues.
“General BitBake Problems” describes how to use BitBake’s -D debug output option to reveal more about what BitBake is doing during the build.
“Building with No Dependencies” describes how to use the BitBake -b option to build a recipe while ignoring dependencies.
“Recipe Logging Mechanisms” describes how to use the many recipe logging functions to produce debugging output and report errors and warnings.
“Debugging Parallel Make Races” describes how to debug situations where the build consists of several parts that are run simultaneously and when the output or result of one part is not ready for use with a different part of the build that depends on that output.
“Debugging With the GNU Project Debugger (GDB) Remotely” describes how to use GDB to allow you to examine running programs, which can help you fix problems.
“Debugging with the GNU Project Debugger (GDB) on the Target” describes how to use GDB directly on target hardware for debugging.
“Other Debugging Tips” describes miscellaneous debugging tips that can be useful.
3.30.1. Viewing Logs from Failed Tasks
You can find the log for a task in the file ${WORKDIR}/temp/log.do_taskname. For example, the log for the do_compile task of the QEMU minimal image for the x86 machine (qemux86) might be in tmp/work/qemux86-poky-linux/core-image-minimal/1.0-r0/temp/log.do_compile. To see the commands BitBake ran to generate a log, look at the corresponding run.do_taskname file in the same directory.
log.do_taskname and run.do_taskname are actually symbolic links to log.do_taskname.pid and log.run_taskname.pid, where pid is the PID the task had when it ran. The symlinks always point to the files corresponding to the most recent run.
3.30.2. Viewing Variable Values
Sometimes you need to know the value of a variable as a result of BitBake’s parsing step. This could be because some unexpected behavior occurred in your project. Perhaps an attempt to modify a variable did not work out as expected.
BitBake’s -e option is used to display variable values after parsing. The following command displays the variable values after the configuration files (i.e. local.conf, bblayers.conf, bitbake.conf and so forth) have been parsed:
$ bitbake -e
The following command displays variable values after a specific recipe has been parsed. The variables include those from the configuration as well:
$ bitbake -e recipename
Note
Each recipe has its own private set of variables (datastore). Internally, after parsing the configuration, a copy of the resulting datastore is made prior to parsing each recipe. This copying implies that variables set in one recipe will not be visible to other recipes.
Likewise, each task within a recipe gets a private datastore based on the recipe datastore, which means that variables set within one task will not be visible to other tasks.
In the output of bitbake -e, each variable is preceded by a description of how the variable got its value, including temporary values that were later overriden. This description also includes variable flags (varflags) set on the variable. The output can be very helpful during debugging.
Variables that are exported to the environment are preceded by export in the output of bitbake -e. See the following example:
export CC="i586-poky-linux-gcc -m32 -march=i586 --sysroot=/home/ulf/poky/build/tmp/sysroots/qemux86"
In addition to variable values, the output of the bitbake -e and bitbake -e recipe commands includes the following information:
The output starts with a tree listing all configuration files and classes included globally, recursively listing the files they include or inherit in turn. Much of the behavior of the OpenEmbedded build system (including the behavior of the normal recipe build tasks) is implemented in the base class and the classes it inherits, rather than being built into BitBake itself.
After the variable values, all functions appear in the output. For shell functions, variables referenced within the function body are expanded. If a function has been modified using overrides or using override-style operators like _append and _prepend, then the final assembled function body appears in the output.
3.30.3. Viewing Package Information with oe-pkgdata-util
You can use the oe-pkgdata-util command-line utility to query PKGDATA_DIR and display various package-related information. When you use the utility, you must use it to view information on packages that have already been built.
Following are a few of the available oe-pkgdata-util subcommands.
Note
You can use the standard * and ? globbing wildcards as part of package names and paths.
oe-pkgdata-util list-pkgs [pattern]: Lists all packages that have been built, optionally limiting the match to packages that match pattern.
oe-pkgdata-util list-pkg-files package …: Lists the files and directories contained in the given packages.
Note
A different way to view the contents of a package is to look at the ${WORKDIR}/packages-split directory of the recipe that generates the package. This directory is created by the do_package task and has one subdirectory for each package the recipe generates, which contains the files stored in that package.If you want to inspect the ${WORKDIR}/packages-split directory, make sure that rm_work is not enabled when you build the recipe.
oe-pkgdata-util find-path path …: Lists the names of the packages that contain the given paths. For example, the following tells us that /usr/share/man/man1/make.1 is contained in the make-doc package:
$ oe-pkgdata-util find-path /usr/share/man/man1/make.1make-doc: /usr/share/man/man1/make.1
- oe-pkgdata-util lookup-recipe package …: Lists the name of the recipes that produce the given packages.
For more information on the oe-pkgdata-util command, use the help facility:
$ oe-pkgdata-util ‐‐help$ oe-pkgdata-util subcommand --help
3.30.4. Viewing Dependencies Between Recipes and Tasks
Sometimes it can be hard to see why BitBake wants to build other recipes before the one you have specified. Dependency information can help you understand why a recipe is built.
To generate dependency information for a recipe, run the following command:
$ bitbake -g recipename
This command writes the following files in the current directory:
pn-buildlist: A list of recipes/targets involved in building recipename. “Involved” here means that at least one task from the recipe needs to run when building recipename from scratch. Targets that are in ASSUME_PROVIDED are not listed.
task-depends.dot: A graph showing dependencies between tasks.
The graphs are in DOT format and can be converted to images (例如 using the dot tool from Graphviz).
Notes
- DOT files use a plain text format. The graphs generated using the bitbake -g command are often so large as to be difficult to read without special pruning (例如 with Bitbake’s -I option) and processing. Despite the form and size of the graphs, the corresponding .dot files can still be possible to read and provide useful information.
As an example, the task-depends.dot file contains lines such as the following:
"libxslt.do_configure" -> "libxml2.do_populate_sysroot"
The above example line reveals that the do_configure task in libxslt depends on the do_populate_sysroot task in libxml2, which is a normal DEPENDS dependency between the two recipes.
For an example of how .dot files can be processed, see the scripts/contrib/graph-tool Python script, which finds and displays paths between graph nodes.
You can use a different method to view dependency information by using the following command:
$ bitbake -g -u taskexp recipename
This command displays a GUI window from which you can view build-time and runtime dependencies for the recipes involved in building
recipename.
3.30.5. Viewing Task Variable Dependencies
As mentioned in the “Checksums (Signatures)” section of the BitBake User Manual, BitBake tries to automatically determine what variables a task depends on so that it can rerun the task if any values of the variables change. This determination is usually reliable. However, if you do things like construct variable names at runtime, then you might have to manually declare dependencies on those variables using vardeps as described in the “Variable Flags” section of the BitBake User Manual.
If you are unsure whether a variable dependency is being picked up automatically for a given task, you can list the variable dependencies BitBake has determined by doing the following:
- Build the recipe containing the task:
$ bitbake recipename
Inside the STAMPS_DIR directory, find the signature data (sigdata) file that corresponds to the task. The sigdata files contain a pickled Python database of all the metadata that went into creating the input checksum for the task. As an example, for the do_fetch task of the db recipe, the sigdata file might be found in the following location:
${BUILDDIR}/tmp/stamps/i586-poky-linux/db/6.0.30-r1.do_fetch.sigdata.7c048c18222b16ff0bcee2000ef648b1
For tasks that are accelerated through the shared state (sstate) cache, an additional siginfo file is written into SSTATE_DIR along with the cached task output. The siginfo files contain exactly the same information as sigdata files.
Run bitbake-dumpsig on the sigdata or siginfo file. Here is an example:
$ bitbake-dumpsig ${BUILDDIR}/tmp/stamps/i586-poky-linux/db/6.0.30-r1.do_fetch.sigdata.7c048c18222b16ff0bcee2000ef648b1
In the output of the above command, you will find a line like the following, which lists all the (inferred) variable dependencies for the task. This list also includes indirect dependencies from variables depending on other variables, recursively.
Task dependencies: ['PV', 'SRCREV', 'SRC_URI', 'SRC_URI[`md5`sum]', 'SRC_URI[`sha256`sum]', 'base_do_fetch']
Note
Functions (例如 base_do_fetch) also count as variable dependencies. These functions in turn depend on the variables they reference.The output of bitbake-dumpsig also includes the value each variable had, a list of dependencies for each variable, and BB_HASHBASE_WHITELIST information.
There is also a bitbake-diffsigs command for comparing two siginfo or sigdata files. This command can be helpful when trying to figure out what changed between two versions of a task. If you call bitbake-diffsigs with just one file, the command behaves like bitbake-dumpsig.
You can also use BitBake to dump out the signature construction information without executing tasks by using either of the following BitBake command-line options:
‐‐dump-signatures=SIGNATURE_HANDLER-S SIGNATURE_HANDLER
Note
Two common values for SIGNATURE_HANDLER are “none” and “printdiff”, which dump only the signature or compare the dumped signature with the cached one, respectively.
Using BitBake with either of these options causes BitBake to dump out sigdata files in the stamps directory for every task it would have executed instead of building the specified target package.
3.30.6. Viewing Metadata Used to Create the Input Signature of a Shared State Task
Seeing what metadata went into creating the input signature of a shared state (sstate) task can be a useful debugging aid. This information is available in signature information (siginfo) files in SSTATE_DIR. For information on how to view and interpret information in siginfo files, see the “Viewing Task Variable Dependencies” section.
For conceptual information on shared state, see the “Shared State” section in the Yocto Project Overview and Concepts Manual.
3.30.7. Invalidating Shared State to Force a Task to Run
The OpenEmbedded build system uses checksums and shared state cache to avoid unnecessarily rebuilding tasks. Collectively, this scheme is known as “shared state code.”
As with all schemes, this one has some drawbacks. It is possible that you could make implicit changes to your code that the checksum calculations do not take into account. These implicit changes affect a task’s output but do not trigger the shared state code into rebuilding a recipe. Consider an example during which a tool changes its output. Assume that the output of rpmdeps changes. The result of the change should be that all the package and package_write_rpm shared state cache items become invalid. However, because the change to the output is external to the code and therefore implicit, the associated shared state cache items do not become invalidated. In this case, the build process uses the cached items rather than running the task again. Obviously, these types of implicit changes can cause problems.
To avoid these problems during the build, you need to understand the effects of any changes you make. Realize that changes you make directly to a function are automatically factored into the checksum calculation. Thus, these explicit changes invalidate the associated area of shared state cache. However, you need to be aware of any implicit changes that are not obvious changes to the code and could affect the output of a given task.
When you identify an implicit change, you can easily take steps to invalidate the cache and force the tasks to run. The steps you can take are as simple as changing a function’s comments in the source code. For example, to invalidate package shared state files, change the comment statements of do_package or the comments of one of the functions it calls. Even though the change is purely cosmetic, it causes the checksum to be recalculated and forces the build system to run the task again.
Note
For an example of a commit that makes a cosmetic change to invalidate shared state, see this commit.
3.30.8. Running Specific Tasks
Any given recipe consists of a set of tasks. The standard BitBake behavior in most cases is: dofetch, do_unpack, do_patch, do_configure, do_compile, do_install, do_package, do_package_write*, and do_build. The default task is do_build and any tasks on which it depends build first. Some tasks, such as do_devshell, are not part of the default build chain. If you wish to run a task that is not part of the default build chain, you can use the -c option in BitBake. Here is an example:
$ bitbake matchbox-desktop -c devshell
The -c option respects task dependencies, which means that all other tasks (including tasks from other recipes) that the specified task depends on will be run before the task. Even when you manually specify a task to run with -c, BitBake will only run the task if it considers it “out of date”. See the “Stamp Files and the Rerunning of Tasks” section in the Yocto Project Overview and Concepts Manual for how BitBake determines whether a task is “out of date”.
If you want to force an up-to-date task to be rerun (例如 because you made manual modifications to the recipe’s WORKDIR that you want to try out), then you can use the -f option.
Note
The reason -f is never required when running the do_devshell task is because the [nostamp] variable flag is already set for the task.
The following example shows one way you can use the -f option:
$ bitbake matchbox-desktop..make some changes to the source code in the work directory..$ bitbake matchbox-desktop -c compile -f$ bitbake matchbox-desktop
This sequence first builds and then recompiles matchbox-desktop. The last command reruns all tasks (basically the packaging tasks) after the compile. BitBake recognizes that the do_compile task was rerun and therefore understands that the other tasks also need to be run again.
Another, shorter way to rerun a task and all normal recipe build tasks that depend on it is to use the -C option.
Note
This option is upper-cased and is separate from the -c option, which is lower-cased.
Using this option invalidates the given task and then runs the do_build task, which is the default task if no task is given, and the tasks on which it depends. You could replace the final two commands in the previous example with the following single command:
$ bitbake matchbox-desktop -C compile
Internally, the -f and -C options work by tainting (modifying) the input checksum of the specified task. This tainting indirectly causes the task and its dependent tasks to be rerun through the normal task dependency mechanisms.
Note
BitBake explicitly keeps track of which tasks have been tainted in this fashion, and will print warnings such as the following for builds involving such tasks:
WARNING: /home/ulf/poky/meta/recipes-sato/matchbox-desktop/matchbox-desktop_2.1.bb.do_compile is tainted from a forced runThe purpose of the warning is to let you know that the work directory and build output might not be in the clean state they would be in for a “normal” build, depending on what actions you took. To get rid of such warnings, you can remove the work directory and rebuild the recipe, as follows:
$ bitbake matchbox-desktop -c clean$ bitbake matchbox-desktop
You can view a list of tasks in a given package by running the do_listtasks task as follows:
$ bitbake matchbox-desktop -c listtasks
The results appear as output to the console and are also in the file ${WORKDIR}/temp/log.do_listtasks.
3.30.9. General BitBake Problems
You can see debug output from BitBake by using the -D option. The debug output gives more information about what BitBake is doing and the reason behind it. Each -D option you use increases the logging level. The most common usage is -DDD.
The output from bitbake -DDD -v targetname can reveal why BitBake chose a certain version of a package or why BitBake picked a certain provider. This command could also help you in a situation where you think BitBake did something unexpected.
3.30.10. Building with No Dependencies
To build a specific recipe (.bb file), you can use the following command form:
$ bitbake -b somepath/somerecipe.bb
This command form does not check for dependencies. Consequently, you should use it only when you know existing dependencies have been met.
Note
You can also specify fragments of the filename. In this case, BitBake checks for a unique match.
3.30.11. Recipe Logging Mechanisms
The Yocto Project provides several logging functions for producing debugging output and reporting errors and warnings. For Python functions, the following logging functions exist. All of these functions log to ${T}/log.do_task, and can also log to standard output (stdout) with the right settings:
bb.plain(msg): Writes msg as is to the log while also logging to stdout.
bb.note(msg): Writes “NOTE: msg” to the log. Also logs to stdout if BitBake is called with “-v”.
bb.debug(level, msg): Writes “DEBUG: msg” to the log. Also logs to stdout if the log level is greater than or equal to level. See the “-D” option in the BitBake User Manual for more information.
bb.warn(msg): Writes “WARNING: msg” to the log while also logging to stdout.
bb.error(msg): Writes “ERROR: msg” to the log while also logging to standard out (stdout).
Note
Calling this function does not cause the task to fail.bb.fatal(msg): This logging function is similar to bb.error(msg) but also causes the calling task to fail.
Note
bb.fatal() raises an exception, which means you do not need to put a “return” statement after the function.
The same logging functions are also available in shell functions, under the names bbplain, bbnote, bbdebug, bbwarn, bberror, and bbfatal. The logging class implements these functions. See that class in the meta/classes folder of the Source Directory for information.
3.30.11.1. Logging With Python
When creating recipes using Python and inserting code that handles build logs, keep in mind the goal is to have informative logs while keeping the console as “silent” as possible. Also, if you want status messages in the log, use the “debug” loglevel.
Following is an example written in Python. The code handles logging for a function that determines the number of tasks needed to be run. See the “do_listtasks” section for additional information:
python do_listtasks() {bb.debug(2, "Starting to figure out the task list")if noteworthy_condition:bb.note("There are 47 tasks to run")bb.debug(2, "Got to point xyz")if warning_trigger:bb.warn("Detected warning_trigger, this might be a problem later.")if recoverable_error:bb.error("Hit recoverable_error, you really need to fix this!")if fatal_error:bb.fatal("fatal_error detected, unable to print the task list")bb.plain("The tasks present are abc")bb.debug(2, "Finished figuring out the tasklist")}
3.30.11.2. Logging With Bash
When creating recipes using Bash and inserting code that handles build logs, you have the same goals - informative with minimal console output. The syntax you use for recipes written in Bash is similar to that of recipes written in Python described in the previous section.
Following is an example written in Bash. The code logs the progress of the do_my_function function.
do_my_function() {bbdebug 2 "Running do_my_function"if [ exceptional_condition ]; thenbbnote "Hit exceptional_condition"fibbdebug 2 "Got to point xyz"if [ warning_trigger ]; thenbbwarn "Detected warning_trigger, this might cause a problem later."fiif [ recoverable_error ]; thenbberror "Hit recoverable_error, correcting"fiif [ fatal_error ]; thenbbfatal "fatal_error detected"fibbdebug 2 "Completed do_my_function"}
3.30.12. 调试并行Make冲突
A parallel make race occurs when the build consists of several parts that are run simultaneously and a situation occurs when the output or result of one part is not ready for use with a different part of the build that depends on that output. Parallel make races are annoying and can sometimes be difficult to reproduce and fix. However, some simple tips and tricks exist that can help you debug and fix them. This section presents a real-world example of an error encountered on the Yocto Project autobuilder and the process used to fix it.
Note
If you cannot properly fix a make race condition, you can work around it by clearing either the PARALLEL_MAKE or PARALLEL_MAKEINST variables.
3.30.12.1. The Failure
For this example, assume that you are building an image that depends on the “neard” package. And, during the build, BitBake runs into problems and creates the following output.
Note
This example log file has longer lines artificially broken to make the listing easier to read.
If you examine the output or the log file, you see the failure during make:
| DEBUG: SITE files ['endian-little', 'bit-32', 'ix86-common', 'common-linux', 'common-glibc', 'i586-linux', 'common']| DEBUG: Executing shell function do_compile| NOTE: make -j 16| make --no-print-directory all-am| /bin/mkdir -p include/near| /bin/mkdir -p include/near| /bin/mkdir -p include/near| ln -s /home/pokybuild/yocto-autobuilder/yocto-slave/nightly-x86/build/build/tmp/work/i586-poky-linux/neard/0.14-r0/neard-0.14/include/types.h include/near/types.h| ln -s /home/pokybuild/yocto-autobuilder/yocto-slave/nightly-x86/build/build/tmp/work/i586-poky-linux/neard/0.14-r0/neard-0.14/include/log.h include/near/log.h| ln -s /home/pokybuild/yocto-autobuilder/yocto-slave/nightly-x86/build/build/tmp/work/i586-poky-linux/neard/0.14-r0/neard-0.14/include/plugin.h include/near/plugin.h| /bin/mkdir -p include/near| /bin/mkdir -p include/near| /bin/mkdir -p include/near| ln -s /home/pokybuild/yocto-autobuilder/yocto-slave/nightly-x86/build/build/tmp/work/i586-poky-linux/neard/0.14-r0/neard-0.14/include/tag.h include/near/tag.h| /bin/mkdir -p include/near| ln -s /home/pokybuild/yocto-autobuilder/yocto-slave/nightly-x86/build/build/tmp/work/i586-poky-linux/neard/0.14-r0/neard-0.14/include/adapter.h include/near/adapter.h| /bin/mkdir -p include/near| ln -s /home/pokybuild/yocto-autobuilder/yocto-slave/nightly-x86/build/build/tmp/work/i586-poky-linux/neard/0.14-r0/neard-0.14/include/ndef.h include/near/ndef.h| ln -s /home/pokybuild/yocto-autobuilder/yocto-slave/nightly-x86/build/build/tmp/work/i586-poky-linux/neard/0.14-r0/neard-0.14/include/tlv.h include/near/tlv.h| /bin/mkdir -p include/near| /bin/mkdir -p include/near| ln -s /home/pokybuild/yocto-autobuilder/yocto-slave/nightly-x86/build/build/tmp/work/i586-poky-linux/neard/0.14-r0/neard-0.14/include/setting.h include/near/setting.h| /bin/mkdir -p include/near| /bin/mkdir -p include/near| /bin/mkdir -p include/near| ln -s /home/pokybuild/yocto-autobuilder/yocto-slave/nightly-x86/build/build/tmp/work/i586-poky-linux/neard/0.14-r0/neard-0.14/include/device.h include/near/device.h| ln -s /home/pokybuild/yocto-autobuilder/yocto-slave/nightly-x86/build/build/tmp/work/i586-poky-linux/neard/0.14-r0/neard-0.14/include/nfc_copy.h include/near/nfc_copy.h| ln -s /home/pokybuild/yocto-autobuilder/yocto-slave/nightly-x86/build/build/tmp/work/i586-poky-linux/neard/0.14-r0/neard-0.14/include/snep.h include/near/snep.h| ln -s /home/pokybuild/yocto-autobuilder/yocto-slave/nightly-x86/build/build/tmp/work/i586-poky-linux/neard/0.14-r0/neard-0.14/include/version.h include/near/version.h| ln -s /home/pokybuild/yocto-autobuilder/yocto-slave/nightly-x86/build/build/tmp/work/i586-poky-linux/neard/0.14-r0/neard-0.14/include/dbus.h include/near/dbus.h| ./src/genbuiltin nfctype1 nfctype2 nfctype3 nfctype4 p2p > src/builtin.h| i586-poky-linux-gcc -m32 -march=i586 --sysroot=/home/pokybuild/yocto-autobuilder/yocto-slave/nightly-x86/build/build/tmp/sysroots/qemux86 -DHAVE_CONFIG_H -I. -I./include -I./src -I./gdbus -I/home/pokybuild/yocto-autobuilder/yocto-slave/nightly-x86/build/build/tmp/sysroots/qemux86/usr/include/glib-2.0-I/home/pokybuild/yocto-autobuilder/yocto-slave/nightly-x86/build/build/tmp/sysroots/qemux86/usr/lib/glib-2.0/include -I/home/pokybuild/yocto-autobuilder/yocto-slave/nightly-x86/build/build/tmp/sysroots/qemux86/usr/include/dbus-1.0 -I/home/pokybuild/yocto-autobuilder/yocto-slave/nightly-x86/build/build/tmp/sysroots/qemux86/usr/lib/dbus-1.0/include -I/home/pokybuild/yocto-autobuilder/yocto-slave/nightly-x86/build/build/tmp/sysroots/qemux86/usr/include/libnl3-DNEAR_PLUGIN_BUILTIN -DPLUGINDIR=\""/usr/lib/near/plugins"\"-DCONFIGDIR=\""/etc/neard\"" -O2 -pipe -g -feliminate-unused-debug-types -c-o tools/snep-send.o tools/snep-send.c| In file included from tools/snep-send.c:16:0:| tools/../src/near.h:41:23: fatal error: near/dbus.h: No such file or directory| #include <near/dbus.h>| ^| compilation terminated.| make[1]: *** [tools/snep-send.o] Error 1| make[1]: *** Waiting for unfinished jobs....| make: *** [all] Error 2| ERROR: oe_runmake failed
3.30.12.2. Reproducing the Error
Because race conditions are intermittent, they do not manifest themselves every time you do the build. In fact, most times the build will complete without problems even though the potential race condition exists. Thus, once the error surfaces, you need a way to reproduce it.
In this example, compiling the “neard” package is causing the problem. So the first thing to do is build “neard” locally. Before you start the build, set the PARALLEL_MAKE variable in your local.conf file to a high number (例如 “-j 20”). Using a high value for PARALLEL_MAKE increases the chances of the race condition showing up:
$ bitbake neard
Once the local build for “neard” completes, start a devshell build:
$ bitbake neard -c devshell
For information on how to use a devshell, see the “Using a Development Shell” section.
In the devshell, do the following:
$ make clean$ make tools/snep-send.o
The devshell commands cause the failure to clearly be visible. In this case, a missing dependency exists for the “neard” Makefile target. Here is some abbreviated, sample output with the missing dependency clearly visible at the end:
i586-poky-linux-gcc -m32 -march=i586 --sysroot=/home/scott-lenovo/.........tools/snep-send.cIn file included from tools/snep-send.c:16:0:tools/../src/near.h:41:23: fatal error: near/dbus.h: No such file or directory#include <near/dbus.h>^compilation terminated.make: *** [tools/snep-send.o] Error 1$
3.30.12.3. Creating a Patch for the Fix
Because there is a missing dependency for the Makefile target, you need to patch the Makefile.am file, which is generated from Makefile.in. You can use Quilt to create the patch:
$ quilt new parallelmake.patchPatch patches/parallelmake.patch is now on top$ quilt add Makefile.amFile Makefile.am added to patch patches/parallelmake.patch
For more information on using Quilt, see the “Using Quilt in Your Workflow” section.
At this point you need to make the edits to Makefile.am to add the missing dependency. For our example, you have to add the following line to the file:
tools/snep-send.$(OBJEXT): include/near/dbus.h
Once you have edited the file, use the refresh command to create the patch:
$ quilt refreshRefreshed patch patches/parallelmake.patch
Once the patch file exists, you need to add it back to the originating recipe folder. Here is an example assuming a top-level Source Directory named poky:
$ cp patches/parallelmake.patch poky/meta/recipes-connectivity/neard/neard
The final thing you need to do to implement the fix in the build is to update the “neard” recipe (i.e. neard-0.14.bb) so that the SRC_URI statement includes the patch file. The recipe file is in the folder above the patch. Here is what the edited SRC_URI statement would look like:
SRC_URI = "${KERNELORG_MIRROR}/linux/network/nfc/${BPN}-${PV}.tar.xz \file://neard.in \file://neard.service.in \file://parallelmake.patch \"
With the patch complete and moved to the correct folder and the SRC_URI statement updated, you can exit the devshell:
$ exit
3.30.12.4. Testing the Build
With everything in place, you can get back to trying the build again locally:
$ bitbake neard
This build should succeed.
Now you can open up a devshell again and repeat the clean and make operations as follows:
$ bitbake neard -c devshell$ make clean$ make tools/snep-send.o
The build should work without issue.
As with all solved problems, if they originated upstream, you need to submit the fix for the recipe in OE-Core and upstream so that the problem is taken care of at its source. See the “Submitting a Change to the Yocto Project” section for more information.
3.30.13. Debugging With the GNU Project Debugger (GDB) Remotely
GDB allows you to examine running programs, which in turn helps you to understand and fix problems. It also allows you to perform post-mortem style analysis of program crashes. GDB is available as a package within the Yocto Project and is installed in SDK images by default. See the “Images” chapter in the Yocto Project Reference Manual for a description of these images. You can find information on GDB at http://sourceware.org/gdb/.
Tip
For best results, install debug (-dbg) packages for the applications you are going to debug. Doing so makes extra debug symbols available that give you more meaningful output.
Sometimes, due to memory or disk space constraints, it is not possible to use GDB directly on the remote target to debug applications. These constraints arise because GDB needs to load the debugging information and the binaries of the process being debugged. Additionally, GDB needs to perform many computations to locate information such as function names, variable names and values, stack traces and so forth - even before starting the debugging process. These extra computations place more load on the target system and can alter the characteristics of the program being debugged.
To help get past the previously mentioned constraints, you can use gdbserver, which runs on the remote target and does not load any debugging information from the debugged process. Instead, a GDB instance processes the debugging information that is run on a remote computer - the host GDB. The host GDB then sends control commands to gdbserver to make it stop or start the debugged program, as well as read or write memory regions of that debugged program. All the debugging information loaded and processed as well as all the heavy debugging is done by the host GDB. Offloading these processes gives the gdbserver running on the target a chance to remain small and fast.
Because the host GDB is responsible for loading the debugging information and for doing the necessary processing to make actual debugging happen, you have to make sure the host can access the unstripped binaries complete with their debugging information and also be sure the target is compiled with no optimizations. The host GDB must also have local access to all the libraries used by the debugged program. Because gdbserver does not need any local debugging information, the binaries on the remote target can remain stripped. However, the binaries must also be compiled without optimization so they match the host’s binaries.
To remain consistent with GDB documentation and terminology, the binary being debugged on the remote target machine is referred to as the “inferior” binary. For documentation on GDB see the GDB site.
The following steps show you how to debug using the GNU project debugger.
Configure your build system to construct the companion debug filesystem:
In your
local.conffile, set the following:IMAGE_GEN_DEBUGFS = “1” IMAGE_FSTYPES_DEBUGFS = “tar.bz2”
These options cause the OpenEmbedded build system to generate a special companion filesystem fragment, which contains the matching source and debug symbols to your deployable filesystem. The build system does this by looking at what is in the deployed filesystem, and pulling the corresponding -dbg packages.
The companion debug filesystem is not a complete filesystem, but only contains the debug fragments. This filesystem must be combined with the full filesystem for debugging. Subsequent steps in this procedure show how to combine the partial filesystem with the full filesystem.
Configure the system to include gdbserver in the target filesystem:
Make the following addition in either your
local.conffile or in an image recipe:IMAGE_INSTALL_append = “ gdbserver”
The change makes sure the gdbserver package is included.
Build the environment:
Use the following command to construct the image and the companion Debug Filesystem:
$ bitbake image
Build the cross GDB component and make it available for debugging. Build the SDK that matches the image. Building the SDK is best for a production build that can be used later for debugging, especially during long term maintenance:
$ bitbake -c populate_sdk image
Alternatively, you can build the minimal toolchain components that match the target. Doing so creates a smaller than typical SDK and only contains a minimal set of components with which to build simple test applications, as well as run the debugger:
$ bitbake meta-toolchain
A final method is to build Gdb itself within the build system:
$ bitbake gdb-cross-architecture
Doing so produces a temporary copy of cross-gdb you can use for debugging during development. While this is the quickest approach, the two previous methods in this step are better when considering long-term maintenance strategies.
Note
If you run bitbake gdb-cross, the OpenEmbedded build system suggests the actual image (例如 gdb-cross-i586). The suggestion is usually the actual name you want to use.Set up the debugfs
Run the following commands to set up the debugfs:
$ mkdir debugfs$ cd debugfs$ tar xvfj build-dir/tmp-glibc/deploy/images/machine/image.rootfs.tar.bz2$ tar xvfj build-dir/tmp-glibc/deploy/images/machine/image-dbg.rootfs.tar.bz2
Set up GDB
Install the SDK (if you built one) and then source the correct environment file. Sourcing the environment file puts the SDK in your PATH environment variable.
If you are using the build system, Gdb is located in build-dir/tmp/sysroots/host/usr/bin/architecture/architecture-gdb
Boot the target:
For information on how to run QEMU, see the QEMU Documentation.
Note
Be sure to verify that your host can access the target via TCP.Debug a program:
Debugging a program involves running gdbserver on the target and then running Gdb on the host. The example in this step debugs gzip:
root@qemux86:~# gdbserver localhost:1234 /bin/gzip —help
For additional gdbserver options, see the GDB Server Documentation.
After running gdbserver on the target, you need to run Gdb on the host and configure it and connect to the target. Use these commands:
$ cd directory-holding-the-debugfs-directory$ arch-gdb(gdb) set sysroot debugfs(gdb) set substitute-path /usr/src/debug debugfs/usr/src/debug(gdb) target remote IP-of-target:1234
At this point, everything should automatically load (i.e. matching binaries, symbols and headers).
Note
The Gdb set commands in the previous example can be placed into the users ~/.gdbinit file. Upon starting, Gdb automatically runs whatever commands are in that file.Deploying without a full image rebuild:
In many cases, during development you want a quick method to deploy a new binary to the target and debug it, without waiting for a full image build.
One approach to solving this situation is to just build the component you want to debug. Once you have built the component, copy the executable directly to both the target and the host debugfs.
If the binary is processed through the debug splitting in OpenEmbedded, you should also copy the debug items (i.e. .debug contents and corresponding /usr/src/debug files) from the work directory. Here is an example:
$ bitbake bash$ bitbake -c devshell bash$ cd ..$ scp packages-split/bash/bin/bash target:/bin/bash$ cp -a packages-split/bash-dbg/* path/debugfs
3.30.14. Debugging with the GNU Project Debugger (GDB) on the Target
The previous section addressed using GDB remotely for debugging purposes, which is the most usual case due to the inherent hardware limitations on many embedded devices. However, debugging in the target hardware itself is also possible with more powerful devices. This section describes what you need to do in order to support using GDB to debug on the target hardware.
To support this kind of debugging, you need do the following:
Ensure that GDB is on the target. You can do this by adding “gdb” to IMAGE_INSTALL:
IMAGE_INSTALL_append = “ gdb”
Alternatively, you can add “tools-debug” to IMAGE_FEATURES:
IMAGE_FEATURES_append = “ tools-debug”
Ensure that debug symbols are present. You can make sure these symbols are present by installing -dbg:
IMAGE_INSTALL_append = “ packagename-dbg”
Alternatively, you can do the following to include all the debug symbols:
IMAGE_FEATURES_append = “ dbg-pkgs”
Note
To improve the debug information accuracy, you can reduce the level of optimization used by the compiler. For example, when adding the following line to yourlocal.conffile, you will reduce optimization from FULL_OPTIMIZATION of “-O2” to DEBUG_OPTIMIZATION of “-O -fno-omit-frame-pointer”:DEBUG_BUILD = "1"
Consider that this will reduce the application’s performance and is recommended only for debugging purposes.
3.30.15. Other Debugging Tips
Here are some other tips that you might find useful:
When adding new packages, it is worth watching for undesirable items making their way into compiler command lines. For example, you do not want references to local system files like /usr/lib/ or /usr/include/.
If you want to remove the psplash boot splashscreen, add psplash=false to the kernel command line. Doing so prevents psplash from loading and thus allows you to see the console. It is also possible to switch out of the splashscreen by switching the virtual console (例如 Fn+Left or Fn+Right on a Zaurus).
Removing TMPDIR (usually tmp/, within the Build Directory) can often fix temporary build issues. Removing TMPDIR is usually a relatively cheap operation, because task output will be cached in SSTATE_DIR (usually sstate-cache/, which is also in the Build Directory).
Note
Removing TMPDIR might be a workaround rather than a fix. Consequently, trying to determine the underlying cause of an issue before removing the directory is a good idea.Understanding how a feature is used in practice within existing recipes can be very helpful. It is recommended that you configure some method that allows you to quickly search through files.
Using GNU Grep, you can use the following shell function to recursively search through common recipe-related files, skipping binary files, .git directories, and the Build Directory (assuming its name starts with “build”):
g() {grep -Ir \--exclude-dir=.git \--exclude-dir='build*' \--include='*.bb*' \--include='*.inc*' \--include='*.conf*' \--include='*.py*' \"$@"}
Following are some usage examples:
$ g FOO # Search recursively for "FOO"$ g -i foo # Search recursively for "foo", ignoring case$ g -w FOO # Search recursively for "FOO" as a word, ignoring 例如 "FOOBAR"
If figuring out how some feature works requires a lot of searching, it might indicate that the documentation should be extended or improved. In such cases, consider filing a documentation bug using the Yocto Project implementation of Bugzilla. For information on how to submit a bug against the Yocto Project, see the Yocto Project Bugzilla wiki page and the “Submitting a Defect Against the Yocto Project” section.
Note
The manuals might not be the right place to document variables that are purely internal and have a limited scope (例如 internal variables used to implement a single .bbclass file).
3.31. Making Changes to the Yocto Project
Because the Yocto Project is an open-source, community-based project, you can effect changes to the project. This section presents procedures that show you how to submit a defect against the project and how to submit a change.
3.31.1. Submitting a Defect Against the Yocto Project
Use the Yocto Project implementation of Bugzilla to submit a defect (bug) against the Yocto Project. For additional information on this implementation of Bugzilla see the “Yocto Project Bugzilla” section in the Yocto Project Reference Manual. For more detail on any of the following steps, see the Yocto Project Bugzilla wiki page.
Use the following general steps to submit a bug”
Open the Yocto Project implementation of Bugzilla.
Click “File a Bug” to enter a new bug.
Choose the appropriate “Classification”, “Product”, and “Component” for which the bug was found. Bugs for the Yocto Project fall into one of several classifications, which in turn break down into several products and components. For example, for a bug against the meta-intel layer, you would choose “Build System, Metadata & Runtime”, “BSPs”, and “bsps-meta-intel”, respectively.
Choose the “Version” of the Yocto Project for which you found the bug (例如 2.7).
Determine and select the “Severity” of the bug. The severity indicates how the bug impacted your work.
Choose the “Hardware” that the bug impacts.
Choose the “Architecture” that the bug impacts.
Choose a “Documentation change” item for the bug. Fixing a bug might or might not affect the Yocto Project documentation. If you are unsure of the impact to the documentation, select “Don’t Know”.
Provide a brief “Summary” of the bug. Try to limit your summary to just a line or two and be sure to capture the essence of the bug.
Provide a detailed “Description” of the bug. You should provide as much detail as you can about the context, behavior, output, and so forth that surrounds the bug. You can even attach supporting files for output from logs by using the “Add an attachment” button.
Click the “Submit Bug” button submit the bug. A new Bugzilla number is assigned to the bug and the defect is logged in the bug tracking system.
Once you file a bug, the bug is processed by the Yocto Project Bug Triage Team and further details concerning the bug are assigned (例如 priority and owner). You are the “Submitter” of the bug and any further categorization, progress, or comments on the bug result in Bugzilla sending you an automated email concerning the particular change or progress to the bug.
3.31.2. Submitting a Change to the Yocto Project
Contributions to the Yocto Project and OpenEmbedded are very welcome. Because the system is extremely configurable and flexible, we recognize that developers will want to extend, configure or optimize it for their specific uses.
The Yocto Project uses a mailing list and a patch-based workflow that is similar to the Linux kernel but contains important differences. In general, a mailing list exists through which you can submit patches. You should send patches to the appropriate mailing list so that they can be reviewed and merged by the appropriate maintainer. The specific mailing list you need to use depends on the location of the code you are changing. Each component (例如 layer) should have a README file that indicates where to send the changes and which process to follow.
You can send the patch to the mailing list using whichever approach you feel comfortable with to generate the patch. Once sent, the patch is usually reviewed by the community at large. If somebody has concerns with the patch, they will usually voice their concern over the mailing list. If a patch does not receive any negative reviews, the maintainer of the affected layer typically takes the patch, tests it, and then based on successful testing, merges the patch.
The “poky” repository, which is the Yocto Project’s reference build environment, is a hybrid repository that contains several individual pieces (例如 BitBake, Metadata, documentation, and so forth) built using the combo-layer tool. The upstream location used for submitting changes varies by component:
Core Metadata: Send your patch to the openembedded-core mailing list. For example, a change to anything under the meta or scripts directories should be sent to this mailing list.
BitBake: For changes to BitBake (i.e. anything under the bitbake directory), send your patch to the bitbake-devel mailing list.
“meta-“ trees*: These trees contain Metadata. Use the poky mailing list.
For changes to other layers hosted in the Yocto Project source repositories (i.e. yoctoproject.org), tools, and the Yocto Project documentation, use the Yocto Project general mailing list.
Note
Sometimes a layer’s documentation specifies to use a particular mailing list. If so, use that list.For additional recipes that do not fit into the core Metadata, you should determine which layer the recipe should go into and submit the change in the manner recommended by the documentation (例如 the README file) supplied with the layer. If in doubt, please ask on the Yocto general mailing list or on the openembedded-devel mailing list.
You can also push a change upstream and request a maintainer to pull the change into the component’s upstream repository. You do this by pushing to a contribution repository that is upstream. See the “Git Workflows and the Yocto Project” section in the Yocto Project Overview and Concepts Manual for additional concepts on working in the Yocto Project development environment.
Two commonly used testing repositories exist for OpenEmbedded-Core:
“ross/mut” branch: The “mut” (master-under-test) tree exists in the poky-contrib repository in the Yocto Project source repositories.
“master-next” branch: This branch is part of the main “poky” repository in the Yocto Project source repositories.
Maintainers use these branches to test submissions prior to merging patches. Thus, you can get an idea of the status of a patch based on whether the patch has been merged into one of these branches.
Note
This system is imperfect and changes can sometimes get lost in the flow. Asking about the status of a patch or change is reasonable if the change has been idle for a while with no feedback. The Yocto Project does have plans to use Patchwork to track the status of patches and also to automatically preview patches.
The following sections provide procedures for submitting a change.
3.31.2.1. Using Scripts to Push a Change Upstream and Request a Pull
Follow this procedure to push a change to an upstream “contrib” Git repository:
Note
You can find general Git information on how to push a change upstream in the Git Community Book.
Make Your Changes Locally: Make your changes in your local Git repository. You should make small, controlled, isolated changes. Keeping changes small and isolated aids review, makes merging/rebasing easier and keeps the change history clean should anyone need to refer to it in future.
Stage Your Changes: Stage your changes by using the git add command on each file you changed.
Commit Your Changes: Commit the change by using the git commit command. Make sure your commit information follows standards by following these accepted conventions:
Be sure to include a “Signed-off-by:” line in the same style as required by the Linux kernel. Adding this line signifies that you, the submitter, have agreed to the Developer’s Certificate of Origin 1.1 as follows:
Developer's Certificate of Origin 1.1By making a contribution to this project, I certify that:(a) The contribution was created in whole or in part by me and Ihave the right to submit it under the open source licenseindicated in the file; or(b) The contribution is based upon previous work that, to the bestof my knowledge, is covered under an appropriate open sourcelicense and I have the right under that license to submit thatwork with modifications, whether created in whole or in partby me, under the same open source license (unless I ampermitted to submit under a different license), as indicatedin the file; or(c) The contribution was provided directly to me by some otherperson who certified (a), (b) or (c) and I have not modifiedit.(d) I understand and agree that this project and the contributionare public and that a record of the contribution (including allpersonal information I submit with it, including my sign-off) ismaintained indefinitely and may be redistributed consistent withthis project or the open source license(s) involved.
Provide a single-line summary of the change. and, if more explanation is needed, provide more detail in the body of the commit. This summary is typically viewable in the “shortlist” of changes. Thus, providing something short and descriptive that gives the reader a summary of the change is useful when viewing a list of many commits. You should prefix this short description with the recipe name (if changing a recipe), or else with the short form path to the file being changed.
For the body of the commit message, provide detailed information that describes what you changed, why you made the change, and the approach you used. It might also be helpful if you mention how you tested the change. Provide as much detail as you can in the body of the commit message.
Note
You do not need to provide a more detailed explanation of a change if the change is minor to the point of the single line summary providing all the information.If the change addresses a specific bug or issue that is associated with a bug-tracking ID, include a reference to that ID in your detailed description. For example, the Yocto Project uses a specific convention for bug references - any commit that addresses a specific bug should use the following form for the detailed description. Be sure to use the actual bug-tracking ID from Bugzilla for bug-id: ``` Fixes [YOCTO #bug-id]
detailed description of change ```
Push Your Commits to a “Contrib” Upstream: If you have arranged for permissions to push to an upstream contrib repository, push the change to that repository:
$ git push upstream_remote_repo local_branch_name
For example, suppose you have permissions to push into the upstream meta-intel-contrib repository and you are working in a local branch named your_name/README. The following command pushes your local commits to the meta-intel-contrib upstream repository and puts the commit in a branch named your_name/README:
$ git push meta-intel-contrib your_name/README
Determine Who to Notify: Determine the maintainer or the mailing list that you need to notify for the change.
Before submitting any change, you need to be sure who the maintainer is or what mailing list that you need to notify. Use either these methods to find out:
Maintenance File: Examine the maintainers.inc file, which is located in the Source Directory at meta/conf/distro/include, to see who is responsible for code.
Search by File: Using Git, you can enter the following command to bring up a short list of all commits against a specific file:
git shortlog -- filename
Just provide the name of the file for which you are interested. The information returned is not ordered by history but does include a list of everyone who has committed grouped by name. From the list, you can see who is responsible for the bulk of the changes against the file.
Examine the List of Mailing Lists: For a list of the Yocto Project and related mailing lists, see the “Mailing lists” section in the Yocto Project Reference Manual.
Make a Pull Request: Notify the maintainer or the mailing list that you have pushed a change by making a pull request.
The Yocto Project provides two scripts that conveniently let you generate and send pull requests to the Yocto Project. These scripts are create-pull-request and send-pull-request. You can find these scripts in the scripts directory within the Source Directory (例如 ~/poky/scripts).
Using these scripts correctly formats the requests without introducing any whitespace or HTML formatting. The maintainer that receives your patches either directly or through the mailing list needs to be able to save and apply them directly from your emails. Using these scripts is the preferred method for sending patches.
First, create the pull request. For example, the following command runs the script, specifies the upstream repository in the contrib directory into which you pushed the change, and provides a subject line in the created patch files:
$ ~/poky/scripts/create-pull-request -u meta-intel-contrib -s "Updated Manual Section Reference in README"
Running this script forms *.patch files in a folder named pull-PID in the current directory. One of the patch files is a cover letter.
Before running the send-pull-request script, you must edit the cover letter patch to insert information about your change. After editing the cover letter, send the pull request. For example, the following command runs the script and specifies the patch directory and email address. In this example, the email address is a mailing list:
$ ~/poky/scripts/send-pull-request -p ~/meta-intel/pull-10565 -t meta-intel@yoctoproject.org
You need to follow the prompts as the script is interactive.
Note
For help on using these scripts, simply provide the -h argument as follows:$ poky/scripts/create-pull-request -h$ poky/scripts/send-pull-request -h
3.31.2.2. Using Email to Submit a Patch
You can submit patches without using the create-pull-request and send-pull-request scripts described in the previous section. However, keep in mind, the preferred method is to use the scripts.
Depending on the components changed, you need to submit the email to a specific mailing list. For some guidance on which mailing list to use, see the list at the beginning of this section. For a description of all the available mailing lists, see the “Mailing Lists” section in the Yocto Project Reference Manual.
Here is the general procedure on how to submit a patch through email without using the scripts:
Make Your Changes Locally: Make your changes in your local Git repository. You should make small, controlled, isolated changes. Keeping changes small and isolated aids review, makes merging/rebasing easier and keeps the change history clean should anyone need to refer to it in future.
Stage Your Changes: Stage your changes by using the git add command on each file you changed.
Commit Your Changes: Commit the change by using the git commit —signoff command. Using the —signoff option identifies you as the person making the change and also satisfies the Developer’s Certificate of Origin (DCO) shown earlier.
When you form a commit, you must follow certain standards established by the Yocto Project development team. See Step 3 in the previous section for information on how to provide commit information that meets Yocto Project commit message standards.
Format the Commit: Format the commit into an email message. To format commits, use the git format-patch command. When you provide the command, you must include a revision list or a number of patches as part of the command. For example, either of these two commands takes your most recent single commit and formats it as an email message in the current directory:
$ git format-patch -1
or
$ git format-patch HEAD~
After the command is run, the current directory contains a numbered .patch file for the commit.
If you provide several commits as part of the command, the git format-patch command produces a series of numbered files in the current directory – one for each commit. If you have more than one patch, you should also use the —cover option with the command, which generates a cover letter as the first “patch” in the series. You can then edit the cover letter to provide a description for the series of patches. For information on the git format-patch command, see GIT_FORMAT_PATCH(1) displayed using the man git-format-patch command.
Note
If you are or will be a frequent contributor to the Yocto Project or to OpenEmbedded, you might consider requesting a contrib area and the necessary associated rights.Import the Files Into Your Mail Client: Import the files into your mail client by using the git send-email command.
Note
In order to use git send-email, you must have the proper Git packages installed on your host. For Ubuntu, Debian, and Fedora the package is git-email.The git send-email command sends email by using a local or remote Mail Transport Agent (MTA) such as msmtp, sendmail, or through a direct smtp configuration in your Git ~/.gitconfig file. If you are submitting patches through email only, it is very important that you submit them without any whitespace or HTML formatting that either you or your mailer introduces. The maintainer that receives your patches needs to be able to save and apply them directly from your emails. A good way to verify that what you are sending will be applicable by the maintainer is to do a dry run and send them to yourself and then save and apply them as the maintainer would.
The git send-email command is the preferred method for sending your patches using email since there is no risk of compromising whitespace in the body of the message, which can occur when you use your own mail client. The command also has several options that let you specify recipients and perform further editing of the email message. For information on how to use the git send-email command, see GIT-SEND-EMAIL(1) displayed using the man git-send-email command.
3.32. Working With Licenses
As mentioned in the “Licensing” section in the Yocto Project Overview and Concepts Manual, open source projects are open to the public and they consequently have different licensing structures in place. This section describes the mechanism by which the OpenEmbedded build system tracks changes to licensing text and covers how to maintain open source license compliance during your project’s lifecycle. The section also describes how to enable commercially licensed recipes, which by default are disabled.
3.32.1. 跟踪LICENING改动
The license of an upstream project might change in the future. In order to prevent these changes going unnoticed, the LIC_FILES_CHKSUM variable tracks changes to the license text. The checksums are validated at the end of the configure step, and if the checksums do not match, the build will fail.
3.32.1.1. Specifying the LIC_FILES_CHKSUM Variable
The LIC_FILES_CHKSUM variable contains checksums of the license text in the source code for the recipe. Following is an example of how to specify LIC_FILES_CHKSUM:
LIC_FILES_CHKSUM = "file://COPYING;`md5`=xxxx \file://licfile1.txt;beginline=5;endline=29;`md5`=yyyy \file://licfile2.txt;endline=50;`md5`=zzzz \..."
Notes
When using “beginline” and “endline”, realize that line numbering begins with one and not zero. Also, the included lines are inclusive (i.e. lines five through and including 29 in the previous example for licfile1.txt).
When a license check fails, the selected license text is included as part of the QA message. Using this output, you can determine the exact start and finish for the needed license text.
The build system uses the S variable as the default directory when searching files listed in LIC_FILES_CHKSUM. The previous example employs the default directory.
Consider this next example:
LIC_FILES_CHKSUM = "file://src/ls.c;beginline=5;endline=16;\`md5`=bb14ed3c4cda583abc85401304b5cd4e"LIC_FILES_CHKSUM = "file://${WORKDIR}/license.html;`md5`=5c94767cedb5d6987c902ac850ded2c6"
The first line locates a file in ${S}/src/ls.c and isolates lines five through 16 as license text. The second line refers to a file in WORKDIR.
Note that LIC_FILES_CHKSUM variable is mandatory for all recipes, unless the LICENSE variable is set to “CLOSED”.
3.32.1.2. Explanation of Syntax
As mentioned in the previous section, the LIC_FILES_CHKSUM variable lists all the important files that contain the license text for the source code. It is possible to specify a checksum for an entire file, or a specific section of a file (specified by beginning and ending line numbers with the “beginline” and “endline” parameters, respectively). The latter is useful for source files with a license notice header, README documents, and so forth. If you do not use the “beginline” parameter, then it is assumed that the text begins on the first line of the file. Similarly, if you do not use the “endline” parameter, it is assumed that the license text ends with the last line of the file.
The “md5“ parameter stores the md5 checksum of the license text. If the license text changes in any way as compared to this parameter then a mismatch occurs. This mismatch triggers a build failure and notifies the developer. Notification allows the developer to review and address the license text changes. Also note that if a mismatch occurs during the build, the correct md5 checksum is placed in the build log and can be easily copied to the recipe.
There is no limit to how many files you can specify using the LIC_FILES_CHKSUM variable. Generally, however, every project requires a few specifications for license tracking. Many projects have a “COPYING” file that stores the license information for all the source code files. This practice allows you to just track the “COPYING” file as long as it is kept up to date.
Tips
If you specify an empty or invalid “
md5“ parameter, BitBake returns anmd5mis-match error and displays the correct “md5“ parameter value during the build. The correct parameter is also captured in the build log.If the whole file contains only license text, you do not need to use the “beginline” and “endline” parameters.
3.32.2. Enabling Commercially Licensed Recipes
By default, the OpenEmbedded build system disables components that have commercial or other special licensing requirements. Such requirements are defined on a recipe-by-recipe basis through the LICENSE_FLAGS variable definition in the affected recipe. For instance, the poky/meta/recipes-multimedia/gstreamer/gst-plugins-ugly recipe contains the following statement:
LICENSE_FLAGS = "commercial"
Here is a slightly more complicated example that contains both an explicit recipe name and version (after variable expansion):
LICENSE_FLAGS = "license_`${PN}`_${PV}"
In order for a component restricted by a LICENSE_FLAGS definition to be enabled and included in an image, it needs to have a matching entry in the global LICENSE_FLAGS_WHITELIST variable, which is a variable typically defined in your local.conf file. For example, to enable the poky/meta/recipes-multimedia/gstreamer/gst-plugins-ugly package, you could add either the string “commercial_gst-plugins-ugly” or the more general string “commercial” to LICENSE_FLAGS_WHITELIST. See the “License Flag Matching” section for a full explanation of how LICENSE_FLAGS matching works. Here is the example:
LICENSE_FLAGS_WHITELIST = "commercial_gst-plugins-ugly"
Likewise, to additionally enable the package built from the recipe containing LICENSEFLAGS = “license${PN}_${PV}”, and assuming that the actual recipe name was emgd_1.10.bb, the following string would enable that package as well as the original gst-plugins-ugly package:
LICENSE_FLAGS_WHITELIST = "commercial_gst-plugins-ugly license_emgd_1.10"
As a convenience, you do not need to specify the complete license string in the whitelist for every package. You can use an abbreviated form, which consists of just the first portion or portions of the license string before the initial underscore character or characters. A partial string will match any license that contains the given string as the first portion of its license. For example, the following whitelist string will also match both of the packages previously mentioned as well as any other packages that have licenses starting with “commercial” or “license”.
LICENSE_FLAGS_WHITELIST = "commercial license"
3.32.2.1. License Flag Matching
License flag matching allows you to control what recipes the OpenEmbedded build system includes in the build. Fundamentally, the build system attempts to match LICENSE_FLAGS strings found in recipes against LICENSE_FLAGS_WHITELIST strings found in the whitelist. A match causes the build system to include a recipe in the build, while failure to find a match causes the build system to exclude a recipe.
In general, license flag matching is simple. However, understanding some concepts will help you correctly and effectively use matching.
Before a flag defined by a particular recipe is tested against the contents of the whitelist, the expanded string _${PN} is appended to the flag. This expansion makes each LICENSE_FLAGS value recipe-specific. After expansion, the string is then matched against the whitelist. Thus, specifying LICENSE_FLAGS = “commercial” in recipe “foo”, for example, results in the string “commercial_foo”. And, to create a match, that string must appear in the whitelist.
Judicious use of the LICENSE_FLAGS strings and the contents of the LICENSE_FLAGS_WHITELIST variable allows you a lot of flexibility for including or excluding recipes based on licensing. For example, you can broaden the matching capabilities by using license flags string subsets in the whitelist.
Note
When using a string subset, be sure to use the part of the expanded string that precedes the appended underscore character (例如 usethispart_1.3, usethispart_1.4, and so forth).
For example, simply specifying the string “commercial” in the whitelist matches any expanded LICENSE_FLAGS definition that starts with the string “commercial” such as “commercial_foo” and “commercial_bar”, which are the strings the build system automatically generates for hypothetical recipes named “foo” and “bar” assuming those recipes simply specify the following:
LICENSE_FLAGS = "commercial"
Thus, you can choose to exhaustively enumerate each license flag in the whitelist and allow only specific recipes into the image, or you can use a string subset that causes a broader range of matches to allow a range of recipes into the image.
This scheme works even if the LICENSEFLAGS string already has ${PN} appended. For example, the build system turns the license flag “commercial_1.2_foo” into “commercial_1.2_foo_foo” and would match both the general “commercial” and the specific “commercial_1.2_foo” strings found in the whitelist, as expected.
Here are some other scenarios:
You can specify a versioned string in the recipe such as “commercial_foo_1.2” in a “foo” recipe. The build system expands this string to “commercial_foo_1.2_foo”. Combine this license flag with a whitelist that has the string “commercial” and you match the flag along with any other flag that starts with the string “commercial”.
Under the same circumstances, you can use “commercial_foo” in the whitelist and the build system not only matches “commercial_foo_1.2” but also matches any license flag with the string “commercial_foo”, regardless of the version.
You can be very specific and use both the package and version parts in the whitelist (例如 “commercial_foo_1.2”) to specifically match a versioned recipe.
3.32.2.2. Other Variables Related to Commercial Licenses
Other helpful variables related to commercial license handling exist and are defined in the poky/meta/conf/distro/include/default-distrovars.inc file:
COMMERCIAL_AUDIO_PLUGINS ?= ""COMMERCIAL_VIDEO_PLUGINS ?= ""
If you want to enable these components, you can do so by making sure you have statements similar to the following in your local.conf configuration file:
COMMERCIAL_AUDIO_PLUGINS = "gst-plugins-ugly-mad \gst-plugins-ugly-mpegaudioparse"COMMERCIAL_VIDEO_PLUGINS = "gst-plugins-ugly-mpeg2dec \gst-plugins-ugly-mpegstream gst-plugins-bad-mpegvideoparse"LICENSE_FLAGS_WHITELIST = "commercial_gst-plugins-ugly commercial_gst-plugins-bad commercial_qmmp"
Of course, you could also create a matching whitelist for those components using the more general “commercial” in the whitelist, but that would also enable all the other packages with LICENSE_FLAGS containing “commercial”, which you may or may not want:
LICENSE_FLAGS_WHITELIST = "commercial"
Specifying audio and video plug-ins as part of the COMMERCIAL_AUDIO_PLUGINS and COMMERCIAL_VIDEO_PLUGINS statements (along with the enabling LICENSE_FLAGS_WHITELIST) includes the plug-ins or components into built images, thus adding support for media formats or components.
3.32.3. Maintaining Open Source License Compliance During Your Product’s Lifecycle
One of the concerns for a development organization using open source software is how to maintain compliance with various open source licensing during the lifecycle of the product. While this section does not provide legal advice or comprehensively cover all scenarios, it does present methods that you can use to assist you in meeting the compliance requirements during a software release.
With hundreds of different open source licenses that the Yocto Project tracks, it is difficult to know the requirements of each and every license. However, the requirements of the major FLOSS licenses can begin to be covered by assuming that three main areas of concern exist:
Source code must be provided.
License text for the software must be provided.
Compilation scripts and modifications to the source code must be provided.
There are other requirements beyond the scope of these three and the methods described in this section (例如 the mechanism through which source code is distributed).
As different organizations have different methods of complying with open source licensing, this section is not meant to imply that there is only one single way to meet your compliance obligations, but rather to describe one method of achieving compliance. The remainder of this section describes methods supported to meet the previously mentioned three requirements. Once you take steps to meet these requirements, and prior to releasing images, sources, and the build system, you should audit all artifacts to ensure completeness.
Note
The Yocto Project generates a license manifest during image creation that is located in ${DEPLOY_DIR}/licenses/image_name-datestamp to assist with any audits.
3.32.3.1. Providing the Source Code
Compliance activities should begin before you generate the final image. The first thing you should look at is the requirement that tops the list for most compliance groups - providing the source. The Yocto Project has a few ways of meeting this requirement.
One of the easiest ways to meet this requirement is to provide the entire DL_DIR used by the build. This method, however, has a few issues. The most obvious is the size of the directory since it includes all sources used in the build and not just the source used in the released image. It will include toolchain source, and other artifacts, which you would not generally release. However, the more serious issue for most companies is accidental release of proprietary software. The Yocto Project provides an archiver class to help avoid some of these concerns.
Before you employ DL_DIR or the archiver class, you need to decide how you choose to provide source. The source archiver class can generate tarballs and SRPMs and can create them with various levels of compliance in mind.
One way of doing this (but certainly not the only way) is to release just the source as a tarball. You can do this by adding the following to the local.conf file found in the Build Directory:
INHERIT += "archiver"ARCHIVER_MODE[src] = "original"
During the creation of your image, the source from all recipes that deploy packages to the image is placed within subdirectories of DEPLOY_DIR/sources based on the LICENSE for each recipe. Releasing the entire directory enables you to comply with requirements concerning providing the unmodified source. It is important to note that the size of the directory can get large.
A way to help mitigate the size issue is to only release tarballs for licenses that require the release of source. Let us assume you are only concerned with GPL code as identified by running the following script:
# Script to archive a subset of packages matching specific license(s)# Source and license files are copied into sub folders of package folder# Must be run from build folder#!/bin/bashsrc_release_dir="source-release"mkdir -p $src_release_dirfor a in tmp/deploy/sources/*; dofor d in $a/*; do# Get package name from pathp=`basename $d`p=${p%-*}p=${p%-*}# Only archive GPL packages (update *GPL* regex for your license check)numfiles=`ls tmp/deploy/licenses/$p/*GPL* 2> /dev/null | wc -l`if [ $numfiles -gt 1 ]; thenecho Archiving $pmkdir -p $src_release_dir/$p/sourcecp $d/* $src_release_dir/$p/source 2> /dev/nullmkdir -p $src_release_dir/$p/licensecp tmp/deploy/licenses/$p/* $src_release_dir/$p/license 2> /dev/nullfidonedone
At this point, you could create a tarball from the gpl_source_release directory and provide that to the end user. This method would be a step toward achieving compliance with section 3a of GPLv2 and with section 6 of GPLv3.
3.32.3.2. Providing License Text
One requirement that is often overlooked is inclusion of license text. This requirement also needs to be dealt with prior to generating the final image. Some licenses require the license text to accompany the binary. You can achieve this by adding the following to your local.conf file:
COPY_LIC_MANIFEST = "1"COPY_LIC_DIRS = "1"LICENSE_CREATE_PACKAGE = "1"
Adding these statements to the configuration file ensures that the licenses collected during package generation are included on your image.
Note
Setting all three variables to “1” results in the image having two copies of the same license file. One copy resides in/usr/share/common-licensesand the other resides in/usr/share/license.The reason for this behavior is because COPY_LIC_DIRS and COPY_LIC_MANIFEST add a copy of the license when the image is built but do not offer a path for adding licenses for newly installed packages to an image. LICENSE_CREATE_PACKAGE adds a separate package and an upgrade path for adding licenses to an image.
As the source archiver class has already archived the original unmodified source that contains the license files, you would have already met the requirements for inclusion of the license information with source as defined by the GPL and other open source licenses.
3.32.3.3. Providing Compilation Scripts and Source Code Modifications
At this point, we have addressed all we need to prior to generating the image. The next two requirements are addressed during the final packaging of the release.
By releasing the version of the OpenEmbedded build system and the layers used during the build, you will be providing both compilation scripts and the source code modifications in one step.
If the deployment team has a BSP layer and a distro layer, and those those layers are used to patch, compile, package, or modify (in any way) any open source software included in your released images, you might be required to release those layers under section 3 of GPLv2 or section 1 of GPLv3. One way of doing that is with a clean checkout of the version of the Yocto Project and layers used during your build. Here is an example:
# We built using the warrior branch of the poky repo$ git clone -b warrior git://git.yoctoproject.org/poky$ cd poky# We built using the release_branch for our layers$ git clone -b release_branch git://git.mycompany.com/meta-my-bsp-layer$ git clone -b release_branch git://git.mycompany.com/meta-my-software-layer# clean up the .git repos$ find . -name ".git" -type d -exec rm -rf {} \;
One thing a development organization might want to consider for end-user convenience is to modify meta-poky/conf/bblayers.conf.sample to ensure that when the end user utilizes the released build system to build an image, the development organization’s layers are included in the bblayers.conf file automatically:
# POKY_BBLAYERS_CONF_VERSION is increased each time build/conf/`bblayers.conf`# changes incompatiblyPOKY_BBLAYERS_CONF_VERSION = "2"BBPATH = "${TOPDIR}"BBFILES ?= ""BBLAYERS ?= " \##OEROOT##/meta \##OEROOT##/meta-poky \##OEROOT##/meta-yocto-bsp \##OEROOT##/meta-mylayer \"
Creating and providing an archive of the Metadata layers (recipes, configuration files, and so forth) enables you to meet your requirements to include the scripts to control compilation as well as any modifications to the original source.
3.32.4. Copying Licenses that Do Not Exist
Some packages, such as the linux-firmware package, have many licenses that are not in any way common. You can avoid adding a lot of these types of common license files, which are only applicable to a specific package, by using the NO_GENERIC_LICENSE variable. Using this variable also avoids QA errors when you use a non-common, non-CLOSED license in a recipe.
The following is an example that uses the LICENSE.Abilis.txt file as the license from the fetched source:
NO_GENERIC_LICENSE[Firmware-Abilis] = "LICENSE.Abilis.txt"
3.33. Using the Error Reporting Tool
The error reporting tool allows you to submit errors encountered during builds to a central database. Outside of the build environment, you can use a web interface to browse errors, view statistics, and query for errors. The tool works using a client-server system where the client portion is integrated with the installed Yocto Project Source Directory (例如 poky). The server receives the information collected and saves it in a database.
A live instance of the error reporting server exists at http://errors.yoctoproject.org. This server exists so that when you want to get help with build failures, you can submit all of the information on the failure easily and then point to the URL in your bug report or send an email to the mailing list.
Note
If you send error reports to this server, the reports become publicly visible.
3.33.1. Enabling and Using the Tool
By default, the error reporting tool is disabled. You can enable it by inheriting the report-error class by adding the following statement to the end of your local.conf file in your Build Directory.
INHERIT += "report-error"
By default, the error reporting feature stores information in ${LOG_DIR}/error-report. However, you can specify a directory to use by adding the following to your local.conf file:
ERR_REPORT_DIR = "path"
Enabling error reporting causes the build process to collect the errors and store them in a file as previously described. When the build system encounters an error, it includes a command as part of the console output. You can run the command to send the error file to the server. For example, the following command sends the errors to an upstream server:
$ send-error-report /home/brandusa/project/poky/build/tmp/log/error-report/error_report_201403141617.txt
In the previous example, the errors are sent to a public database available at http://errors.yoctoproject.org, which is used by the entire community. If you specify a particular server, you can send the errors to a different database. Use the following command for more information on available options:
$ send-error-report --help
When sending the error file, you are prompted to review the data being sent as well as to provide a name and optional email address. Once you satisfy these prompts, the command returns a link from the server that corresponds to your entry in the database. For example, here is a typical link:
http://errors.yoctoproject.org/Errors/Details/9522/
Following the link takes you to a web interface where you can browse, query the errors, and view statistics.
3.33.2. Disabling the Tool
To disable the error reporting feature, simply remove or comment out the following statement from the end of your local.conf file in your Build Directory.
INHERIT += "report-error"
3.33.3. Setting Up Your Own Error Reporting Server
If you want to set up your own error reporting server, you can obtain the code from the Git repository at http://git.yoctoproject.org/cgit/cgit.cgi/error-report-web/. Instructions on how to set it up are in the README document.
3.34. Using Wayland and Weston
Wayland is a computer display server protocol that provides a method for compositing window managers to communicate directly with applications and video hardware and expects them to communicate with input hardware using other libraries. Using Wayland with supporting targets can result in better control over graphics frame rendering than an application might otherwise achieve.
The Yocto Project provides the Wayland protocol libraries and the reference Weston compositor as part of its release. You can find the integrated packages in the meta layer of the Source Directory. Specifically, you can find the recipes that build both Wayland and Weston at meta/recipes-graphics/wayland.
You can build both the Wayland and Weston packages for use only with targets that accept the Mesa 3D and Direct Rendering Infrastructure, which is also known as Mesa DRI. This implies that you cannot build and use the packages if your target uses, for example, the Intel® Embedded Media and Graphics Driver (Intel® EMGD) that overrides Mesa DRI.
Note
Due to lack of EGL support, Weston 1.0.3 will not run directly on the emulated QEMU hardware. However, this version of Weston will run under X emulation without issues.
This section describes what you need to do to implement Wayland and use the Weston compositor when building an image for a supporting target.
3.34.1. Enabling Wayland in an Image
To enable Wayland, you need to enable it to be built and enable it to be included (installed) in the image.
3.34.1.1. Building
To cause Mesa to build the wayland-egl platform and Weston to build Wayland with Kernel Mode Setting (KMS) support, include the “wayland” flag in the DISTRO_FEATURES statement in your local.conf file:
DISTRO_FEATURES_append = " wayland"
Note
If X11 has been enabled elsewhere, Weston will build Wayland with X11 support
3.34.1.2. Installing
To install the Wayland feature into an image, you must include the following CORE_IMAGE_EXTRA_INSTALL statement in your local.conf file:
CORE_IMAGE_EXTRA_INSTALL += "wayland weston"
3.34.2. Running Weston
To run Weston inside X11, enabling it as described earlier and building a Sato image is sufficient. If you are running your image under Sato, a Weston Launcher appears in the “Utility” category.
Alternatively, you can run Weston through the command-line interpretor (CLI), which is better suited for development work. To run Weston under the CLI, you need to do the following after your image is built:
Run these commands to export XDG_RUNTIME_DIR:
mkdir -p /tmp/$USER-westonchmod 0700 /tmp/$USER-westonexport XDG_RUNTIME_DIR=/tmp/$USER-weston
Launch Weston in the shell:
weston

若有收获,就点个赞吧
0 人点赞
