一,axios跨域访问PHP后端
1,没有在PHP后端代码中设置跨域访问相关配置项之前。
(1)前端向后端发起ajax请求。
axios.post('http://localhost/smartisanPHP/admin/public.php',data).then(function(result){console.log(result);})
(2)后端给前端的响应状态如下
Response to preflight request doesn't pass access control check:No 'Access-Control-Allow-Origin' header is present on the requested resource.Origin 'http://localhost:8080' is therefore not allowed access.
(3)表明后端在默认情况下是不允许前端跨域访问的。
2,在PHP后端php文件中新增如下代码,让其允许前端进行跨域访问。
(1)调整后端代码。
header('Access-Control-Allow-Origin:*');header('Access-Control-Allow-Methods:GET,POST');header('Access-Control-Allow-Headers: Origin, X-Requested-With, Content-Type, Accept');header('content-type:application/json;charset=utf-8');
(2)重新在前端发起请求,查看结果。
axios.post('http://localhost/smartisanPHP/admin/public.php',data).then(function(result){console.log(result);})
(3)后端给前端的响应结果如下:
<br /><b>Notice</b>: Undefined index: name in <b>C:\phpStudy\PHPTutorial\WWW\smartisanPHP\admin\public.php</b> on line <b>28</b><br /><br /><b>Notice</b>: Undefined index: name_intro in <b>C:\phpStudy\PHPTutorial\WWW\smartisanPHP\admin\public.php</b> on line <b>29</b><br /><br /><b>Notice</b>: Undefined index: price in <b>C:\phpStudy\PHPTutorial\WWW\smartisanPHP\admin\public.php</b> on line <b>30</b><br />[] //在后端通过echo json_encode($_POST);输出前端提交的数据包,发现该数据包为空数据存储成功
3,后端接收的的$_POST数据之所以为【空数组】,是因为axios默认发送给后端的数据包格式不正确。
(1)调整前端发起ajax请求的代码
var data = new FormData(); //表单对象data.append('name',this.gData.name);data.append('name_intro',this.gData.name_intro);data.append('price',this.gData.price);axios.post('http://localhost/smartisanPHP/admin/public.php',data).then(function(result){console.log(result);})
(2)后端将可以正确接收前端提交的$_POST数据。
二,在Vue根对象的原型下挂载方法
当我们在使用axios的时候,如果不将axios方法对象挂载到Vue对象下使用的话,则我们需要在每个组件里面都要通过import方法去引入axios模块才能使用,这种使用方式不是很方便,我们采用如下流程,将axios方法挂载到Vue对象的原型下。
(1)在项目的main.js中加入如下代码
import axios from 'axios';Vue.prototype.$axios = axios; //将axios方法模块挂载到Vue对象的原型下面Vue.prototype.getFormData = function(obj){ //将FormData数据包的处理方法函数挂载到Vue对象的原型下面var data = new FormData();for(var attr in obj){data.append(attr,obj[attr]);}return data;}
(2)在项目的.vue单文件组件中通过this.$axios的方式,直接使用axios。
methods: {handleTabsAdd () {this.tabs ++;},pubFn(){var data = this.getFormData(this.gData); //使用Vue.prototype下的getFormData方法this.$axios.post('http://localhost/smartisanPHP/admin/public.php',data)//使用Vue.prototype下的$axios方法.then(function(result){console.log(result);})}}
三,前端获取数据并展示的流程
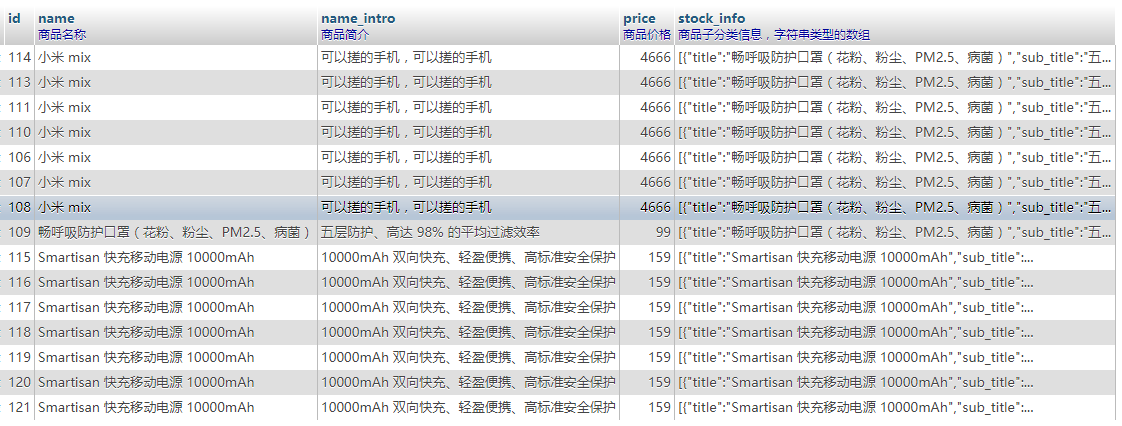
(1)MySQL数据库中已经有录入的商品数据。
(2)新增PHP后端逻辑文件list.php,当用户请求这个接口文件的时候,将数据库中的数据全部获取后,返回给前端。
<?phpheader('Access-Control-Allow-Origin:*');header('Access-Control-Allow-Methods:GET,POST');header('Access-Control-Allow-Headers: Origin, X-Requested-With, Content-Type, Accept');header('content-type:application/json;charset=utf-8');if($connect = mysqli_connect('localhost', 'root', 'root')){if($db = mysqli_select_db($connect, 'smartisan')){$select = "select * from goods"; //用以查询数据的sql语句if($result = mysqli_query($connect, $select)){$gdata = array(); //存储查询得到的所有数据while($row = mysqli_fetch_array($result, MYSQL_ASSOC)){array_push($gdata,$row);}$state=array('code'=>1,'msg'=>'数据存储成功','gdata'=>$gdata);echo json_encode($state);}}}?>
(3)在用户端smartisan-build项目中的Home.vue组件中,使用axios发起ajax请求并获取数据。
export default {data() {return {goodsData:[]}},components:{"good-item":GoodItem},created(){var _This = this;var gdata;this.$axios.get('http://localhost/smartisanPHP/admin/list.php').then((result) => {gdata = result.data.gdata;var Len = gdata.length;for(var i=0;i<Len;i++){gdata[i].stock_info = JSON.parse(gdata[i].stock_info); //将字符串格式的数据转换为json对象}_This.goodsData = gdata}).catch((err) => {});}}
(4)将获取到的数据goodsData绑定至组件的HTML结构中显示。
<div class="item-box"><good-itemv-for="(item,index) in goodsData"v-bind:key="index":g-data="item":g-index="item.id"></good-item></div>
四,后端数据库及代码线上部署
1,将本地MySQL数据表导出并上传至百度云虚机的MySQL数据库。
(1)本地导出sql数据表。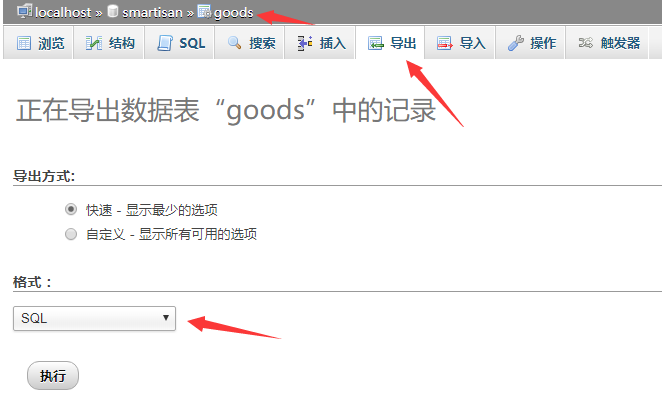
(2)打开百度云MySQL数据库。
【主机控制台】—【控制面板】—【数据库管理】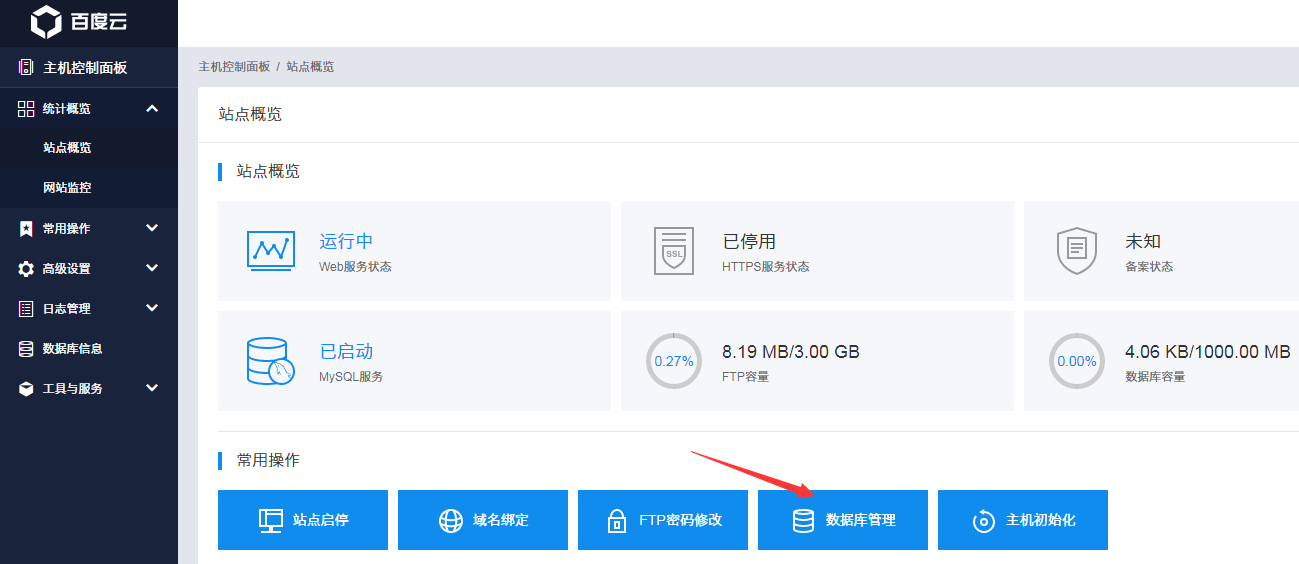
(3)在百度云MySQL数据库中导入第一步中得到的goods.sql文件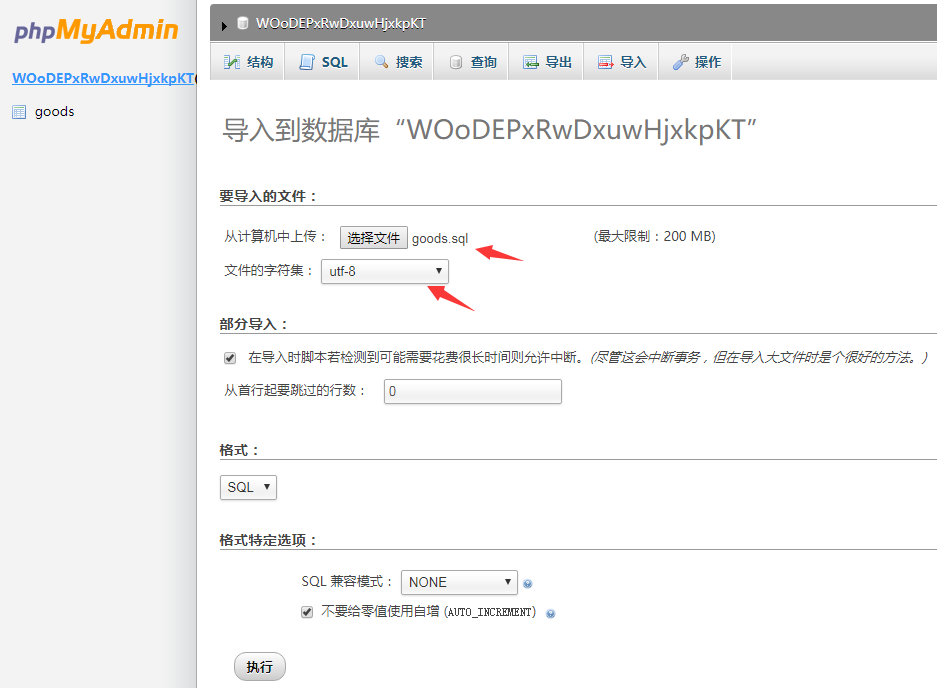
2,迁移PHP后端逻辑代码。
(1)得到百度云数据库相关信息。
【主机控制台】—【控制面板】—【查看更多主机信息】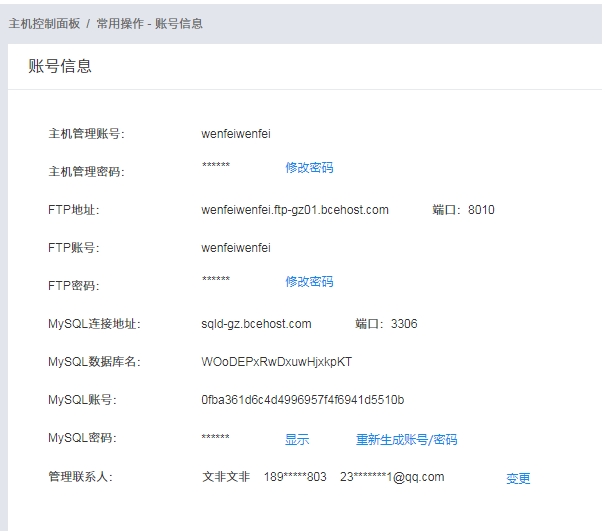
(2)将原来放在本地phpstudy服务器的www目录下的所有项目相关的.php文件中的数据库连接信息,改为百度云数据库的信息。以list.php文件代码为例:
<?phpheader('Access-Control-Allow-Origin:*');header('Access-Control-Allow-Methods:GET,POST');header('Access-Control-Allow-Headers: Origin, X-Requested-With, Content-Type, Accept');header('content-type:application/json;charset=utf-8');if($connect = mysqli_connect('sqld-gz.bcehost.com:3306', '0fba361d6c4d4996957f4f6941d5510b', '上图中的MySQL密码')){if($db = mysqli_select_db($connect, 'WOoDEPxRwDxuwHjxkpKT')){$select = "select * from goods";if($result = mysqli_query($connect, $select)){$gdata = array();while($row = mysqli_fetch_array($result, MYSQL_ASSOC)){array_push($gdata,$row);}$state=array('code'=>1,'msg'=>'数据存储成功','gdata'=>$gdata);echo json_encode($state);}}}?>
(3)通过FTP工具(winscp)连接云虚机,在其webroot目录下新建一个跟本地路径一样的smartisanPHP文件夹,并将所有.php文件上传至该文件夹中。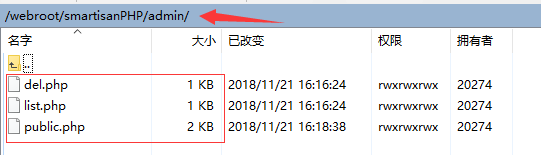
3,迁移【iview后端管理界面】代码至云虚机。
因为云虚机的webroot根目录下,已经放置了用户端代码打包后的static文件夹及index.html,所以我们需要在webroot中新建一个admin文件夹,将【iview后端管理界面】打包代码,放在该admin文件中。这会导致打包后的index.html文件中引入js与css默认路径无法匹配,需要调整打包配置项。
(1)在myapp目录下的config文件夹中的index.js中调整打包配置项。
build: {// Template for index.htmlindex: path.resolve(__dirname, '../dist/index.html'),// PathsassetsRoot: path.resolve(__dirname, '../dist'),assetsSubDirectory: 'static',assetsPublicPath: '/admin/', //修改打包后html页面引用js及css的路径配置,默认为 '/'}
(2)将myapp项目中的所有axios发起的请求路径,改为线上路径,示例如下:
del(i) {var _This = this;var id = this.data1[i].id;var data = this.getFormData({gid:id})this.$axios.post('http://wenfeiwenfei.gz01.bdysite.com/smartisanPHP/admin/del.php',data).then(function(result){if(result.data.code==1){_This.$Message.info('删除成功');_This.data1.splice(i,1);}})}
(3)执行如下命令,打包iview后端界面
npm run build
(4)将打包得到的dist目录下的所有文件,上传至云虚机的webroot下的admin文件中。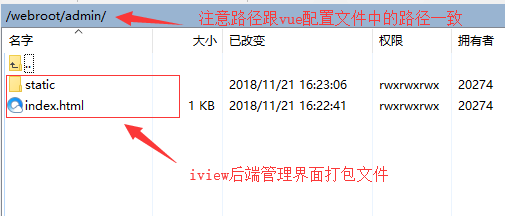
(5)访问线上的iview后端界面,并测试其功能。
http://wenfeiwenfei.gz01.bdysite.com/admin
(6)如果迁移成功,线上的iview界面功能应该跟本地测试功能一样。

若有收获,就点个赞吧
0 人点赞
