一、组件(重点)
组件(Component)是 Vue.js 最强大的功能之一。
组件可以扩展 HTML 元素,封装可重用的代码。
组件系统让我们可以用独立可复用的小组件来构建大型应用,几乎任意类型的应用的界面都可以抽象为一个组件树: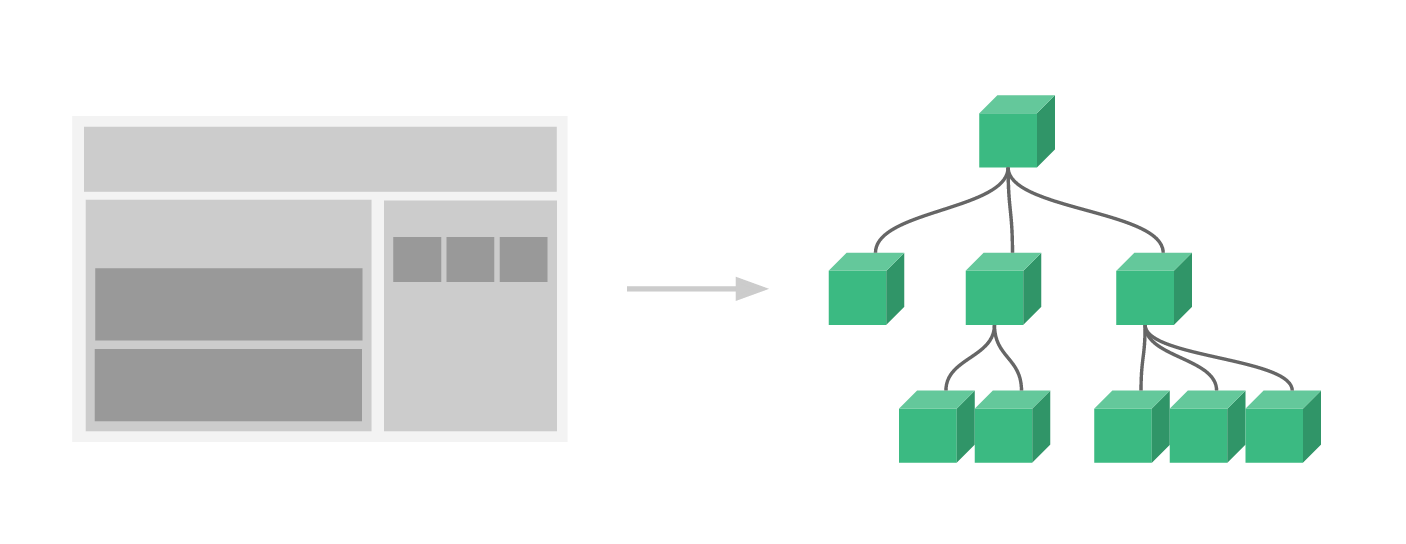
1、局部组件
创建 01-1-局部组件.html
定义组件
var app = new Vue({
el: ‘#app’,
// 定义局部组件,这里可以定义多个局部组件
components: {
//组件的名字
‘Navbar’: {
//组件的内容
template: ‘
- 首页
- 学员管理
}
}
})
使用组件
2、全局组件
创建 01-2-全局组件.html
定义全局组件:components/Navbar.js
// 定义全局组件
Vue.component(‘Navbar’, {
template: ‘
- 首页
- 学员管理
- 讲师管理
})
二、实例生命周期
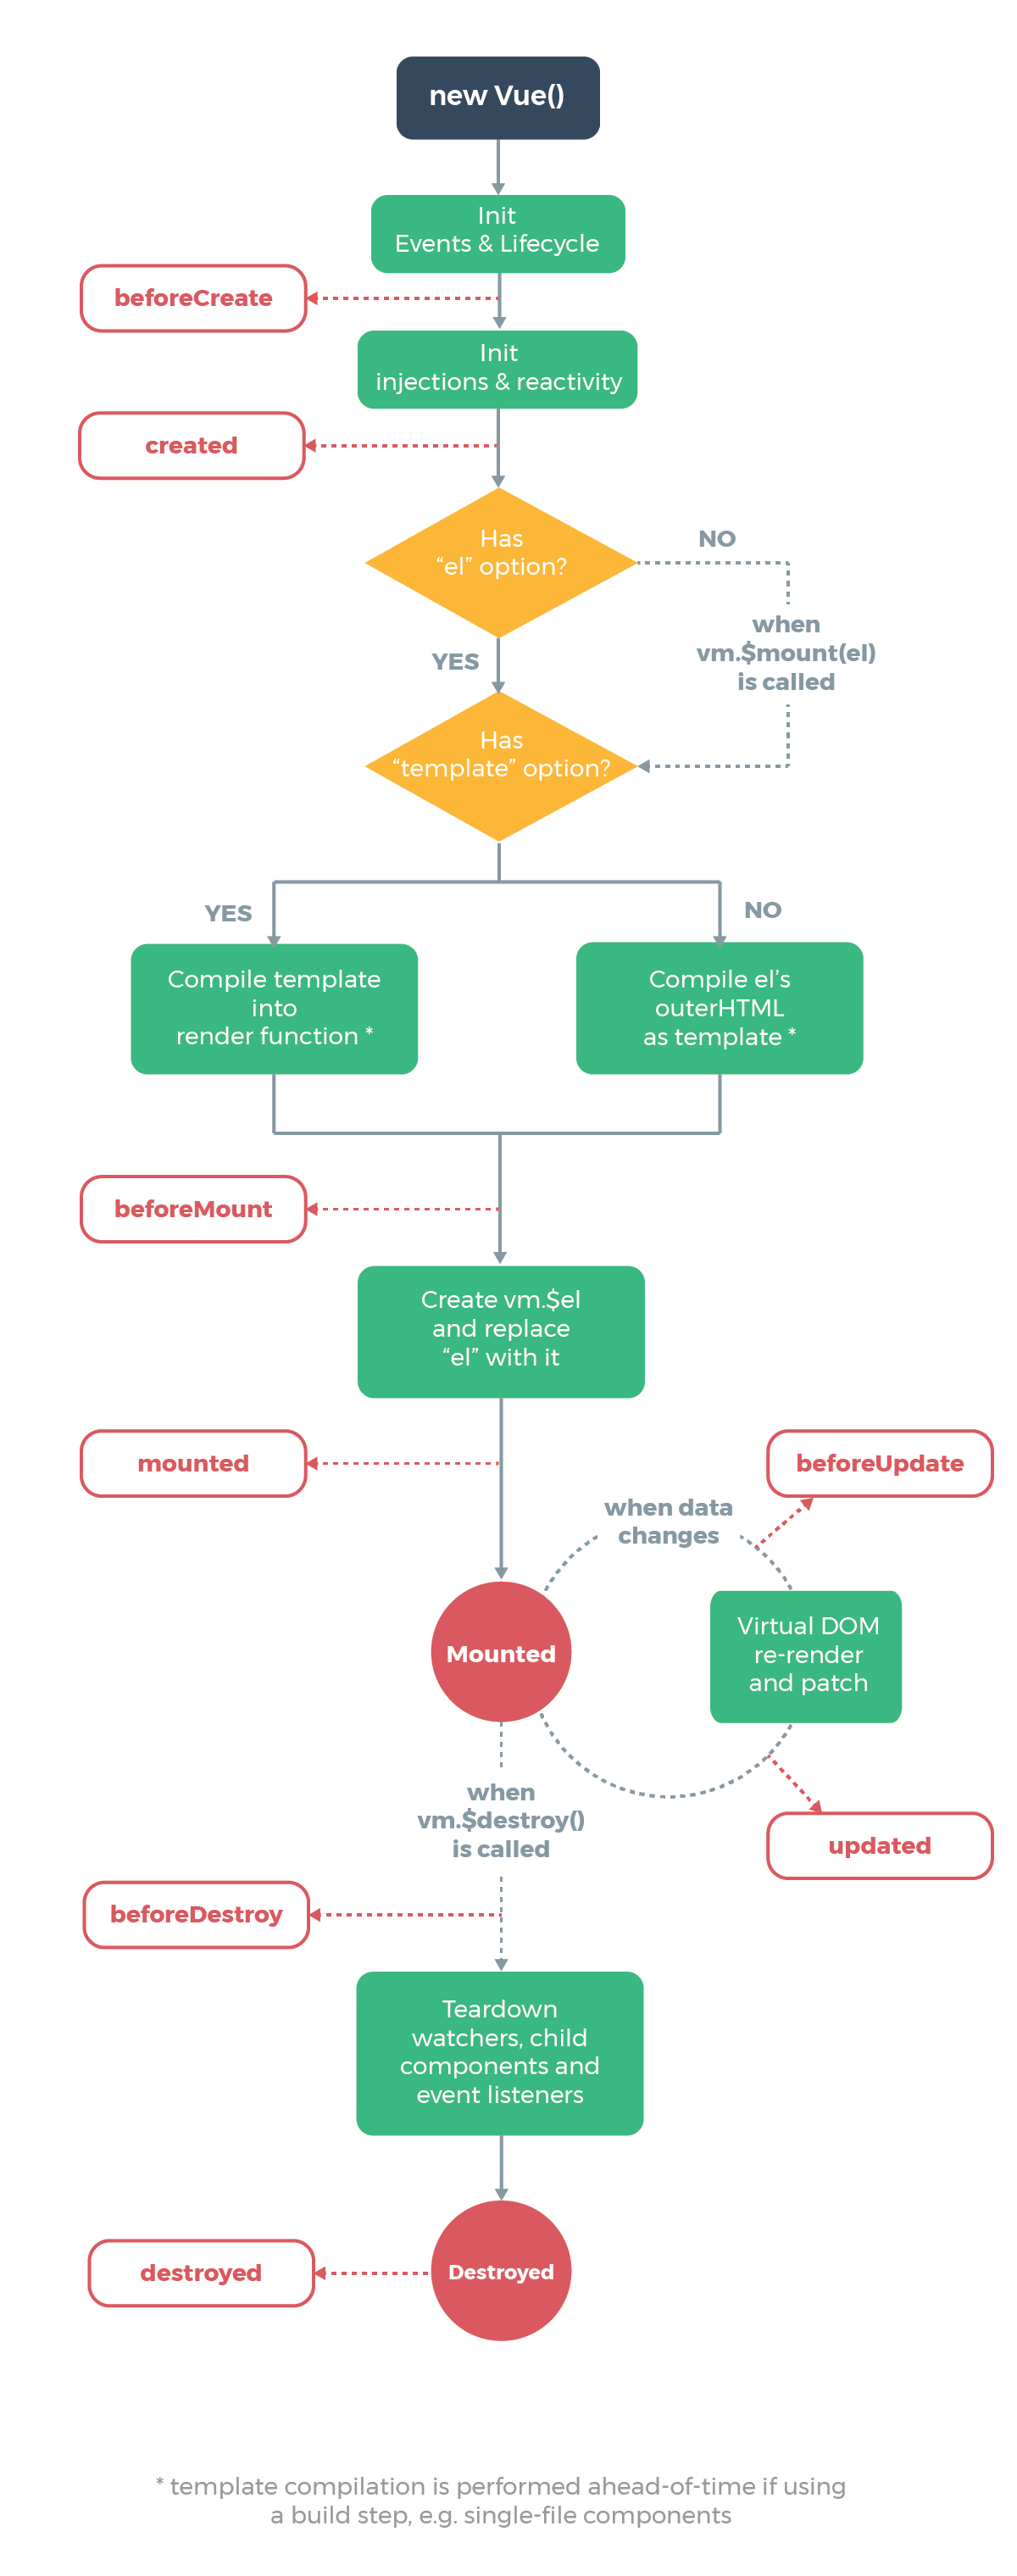
创建 03-vue实例的生命周期.html
data: {
message: ‘床前明月光’
},
methods: {
show() {
console.log(‘执行show方法’)
},
update() {
this.message = ‘玻璃好上霜’
}
},
{{ message }}
分析生命周期相关方法的执行时机
//===创建时的四个事件
beforeCreate() { // 第一个被执行的钩子方法:实例被创建出来之前执行
console.log(this.message) //undefined
this.show() //TypeError: this.show is not a function
// beforeCreate执行时,data 和 methods 中的 数据都还没有没初始化
},
created() { // 第二个被执行的钩子方法
console.log(this.message) //床前明月光
this.show() //执行show方法
// created执行时,data 和 methods 都已经被初始化好了!
// 如果要调用 methods 中的方法,或者操作 data 中的数据,最早,只能在 created 中操作
},
beforeMount() { // 第三个被执行的钩子方法
console.log(document.getElementById(‘h3’).innerText) //{{ message }}
// beforeMount执行时,模板已经在内存中编辑完成了,尚未被渲染到页面中
},
mounted() { // 第四个被执行的钩子方法
console.log(document.getElementById(‘h3’).innerText) //床前明月光
// 内存中的模板已经渲染到页面,用户已经可以看见内容
},
//===运行中的两个事件
beforeUpdate() { // 数据更新的前一刻
console.log(‘界面显示的内容:’ + document.getElementById(‘h3’).innerText)
console.log(‘data 中的 message 数据是:’ + this.message)
// beforeUpdate执行时,内存中的数据已更新,但是页面尚未被渲染
},
updated() {
console.log(‘界面显示的内容:’ + document.getElementById(‘h3’).innerText)
console.log(‘data 中的 message 数据是:’ + this.message)
// updated执行时,内存中的数据已更新,并且页面已经被渲染
}
四、路由
Vue.js 路由允许我们通过不同的 URL 访问不同的内容。
通过 Vue.js 可以实现多视图的单页Web应用(single page web application,SPA)。
Vue.js 路由需要载入 vue-router 库
1、引入js
2、编写html
Hello App!
3、编写js
五、axios
axios是独立于vue的一个项目,基于promise用于浏览器和node.js的http客户端
- 在浏览器中可以帮助我们完成 ajax请求的发送
- 在node.js中可以向远程接口发送请求
获取数据
注意:测试时需要开启后端服务器,并且后端开启跨域访问权限
var app = new Vue({
el: ‘#app’,
data: {
memberList: []//数组
},
created() {
this.getList()
},
methods: {
getList(id) {
//vm = this
axios.get(‘http://localhost:8081/admin/ucenter/member‘)
.then(response => {
console.log(response)
this.memberList = response.data.data.items
})
.catch(error => {
console.log(error)
})
}
}
})
控制台查看输出2、显示数据
id 姓名 {{item.memberId}} {{item.nickname}}
六、element-ui:
element-ui 是饿了么前端出品的基于 Vue.js的 后台组件库,方便程序员进行页面快速布局和构建
官网: http://element-cn.eleme.io/#/zh-CN
创建 06-element-ui.html
将element-ui引入到项目
1、引入css
2、引入js
3、编写html
Try Element
关于.sync的扩展阅读
https://www.jianshu.com/p/d42c508ea9de
4、编写js
测试
其他ui组件我们在项目中学习

若有收获,就点个赞吧
0 人点赞
