1 简介
- 在Spring项目中,可以使用Spring-Rabbit去操作RabbitMQ。尤其是在SpringBoot项目中只需要引入对应的amqp的启动器依赖即可,可以很方便的使用RabbitTemplate发送消息,使用注解接收消息。
- 一般的开发过程中:
 生产者工程:
- ①application.yaml文件中配置RabbitMQ的相关信息。
- ②在生产者工程中编写配置类,用于创建交换机和队列,并进行绑定。
- ③注入RabbitTemplate对象,通过RabbitTemplate对象发送消息到交换机。
 消费者工程:
- ①application.yaml文件配置RabbitMQ的相关信息。
- ②创建消息处理类,用于接收队列中的消息并进行处理。
2 创建总工程
2.1 创建总工程

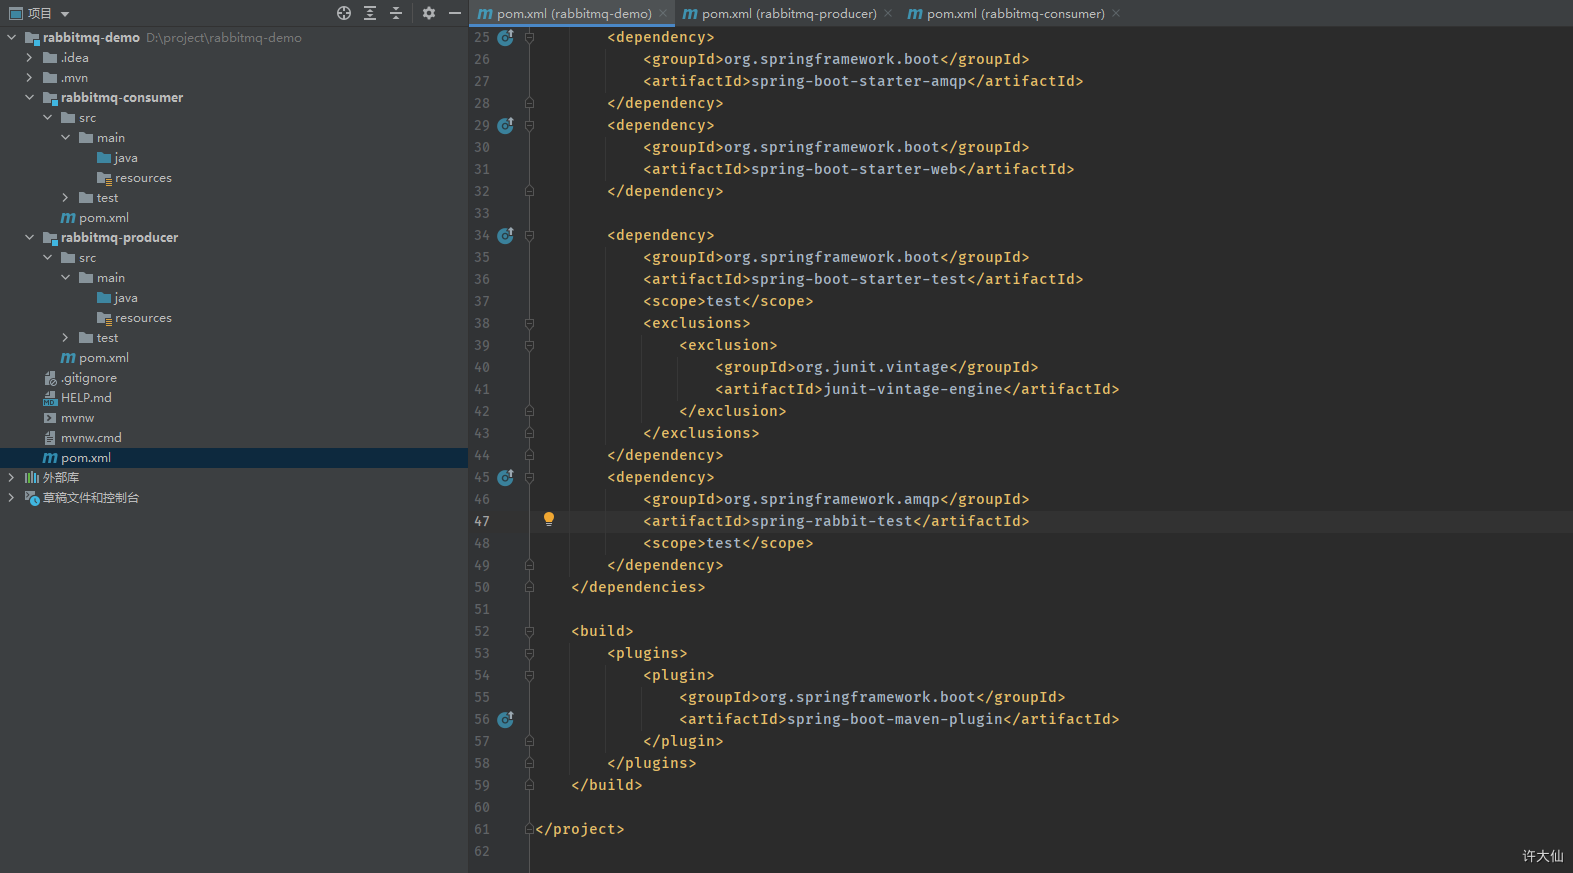
2.2 导入依赖
<?xml version="1.0" encoding="UTF-8"?><project xmlns="http://maven.apache.org/POM/4.0.0" xmlns:xsi="http://www.w3.org/2001/XMLSchema-instance" xsi:schemaLocation="http://maven.apache.org/POM/4.0.0 https://maven.apache.org/xsd/maven-4.0.0.xsd"> <modelVersion>4.0.0</modelVersion> <packaging>pom</packaging> <modules> <module>rabbitmq-producer</module> <module>rabbitmq-consumer</module> </modules> <parent> <groupId>org.springframework.boot</groupId> <artifactId>spring-boot-starter-parent</artifactId> <version>2.3.8.RELEASE</version> <relativePath/> </parent> <groupId>com.example</groupId> <artifactId>rabbitmq-demo</artifactId> <version>1.0</version> <name>rabbitmq-demo</name> <properties> <java.version>1.8</java.version> </properties> <dependencies> <dependency> <groupId>org.springframework.boot</groupId> <artifactId>spring-boot-starter-amqp</artifactId> </dependency> <dependency> <groupId>org.springframework.boot</groupId> <artifactId>spring-boot-starter-web</artifactId> </dependency> <dependency> <groupId>org.springframework.boot</groupId> <artifactId>spring-boot-starter-test</artifactId> <scope>test</scope> <exclusions> <exclusion> <groupId>org.junit.vintage</groupId> <artifactId>junit-vintage-engine</artifactId> </exclusion> </exclusions> </dependency> <dependency> <groupId>org.springframework.amqp</groupId> <artifactId>spring-rabbit-test</artifactId> <scope>test</scope> </dependency> </dependencies> <build> <plugins> <plugin> <groupId>org.springframework.boot</groupId> <artifactId>spring-boot-maven-plugin</artifactId> </plugin> </plugins> </build></project>
2.3 创建生产者和消费者工程
3 搭建生产者工程
3.1 创建工程
3.2 导入依赖
3.3 启动类
package com.xudaxian;import org.springframework.boot.SpringApplication;import org.springframework.boot.autoconfigure.SpringBootApplication;/** * @version 1.0 * @since 2021-02-04 22:11 */@SpringBootApplicationpublic class ProducerApplication { public static void main(String[] args) { SpringApplication.run(ProducerApplication.class, args); }}
3.4 配置RabbitMQ
3.4.1 配置文件
- 创建application.yml文件,内容如下:
server: # 端口 port: 8888spring: # RabbitMQ rabbitmq: host: 192.168.49.100 port: 5672 virtual-host: /xudaxian username: xudaxian password: 123456
3.4.2 绑定交换机和队列
- 创建RabbitMQConfig.java文件,内容如下:
package com.xudaxian.config;import org.springframework.amqp.core.*;import org.springframework.amqp.rabbit.connection.ConnectionFactory;import org.springframework.amqp.rabbit.core.RabbitAdmin;import org.springframework.beans.factory.annotation.Autowired;import org.springframework.context.annotation.Bean;import org.springframework.context.annotation.Configuration;/** * @version 1.0 * @since 2021-02-05 08:45 */@Configurationpublic class RabbitMQConfig { //交换机名称 public static String EXCHANGE_NAME = "xudaxian_topic_exchange"; //队列名称 public static String QUEUE_NAME = "xudaxian_queue"; //声明交换机 @Bean public Exchange exchange() { return ExchangeBuilder.topicExchange(EXCHANGE_NAME).durable(true).build(); } //声明队列 @Bean public Queue queue() { return QueueBuilder.durable(QUEUE_NAME).build(); } //绑定交换机和队列 @Bean public Binding binding(@Autowired Queue queue, @Autowired Exchange exchange) { return BindingBuilder.bind(queue).to(exchange).with("item.#").noargs(); } /** * 如果不配置RabbitAdmin,默认情况下,SpringBoot启动的时候是不会自动创建交换机和消息队列的,而是等到发送消息的时候 * * @param connectionFactory * @return */ @Bean public RabbitAdmin rabbitAdmin(ConnectionFactory connectionFactory) { RabbitAdmin rabbitAdmin = new RabbitAdmin(connectionFactory); //只有设置为true的时候,SpringBoot启动的时候会加载RabbitAdmin rabbitAdmin.setAutoStartup(true); rabbitAdmin.declareExchange(exchange()); rabbitAdmin.declareQueue(queue()); return rabbitAdmin; }}
3.5 消息发送的Controller
- 创建ProducerController.java文件,内容如下:
package com.xudaxian.web;import com.xudaxian.config.RabbitMQConfig;import org.springframework.amqp.rabbit.core.RabbitTemplate;import org.springframework.beans.factory.annotation.Autowired;import org.springframework.web.bind.annotation.GetMapping;import org.springframework.web.bind.annotation.RequestParam;import org.springframework.web.bind.annotation.RestController;/** * @version 1.0 * @since 2021-02-04 22:27 */@RestControllerpublic class ProducerController { @Autowired private RabbitTemplate rabbitTemplate; /** * @param msg 发送的消息 * @param routingKey 路由key * @return */ @GetMapping(value = "/sendMessage") public String sendMessage(@RequestParam(value = "msg") String msg, @RequestParam(value = "routingKey") String routingKey) { rabbitTemplate.convertAndSend(RabbitMQConfig.EXCHANGE_NAME, routingKey, msg); return "发送消息成功"; }}
3.6 测试
4 搭建消费者工程
4.1 创建工程
4.2 导入依赖
4.3 启动类
package com.xudaxian;import org.springframework.boot.SpringApplication;import org.springframework.boot.autoconfigure.SpringBootApplication;/** * @version 1.0 * @since 2021-02-04 22:40 */@SpringBootApplicationpublic class ConsumerApplication { public static void main(String[] args) { SpringApplication.run(ConsumerApplication.class, args); }}
4.4 配置RabbitMQ
- 创建application.yml文件,内容如下:
server: # 端口 port: 8889spring: # RabbitMQ rabbitmq: host: 192.168.49.100 port: 5672 virtual-host: /xudaxian username: xudaxian password: 123456
- 创建RabbitMQConfig.java文件,内容如下:
package com.xudaxian.config;import org.springframework.amqp.core.Queue;import org.springframework.amqp.core.QueueBuilder;import org.springframework.amqp.rabbit.connection.ConnectionFactory;import org.springframework.amqp.rabbit.core.RabbitAdmin;import org.springframework.context.annotation.Bean;import org.springframework.context.annotation.Configuration;/** * @version 1.0 * @since 2021-02-06 10:55 */@Configurationpublic class RabbitMQConfig { public static String QUEUE_NAME = "xudaxian_queue"; @Bean public Queue queue() { return QueueBuilder.durable(QUEUE_NAME).build(); } /** * 如果不配置RabbitAdmin,默认情况下,SpringBoot启动的时候是不会自动创建交换机和消息队列的,而是等到发送消息的时候 * * @param connectionFactory * @return */ @Bean public RabbitAdmin rabbitAdmin(ConnectionFactory connectionFactory) { RabbitAdmin rabbitAdmin = new RabbitAdmin(connectionFactory); //只有设置为true的时候,SpringBoot启动的时候会加载RabbitAdmin rabbitAdmin.setAutoStartup(true); rabbitAdmin.declareQueue(queue()); return rabbitAdmin; }}
4.5 消息监听处理类
- 创建RabbitMQListener.java文件,内容如下:
package com.xudaxian.listener;import org.springframework.amqp.rabbit.annotation.RabbitListener;import org.springframework.stereotype.Component;/** * @version 1.0 * @since 2021-02-04 23:06 */@Componentpublic class RabbitMQListener { @RabbitListener(queues = "xudaxian_queue") public void listener(String message) { System.out.println("消费者接受到的消息:" + message); }}
生产者工程:
消费者工程:


