记快乐符号:
在centos7服务器命令安装gitlab runner
1、选择你需要的版本 uname -a
https://gitlab-runner-downloads.s3.amazonaws.com/latest/index.html
2、下载选择版本内容
wget https://gitlab-runner-downloads.s3.amazonaws.com/latest/rpm/gitlab-runner_amd64.rpm
3、rpm安装服务 你会发现错误 这个时候请安装 git 服务
rpm -i gitlab-runner_amd64.rpm
4、rpm更新服务
rpm -Uvh gitlab-runner_<arch>.rpm
5、安装git 服务继续第四步
yum install git
6、开始注册runner
gitlab-runner register
7、gitlab页面操作该地址以及token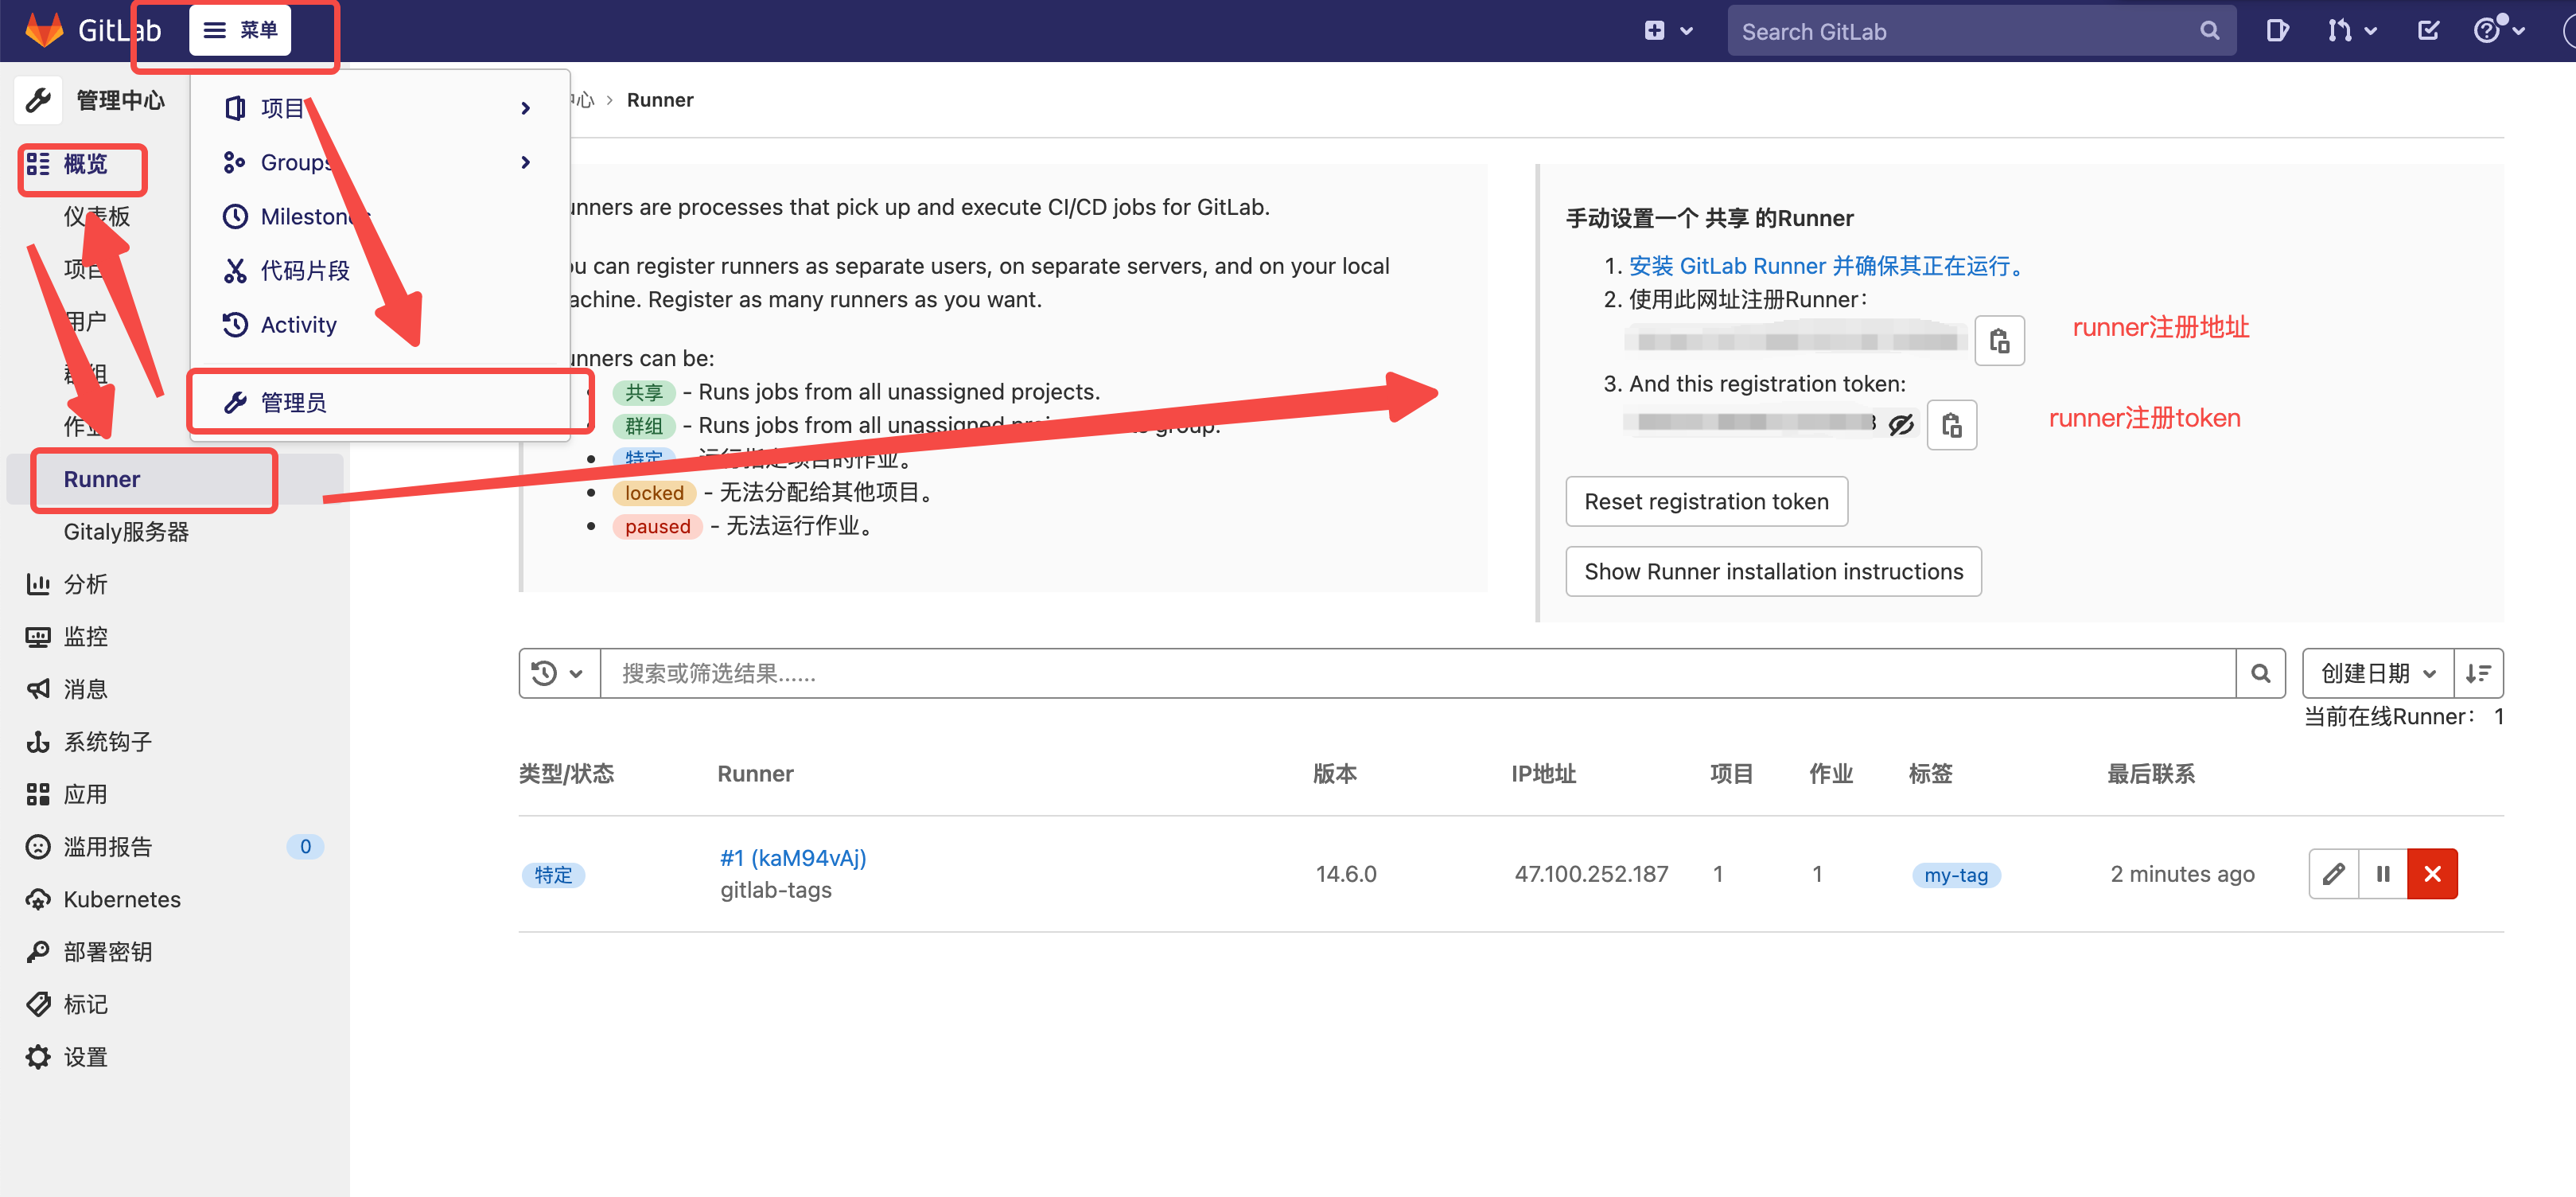
8、开始注册runnner
gitlab-runner register

Please enter the gitlab-ci coordinator URL (e.g. https://gitlab.com )https://gitlab.com(输入GitLab实例URL)Please enter the gitlab-ci token for this runnerxxx(输入runner注册令牌)Please enter the gitlab-ci tags for this runner (comma separated):my-tag(输入runner标签 可在gitlab的UI页面修改)Please enter the executor: ssh, docker+machine, docker-ssh+machine, kubernetes, docker, parallels, virtualbox, docker-ssh, shell:docker(输入runner脚本执行环境根据自身选择Enter the default Docker image (for example, ruby:2.6):app
9、此时最好是把 宿主机的docker 执行权限配置给 runner
/etc/gitlab-runner/config.toml
10、找到配置runners.docker 修改配置 前面路径为宿主机目录 后面为内部路径
volumes = ["/cache","/usr/local/bin/docker:/usr/local/bin/docker:ro","/var/run/docker.sock:/var/run/docker.sock:rw"]
11、重启服务
systemctl restart gitlab-runner
12、上传项目并在项目根目录添加文件 .gitlab-ci.yml
image: circleci/jdk8:0.1.1variables:DOCKER_DRIVER: overlay2DOCKER_TLS_CERTDIR: ''stages:- testtest:stage: testscript:- ls- pwd- java -version
13、测试needs流水线写法
image: circleci/jdk8:0.1.1variables:DOCKER_DRIVER: overlay2DOCKER_TLS_CERTDIR: ''stages:- build- test- deploy# test:# stage: test# script:# - ls# - pwd# - java -versionlinux:build:stage: buildscript: echo "Building linux..."mac:build:stage: buildscript: echo "Building mac..."lint:stage: testneeds: []script: echo "Linting..."linux:rspec:stage: testneeds: ["linux:build"]script: echo "Running rspec on linux..."linux:rubocop:stage: testneeds: ["linux:build"]script: echo "Running rubocop on linux..."mac:rspec:stage: testneeds: ["mac:build"]script: echo "Running rspec on mac..."mac:rubocop:stage: testneeds: ["mac:build"]script: echo "Running rubocop on mac..."production:stage: deployscript: echo "Running production..."
14、查看项目CI/CD流水线 完成后大功告成
15、新问题 默认runner 单线程执行所以修改参数配置
concurrent = 1

若有收获,就点个赞吧
0 人点赞
