# curl 用来请求 Web 服务器curl www.baidu.com
1、下载nginx
http://nginx.org/
注意:不要用最新版本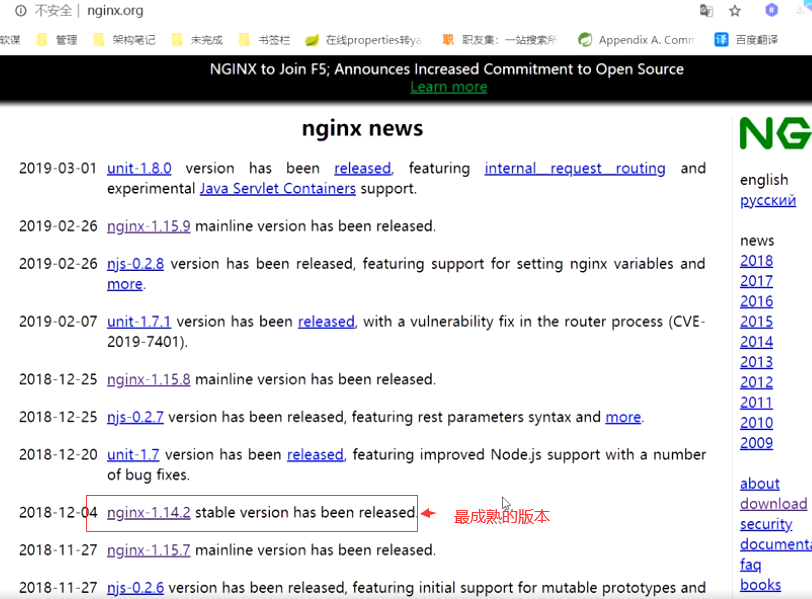
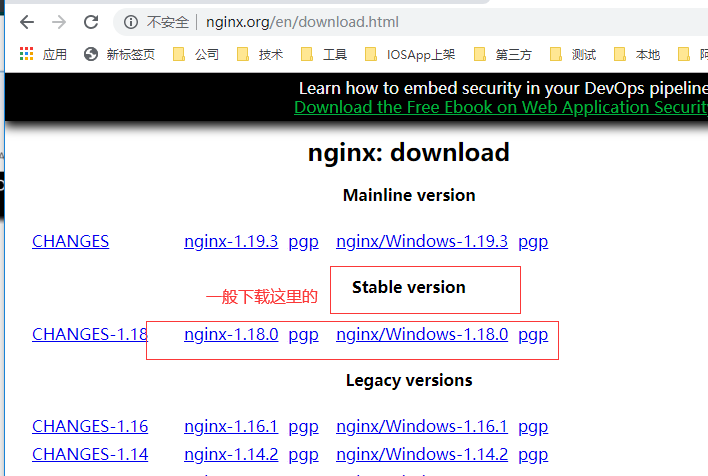
# 下载安装包wget http://nginx.org/download/nginx-1.18.0.tar.gz

# 查询是否安装过nginxps -ef | grep nginx
如下所示:证明没有安装过nginx
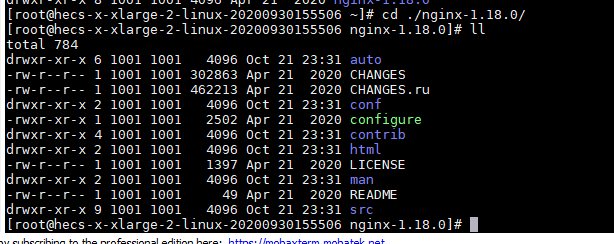
# 解压缩tar xf nginx-1.18.0.tar.gz
2、安装Nginx依赖
nginx是C语言开发,建议在linux上运行,本教程使用Centos7.4为安装环境。
同时安装 gcc gcc++ pcre pcre-devel zlib zlib-devel openssl poenssl-devel
yum install gcc-gcc++ pcre pcre-devel zlib zlib-devel openssl openssl-devel
安装gcc
安装nginx需要先将官网下载的源码进行编译,编译依赖gcc环境,如果没有gcc环境,需要安装gcc:
yum install gcc-c++
安装 PCRE pcre-devel
PCRE(Perl Compatible Regular Expressions)是一个Perl库,包括 perl 兼容的正则表达式库。nginx的http模块使用pcre来解析正则表达式,所以需要在linux上安装pcre库。
注:pcre-devel是使用pcre开发的一个二次开发库。nginx也需要此库。
yum install -y pcre pcre-devel
安装 zlib
zlib库提供了很多种压缩和解压缩的方式,nginx使用zlib对http包的内容进行gzip,所以需要在linux上安装zlib库。
yum install -y zlib zlib-devel
安装 openssl
OpenSSL 是一个强大的安全套接字层密码库,囊括主要的密码算法、常用的密钥和证书封装管理功能及SSL协议,并提供丰富的应用程序供测试或其它目的使用。
nginx不仅支持http协议,还支持https(即在ssl协议上传输http),所以需要在linux安装openssl库。
yum install -y openssl openssl-devel
3 安装nginx
解压
tar xf nginx-1.12.2.tar.gz
进行configure配置
./configure --prefix=/usr/local/nginx
(可以配置很多nginx其他模块,后面配置https的时候讲解)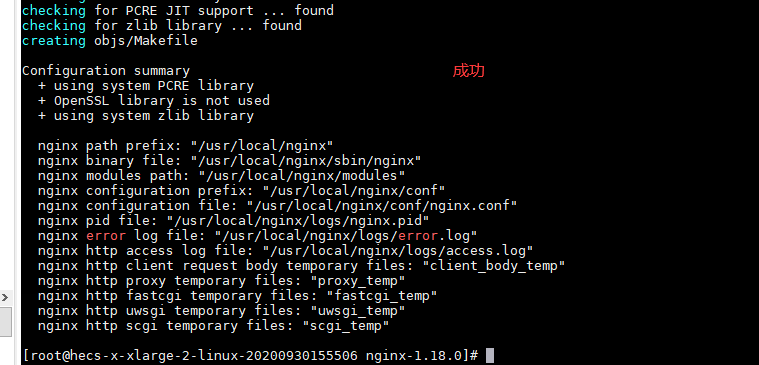
编译和安装
make & make install -j 4
如果以上操作没有报错则安装成功
make & make install -j 4 命令说明:
-j 4 是 4核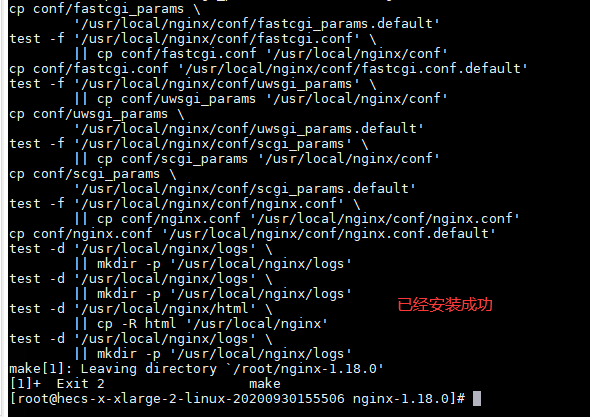

nginx文件夹说明:
- conf: 配置文件夹
.default :是默认配置文件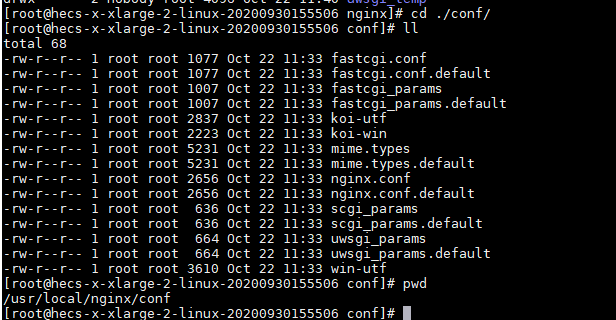
*nginx.conf 最重要的配置文件
vim nginx.conf

#user nobody;worker_processes 1;#error_log logs/error.log;#error_log logs/error.log notice;#error_log logs/error.log info;#pid logs/nginx.pid;events {use epoll;worker_connections 1024;}/*以上这块配置代码是对nginx全局属性的配置。user :主模块命令, 指定Nginx的worker进程运行用户以及用户组,默认由nobody账号运行(默认nginx)。worker processes: 指定Nginx要开启的进程数。error log:用来定义全局错设日志文件的路径和日志名称。日志输出级别有debug,info,notice,warn,error,crit可供选择,其中debug输出日志最为详细,面crit输出日志最少。pid: 用来指定进程id的存储文件位置。event:设定nginx的工作模式及连接数上限,其中参数use用来指定nginx的工作模式(这里是epoll,epoll是多路复用IO(I/O Multiplexing)中的一种方式),nginx支持的工作模式有select ,poll,kqueue,epoll,rtsig,/dev/poll。其中select和poll都是标准的工作模式,kqueue和epoll是高效的工作模式,对于linux系统,epoll是首选。worker_connection是设置nginx每个进程最大的连接数,默认是1024,所以nginx最大的连接数max_client=worker_processes * worker_connections。进程最大连接数受到系统最大打开文件数的限制,需要设置ulimit。*/#下面部分是nginx对http服务器相关属性的设置http {include mime.types; 主模块命令,对配置文件所包含文件的设定,减少主配置文件的复杂度,相当于把部分设置放在别的地方,然后在包含进来,保持主配置文件的简洁default_type application/octet-stream; 默认文件类型,当文件类型未定义时候就使用这类设置的。#log_format main '$remote_addr - $remote_user [$time_local] "$request" ' 指定nginx日志的格式# '$status $body_bytes_sent "$http_referer" '# '"$http_user_agent" "$http_x_forwarded_for"';#access_log logs/access.log main;sendfile on; 开启高效文件传输模式(zero copy 方式),避免内核缓冲区数据和用户缓冲区数据之间的拷贝。#tcp_nopush on;#keepalive_timeout 0; 客户端连接超时时间keepalive_timeout 65;#gzip on; 设置是否开启gzip模块#server段是虚拟主机的配置 这里可以写在别的文件中 然后在包含进来,比如写在/usr/local/nginx/vhost/xxx.conf 目录某文件中 然后在包含进来,可以包含多个文件 include /usr/local/nginx/vhost/*;server {listen 80; 虚拟主机的服务端口server_name localhost; 用来指定ip或者域名,多个域名用逗号分开#charset utf-8;#access_log logs/host.access.log main;# location / 这里的 斜杠代表的是根目录 也就是 /usr/local/nginxlocation / { 地址匹配设置,支持正则匹配,也支持条件匹配,这里是默认请求地址,用户可以location命令对nginx进行动态和静态网页过滤处理root html; 虚拟主机的网页根目录index index.html index.htm; 默认访问首页文件}#error_page 404 /404.html;# redirect server error pages to the static page /50x.html#error_page 500 502 503 504 /50x.html;location = /50x.html {root html;}# proxy the PHP scripts to Apache listening on 127.0.0.1:80#location ~ \.php$ { 将以php为后缀的文件转发到 FastCGI处理. 使用FastCGI默认配置。本地8088端口处理fastcgi_pass http://127.0.0.1:8088;fastcgi_index index.php;fastcgi_param SCRIPT_FILENAME $document_root$fastcgi_script_name;include fastcgi_params;}#静态文件,nginx自己处理location ~ ^/(images|javascript|js|css|flash|media|static)/ {root /var/www/public/images;expires 30d; #缓存时间30天,静态文件更新不多,过期时间可以设大一点。}#配置Nginx状态的地址location /NginxStatus {stub_status on;access_log on;auth_basic "NginxStatus";auth_basic_user_file conf/htpasswd;}#配置nginx负载均衡的服务器列表upstream mysvr {#weigth参数表示权值,权值越高被分配到的几率越大#本机上的Squid开启3128端口server 192.168.199.1:88 weight=5;server 192.168.199.1:80 weight=1;}# pass the PHP scripts to FastCGI server listening on 127.0.0.1:9000##location ~ \.php$ {# root html;# fastcgi_pass 127.0.0.1:9000;# fastcgi_index index.php;# fastcgi_param SCRIPT_FILENAME /scripts$fastcgi_script_name;# include fastcgi_params;#}# deny access to .htaccess files, if Apache's document root# concurs with nginx's one##location ~ /\.ht {# deny all;#}}# another virtual host using mix of IP-, name-, and port-based configuration##server {# listen 8000;# listen somename:8080;# server_name somename alias another.alias;# location / {# root html;# index index.html index.htm;# }#}# HTTPS server##server {# listen 443 ssl;# server_name localhost;# ssl_certificate cert.pem;# ssl_certificate_key cert.key;# ssl_session_cache shared:SSL:1m;# ssl_session_timeout 5m;# ssl_ciphers HIGH:!aNULL:!MD5;# ssl_prefer_server_ciphers on;# location / {# root html;# index index.html index.htm;# }#}}
- html
- logs
-
启动nginx
启动nginx1
进入sbin,输入如下命令
./nginx
nginx启动指定配置文件位置
./nginx -c 指定配置文件位置
例如: ./nginx -c /usr/local/conf/nginx.conf
./nginx 默认使用NGINX_HOME/config/nginx.conf配置文件停止,退出,重新加载 niginx
./nginx -s stop
./nginx -s stop 停止
./nginx -s quit
./nginx -s quit 退出
./nginx -s reload
./nginx -s reload 重新加载nginx.conf (很常用)
发送信号量 (找不到nginx安装位置,但是想要停止nginx服务器情况下使用)
可以先用 ps-ef | grep nginx 找到 进程号,使用如下命令停止nginx,不建议使用 kill -9
kill -TERM master进程号 (这个与kill -9 是一个意思,尽量不要使用)
kill -QUIT master进程号 (进来的所有请求会被忽略,会等待未执行完的请求执行完后,才正式的退出线程)
nginx 常用命令
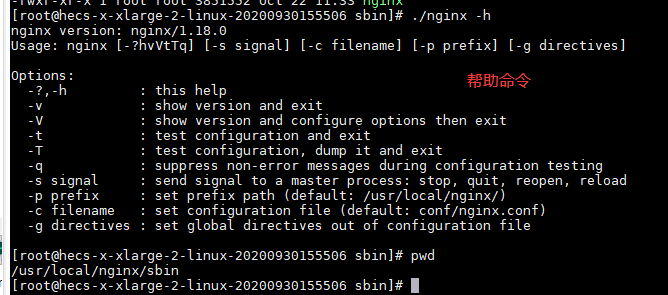
./nginx -v 查看nginx版本
./nginx -V 查看nginx的编译版本及配置的参数
./nginx -t 主要验证nginx.conf配置文件是否有问题
./nginx -c 根据配置文件的位置启动nginx
./nginx -s 发送对应信号处理master进程
-s signal : send signal to a master process: stop, quit, reopen, reload4 nginx配置文件初识别
Nginx 服务的基本配置项详解:

我的本机nginx配置文件路径是 /usr/local/nginx/conf/ 这个目录下面,其中nginx.conf是主配置文件。### Nginx.conf配置文件主要分成四个部分: main (全局设置) 。
- sever (虚拟主机设置)。
- upstream负载均街服务器设置。
- location(URL匹配特定位置的设置)。
说明:
main部分设置的命令将影响其他所有设置。 server 部分的命令主要用于指定主机和端口;。upstream命令主要用于负载均衡,设置一系列的后端服务器。 location 部分用于匹配网页位置。这四者之间的关系式server继承main, location 继承server, upstream 既不会继承其他设置也不会被继承。
在这四个部分当中,每个部分都包含若干命令,这些命令主要包含Nginx的主模块命令,事件模块命令,HTTP核心模块命令,同时每个部分还可以使用其他HTTP模块命令(例如HTTP SSL模块,HttpGzip Static模块和Http Addition模块等)。 ```bashuser nobody;
worker_processes 1;
error_log logs/error.log;
error_log logs/error.log notice;
error_log logs/error.log info;
pid logs/nginx.pid;
events { use epoll; worker_connections 1024; }
/ 以上这块配置代码是对nginx全局属性的配置。 user :主模块命令, 指定Nginx的worker进程运行用户以及用户组,默认由nobody账号运行(默认nginx)。 worker processes: 指定Nginx要开启的进程数。 error log: 用来定义全局错设日志文件的路径和日志名称。日志输出级别有debug,info,notice,warn,error,crit 可供选择,其中debug输出日志最为详细,面crit输出日志最少。 pid: 用来指定进程id的存储文件位置。 event:设定nginx的工作模式及连接数上限,其中参数use用来指定nginx的工作模式(这里是epoll,epoll是多路复用IO(I/O Multiplexing)中的一种方式),nginx支持的工作模式有select ,poll,kqueue,epoll,rtsig,/dev/poll。其中select和poll都是标准的工作模式,kqueue和epoll是高效的工作模式,对于linux系统,epoll是首选。 worker_connection是设置nginx每个进程最大的连接数,默认是1024,所以nginx最大的连接数max_client=worker_processes worker_connections。进程最大连接数受到系统最大打开文件数的限制,需要设置ulimit。 */
下面部分是nginx对http服务器相关属性的设置
http { include mime.types; 主模块命令,对配置文件所包含文件的设定,减少主配置文件的复杂度,相当于把部分设置放在别的地方,然后在包含进来,保持主配置文件的简洁 default_type application/octet-stream;
# 默认文件类型,当文件类型未定义时候就使用这类设置的,octet-stream代表 什么类型都可以接收#log_format main '$remote_addr - $remote_user [$time_local] "$request" ' 指定nginx日志的格式# '$status $body_bytes_sent "$http_referer" '# '"$http_user_agent" "$http_x_forwarded_for"';#access_log logs/access.log main;sendfile on; 开启高效文件传输模式(zero copy 方式),避免内核缓冲区数据和用户缓冲区数据之间的拷贝。#tcp_nopush on;#keepalive_timeout 0; 客户端连接超时时间keepalive_timeout 65;#gzip on; # 设置是否开启gzip模块,正式服务器这里一般是需要打开的,如果是静态资源服务器就不需要打开了#server段是虚拟主机的配置 这里可以写在别的文件中 然后在包含进来,比如写在/usr/local/nginx/vhost/xxx.conf 目录某文件中 然后在包含进来,可以包含多个文件 include /usr/local/nginx/vhost/*;server {listen 80; 虚拟主机的服务端口server_name localhost; 用来指定ip或者域名,多个域名用逗号分开#charset utf-8;#access_log logs/host.access.log main;location / { 地址匹配设置,支持正则匹配,也支持条件匹配,这里是默认请求地址,用户可以location命令对nginx进行动态和静态网页过滤处理root html; 虚拟主机的网页根目录index index.html index.htm; 默认访问首页文件}#error_page 404 /404.html;# redirect server error pages to the static page /50x.html#error_page 500 502 503 504 /50x.html;location = /50x.html {root html;}# proxy the PHP scripts to Apache listening on 127.0.0.1:80#location ~ \.php$ { 将以php为后缀的文件转发到 FastCGI处理. 使用FastCGI默认配置。本地8088端口处理fastcgi_pass http://127.0.0.1:8088;fastcgi_index index.php;fastcgi_param SCRIPT_FILENAME $document_root$fastcgi_script_name;include fastcgi_params;}#静态文件,nginx自己处理location ~ ^/(images|javascript|js|css|flash|media|static)/ {root /var/www/public/images;expires 30d; #缓存时间30天,静态文件更新不多,过期时间可以设大一点。}#配置Nginx状态的地址 方便监控nginxlocation /NginxStatus {stub_status on;access_log on;auth_basic "NginxStatus";auth_basic_user_file conf/htpasswd;}#配置nginx负载均衡的服务器列表upstream mysvr {# 这里是反向代理#weigth参数表示权值,权值越高被分配到的几率越大#本机上的Squid开启3128端口server 192.168.199.1:88 weight=5;server 192.168.199.1:80 weight=1;}# pass the PHP scripts to FastCGI server listening on 127.0.0.1:9000##location ~ \.php$ {# root html;# fastcgi_pass 127.0.0.1:9000;# fastcgi_index index.php;# fastcgi_param SCRIPT_FILENAME /scripts$fastcgi_script_name;# include fastcgi_params;#}# deny access to .htaccess files, if Apache's document root# concurs with nginx's one##location ~ /\.ht {# deny all;#}}# another virtual host using mix of IP-, name-, and port-based configuration##server {# listen 8000;# listen somename:8080;# server_name somename alias another.alias;# location / {# root html;# index index.html index.htm;# }#}# HTTPS server##server {# listen 443 ssl;# server_name localhost;# ssl_certificate cert.pem;# ssl_certificate_key cert.key;# ssl_session_cache shared:SSL:1m;# ssl_session_timeout 5m;# ssl_ciphers HIGH:!aNULL:!MD5;# ssl_prefer_server_ciphers on;# location / {# root html;# index index.html index.htm;# }#}
1、Server
基于域名的配置
a、首先在本地的(系统盘/windows/system32/driver/etc/hosts)文件中配置DNS
格式为: IP 域名
192.168.3.172 www.gerry.com
b、在nginx的配置中配置虚拟主机
基于端口
基于IP地址(不怎么用)
匹配顺序


