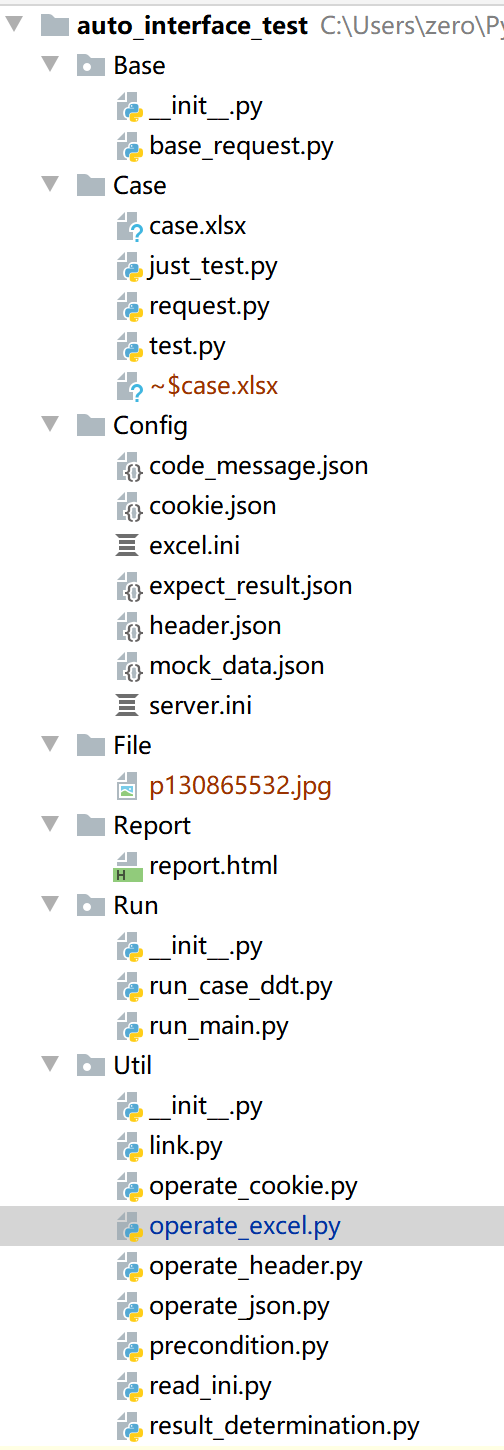
3.1 设计excel结构
根据个人需要设计
| case编号 | 用例名称 | 是否执行 | 是否是链路 | 前置条件 | 依赖key | url或链路名称 | method | 请求参数 | header操作 | 预期结果方式 | 预期结果 | 执行结果 | 返回数据 |
|---|---|---|---|---|---|---|---|---|---|---|---|---|---|
| Aha_001 | 名称1 | yes | /login/phone | post | {“phone”: “15xxxxxx”, |
“password”: “123456”} | yes | code_msg | | pass | | | Aha_002 | 名称2 | no | yes | Aha_001>data.pageData.[0].id | projectId | upload_user_photo | get | | | code | 200 | | | | Aha_003 | 名称3 | yes | no | Aha_004>data.userId | | /userInfo/ | | | | json | | failed | |
3.2 excel操作
写得时候需要调一调,就是+1或者-1的区别。。因为有的时候从0开始,有的时候从1开始
# coding=utf-8import openpyxlimport sysimport ossys.path.append(os.path.realpath('..'))class OperateExcel:def load_excel(self):"""加载excel"""open_excel = openpyxl.load_workbook(r"../Case/case.xlsx")return open_exceldef get_sheet_data(self, index=None):"""加载所有sheet的内容"""sheet_name = self.load_excel().sheetnamesif index is None:index = 0data = self.load_excel()[sheet_name[index]]return datadef get_cell_value(self, row, cols):"""获取某一个单元格的内容"""data = self.get_sheet_data().cell(row=row, column=cols).valuereturn datadef get_rows(self):"""获取行数"""row = self.get_sheet_data().max_rowreturn row-1def get_row_value(self, row):"""获取某行内容"""value_list = []for i in self.get_sheet_data()[row]:value_list.append(i.value)return value_listdef write_data(self, row, cols, value):"""写入数据:param row::param cols::param value::return:"""wb = self.load_excel()wr = wb.activewr.cell(row, cols, value)wb.save(r"../Case/case.xlsx")def get_columns_data(self, col_no=None):"""获取某列的所有值:param col_no: 列号, str:return:"""columns_list = []if col_no is None:col_no = 'A'columns_list_data = self.get_sheet_data()[col_no]for i in columns_list_data:columns_list.append(i.value)return columns_listdef get_row_number(self, case_id):"""获取行号:return:"""number = 1cols_data = self.get_columns_data()for col_data in cols_data:if case_id == col_data:return numbernumber = number + 1def get_excel_data(self):"""获取excel里所有的数据:return:"""data_list = []for i in range(self.get_rows()):# 从1开始数,所以第二行是2data_list.append(self.get_row_value(i+2))return data_list# 单例模式,只需实例化一次excel_data = OperateExcel()if __name__ == "__main__":excel = OperateExcel()print(excel.get_row_number("imooc_002"))
3.3 ini文件操作
ini文件就是配置文件,记录一些常用参数比方说host地址
[server]host=https://aha.cn/aha_testphone=15xxxxxxxxxpassword=123456[case]case_no=0case_name=1is_run=2is_link=3is_depend=4depend_key=5url=6method=7request_data=8header_method=9expect_method=10expect_result=11result=12res_data=13[pic_file1]file_name = p130865532.jpgfile_path = C:\Users\zero\PycharmProjects\auto_interface_test\Filefile_type = image/jpeg
读取ini文件
# coding = utf-8import osimport syssys.path.append(os.path.realpath('..'))import configparserclass ReadIni:def load_ini(self):file_path = r'..\Config\server.ini'cf = configparser.ConfigParser()cf.read(file_path, encoding="utf-8-sig")return cfdef get_value(self, key, section=None):"""获取ini里的值:param key::param section::return:"""if section is None:section = 'server'cf = self.load_ini()try:value = cf.get(section, key)except Exception as e:print("没有获取到值")value = Noneprint(e)return valuereturn valueread_ini = ReadIni()if __name__ == "__main__":ri = ReadIni()data = ri.get_value('result', 'case')print(data)
3.4 run main
3.4.1 前置条件
首先要搞清楚有几种请求
如果是post和有参数的get请求,就需要三个信息。比方说发送评论,需要先获取到评论id,评论id又是通过上一个请求“获取所有评论”获得的。所以就是三个信息:上一请求的返回参数,提取参数的规则,依赖参数。就是表格中的返回数据、前置条件、依赖参数。(名称自己瞎起的,领会精神)
如果是不带参数的get请求,比方说host/project/23这样的url,就不需要有依赖参数,拼接一下url就可以了。
那么代码中就是:
if is_depend is not None:depend_data = load_dependency(is_depend)if depend_key is not None:request_data[depend_key] = depend_dataprint(request_data)else:url = url + str(depend_data)
提取所需的前置参数值,precondition.py
规则是imooc_001>data:banner:id
先使用get_dependent_data获取imooc_001这条用例中的返回数据集,然后通过后面的规则通过get_dependent_value提取所需的参数值,然后整合到load_dependency中方便调用。
# coding = utf-8import osimport sysfrom jsonpath_rw import parseimport jsonsys.path.append(os.path.realpath('..'))from Util.operate_excel import excel_datadef split_data(data):""":param data: excel中的内容:return:"""# data = imooc_001>data:banner:idcase_id = data.split(">")[0]data_rule = data.split(">")[1]return case_id, data_ruledef get_dependent_data(data):"""从excel中获取数据集:param data: excel中的内容:return:"""case_id = split_data(data)[0]row_number = excel_data.get_row_number(case_id)row_value = excel_data.get_cell_value(row_number, 14)return row_valuedef get_dependent_value(data, rule):"""从数据集中提取所需的字段:param data: 请求返回的数据:param rule: 匹配规则:data.banner.[0].id:return:"""data = json.loads(data)for i in parse(rule).find(data):return i.value#return [i.value for i in parse(rule).find(data)][0]def load_dependency(data):response_data = get_dependent_data(data)rule = split_data(data)[1]return get_dependent_value(response_data, rule)
3.4.2 链路
(这部分是自己瞎写的)
因为有一些用例需要通过多个请求完成,所以把这些请求整合到一个方法中,直接调用方法。
我使用反射完成。
if is_link is not None:#url=upload_user_photoexecute_link = getattr(link, url)res = execute_link(phone, password, file_name, file_path, file_type)
就是先新建一个link.py文件,调用里面的方法。
下面用上传头像举例:
# coding = utf-8import osimport syssys.path.append(os.path.realpath('..'))import requestsfrom Base.base_request import requestfrom requests.packages.urllib3.exceptions import InsecureRequestWarningrequests.packages.urllib3.disable_warnings(InsecureRequestWarning)class Link:def upload_user_photo(*args):"""上传头像:param phone::param password::param filename::param path::param pic_type: image/jpeg:return:"""# 登录proxies = {'http': "http://localHost:8888", 'https': 'http://localhost:8888'}headers = {'Content-Type': 'application/json'}login_url = "/login/phone"data1 = {'phone': args[1], 'password': args[2]}res_login = request.run_main('post', login_url, data1, headers, proxies, False)print(res_login)token = res_login['data']['token']headers['Authorization'] = token# 获取向COS上传公共文件签名signature_url = "/userInfo/avatar/sign/upload"data2 = {"filename": args[3]}res_signature = request.run_main('get', signature_url, data2, headers, proxies, False)print(res_signature)key = res_signature['data']['filename']policy = res_signature['data']['policy']q_ak = res_signature['data']['secretId']q_key_time = res_signature['data']['keyTime']q_sign_algorithm = "sha1"q_signature = res_signature['data']['signature']# 上传图片到服务器pic_url = "https://aha-public-1257019972.cos.ap-shanghai.myqcloud.com"with open(args[4], "rb") as f_abs:body = {"key": (None, key),"policy": (None, policy),"q-ak": (None, q_ak),"q-key-time": (None, q_key_time),"q-sign-algorithm": (None, q_sign_algorithm),"q-signature": (None, q_signature),"file": (args[3], f_abs, args[5])}res_pic = requests.post(pic_url, files=body, proxies=proxies, verify=False)print(res_pic.headers)location = res_pic.headers['Location']# 修改用户信息modify_user_info_url = "/userInfo/me"modify_user_info_data = {"avatarUrl": location}res_put = request.run_main("put", modify_user_info_url, modify_user_info_data, headers, proxies, False)print(res_put)return res_put
3.4.3 判断case是否通过
首先要知道有几种判断方法,可以通过code_msg、code、json结构判断。
if expect_method == 'code_msg':config_message = read_expected_msg(url, code)if message == config_message:print("测试case通过")excel_data.write_data(i + 2, int(read_ini.get_value('result', 'case'))+1, "pass")excel_data.write_data(i + 2, int(read_ini.get_value('res_data', 'case'))+1, json.dumps(res))else:print("测试case失败")excel_data.write_data(i + 2, int(read_ini.get_value('result', 'case'))+1, "fail")excel_data.write_data(i + 2, int(read_ini.get_value('res_data', 'case'))+1, json.dumps(res))if expect_method == 'code':if expect_result == code:print("测试case通过")excel_data.write_data(i + 2, int(read_ini.get_value('result', 'case'))+1, "pass")excel_data.write_data(i + 2, int(read_ini.get_value('res_data', 'case'))+1, json.dumps(res))else:print("测试case失败")excel_data.write_data(i + 2, int(read_ini.get_value('result', 'case'))+1, "fail")excel_data.write_data(i + 2, int(read_ini.get_value('res_data', 'case'))+1, json.dumps(res))if expect_method == 'json':if code == "200":status = "success"else:status = "error"expect_result = get_result_json(url, status)if check_json_format(res, expect_result):print("测试case通过")excel_data.write_data(i + 2, int(read_ini.get_value('result', 'case'))+1, "pass")excel_data.write_data(i + 2, int(read_ini.get_value('res_data', 'case'))+1, json.dumps(res))else:print("测试case失败")excel_data.write_data(i + 2, int(read_ini.get_value('result', 'case'))+1, "fail")excel_data.write_data(i + 2, int(read_ini.get_value('res_data', 'case'))+1, json.dumps(res))if expect_method is None:excel_data.write_data(i + 2, int(read_ini.get_value('res_data', 'case')) + 1, json.dumps(res))
a. code_msg
举个栗子。就是状态码和返回信息之间的对应关系。
code_msg.json
"/login/phone": [{"200": "登录成功"},{"302": "用户名或密码错误!"},{"301": "用户不存在!"},{"701": "访问次数超限!"}
问题就是如何提取,和判断是否对应。
def read_expected_msg(url, code):data = get_value(url, "code_message.json")if data is not None:# data是一个listfor i in data:message = i.get(code)if message is not None:return messagereturn None
b. code
c. json结构
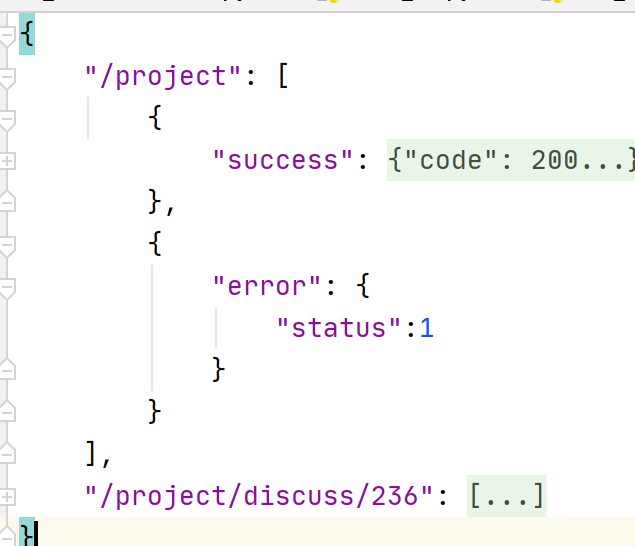
这个就是看返回的结果的json结构是否和预期的json结构一致,所以也是有一个json文件记录预期json结构。
expect_result.json
根据状态(success/error)区分预期的结果
def get_result_json(url, status):data = get_value(url, "expect_result.json")if data is not None:# data是一个listfor i in data:message = i.get(status)if message is not None:return messagereturn Nonedef check_json_format(dict1, dict2):"""校验json格式:return:"""# 参数必须为字典,如果有一个不是字典,就返回falseif isinstance(dict1, dict) and isinstance(dict2, dict):cmp_dirt = DeepDiff(dict1, dict2, ignore_order=True).to_dict()#print(cmp_dirt)if cmp_dirt.get("dictionary_item_added"):return Falseelse:return Truereturn False
未完待续,其实我不是很清楚如何管理case。。。


