一.搭建
1.使用docker搭建
docker search nexus3

docker pull docker.io/sonatype/nexus3mkdir -p /usr/local/nexus3/nexus-datachown -R 200 /usr/local/nexus3/nexus-datadocker run -tid -p 8081:8081 --name nexus -e NEXUS_CONTEXT=nexus -v /usr/local/nexus3/nexus-data:/nexus-data docker.io/sonatype/nexus3

至此安装成功。
二.配置
1.登录nexus
访问:[http://ip:8081/nexus](http://ip:8081/nexus) 使用默认管理员身份登录,帐号:admin,密码:admin123<br />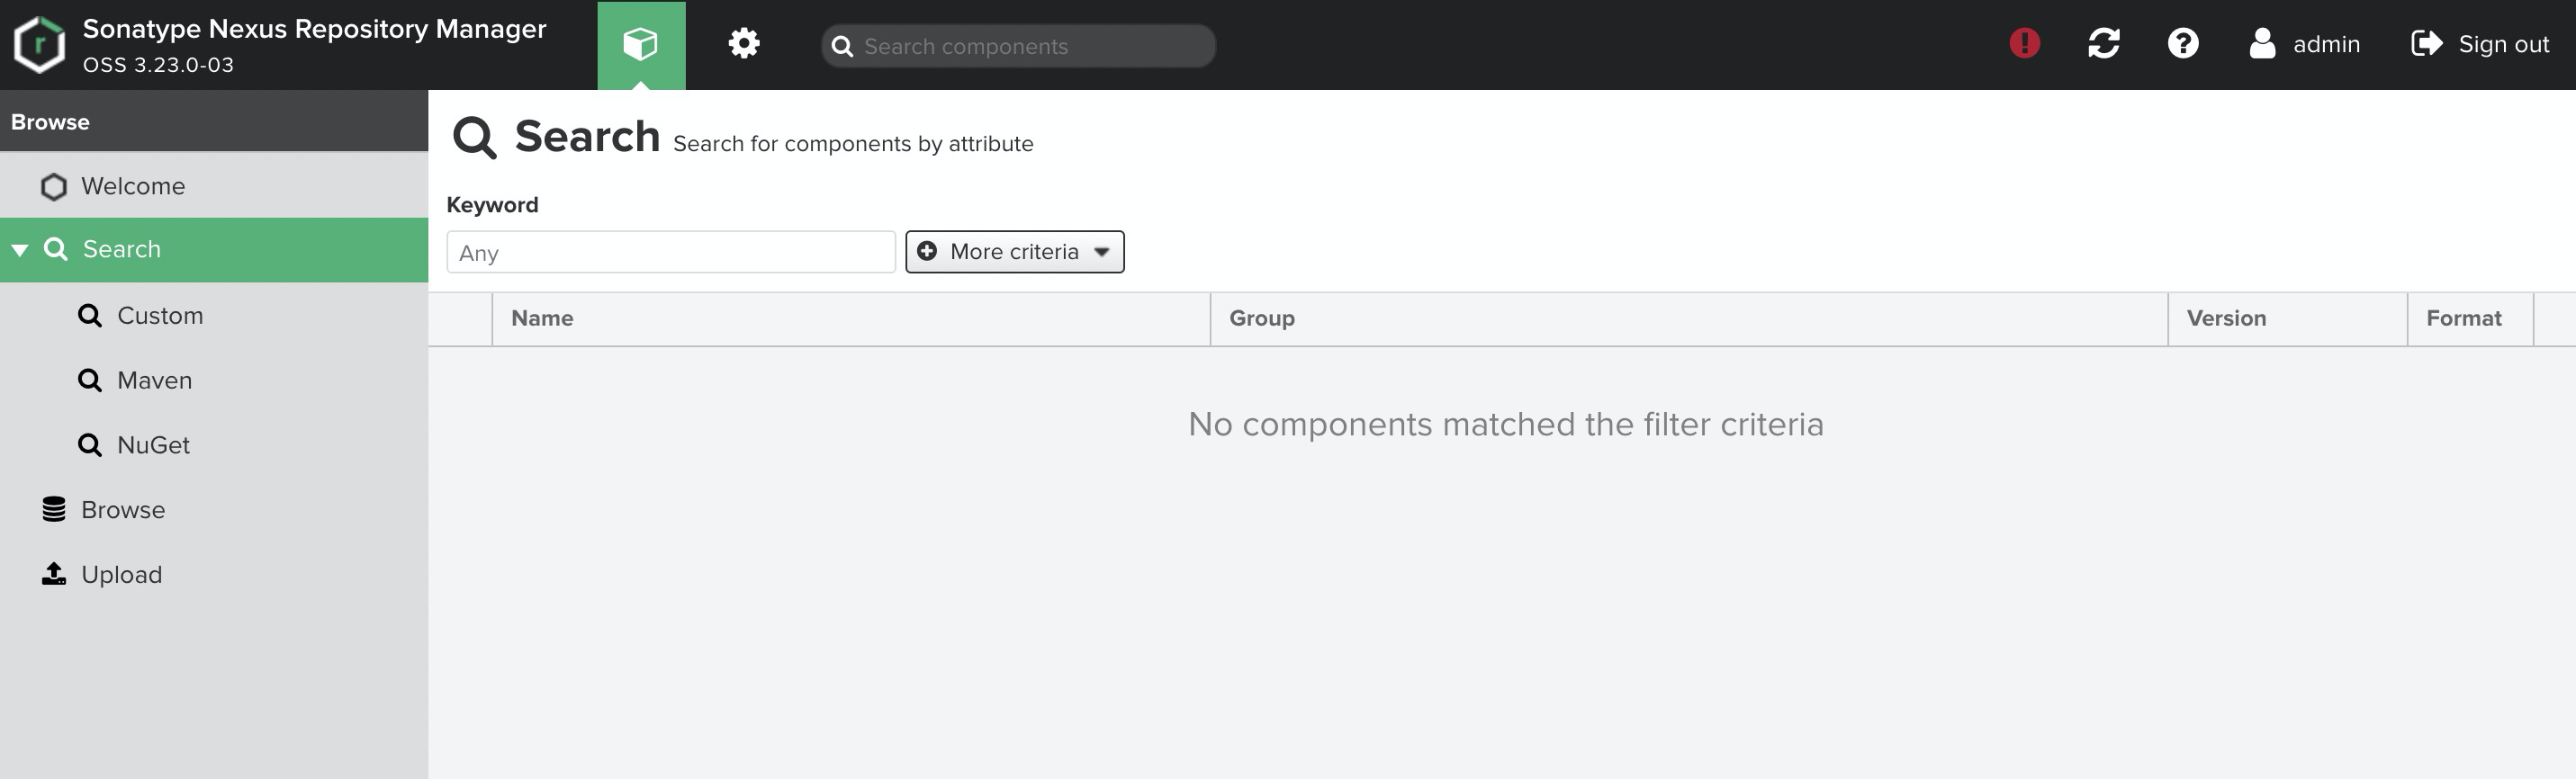
2.设置
- Browse可以查看当前有多少仓库,搭建好的Nexus,默认会带有一些maven仓库,一般使用这些仓库就足够了。
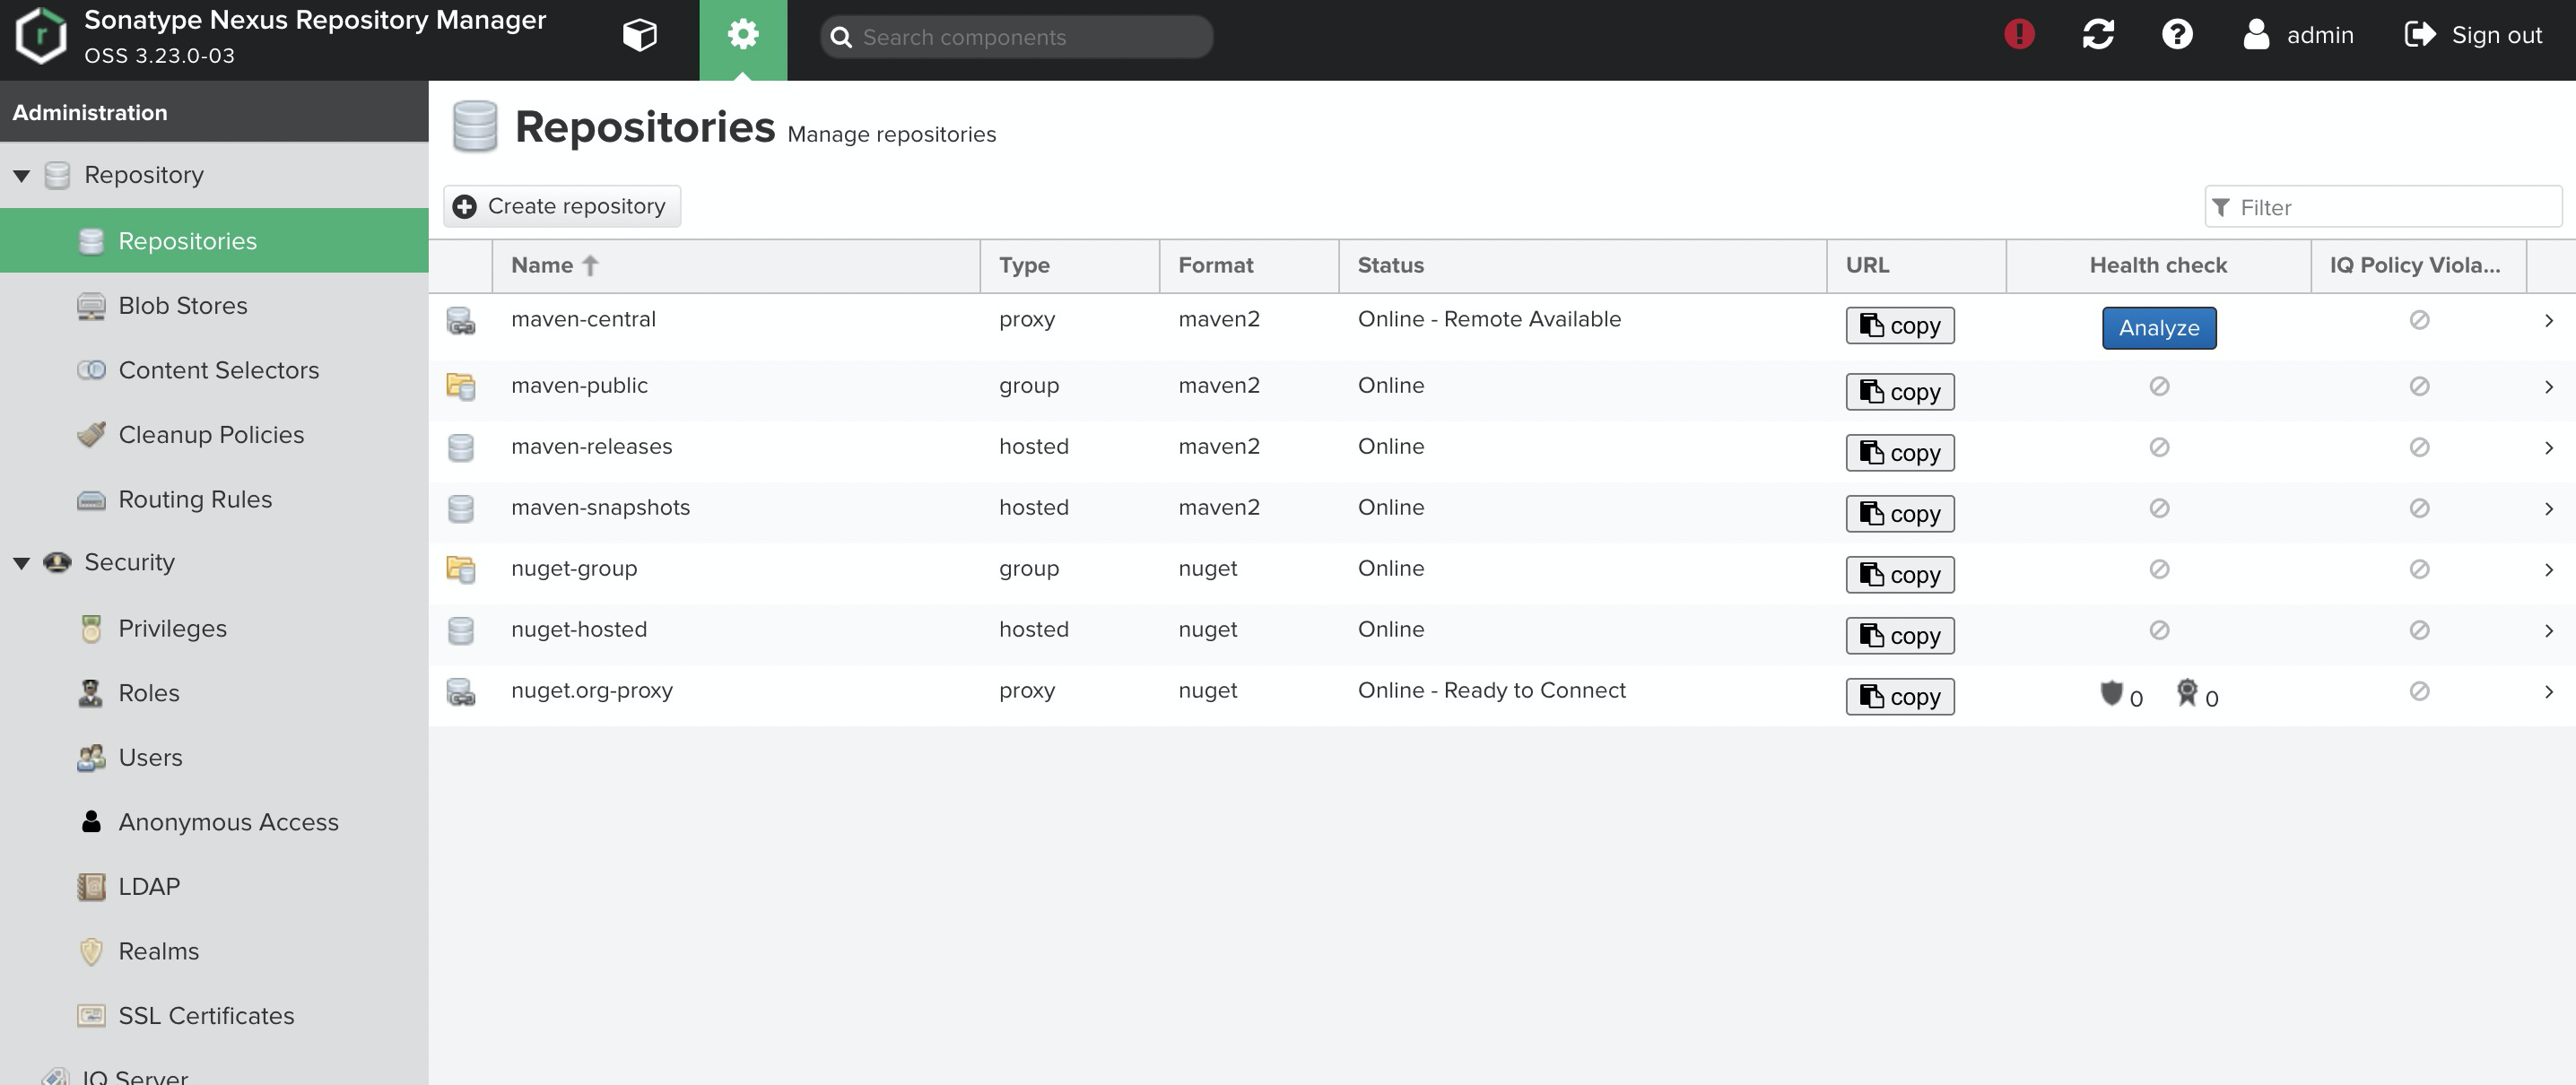
默认仓库说明
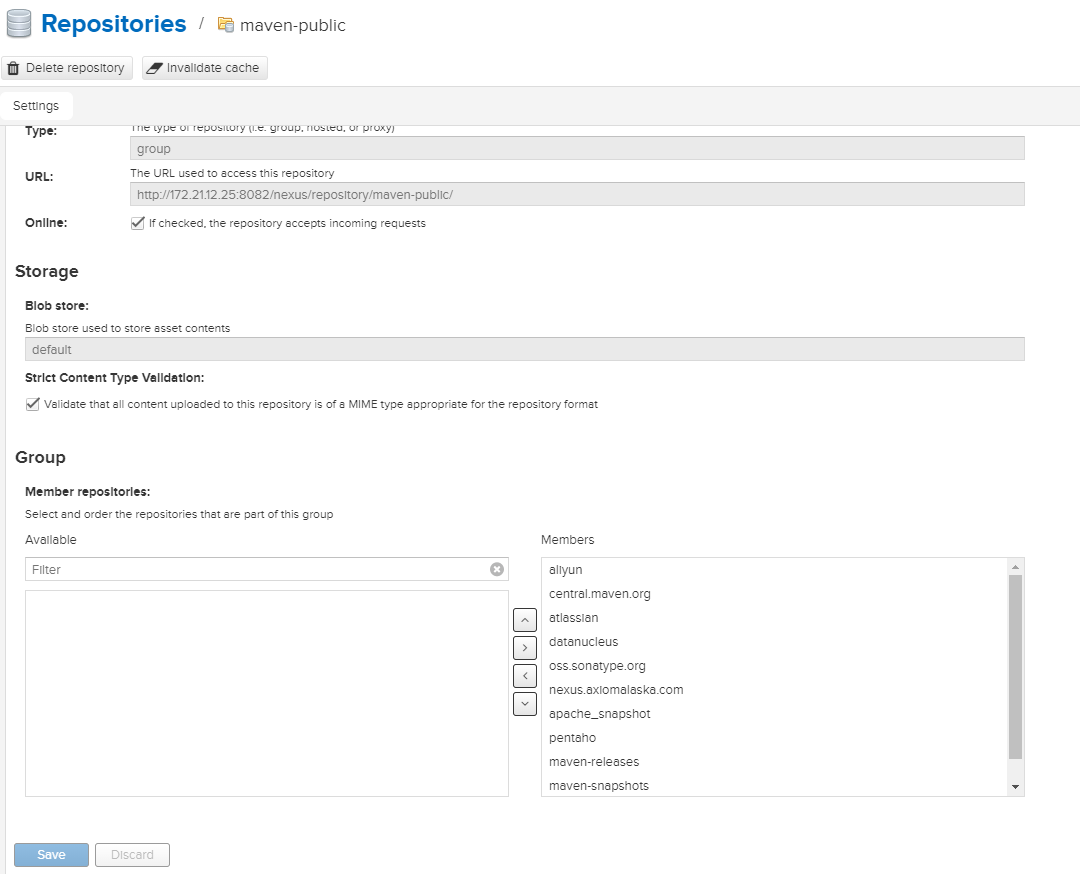
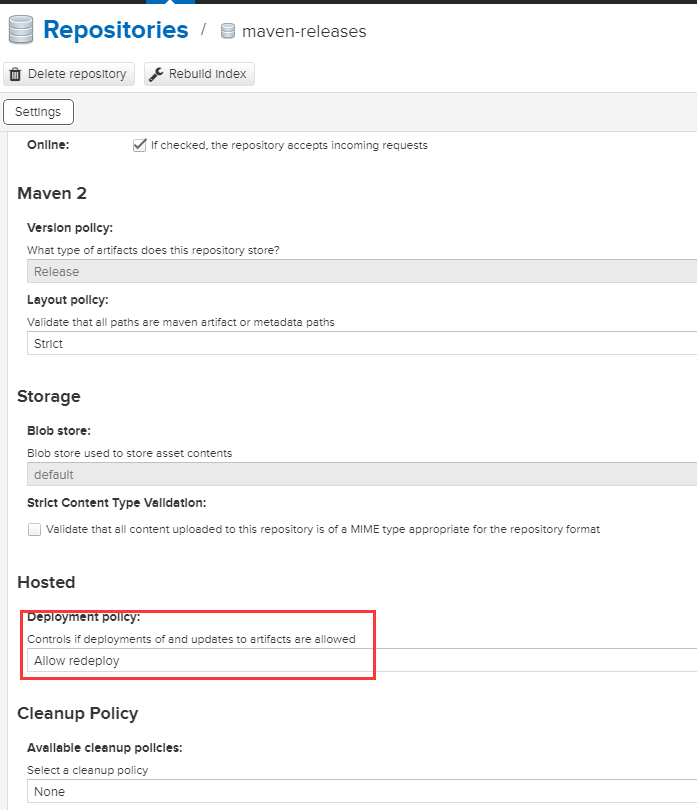
maven-central:maven中央库,默认从[https://repo1.maven.org/maven2/](https://repo1.maven.org/maven2/)拉取jar<br /> maven-releases:私库发行版jar,初次安装请将Deployment policy设置为Allow redeploy<br /> maven-snapshots:私库快照(调试版本)jar<br /> maven-public:仓库分组,把上面三个仓库组合在一起对外提供服务,在本地maven基础配置settings.xml或项目pom.xml中使用。
仓库类型
Group:这是一个仓库聚合的概念,用户仓库地址选择Group的地址,即可访问Group中配置的,用于方便开发人员自己设定的仓库。maven-public就是一个Group类型的仓库,内部设置了多个仓库,访问顺序取决于配置顺序,3.x默认Releases,Snapshots, Central,当然你也可以自己设置。<br /> Hosted:私有仓库,内部项目的发布仓库,专门用来存储我们自己生成的jar文件<br /> Snapshots:本地项目的快照仓库<br /> Releases: 本地项目发布的正式版本<br /> Proxy:代理类型,从远程中央仓库中寻找数据的仓库(可以点击对应的仓库的Configuration页签下Remote Storage属性的值即被代理的远程仓库的路径),如可配置阿里云maven仓库<br /> Central:中央仓库
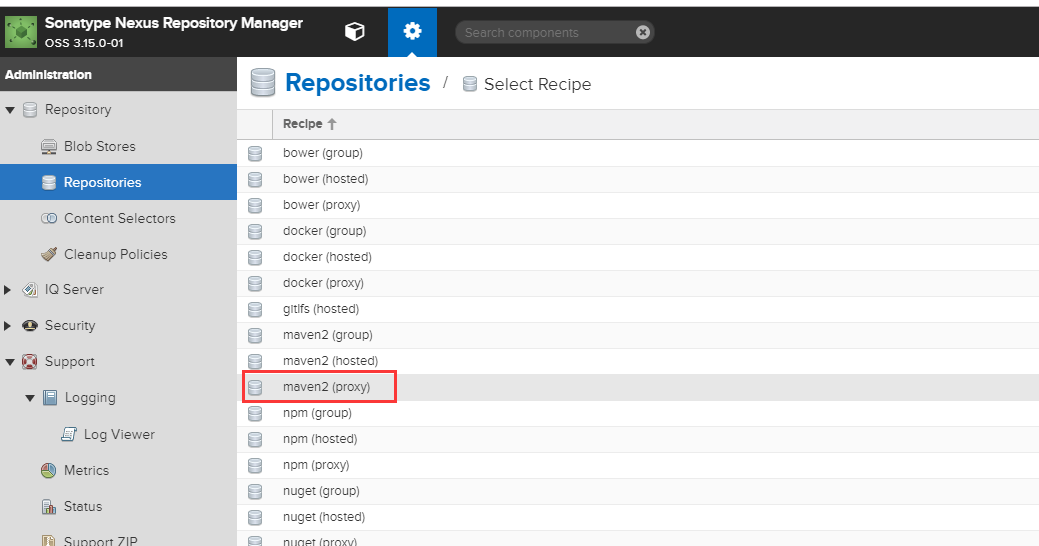
3、增加新的代理源
3.1 按照步骤添加新的代理源
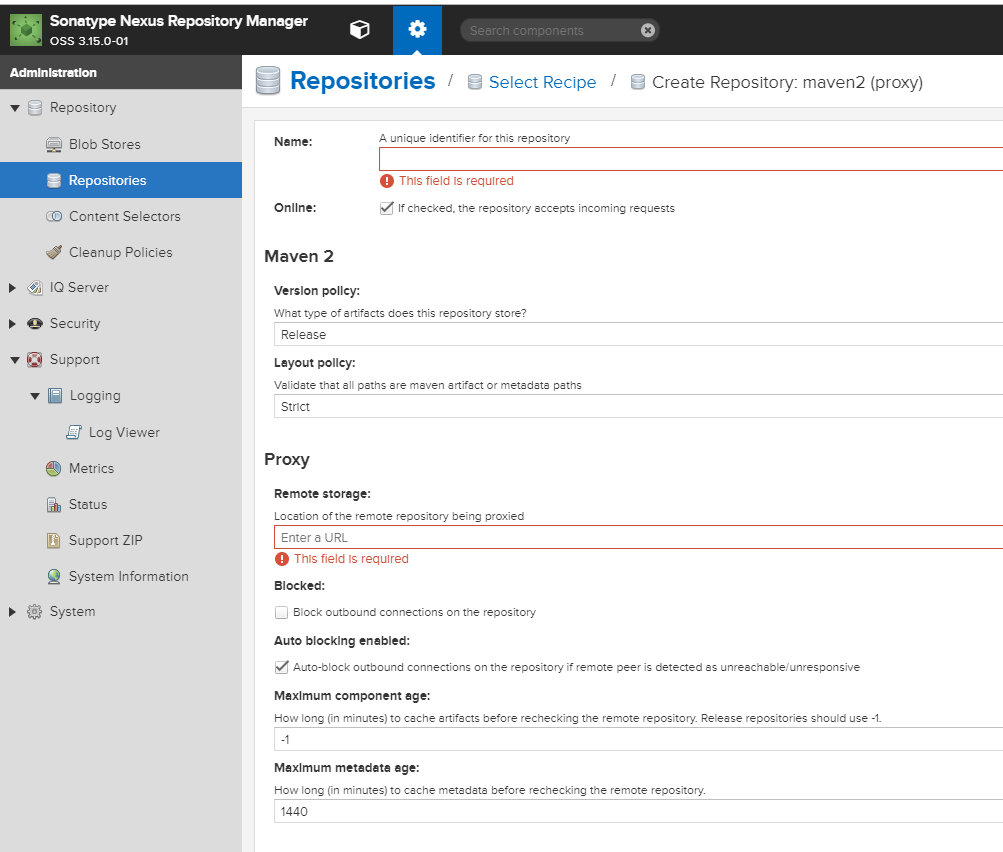
3.2 选择添加maven2的代理
3.3 添加代理(Cache统一设置为200天 288000)
<br /> 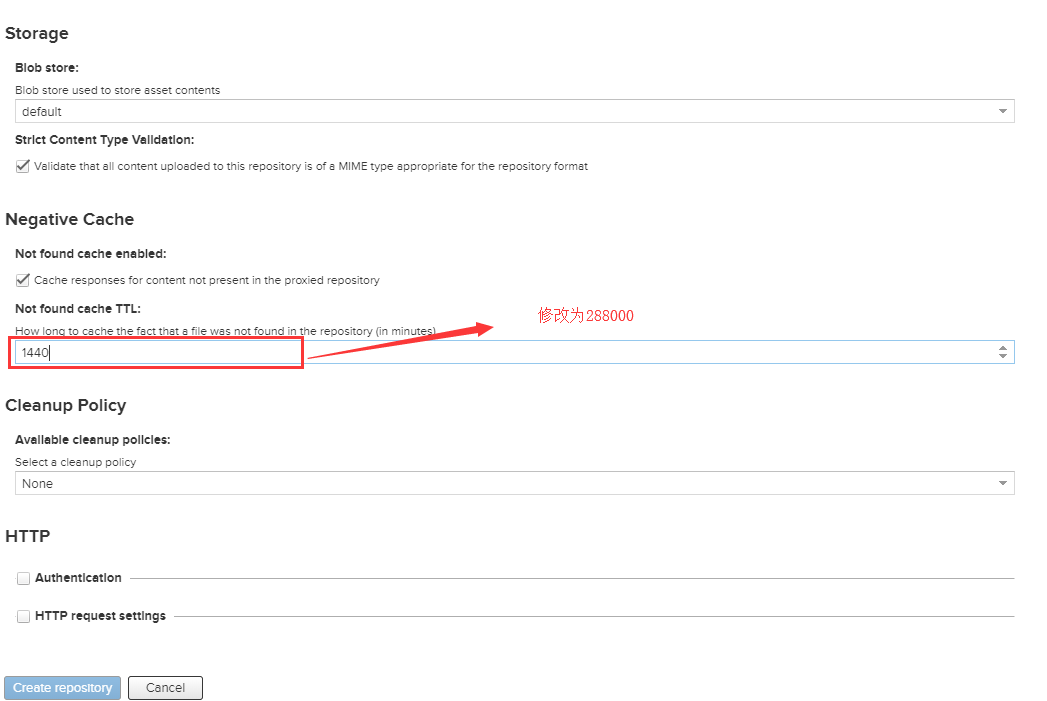
3.4 逐个增加常用代理
```
- aliyun http://maven.aliyun.com/nexus/content/groups/public
- apache_snapshot https://repository.apache.org/content/repositories/snapshots/
- apache_release https://repository.apache.org/content/repositories/releases/
- atlassian https://maven.atlassian.com/content/repositories/atlassian-public/
- central.maven.org http://central.maven.org/maven2/
- datanucleus http://www.datanucleus.org/downloads/maven2
- maven-central (安装后自带,仅需设置Cache有效期即可) https://repo1.maven.org/maven2/
- nexus.axiomalaska.com http://nexus.axiomalaska.com/nexus/content/repositories/public
- oss.sonatype.org
https://oss.sonatype.org/content/repositories/snapshots
10.pentaho
https://public.nexus.pentaho.org/content/groups/omni/
```
3.5 设置maven-public 将这些代理加入Group,最好将默认的maven库放到最底下
3.6 设置私用仓库可重复发布
Nexus安装后自带maven-releases,maven-snapshots两个仓库,用于将生成的jar包发布在这两个仓库中,在实际开发中需要将maven-releases设置为可以重复发布
三. maven配置使用Nexus
1. 修改maven setting.xml文件配置
1.1 设置
在节点 节点中添加如下子节点信息:
<servers><server><id>releases</id><username>admin</username><password>admin23</password></server><server><id>snapshots</id><username>admin</username><password>admin123</password></server></servers>
说明:username 和password根据自己搭建的nexus的情况而定,这里设置请求私有仓库的凭证信息。
1.2 配置 节点
修改
<mirrors><mirror><id>nexus</id><mirrorOf>*</mirrorOf><name>Public Repository Mirror.</name><url>http://ip:8081/repository/maven-public/</url></mirror></mirrors>
1.4 配置节点
<profiles><profile><id>dev</id><repositories><repository><id>nexus</id><name>Public Repositories</name><url>http://ip:8081/repository/maven-public/</url><releases><enabled>true</enabled></releases></repository><repository><id>central</id><name>Central Repositories</name><url>http://ip:8081/repository/maven-central/</url><releases><enabled>true</enabled></releases><snapshots><enabled>false</enabled></snapshots></repository><repository><id>release</id><name>Release Repositories</name><url>http://ip:8082/repository/maven-releases/</url><releases><enabled>true</enabled></releases><snapshots><enabled>false</enabled></snapshots></repository><repository><id>snapshots</id><name>Snapshot Repositories</name><url>http://ip:8082/repository/maven-snapshots/</url><releases><enabled>true</enabled></releases><snapshots><enabled>true</enabled></snapshots></repository></repositories><pluginRepositories><pluginRepository><id>plugins</id><name>Plugin Repositories</name><url>http://ip:8081/repository/maven-public/</url></pluginRepository></pluginRepositories></profile></profiles>
说明:配置个repository信息,ip:8081根据自己nexus搭建做出改变。
1.5 添加活跃profile
设置maven总是先从哪个profile拉取,
<activeProfiles><activeProfile>dev</activeProfile></activeProfiles>
2. 往私有仓库发布jar包
2.1 创建一个maven工程

2.2 maven打包
mvn clean package
2.3 通过命令上传jar包到私有仓库
mvn deploy:deploy-file -Dmaven.test.skip=true \-Dfile=****demo-0.0.1-SNAPSHOT.jar \ #jar包绝对路径-DgroupId=com.ftlcloud \ #groupId-DartifactId=demo \ #artifactId-Dversion=1.0.0-SNAPSHOT \ #version-Dpackaging=jar \-DrepositoryId=snapshots \ #类型,有snapshots,releases,根据生成的jar结尾而定,如果以SNAPSHOT结尾则snapshots,其他releases-Durl=http://ip:8081/repository/maven-snapshots/ #仓库路径

2.3 配置pom.xml 简化上传
在pom文件中加入distributionManagement节点,注意:pom.xml中repository里的id需要和.m2中setting.xml里的server id名称保持一致
<distributionManagement><repository><id>releases</id><name>Nexus Release Repository</name><url>http://ip:8081/repository/maven-releases/</url></repository><snapshotRepository><id>snapshots</id><name>Nexus Snapshot Repository</name><url>http://ip:8081/repository/maven-snapshots/</url></snapshotRepository></distributionManagement>
2.4 发布私有公库
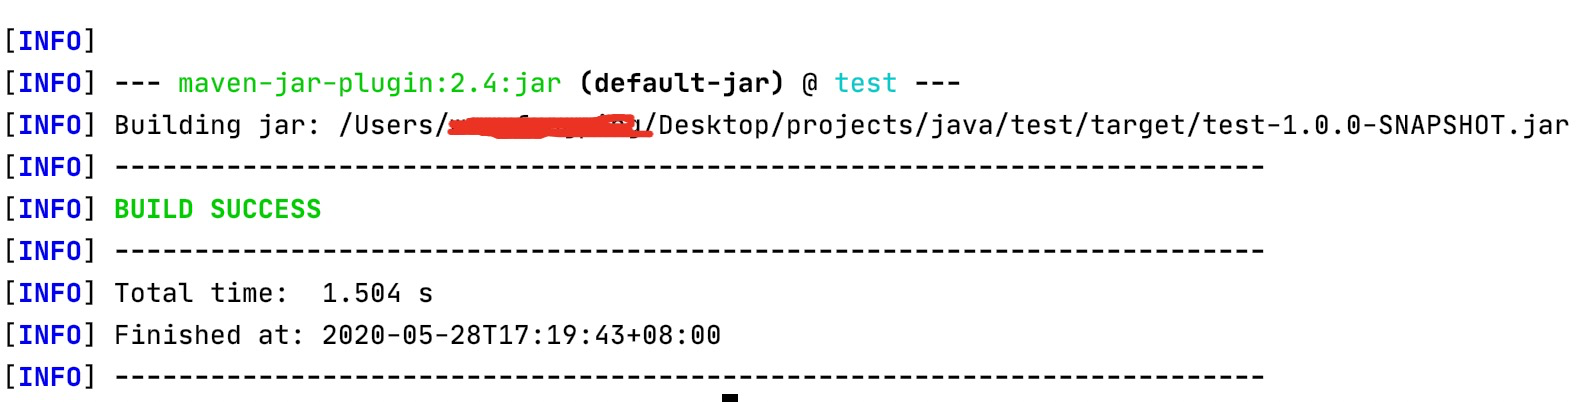
执行部署命令即可发布。
mvn deploy

2.5 验证
登录Nexus,查看对应的仓库已经有相关的依赖包了 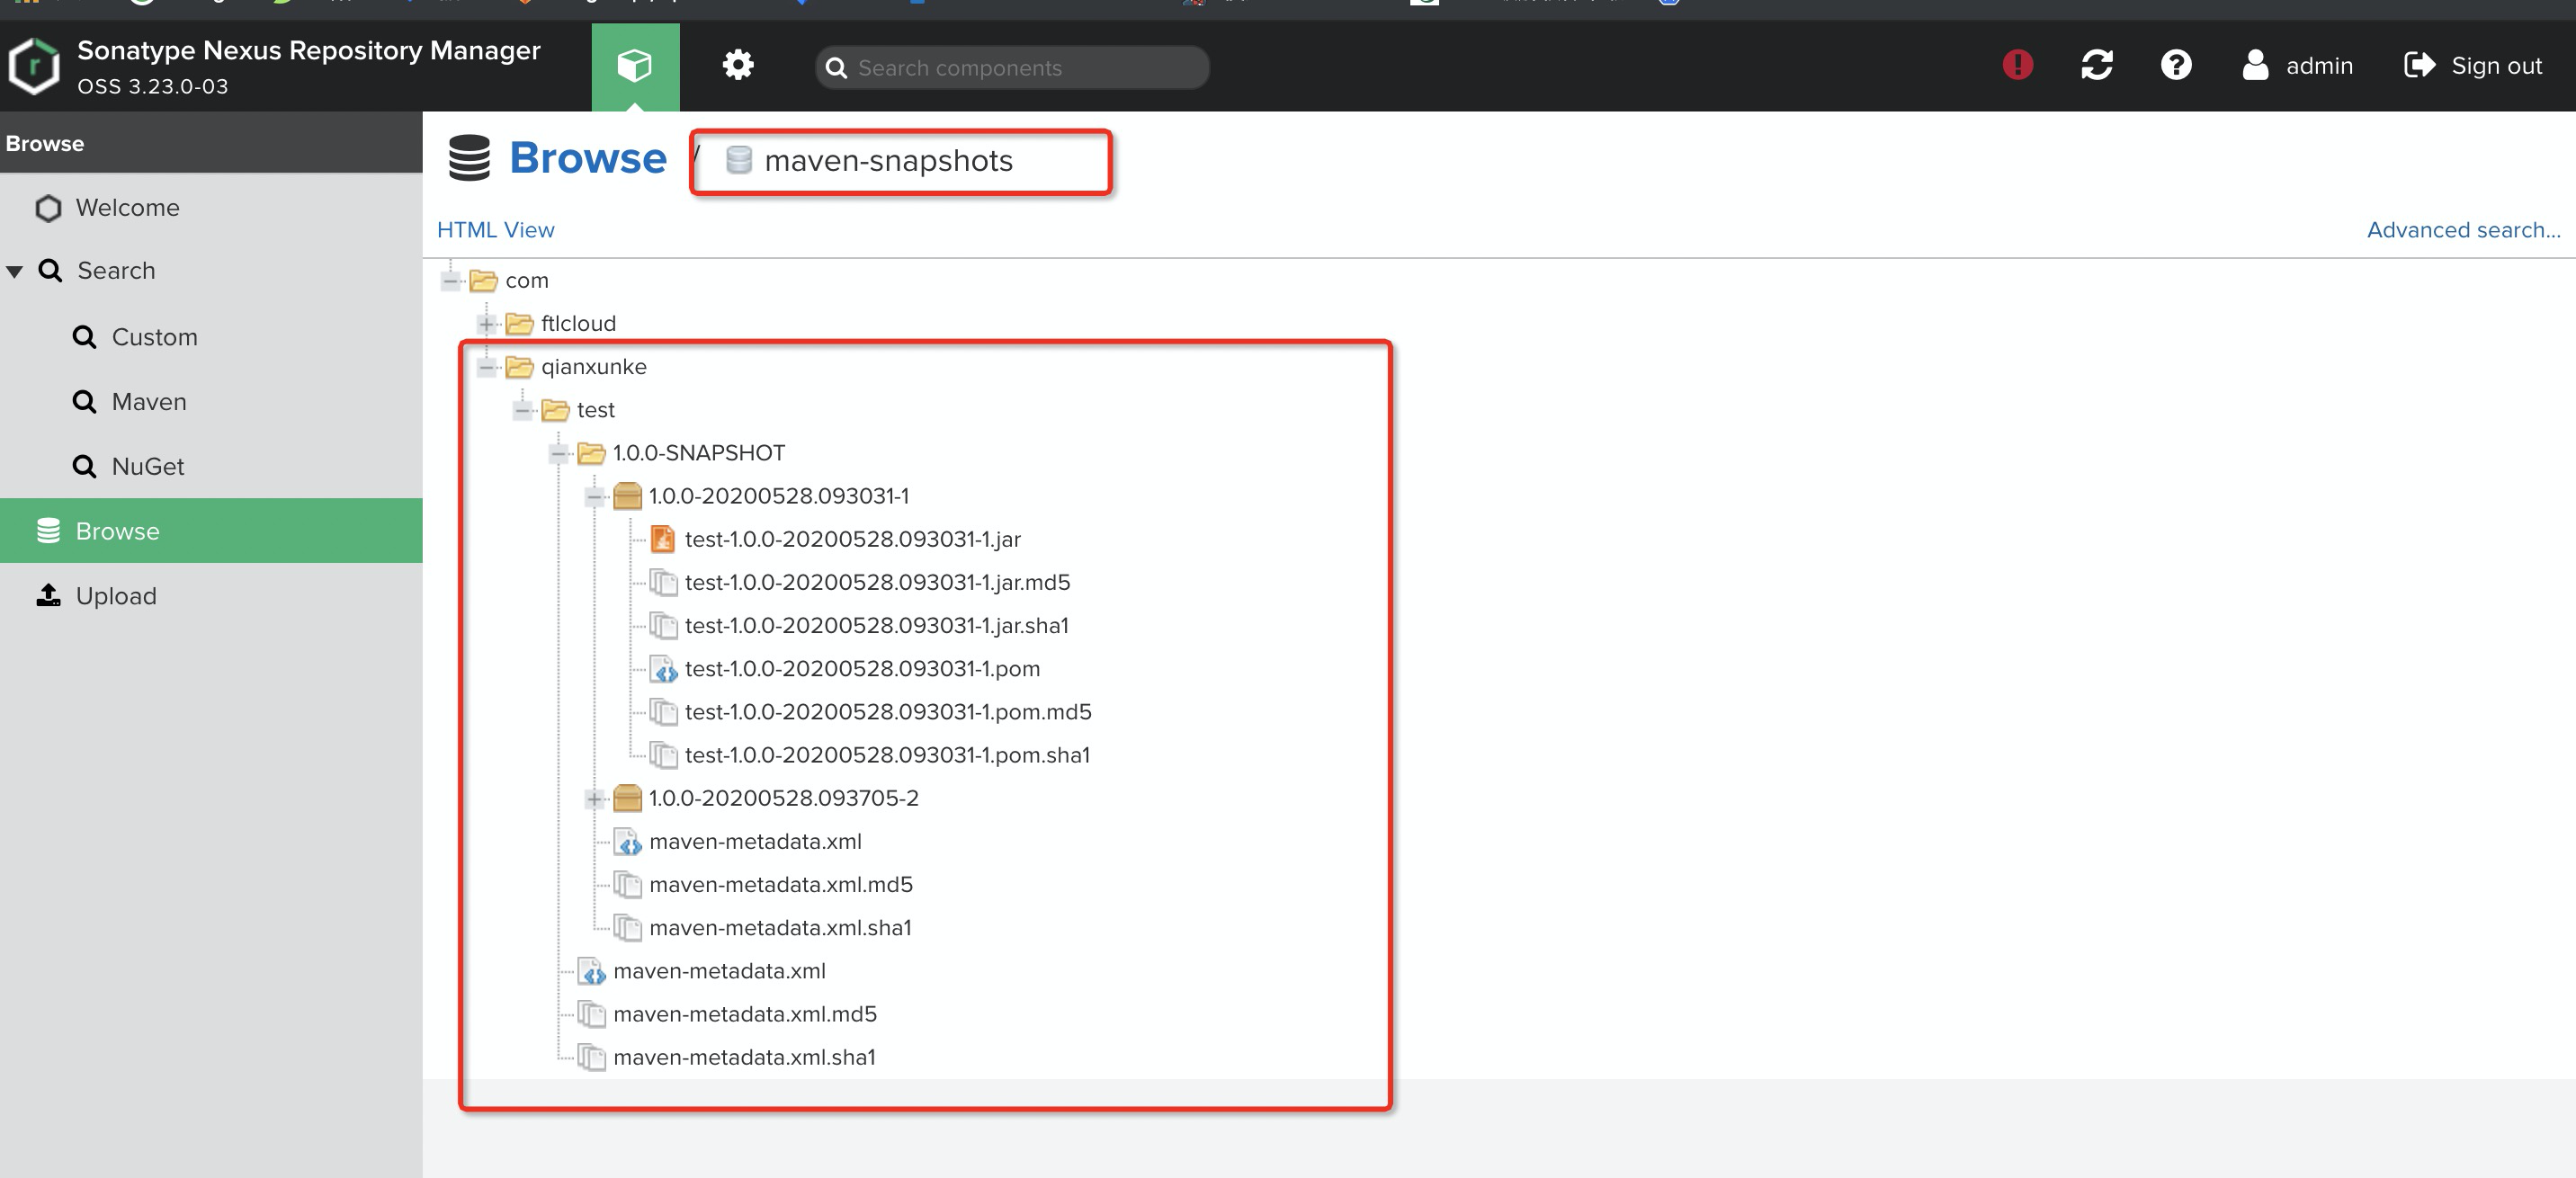<br /> 注意以下几点:
- 若项目版本号末尾带有 -SNAPSHOT,则会发布到snapshots快照版本仓库
- 若项目版本号末尾带有 -RELEASES 或什么都不带,则会发布到releases正式版本仓库

若有收获,就点个赞吧
0 人点赞
