前提:
- 会Git和GitHub
- 安装git
- 安装hugo
安装hugo
- 安装Chocolatey
以管理员身份运行cmd命令行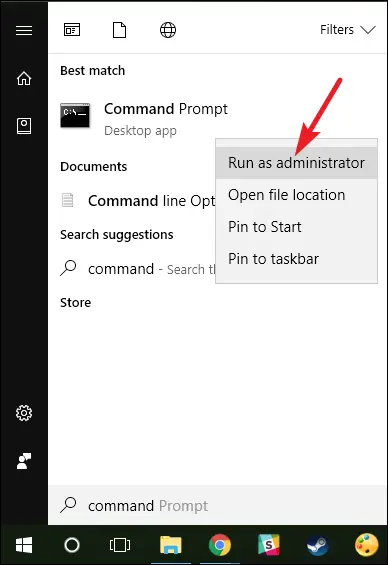
直接输入以下命令,回车。@"%SystemRoot%\System32\WindowsPowerShell\v1.0\powershell.exe" -NoProfile -InputFormat None -ExecutionPolicy Bypass -Command "iex ((New-Object System.Net.WebClient).DownloadString('https://chocolatey.org/install.ps1'))" && SET "PATH=%PATH%;%ALLUSERSPROFILE%\chocolatey\bin"
成功后,输入choco,会显示Chocolatey的版本。
均来自官网教程https://chocolatey.org/install。
- 在安装好choco后,cmd下执行:
choco install hugo -confirm
成功后,执行hugo version。会显示hugo版本号。
关联github和本地的hugo建立的一系列文件。
github—>右上角的new repository—>git clone 地址。
进入本地的刚clone下来的路径里,git bash here,然后执行
hugo new site .
在当前路径下创建
要先git clone的原因是:git clone自动为本地分支建立远程分支并跟踪,方便,待会直接push就行了。3.修改配置文件config.toml。
//默认为: baseURL = “http://example.org/“ languageCode = “en-us” title = “My New Hugo Site” //修改为 baseURL = “github发布出去的博客地址” languageCode = “en-us” title = “My New Hugo Site” publishDir = “docs”
<br />修改了baseURL,并增加了publishDir。publishDir的修改是因为:当在content目录下添加了.md文件后,需要执行`hugo -t <主题名>`来用hugo把发布用的目录编译出来,而默认的编译目录名为`publish`,这里改成了`docs`,这是因为Github规定了用做Gitpages的分类只有三种:1.发布路径在master分支下。2.发布路径在master分支的docs目录下。3.发布路径在gh-pages 分支下。[User, Organization, and Project Pages](https://help.github.com/articles/user-organization-and-project-pages/)<a name="8a540af5"></a>## 安装主题选择一款主题[https://themes.gohugo.io/](https://themes.gohugo.io/)点进去之后都有demo和git clone用的地址,我选了一个hyde主题。进入到themes目录下
git clone https://github.com/spf13/hyde.git
编辑config.toml,配置待会给博客编译用的主题。
baseURL = “github发布出去的博客地址” languageCode = “en-us” title = “My New Hugo Site” publishDir = “docs” theme=”hyde”
<a name="49615781"></a>## 写一个.md并预览git bash执行
hugo new 你好.md
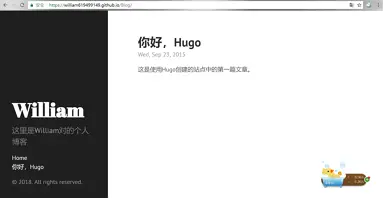
进入content/你好.md。编辑一下,记得把draft=true改成draft=false。不然博客里面不会显示。draft-->草稿.n执行`hugo server` ,他运行一个本地服务器,并且把文章部署上去,但是没有生成发布目录(默认/publish),具体原因不清楚,好像新版的在内存中完成,老版的会生成发布目录。```bash$ hugo serverERROR 2018/07/23 01:31:53 port 1313 already in use, attempting to use an available portBuilding sites …| EN+------------------+----+Pages | 8Paginator pages | 0Non-page files | 0Static files | 6Processed images | 0Aliases | 0Sitemaps | 1Cleaned | 0Total in 4 msWatching for changes in Q:\123\{content,data,layouts,static,themes}Watching for config changes in Q:\123\config.tomlServing pages from memoryRunning in Fast Render Mode. For full rebuilds on change: hugo server --disableFastRenderWeb Server is available at //localhost:54116/ (bind address 127.0.0.1)Press Ctrl+C to stop
浏览器打开localhost:54116/:

发布到github。
hugo -t hyde
hyde是主题名。必须有。
然后回到git工作目录.
git add .git commit -m "XXX"git push
到github上的代码仓库的settings中。

选择master branch/docs。 并且Save保存。
完成。

若有收获,就点个赞吧
0 人点赞
