
1. React-Redux 介绍
目标: 能够说出为什么需要使用 react-redux
知识点:
react-redux 库是 Redux 官方提供的 React 绑定库
- 为什么要使用 React-Redux 绑定库?
答:React 和 Redux 是两个独立的库,两者之间职责独立。因此,为了实现在 React 中使用 Redux 进行状态管理 ,就需要一种机制,将这两个独立的库关联在一起。这时候就用到 React-Redux 这个绑定库了。
- React-Redux 的作用
为 React 接入 Redux,实现在 React 中使用 Redux 进行状态管理
总结:
react-redux 是为了让 React 接入 Redux,官方提供的 React 绑定库
2. React-Redux 基本使用
目标:使用 react-redux 库在 react 中使用 redux 管理状态
知识点:
- react-redux 的使用分为两大步:
- 将 react-redux 进行全局配置(只需要配置一次)
- 组件接入(获取状态或修改状态)
- 使用步骤
- 安装 react-redux:yarn add react-redux
- 从 react-redux 中导入 Provider 组件
- 导入创建好的 redux 仓库
- 使用 Provider 包裹整个应用
- 将导入的 store 设置为 Provider 的 store 属性值
落地代码:
- store.js ```jsx import { createStore } from ‘redux’ // 创建 store 仓库 const store = createStore(reducer)
// 操作数据 function reducer(state = 10, action) { switch (action.type) { case ‘increment’: return state + 1 default: return state } }
// 分发 action store.dispatch({ type: ‘increment’ })
export default store
2. index.js 入口文件```jsximport ReactDOM from 'react-dom'import App from './09-redux/02-react-redux'// 从 react-redux 中导入 Provider 进行提供数据import { Provider } from 'react-redux'// 导入 store.jsimport store from './store'ReactDOM.render((// 使用 Provider 包裹整个应用// 将导入的 store 设置为 Provider 的 store 属性值<Provider store={store}><App /></Provider>), document.getElementById('root'))
小结:
- React-Redux 的使用流程
3. React-Redux-获取状态
目标:能够使用 useSelector hook 获取redux中共享的状态
知识点:
使用 useSelector hook 获取redux中共享的状态
- useSelector:获取 Redux 提供的状态数据
- 参数:selector 函数,用于从 Redux 状态中筛选出需要的状态数据并返回
- 返回值:筛选出的状态 ```jsx import { useSelector } from ‘react-redux’
// 计数器案例中,Redux 中的状态是数值,所以,可以直接返回 state 本身 const count = useSelector(state => state)
// 比如,Redux 中的状态是个对象,就可以: const list = useSelector(state => state.list)
**落地代码:**```jsx// 导入 useSelector hookimport { useSelector } from 'react-redux'function App() {// 调用 useSelector,传入 selector 函数const data = useSelector((state) => state)console.log(data)return null}export default App
总结:
如何获取 redux 共享的状态:使用 useSelector hook 获取redux中共享的状态
4. React-Redux-修改状态
目标:能够使用 useDispatch hook 修改 redux 中共享的状态
知识点:
使用 useDispatch hook 修改 redux 中共享的状态
- useDispatch:拿到 dispatch 函数,分发 action,修改 redux 中的状态数据
- 调用 useDispatch hook,返回 dispatch 函数
- 调用返回的 dispatch 函数传入 action,来分发动作即可 ```jsx import { useDispatch } from ‘react-redux’
// 调用 useDispatch hook,拿到 dispatch 函数 const dispatch = useDispatch()
// 调用 dispatch 传入 action,来分发动作 dispatch(action)
**落地代码:**1. store.js```jsximport * as types from '../actionTypes'const reducer = (count = 0, action) => {switch (action.type) {case types.increment:return count + action.payloadcase types.decrement:return count - action.payloaddefault:return count}}export default reducer
- App.js ```javascript import { useSelector, useDispatch } from ‘react-redux’ import * as types from ‘./store/actionTypes’
function App() { // 调用 useSelector,传入 selector 函数 const data = useSelector((state) => state) const dispatch = useDispatch()
return (
{data}
export default App
** 总结:**如何修改 redux 中共享的状态:使用 useDispatch hook 修改 redux 中共享的状态<a name="j0wVO"></a>## 5. 理解 Redux 数据流> 目标:能够说出 redux 数据流动过程**知识点:**<br /><br />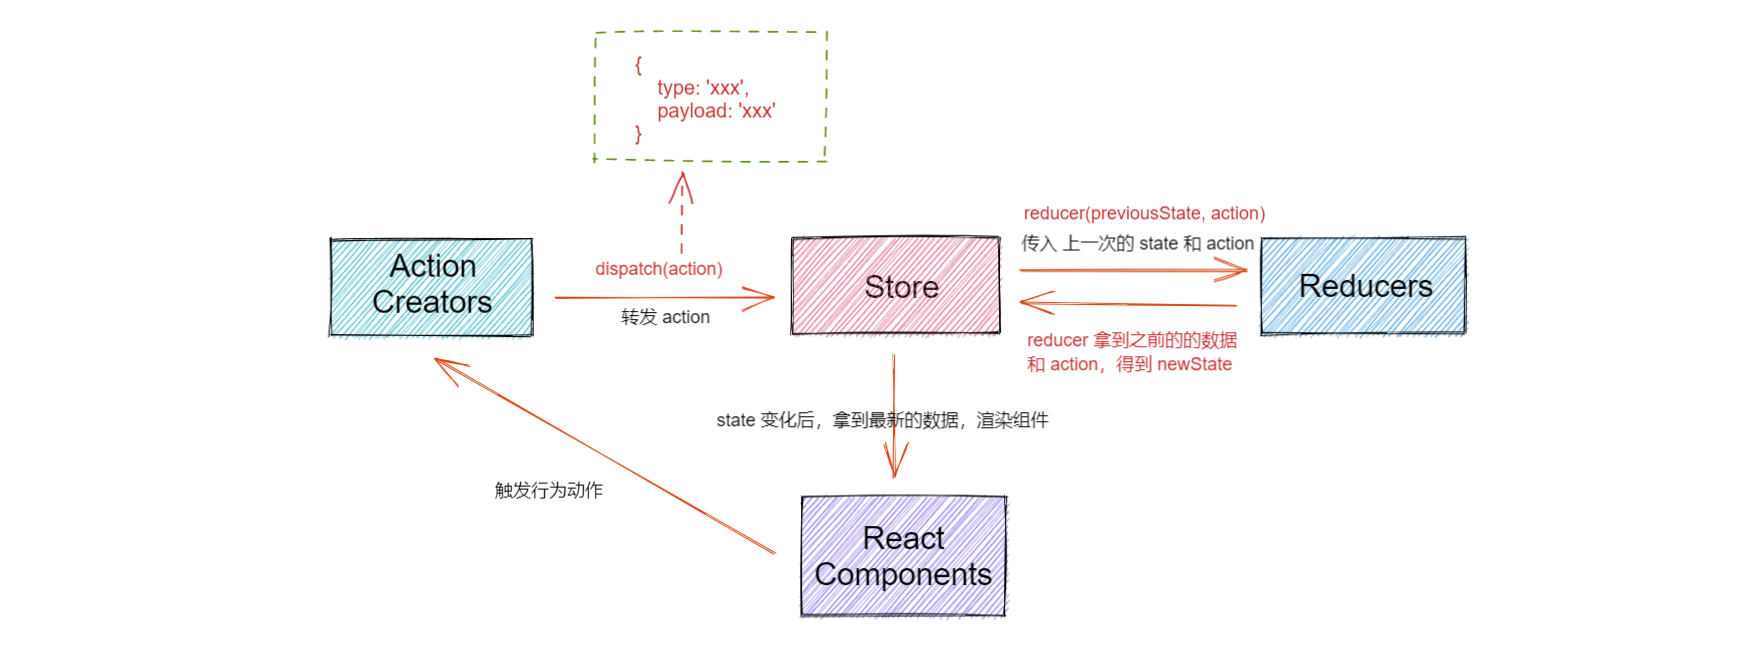1. 在 Store 中创建数据,组件(视图)使用 Store 中数据进行页面的渲染1. 组件(视图)想修改数据,需要通过事件触发 Action;Action 描述做了什么事,即行为,1. Action 通过 Dispatcher 进行分发,分发到 Store;1. Store 接收到分发的 Action 以后,使用 reducer 进行数据的变更或其他处理1. Store 的数据发生变更以后,驱动视图更新** 总结:**- 任何一个组件都可以直接接入 Redux,也就是可以直接:1 修改 Redux 状态,2 接收 Redux 状态- 只要 Redux 中的状态改变了,所有接收该状态的组件都会收到通知,也就是可以获取到最新的 Redux 状态- 这样的话,两个组件不管隔得多远,都可以直接通讯了<a name="wBjgm"></a>## 6. Redux应用-代码结构> 目录:能够组织 redux 的代码结构**知识点:**在使用 Redux 进行项目开发时,不会将 action/reducer/store 都放在同一个文件中,而是会进行拆分,可以按照以下结构,来组织 Redux 的代码:
|-store —- 在 src 目录中创建,用于存放 Redux 相关的代码 |- actions —- 存放所有的 action |- reducers —- 存放所有的 reducer |- index.js —- redux 的入口文件,用来创建 store
<a name="DMwPN"></a>## 7. Redux应用-ActionType的使用> 目标:能够知道为什么要抽离 action type**知识点:**1. Action Type 指的是:action 对象中 type 属性的值- type 属性的值会在多个地方使用 action type,比如:action 对象、reducer 函数、dispatch(action) 等- 如果要更新一个 type 属性值,需要更改多个地方,维护不方便,容易发生错误3. 解决方案:集中处理 action type,保持项目中 action type 的一致性2. action type 的值采用:'domain/action' (功能/动作) 形式,进行分类处理,比如:- 计数器: 'counter/increment' → 表示 Counter 功能中的 increment 动作- 登 录: 'login/getCode' → 表示登录获取验证码的动作- 个人资料: 'profile/get' → 表示获取个人资料**实现步骤:**1. 在 store 目录中创建 actionTypes 目录或者 constants 目录,集中处理1. 创建常量来存储 action type,并导出1. 将项目中用到 action type 的地方替换为这些常量,从而保持项目中 action type 的一致性**落地代码:**1. actionTypes/index.js```jsxconst increment = 'counter/increment'const decrement = 'counter/decrement'export { increment, decrement }
- acitons/index.js ```javascript import * as types from ‘../acitonTypes’
const reducer = (state, action) => { switch (action.type) { case types.increment: return state + 1 case types.decrement: return state - action.payload default: return state } }
export default reducer
3. App.js```javascriptimport { useSelector, useDispatch } from 'react-redux'import * as types from './store/actionTypes'// const increment = (payload) => ({ type: types.increment, payload })// const decrement = (payload) => ({ type: types.decrement, payload })function App() {// 调用 useSelector,传入 selector 函数const data = useSelector((state) => state)const dispatch = useDispatch()return (<div><p>{data}</p><button onClick={() => dispatch({ type: types.increment, payload: 1 })}>修改数据 + 1</button><button onClick={() => dispatch({ type: types.decrement, payload: 1 })}>修改数据 - 1</button>{/*<button onClick={() => dispatch(increment(1))}>修改数据 + 1</button><button onClick={() => dispatch(decrement(1))}>修改数据 - 1</button>*/}</div>)}export default App
8. Redux应用-Reducer的分离与合并
目标:能够合并 redux 的多个 reducer 为一个 根 reducer
知识点:
问题:随着项目功能变得越来越复杂,需要 Redux 管理的状态也会越来越多
解决方案:有两种方式来处理状态的更新:
- 使用一个 reducer:处理项目中所有状态的更新
- 使用多个 reducer:按照项目功能划分,每个功能使用一个 reducer 来处理该功能的状态更新
推荐:使用多个 reducer(第二种方案)
- 每个 reducer 处理的状态更单一,职责更明确,项目中会有多个 reducer
- 但是 store 只能接收一个 reducer,因此,需要将多个 reducer 合并为一根 reducer,才能传递给 store
如何合并?
- 使用 Redux 中的 combineReducers 函数
注意:合并后,Redux 的状态会变为一个对象,对象的结构与 combineReducers 函数的参数结构相同
比如,此时 Redux 状态为:{ a: aReducer 处理的状态, b: bReducer 处理的状态 }
import { combineReducers } from 'redux'// 计数器案例,状态默认值为:0const aReducer = (state = 0, action) => {}// Todos 案例,状态默认值为:[]const bReducer = (state = [], action) => {}// 合并多个 reducer 为一个 根reducerconst rootReducer = combineReducers({a: aReducer,b: bReducer})// 创建 store 时,传入 根reducerconst store = createStore(rootReducer)// 此时,合并后的 redux 状态: { a: 0, b: [] }
注意:
虽然在使用 combineReducers 以后,整个 Redux 应用的状态变为了对象,但是,对于每个 reducer 来说,每个 reducer 只负责整个状态中的某一个值
- 也就是:每个reducer只负责自己要处理的状态
- 举例:
- 登录功能:loginReducer 处理的状态只应该是跟登录相关的状态
- 个人资料:profileReducer 处理的状态只应该是跟个人资料相关的状态
合并 reducer 后,redux 处理方式:
- 只要合并了 reducer,不管分发什么 action,所有的 reducer 都会执行一次。
- 各个 reducer 在执行的时候,能处理这个 action 就处理,处理不了就直接返回上一次的状态。
- 所以,分发的某一个 action 就只能被某一个 reducer 来处理,最终只会修改这个reducer 要处理的状态,
- 最终的表现就是:分发了 action,只修改了 redux 中这个 action 对应的状态
9. Redux应用-redux管理哪些状态
目标:能够知道什么状态可以放在 redux 中管理
知识点:
状态的处理有两种方式:
- 不推荐用法:将所有的状态全部放到 redux 中,由 redux 管理
- 推荐的用法:只将某些状态数据放在 redux 中,其他数据可以放在组件中,
- 如果一个状态,只在某个组件中使用(比如,表单项的值),推荐:放在组件中
- 需要放到 redux 中的状态:
- 在多个组件中都要使用的数据【涉及组件通讯】
- 通过 ajax 请求获取到的接口数据【涉及到请求相关逻辑代码放在哪的问题】
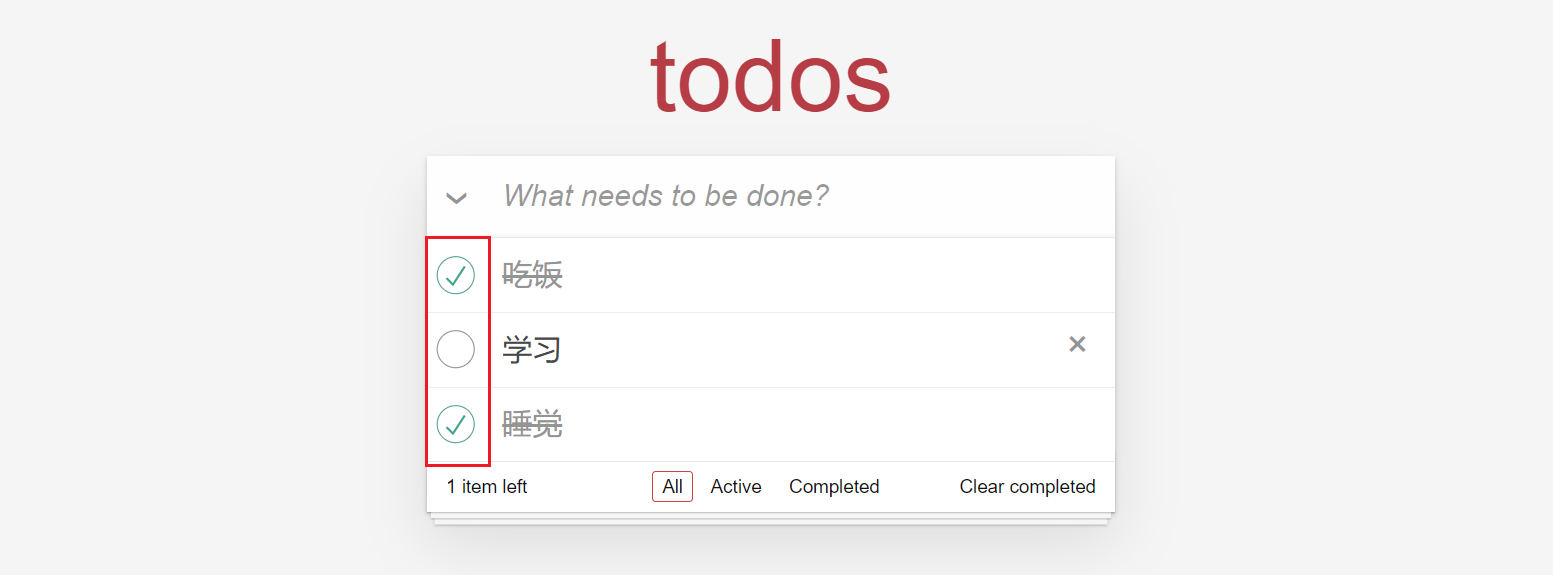
10. 综合案例-todomvc
10.1 案例结构搭建
目标:能够根据模板搭建案例结构
实现步骤:
使用准备好的模板内容,搭建项目,并分析案例的中组件的层级结构
- App- TodoHeader- TodoMain- TodoItem- TodoFooter
10.2 配置 Redux 基本结构
目标:能够在 todomvc 案例中配置 Redux
实现步骤:
- 安装 redux:yarn add redux
- 在 src 目录中创建 store 文件夹
- 在 store 目录中创建 actions、reducers、actionTypes 目录以及 index.js 文件
- 在 reducers 目录中新建 todos.js 和 index.js 文件
- 在 todos.js 中创建一个基本的 reducer 并导出
- 在 reducers/index.js 中创建根 reducer 并导出
- 在 store/index.js 中,导入根 reducer 并创建 store 然后导出
落地代码:
store/reducers/todos.js 中:
// 默认值const initialState = [{ id: 1, text: '吃饭', done: true },{ id: 2, text: '学习', done: false },{ id: 3, text: '睡觉', done: true }]const todos = (state = initialState, action) => {return state}export default todos
store/reducers/index.js 中:
import { combineReducers } from 'redux'// 导入 reducerimport todos from './todos'// 合并 reducerconst rootReducer = combineReducers({todos})export default rootReducer
store/index.js 中:
import { createStore } from 'redux'// 导入 根 reducerimport rootReducer from './reducers'// 创建 storeconst store = createStore(rootReducer)export default store
10.3 配置 React-Redux
目标:能够在 todomvc 案例中配置 react-redux
实现步骤:
- 安装 react-redux:yarn add react-redux
- 在 src/index.js 中,导入 Provider 组件
- 在 src/index.js 中,导入创建好的 store
- 使用 Provider 包裹 App 组件,并设置其 store 属性
落地代码:
import ReactDOM from 'react-dom'import './styles/base.css'import './styles/index.css'import App from './App'// 导入 Provider 组件用来提供数据import { Provider } from 'react-redux'// 导入 storeimport store from './store'ReactDOM.render(<Provider store={store}><App /></Provider>,document.querySelector('#root'))
10.4 渲染任务列表
目标:能够渲染任务列表
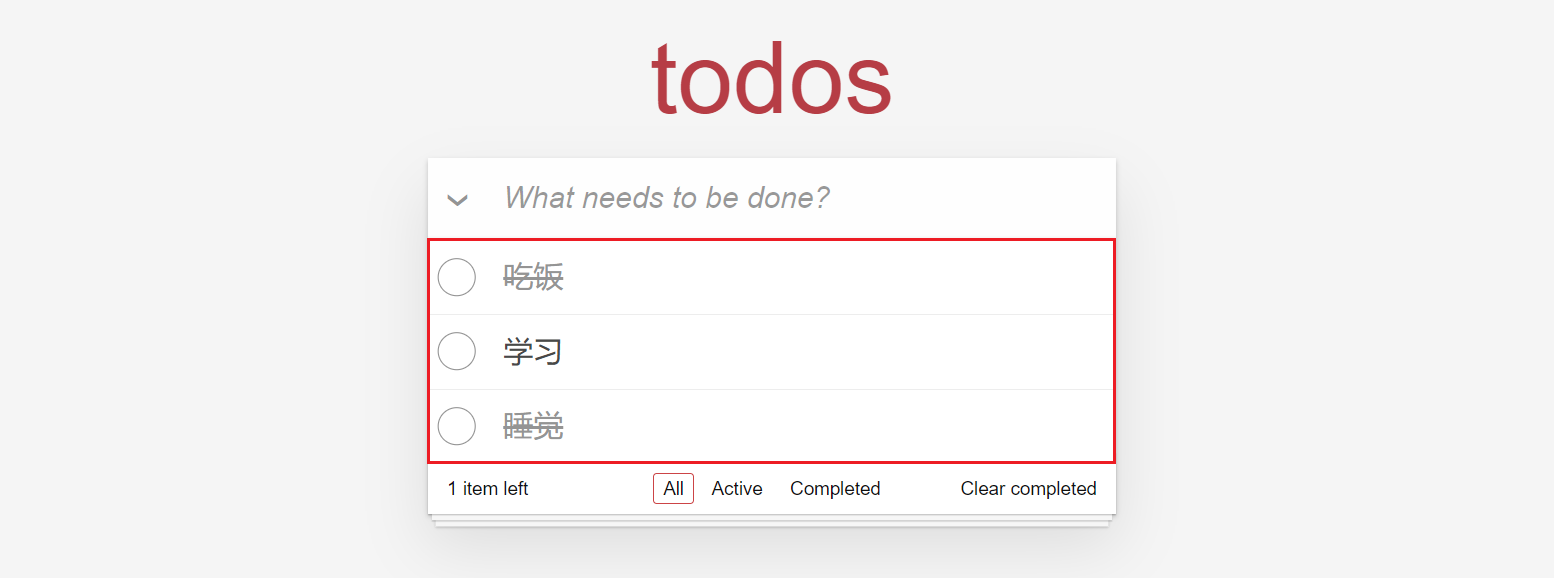
实现步骤:
- 在 TodoMain 组件中导入 useSelector hook
- 调用 useSelector 拿到 todos 状态,也就是任务列表数据
- 遍历任务列表数据,将每个任务项数据传递给 TodoItem 组件
- 在 TodoItem 组件中,拿到数据并渲染(暂时不考虑选中问题)
落地代码:
TodoMain.js 中:
import { TodoItem } from './TodoItem'+ import { useSelector } from 'react-redux'export const TodoMain = () => {+ // 获取状态+ const list = useSelector(state => state.todos)return (<section className="main"><input id="toggle-all" className="toggle-all" type="checkbox" /><label htmlFor="toggle-all">Mark all as complete</label><ul className="todo-list">+ {+ list.map(item => (+ <TodoItem key={item.id} {...item} />+ ))+ }</ul></section>)}
TodoItem.js 中:
+ import classNames from 'classnames'export const TodoItem = ({ id, text, done }) => {return (// 编辑时,添加类名:editing+ <li className={classNames({ completed: done })}><div className="view"><input className="toggle" type="checkbox" />+ <label>{text}</label><button className="destroy"></button></div><input className="edit" /></li>)}
10.5 渲染未完成任务数量
目标:能够渲染未完成任务数量
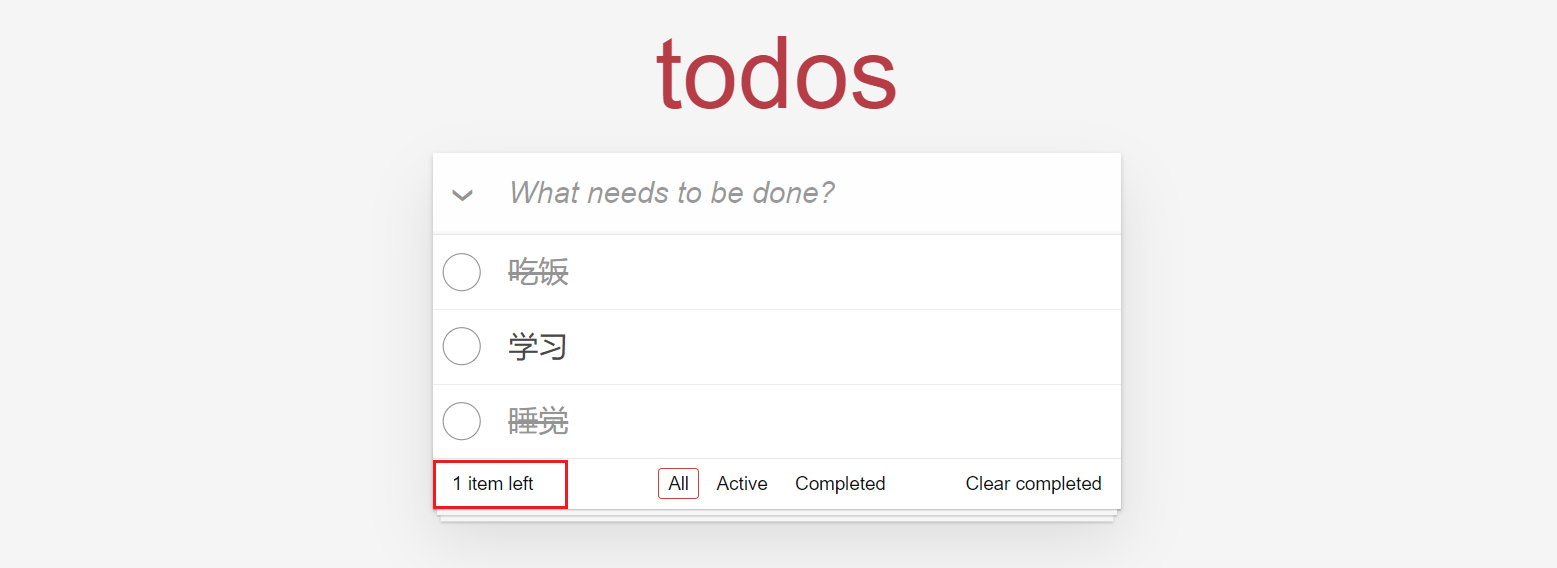
功能分析:
问题:实现该功能,是添加一个新的状态,还是用当前已有的状态?
回答:看一下要用到的这个数据,能不能直接根据现有的状态得到,如果能直接用现有的数据即可;否则,就要创建新的状态了,比如,现在要用的未完成任务数量,可以直接从 todos 任务列表数据中过滤得到,所以,直接用当前数据即可
实现步骤:
直接从 todos 任务列表数据中过滤得到未完成的任务(done 状态代表任务是否完成,false 代表未完成)
- 在 TodoFooter 组件中导入 useSelector hook
- 调用 useSelector 拿到 todos 状态,也就是任务列表数据
- 根据任务列表数据,过滤出未完成任务并拿到其长度,然后渲染
落地代码:
import { useSelector } from 'react-redux'export const TodoFooter = () => {// 获取到未完成任务数量const leftCount = useSelector(state => state.todos.filter(item => !item.done).length)return (<footer className="footer"><span className="todo-count"><strong>{leftCount}</strong> item left</span><ul className="filters">{/* ...... */}</ul><button className="clear-completed">Clear completed</button></footer>)}
10.6 删除任务
目标:能够实现删除任务功能
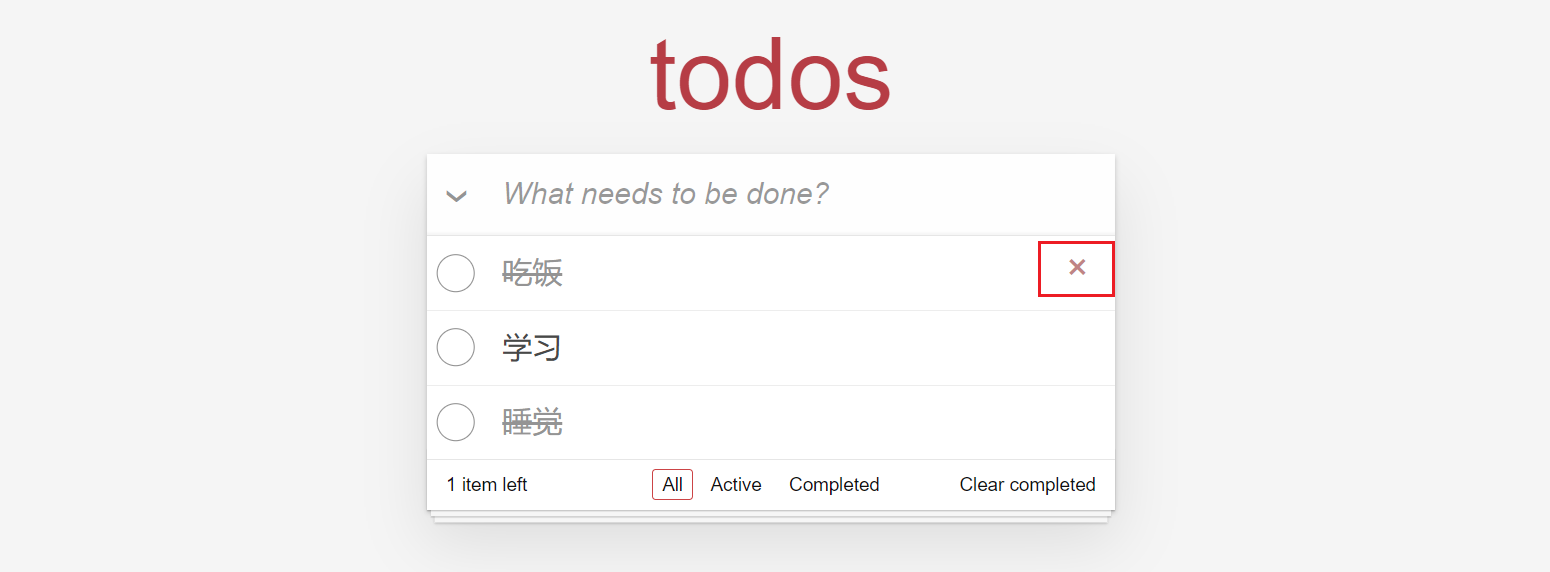
实现步骤:
- 给删除按钮绑定点击事件
- 在点击事件中分发删除任务的 action
- 创建 actionTypes/todos.js 文件,导出删除任务的 action type
- 创建 actions/todos.js 文件,创建删除任务的 action
- 在 reducers/todos.js 中,根据 action 类型删除任务
落地代码:
TodoItem.js 中:
import classNames from 'classnames'+ // 导入 useDispatch 分发 action+ import { useDispatch } from 'react-redux'+ // 导入 action-creator+ import { delTodo } from '../store/actions/todos'export const TodoItem = ({ id, text, done }) => {+ const dispatch = useDispatch()return (// 编辑时,添加类名:editing<li className={classNames({ completed: done })}><div className="view"><input className="toggle" type="checkbox" /><label>{text}</label>+ <button className="destroy" onClick={() => dispatch(delTodo(id))}></button></div><input className="edit" /></li>)}
actionTypes/todos.js 中:
// 删除任务export const DEL_TODO = 'todos/del'
actions/todos.js 中:
// 导入创建好的 action typeimport * as types from '../actionTypes/todos'// 删除任务export const delTodo = id => ({type: types.DEL_TODO,payload: id})
reducers/todos.js 中:
import * as types from '../actionTypes/todos'// 默认值const initialState = [{ id: 1, text: '吃饭', done: true },{ id: 2, text: '学习', done: false },{ id: 3, text: '睡觉', done: true }]const todos = (state = initialState, action) => {switch (action.type) {case types.DEL_TODO:return state.filter(item => item.id !== action.payload)default:return state}}export default todos
10.7 切换任务完成状态
目标:能够实现切换任务完成状态
实现步骤:
- 为 TodoItem 组件中的 checkbox 添加 checked 值为:props.done 并为其绑定 change 事件
- 在 change 事件中分发切换任务完成状态的 action
- 在 actionTypes/todos.js 中,创建切换任务的 action type 并导出
- 在 actions/todos.js 文件,创建切换任务的 action 并导出
- 在 reducers/todos.js 中,根据 action 类型切换任务完成状态
落地代码:
TodoItem.js 中:
// 导入 action-creator+ import { delTodo, toggleTodo } from '../store/actions/todos'export const TodoItem = ({ id, text, done }) => {const dispatch = useDispatch()return (// 编辑时,添加类名:editing<li className={classNames({ completed: done })}><div className="view">+ <input className="toggle" type="checkbox" checked={done} onChange={() => dispatch(toggleTodo(id))} /><label>{text}</label><button className="destroy" onClick={() => dispatch(delTodo(id))}></button></div><input className="edit" /></li>)}
actionTypes/todos.js 中:
// 切换任务export const TOGGLE_TODO = 'todos/toggle'
actions/todos.js 中:
// 切换任务的完成状态export const toggleTodo = id => ({type: types.TOGGLE_TODO,payload: id})
reducers/todos.js 中:
// 切换任务case types.TOGGLE_TODO:return state.map(item => {if (item.id === action.payload) {return {...item,done: !item.done}}return item})
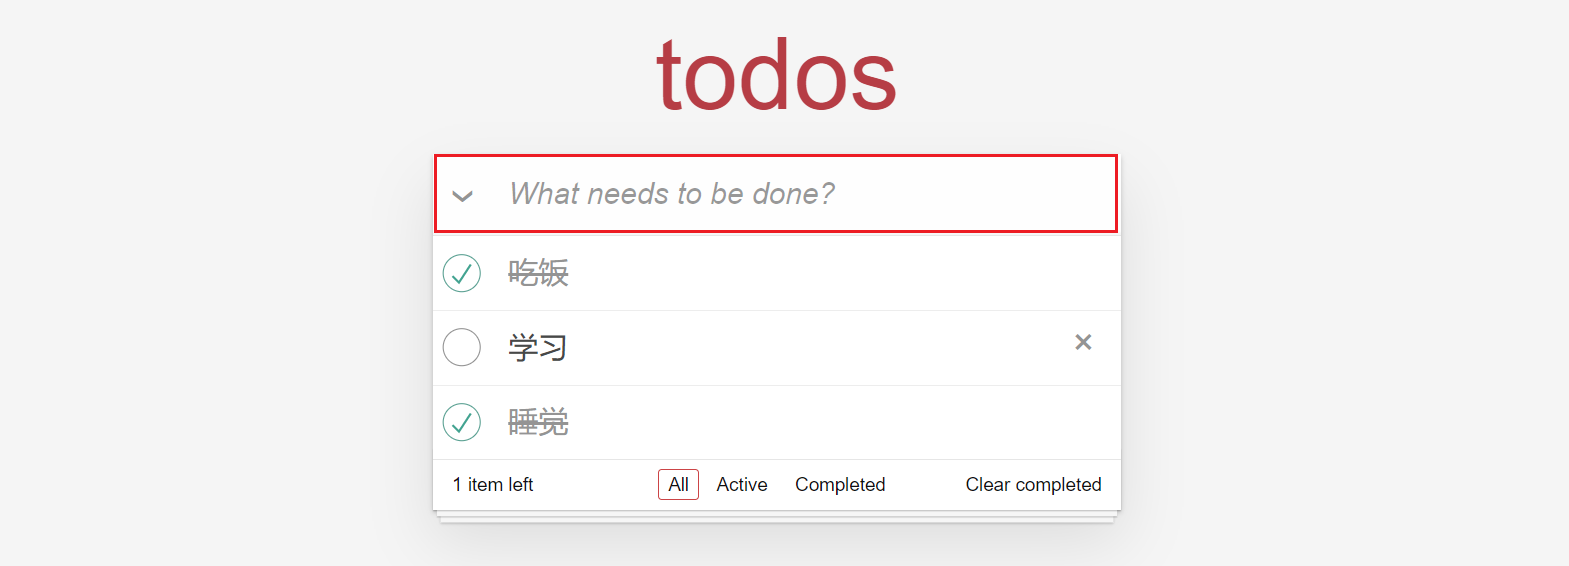
10.8 添加任务
目标:能够实现添加任务
实现步骤:
思考:控制文本框的状态,应该放在 redux 中,还是放在组件中?
回答:组件中
- 在 TodoHeader 组件中通过受控组件获取文本框的值
- 给 input 绑定 keyDown 事件,在事件处理程序中判断按键是不是回车
- 如果不是,直接 return 不执行添加操作
- 如果是,分发添加任务的 action
- 分别添加添加任务的 action type 和 action
- 在 todos 的 reducer 中,完成添加任务的状态更新
- 对添加任务功能进行非空校验和清空文本框的操作
落地代码:
TodoHeader.js 中:
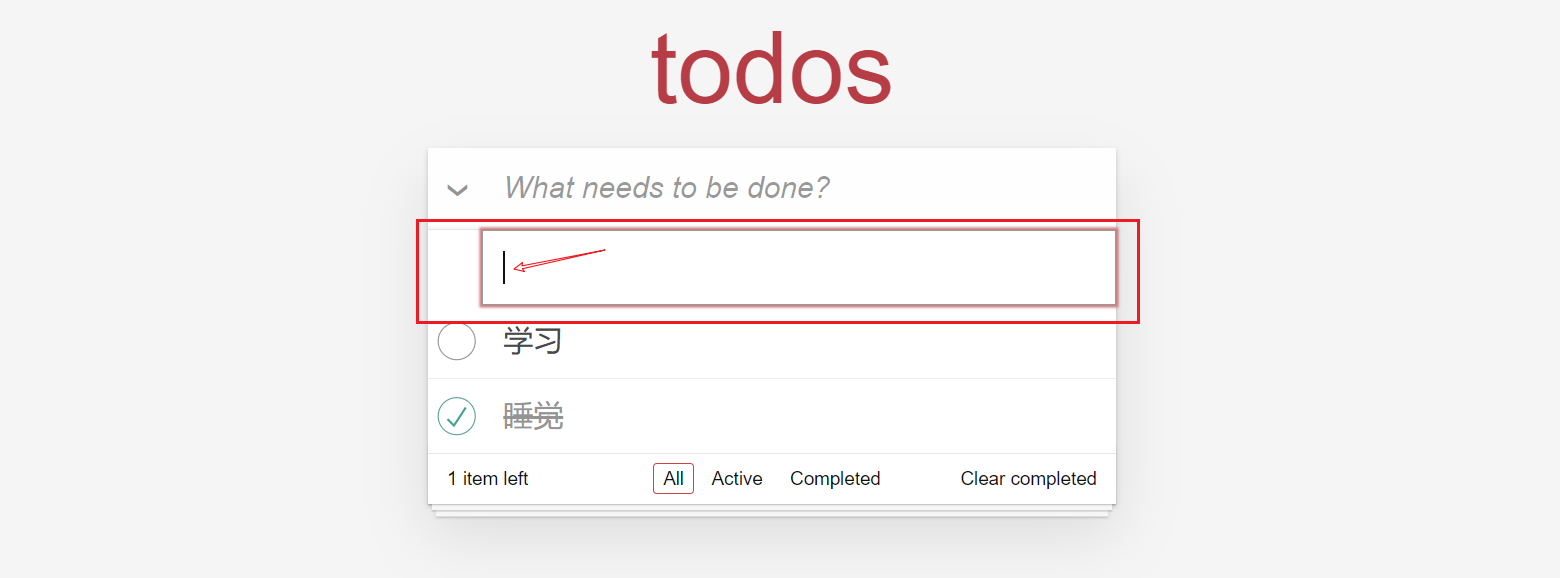
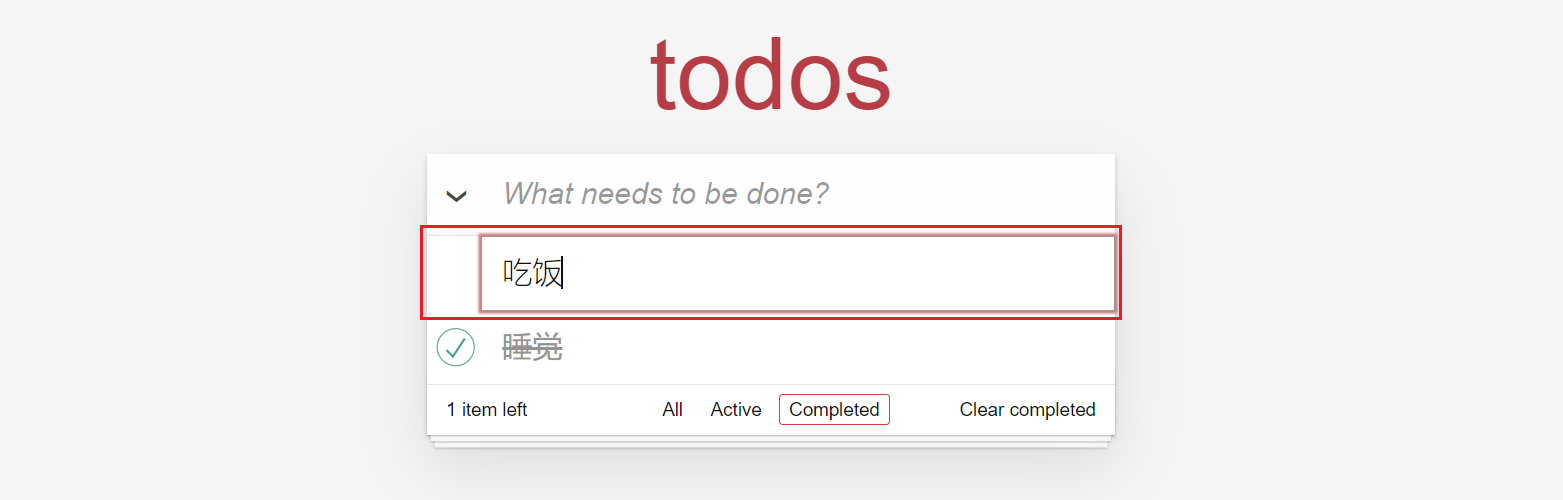
import { useState } from 'react'import { useDispatch } from 'react-redux'import { addTodo } from '../store/actions/todos'export const TodoHeader = () => {// 创建 dispatchconst dispatch = useDispatch()// 用户输入的任务const [text, setText] = useState('')// 点击回车键触发的事件const onAddTodo = e => {if (e.keyCode !== 13) returnif (text.trim() === '') return// 分发添加任务的 actiondispatch(addTodo(text))// 清空输入框的值setText('')}return (<header className="header"><h1>todos</h1><inputclassName="new-todo"placeholder="What needs to be done?"autoFocusvalue={text}onChange={e => setText(e.target.value)}onKeyDown={onAddTodo}/></header>)}
actionTypes/todos.js 中:
// 添加任务export const ADD_TODO = 'todos/add'
actions/todos.js 中:
export const addTodo = text => ({type: types.ADD_TODO,payload: text})
reducers/todos.js 中:
// 添加任务case types.ADD_TODO:// 获取所有任务的 IDlet ids = state.map(item => {return item.id})// 计算所有任务 ID 的最大值,然后 + 1let maxId = Math.max.apply(null, ids) + 1return [...state,{id: maxId,text: action.payload,done: false}]
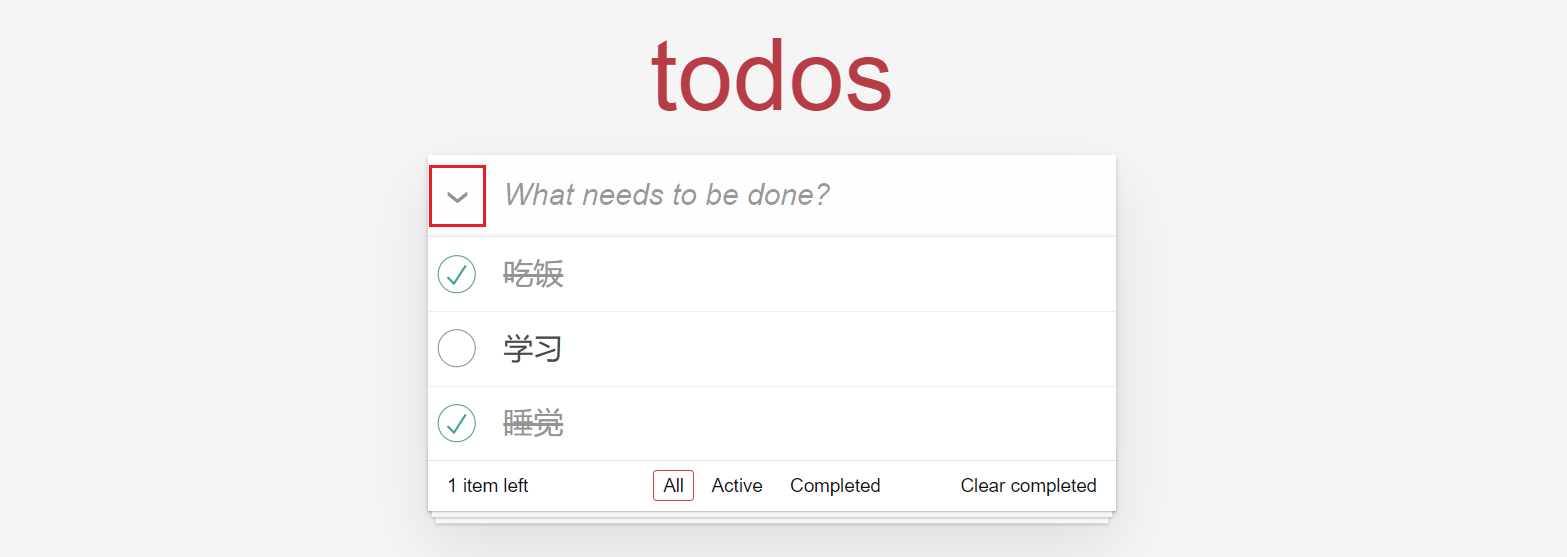
10.9 全选和反选
目标:能够实现全选功能
功能分析:
此处的全选功能,类似于前面 购物车案例 中的全选功能。购物车案例是通过 添加一个新的状态(checkAll)来实现全选功能。但是,此处我们来进行一些优化:
问题:实现一个功能的时候,如何判断要不要添加一个新的状态?
回答:看该功能能不能直接通过现有的状态来实现,如果能就直接根据现有状态派生出一个数据,通过该数据来完成功能即可;否则,就得添加新状态了,比如,处理的全选按钮的选中状态可以直接从 todos 任务列表数据中得到:
// 根据 todos 数据来得到全选按钮是否选中:const checkAll = todos.every(item => item.done)
实现步骤:
- 在 TodoMain 组件中,根据任务列表数据得到全选按钮是否选中的状态数据 checkAll
- 将 checkAll 设置为全选复选框的 checked 属性值
- 为复选框绑定 change 事件,在事件处理程序中分发全选的 action
- 分别添加全选的 action type 和 action
- 在 todos 的 reducer 中,根据全选按钮的选中状态切换每个任务项的选中状态
落地代码:
TodoMain.js 中:
import { TodoItem } from './TodoItem'import { useSelector } from 'react-redux'+ import { useDispatch } from 'react-redux'+ import { toggleAll } from '../store/actions/todos'export const TodoMain = () => {// 获取状态const list = useSelector(state => state.todos)+ // 全选与否的状态+ const checkAll = list.every(item => item.done)+ // 创建 dispatch+ const dispatch = useDispatch()return (<section className="main"><inputid="toggle-all"className="toggle-all"type="checkbox"+ checked={checkAll}+ onChange={e => dispatch(toggleAll(e.target.checked))}/><label htmlFor="toggle-all">Mark all as complete</label><ul className="todo-list">{list.map(item => (<TodoItem key={item.id} {...item} />))}</ul></section>)}
actionTypes/todos.js 中:
// 全选export const TOGGLE_ALL = 'todos/toggleAll'
actions/todos.js 中:
export const toggleAll = checked => ({type: types.TOGGLE_ALL,payload: checked})
reducers/todos.js 中:
// 全选全不选case types.TOGGLE_ALL:return state.map(item => ({ ...item, done: action.payload }))
10.10 清空已完成任务
目标:能够实现清空已完成的任务

实现步骤:
- 在 TodoFooter 组件中,给清除已完成任务的按钮绑定点击事件
- 在点击事件中分发清空已完成任务的 action
- 在 actionTypes/todos.js 文件中,创建并导出清空已完成任务的 action type
- 在 actions/todos.js 文件中,创建清空已完成任务的 action
- 在 reducers/todos.js 中,根据 action 类型清空已完成任务
落地代码:
TodoFooter.js 中:
+ import { useSelector, useDispatch } from 'react-redux'+ import { clearDone } from '../store/actions/todos'export const TodoFooter = () => {// 获取到未完成任务数量const leftCount = useSelector(state => state.todos.filter(item => !item.done).length)+ // 创建 dispatch+ const dispatch = useDispatch()return (<footer className="footer"><span className="todo-count"><strong>{leftCount}</strong> item left</span><ul className="filters">{/* ...... */}</ul>+ <button className="clear-completed" onClick={() => dispatch(clearDone())}>Clear completed</button></footer>)}
actionTypes/todos.js 中:
// 清空已完成export const CLEAR_DONE = 'todos/clearDone'
actions/todos.js 中:
// 清空已完成任务export const clearDone = () => ({type: types.CLEAR_DONE})
reducers/todos.js 中:
// 清空已完成case types.CLEAR_DONE:return state.filter(item => !item.done)
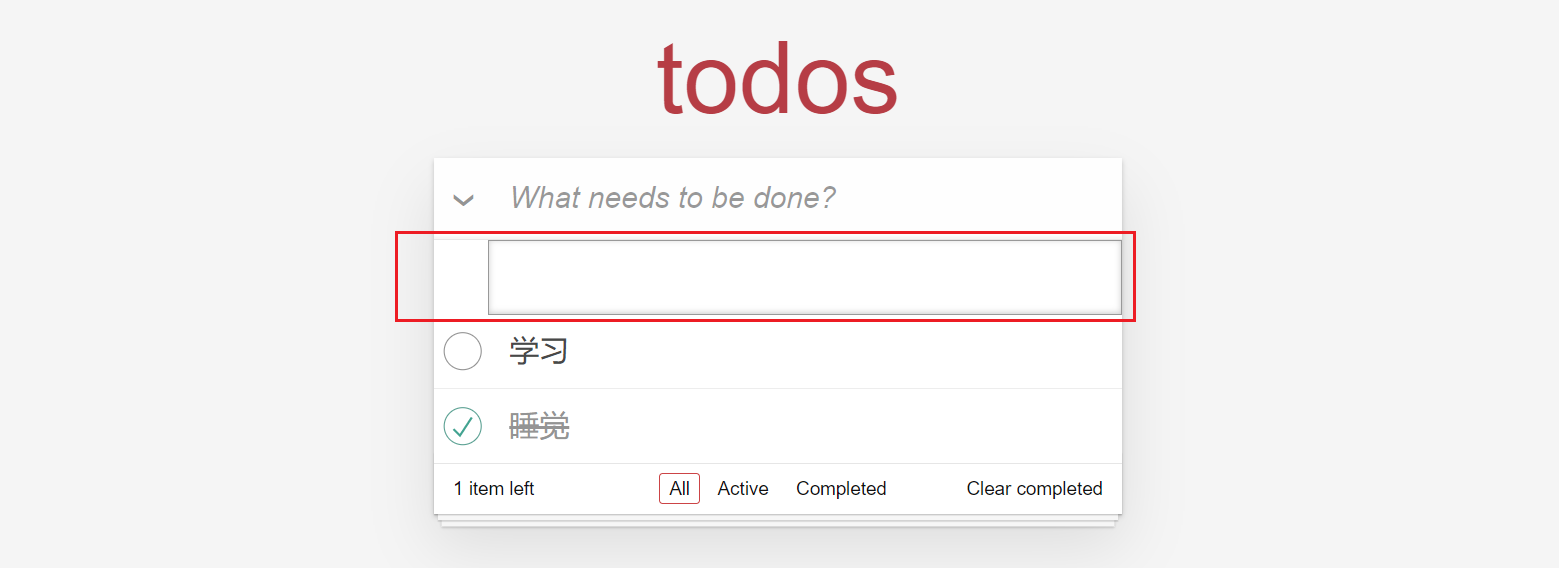
10.11-修改任务-展示修改文本框
目标:能够实现双击修改任务功能
案例分析:
效果:双击哪个任务名称,就展示哪个任务的修改
因为需要控制文本框的展示或隐藏,所以,需要添加一个新的状态值来控制
并且,每个任务项都可以编辑,所以,需要为 TodoItem 组件添加该状态,即:每个任务项控制自己的编辑状态
实现步骤:
- 为 TodoItem 组件添加状态 showEdit 值为 布尔值,用来表示是否展示编辑状态
- 为任务项添加双击事件,将 showEdit 值设置为 true
- 根据 showEdit 的值为任务项添加 editing 类名
落地代码:
TodoItem.js 中:
+ import { useState } from 'react'import classNames from 'classnames'// 导入 useDispatch 分发 actionimport { useDispatch } from 'react-redux'// 导入 action-creatorimport { delTodo, toggleTodo } from '../store/actions/todos'export const TodoItem = ({ id, text, done }) => {+ const dispatch = useDispatch()const [showEdit, setShowEdit] = useState(false)return (// 编辑时,添加类名:editing<li className={classNames({ completed: done, editing: showEdit })}><div className="view"><input className="toggle" type="checkbox" checked={done} onChange={() => dispatch(toggleTodo(id))} />+ <label onDoubleClick={() => setShowEdit(true)}>{text}</label><button className="destroy" onClick={() => dispatch(delTodo(id))}></button></div><input className="edit" /></li>)}
10.12-修改任务-自动获取焦点
目标:能够在展示编辑状态时让文本框自动获得焦点
案例分析:
文本框获得焦点是一个 DOM 操作,可以通过 useRef hook 来拿到文本框的 DOM 对象
要想让文本框获得焦点,必须要在文本框展示后来操作。而文本框的展示是通过一个状态 showEdit 来控制的,也就是必须在状态更新后来操作。
问题:使用 hooks 如何在某个状态更新后,来执行相应的逻辑?
回答:使用 useEffect hook 来监听 showEdit 状态的改变
实现步骤:
- 在 TodoItem 组件中,使用 useRef hook 创建 ref 对象
- 将 ref 设置为编辑任务文本框的 ref 属性
- 监听 showEdit 状态的改变
- 判断 showEdit 是否为 true,也就是是否为编辑状态
- 如果是,就让文本框获得焦点
落地代码:
TodoItem.js 中:
+ import { useState, useEffect, useRef } from 'react'import classNames from 'classnames'// 导入 useDispatch 分发 actionimport { useDispatch } from 'react-redux'// 导入 action-creatorimport { delTodo, toggleTodo } from '../store/actions/todos'export const TodoItem = ({ id, text, done }) => {// 创建 dispatchconst dispatch = useDispatch()// 新增状态控制编辑框的隐藏和展示const [showEdit, setShowEdit] = useState(false)+ // 创建 ref+ const inputRef = useRef(null)+ // 监听+ useEffect(() => {+ if (showEdit) {+ inputRef.current.focus()+ }+ }, [showEdit])return (// 编辑时,添加类名:editing<li className={classNames({ completed: done, editing: showEdit })}>{/* .... */}+ <input className="edit" ref={inputRef} /></li>)}
10.13-修改任务-失焦点隐藏编辑状态
目标:能够实现编辑文本框失去焦点时隐藏编辑状态
实现步骤:
- 为编辑文本框绑定失焦点事件
- 在失焦点事件中,将 showEdit 状态设置为 false
落地代码:
TodoItem.js 中:
// ...export const TodoItem = ({ id, text, done }) => {// ....const onBlur = () => {setShowEdit(false)}return (// 编辑时,添加类名:editing<li className={classNames({ completed: done, editing: showEdit })}>{/* .... */}<input className="edit" ref={inputRef} onBlur={onBlur} /></li>)}
10.14-修改任务-编辑文本框展示任务名称
目标:能够在编辑时的文本框中展示任务名称
实现步骤:
- 添加状态用来控制文本框的值
- 状态的默认值为:props.text
- 为编辑文本框添加 change 事件来修改对应状态的值
落地代码:
TodoItem.js 中:
export const TodoItem = ({ id, text, done }) => {// ....+ // 保存当前编辑项的任务名称+ const [todoName, setTodoName] = useState(text)return (// 编辑时,添加类名:editing<li className={classNames({ completed: done, editing: showEdit })}>{/* .... */}<inputclassName="edit"ref={inputRef}onBlur={onBlur}+ value={todoName}+ onChange={e => setTodoName(e.target.value)}/></li>)}
10.15-任务修改-编辑功能完成
目标:能够实现敲回车时保存任务名称
实现步骤:
- 为编辑文本框绑定 keyDown 事件
- 在 keyDown 事件中判断是否按下回车键,如果不是直接 return 不执行任何操作
- 判断编辑时任务名称是否为空,如果是直接 return 不执行任何操作
- 分发修改任务名称的 action,并将 showEdit 设置为 false 来隐藏编辑状态
- 在 actionTypes/todos.js 文件中,创建并导出修改任务名称的 action type
- 在 actions/todos.js 文件中,创建修改任务名称任务的 action
- 在 reducers/todos.js 中,根据 action 类型修改任务名称
- 同时处理失焦点时保存任务名称
落地代码:
TodoItem.js 中:
// ...export const TodoItem = ({ id, text, done }) => {// ...// 失去焦点时const onBlur = () => {if (todoName.trim() === '') returndispatch(updateTodo(id, todoName))setShowEdit(false)}// 编辑完回车const onUpdateTodo = e => {if (e.keyCode !== 13) returnif (todoName.trim() === '') returndispatch(updateTodo(id, todoName))setShowEdit(false)}return (// 编辑时,添加类名:editing<li className={classNames({ completed: done, editing: showEdit })}>{/* .... */}<inputclassName="edit"ref={inputRef}onBlur={onBlur}value={todoName}onChange={e => setTodoName(e.target.value)}onKeyDown={onUpdateTodo}/></li>)}
actionTypes/todos.js 中:
// 修改任务名称export const UPDATE_TODO = 'todos/updateTodo'
actions/todos.js 中:
// 更新任务export const updateTodo = (id, text) => ({type: types.UPDATE_TODO,payload: {id,text}})
reducers/todos.js 中:
// 修改任务名称case types.UPDATE_TODO:return state.map(item => {if (item.id === action.payload.id) {return {...item,text: action.payload.text}}return item})
10.16-切换状态-准备 filter 状态
目标:能够展示不同状态的任务列表
功能分析:
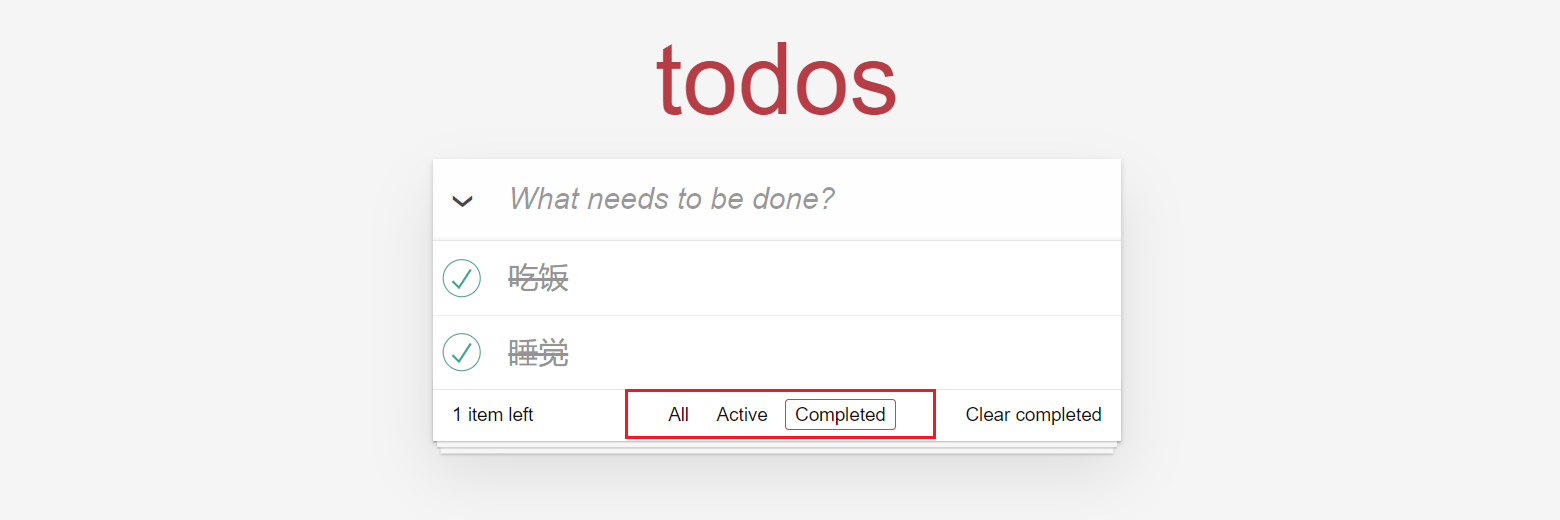
任务列表的展示有 3 种情况:1 展示所有任务 2 展示已完成任务 3 展示未完成任务
操作方式:点击底部 All、Active、Completed 按钮时,展示对应状态的任务列表,因为切换展示不同状态时,页面中的内容会发生改变,而我们知道:只有状态更新后,页面才会改变(重新渲染)
问题:能不能直接修改 redux 中存储的任务列表状态?比如,点击 Active 时,将任务列表数据修改为只包含未完成的任务列表数据
回答:不能,因为这样操作后,再想展示已完成任务列表数据就无法展示了(因为数据中已经没有已完成的数据了)
因为不能直接修改任务列表状态,所以,就必须要添加一个新的状态,来实现展示不同状态的任务列表
所以,在 Redux 中添加一个新的状态:filter 表示当前要展示什么状态的任务列表
filter 的值可以是:'all' | 'active' | 'completed'
实现步骤:
- 创建 reducers/filter.js 文件,用来处理展示不同状态的任务列表
- 为 filter reducer 指定默认值为:’all’ 表示默认展示所有任务列表数据
- 将 filter reducer 合并到根 redcuer
- 在 TodoFooter 组件中获取到 filter 状态
- 根据 filter 状态来控制底部三个按钮的选中
落地代码:
reducers/filter.js 中:
const filter = (state = 'all', action) => {return state}export default filter
reducers/index.js 中:
import { combineReducers } from 'redux'// 导入 reducerimport todos from './todos'import filter from './filter'// 合并 reducerconst rootReducer = combineReducers({todos,filter})export default rootReducer
TodoFooter.js 中:
import { useSelector, useDispatch } from 'react-redux'import { clearDone } from '../store/actions/todos'+ import classNames from 'classnames'export const TodoFooter = () => {// 获取到未完成任务数量const leftCount = useSelector(state => state.todos.filter(item => !item.done).length)+ // 获取筛选的状态+ const filter = useSelector(state => state.filter)// 创建 dispatchconst dispatch = useDispatch()return (<footer className="footer"><span className="todo-count"><strong>{leftCount}</strong> item left</span><ul className="filters"><li>+ <a className={classNames({ selected: filter === 'all' })} href="#/">All</a></li><li>+ <a className={classNames({ selected: filter === 'active' })} href="#/">Active</a></li><li>+ <a className={classNames({ selected: filter === 'completed' })} href="#/">Completed</a></li></ul><button className="clear-completed" onClick={() => dispatch(clearDone())}>Clear completed</button></footer>)}
10.17-切换状态-切换filter状态
目标:能够在点击底部按钮时切换filter的高亮状态
实现步骤:
- 在 TodoFooter 组件中,给 3 个按钮绑定点击事件
- 在点击事件分发切换 filter 状态的 action,并把自己当前的状态值传递给 action
- 创建 actionTypes/filter.js 文件,创建切换filter状态的 action type 并导出
- 创建 actions/filter.js 文件,创建切换filter状态的 action 并导出
- 在 filter 的 reducer 中,处理切换 filter 状态的 action
落地代码:
TodoFooter.js 中:
import { changeFilter } from '../store/actions/filter'export const TodoFooter = () => {return (// ...<ul className="filters"><li><aonClick={() => dispatch(changeFilter('all'))}href="#/">All</a></li><li><aonClick={() => dispatch(changeFilter('active'))}href="#/">Active</a></li><li><aonClick={() => dispatch(changeFilter('completed'))}href="#/">Completed</a></li></ul>)}
actionTypes/filter.js 中:
// 切换 filter 状态export const CHANGE_FILTER = 'filter/changeFilter'
actions/filter.js 中:
import * as types from '../actionTypes/filter'export const changeFilter = filter => ({type: types.CHANGE_FILTER,payload: filter})
reducers/filter.js 中:
import * as types from '../actionTypes/filter'const filter = (state = 'all', action) => {switch (action.type) {case types.CHANGE_FILTER:return action.payloaddefault:return state}}export default filter
10.18-切换状态-筛选状态
目标:能够从任务列表数据中筛选出对应状态的数据
实现步骤:
- 在 TodoMain 组件中,根据 filter 状态来筛选数据
落地代码:
// 获取状态// const list = useSelector(state => state.todos)const list = useSelector(state => {// 根据任务状态,筛选出对应的任务列表数据if (state.filter === 'active') {return state.todos.filter(item => !item.done)} else if (state.filter === 'completed') {return state.todos.filter(item => item.done)} else {return state.todos}})

若有收获,就点个赞吧
0 人点赞
