简介
- node http接口
- 实现即时通信
- 网络爬虫
1. 实现 Http 接口
- 实现一个简单的 http 请求
- http 请求有跨域
- 预检请求 options,设置响应头
- credentail 请求,携带 cookie 信息
实现简单 http
``javascript
// index.html
// 使用 axios 请求 /api/
const res = await axios.get("/api/user")
document.writeln(
Response: ${JSON.stringify(res.data)}`)
// index.js const http = require(“http”); const fs = require(“fs”); http.createServer((req, res) => { const { method, url } = req; if (method == “GET” && url == “/api/user”) { res.setHeader(“Content-Type”, “application/json”); res.end(JSON.stringify({ name: “qiji”, age: 25 })); } }).listen(3000);
<a name="lGeNX"></a>#### http 跨域将上面的代码更改一下,这里面让页面和服务地址使用不同的地址(页面:localhost:3000,服务:localhost:4000),产生跨域。```javascript// index.html(async () => {axios.defaults.baseURL = 'http://localhost:4000'const res = await axios.get("/api/user");document.writeln(`Response : ${JSON.stringify(res.data)}`)})()//新增一个 proxy.js,启动一个 express 作为服务端地址const express = require('express')const app = express()// __dirname 代码所在的目录app.use(express.static(__dirname + '/'))app.listen(3000)// index.js// 端口更改为 4000.listen(4000);
结果如图:
跨域的解决方法
- JSONP:使用 script 标签加载 js 资源不受同源策略限制(现在没人用了吧……)。
设置 CORS
// 属于符合 w3c 的真正意义解决跨域问题res.setHeader("Access-Control-Allow-Origin", "http://localhost:3000")
代理 ```javascript // index.js / api.js 都不需要设置任何的跨域设置 // api.js .listen(4000)
// index.html
(async () => {
axios.defaults.baseURL = ‘http://localhost:3000‘
const res = await axios.get(“/api/user”)
document.writeln(Response : ${JSON.stringify(res.data)})
})()
// proxy.js // node 中可以使用很多种代理服务器,这里选择一种 const proxy = require(‘http-proxy-middleware’)
app.use(‘/api’, proxy({ target: ‘http://localhost:4000‘, changeOrigin: false }));
<a name="0kLRb"></a>#### 预检请求预检不成功的请求无法正常发出,不论跨域与否。```javascript// index.html// const res = await axios.get("/api/user");const res = await axios.post("/api/user", {headers: {'X-Token': 'luelue'}})// api.js// 设置预检 preflightelse if (method == 'OPTIONS' && url == "/api/user") {res.writeHead(200, {'Access-Control-Allow-Origin': "http://localhost:3000",'Access-Control-Allow-Headers': "X-Token,Content-Type","Access-Control-Allow-Methods": "PUT"})res.end()}
设置 cookie
一般来说,ajax 正常是不写 cookie 的。
// 关键代码res.setHeader("Access-Control-Allow-Credentials", 'true')res.setHeader("Set-Cookie", 'cookie=test')
2. 实现一个即时通信(Socket、Http、Socketio)
即时通信(scoket、http、socketio)代码 demo
socket 实现
《node深入浅出》这本书中的首例,很好的演示了 node 的作用
原理:Net模块提供一个异步API能够创建基于流的TCP服务器,客户端与服务器建立连接后,服务器可以获得一个全双工Socket对象,服务器可以保存Socket对象列表,在接收某客户端消息时,推送给其他客户端。
延伸:TCP/IP 协议,UDP 协议
const net = require('net')const chatServer = net.createServer()const clientList = []// 建立链接后 监听所有访问 9000 的用户,然后,分发他们输入的消息chatServer.on("connection", client => {client.write("Hi/n")clientList.push(client)client.on('data', data => {console.log('receive:', data.toString());clientList.forEach(v => {v.write(data)})})})chatServer.listen(9000)
如果其他用户想链接这个 socket 端口,只需要 telnet localhost 9000。
http 实现
在没有 websocket 的协议时,客户端只能用 http 长轮询的方式获取服务端信息,其实 http 是基于 TCP 协议,如果只是作为通信,携带了大量的无关信息显得冗余,很多时候聊天软件都是基于 UDP 协议,数据量小。
简单来说 http 的方式就是一个一个的请求发过去,返回过来新的数据。
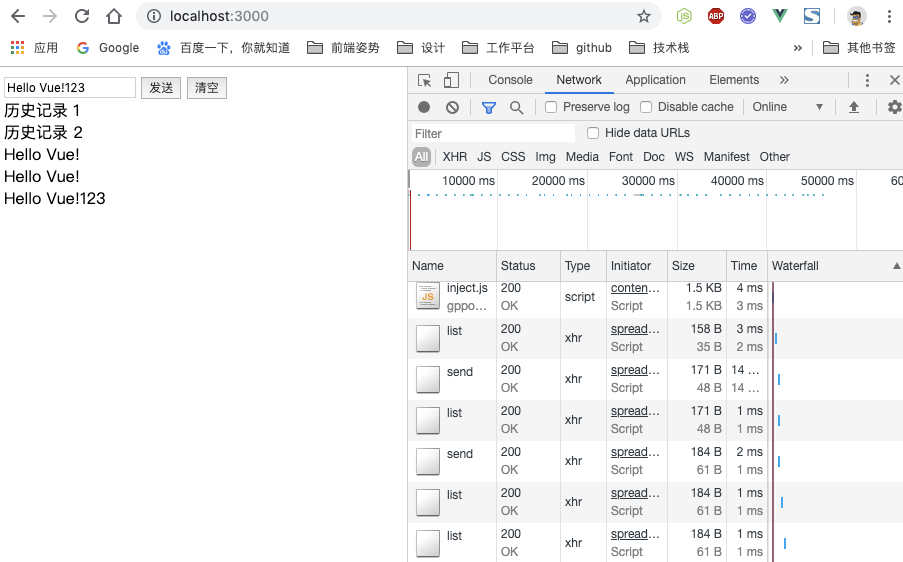
客户端代码:
// vue<div id="app"><input v-model="message" /> <button v-on:click="send">发送</button><button v-on:click="clear">清空</button><div v-for="item in list">{{item}}</div></div>
// 设置端口const host = "http://localhost:3000";var app = new Vue({el: "#app",data: {list: [],message: "Hello Vue!"},methods: {// 操作都是一个一个的 requset 请求send: async function() {let res = await axios.post(host + "/send", {message: this.message});this.list = res.data;},clear: async function() {let res = await axios.post(host + "/clear");this.list = res.data;}},mounted: function() {// 因为 http 天然不能给客户端推数据,这也是 http 的不足,所以需要定时获取。setInterval(async () => {const res = await axios.get(host + "/list");this.list = res.data;}, 1000);}});
服务端代码:
const express = require('express')const app = express()const bodyParser = require('body-parser'); // bodyparser 中间件const path = require('path')app.use(bodyParser.json());const list = ['历史记录 1', '历史记录 2']app.get('/', (req, res) => {// 绝对路径,使用 path 将相对路径转换为绝对路径res.sendFile(path.resolve('./index.html'))})app.get('/list', (req, res) => {res.end(JSON.stringify(list))})app.post('/send', (req, res) => {list.push(req.body.message)res.end(JSON.stringify(list))})app.post('/clear', (req, res) => {list.length = 0res.end(JSON.stringify(list))})app.listen(3000);
最后运行结果如下图
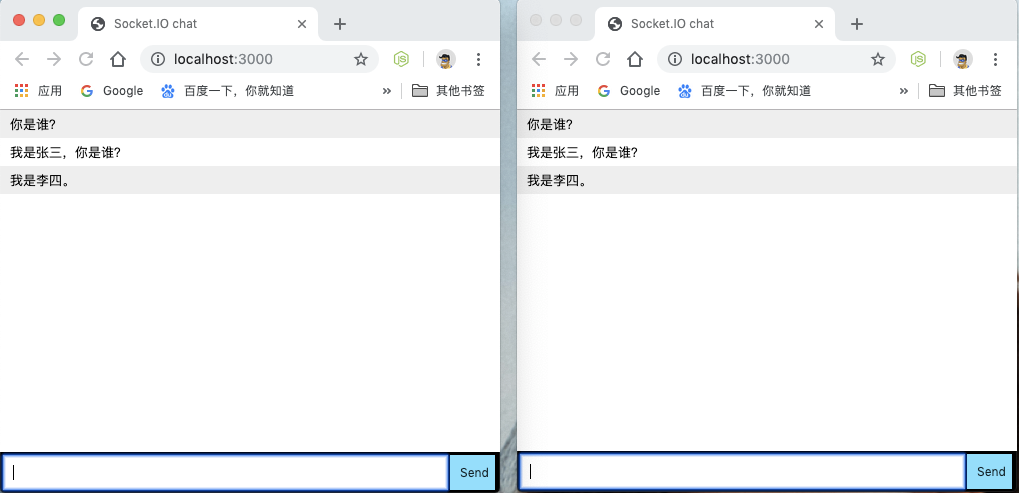
socketio 实现
说一下 socketio 的优势:
- html5 标准
- 支持优雅降级
跟 websocket 相比,减少了兼容问题(其实还是优雅降级,因为 websocket 就是 html5 标准)。
主要的功能都是 socketio 实现的,例子很好写,看一下 socketio 的官网就能弄明白。所以代码就不贴了,地址在上面
3. 实现一个爬虫
很简单的一个爬虫,就是发送 request 请求获取对应网页,然后解析其中的某一个节点的值。这里面获取的是澎湃新闻的文章标题。
// request 库 也是封装的 httpconst originRequest = require("request");// 服务器端的 jqueryconst cheerio = require("cheerio");// 负责转码const iconv = require("iconv-lite");function request(url, callback) {const options = {url: url,encoding: null};originRequest(url, options, callback);}for (let i = 5227428; i < 5227430; i++) {// 随便爬取一个澎湃新闻的例子const url = `https://www.thepaper.cn/newsDetail_forward_${i}`;request(url, function (err, res, body) {// 爬虫网页对应的编码使用 document.chartset 就能获取到const html = iconv.decode(body, "UTF-8");const $ = cheerio.load(html);console.log($(".news_title").text());});}

若有收获,就点个赞吧
0 人点赞
