安装nexus镜像
docker pull sonatype/nexus3
赋予共享目录权限
chmod 777 /vdbdata/nexus-data
启动容器
docker run -p 8081:8081 —name nexus -v {挂载docker共享目录}/nexus-data:/nexus-data snoatype/nexus3
内存不足导致的失败
OpenJDK 64-Bit Server VM warning: INFO: os::commit_memory(0x000000074f550000, 1890254848, 0) failed; error=’Cannot allocate memory’ (errno=12)
定位
free -m
解决
(1)、创建swapfile:
dd if=/dev/zero of=swapfile bs=1024 count=500000
(2)、将swapfile设置为swap空间
mkswap swapfile
(3)、启用交换空间
swapon swapfile
Nexus上的配置
使用管理员账户登录nexus3: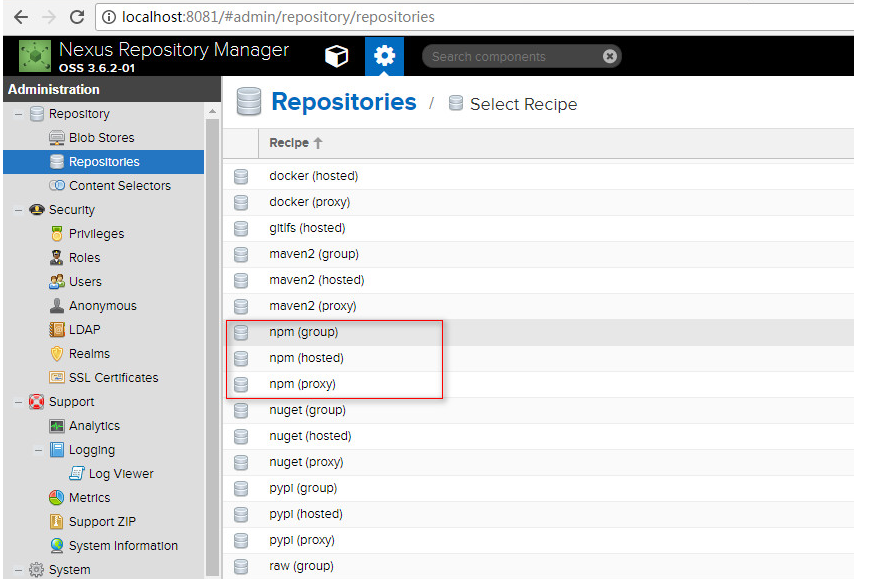
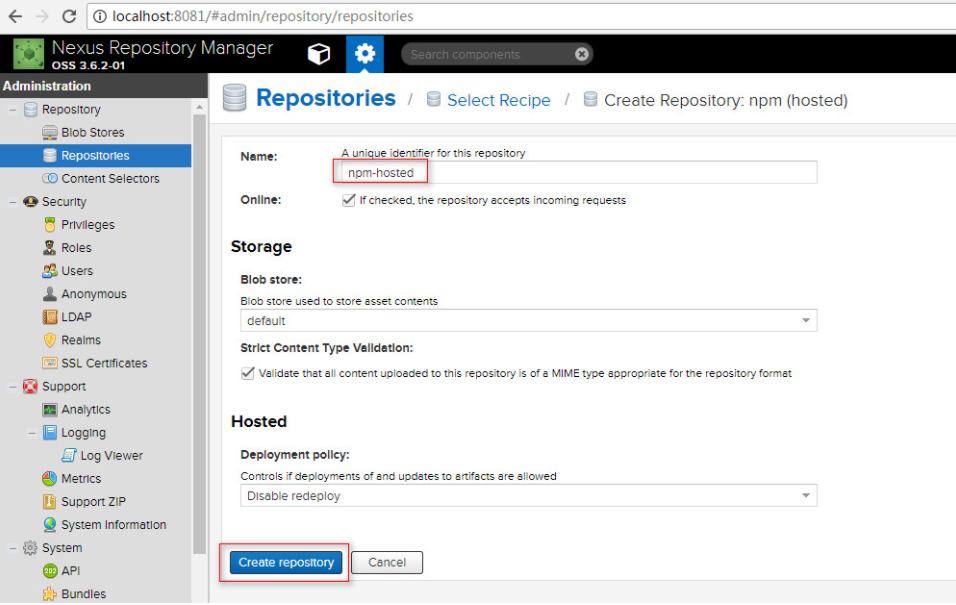
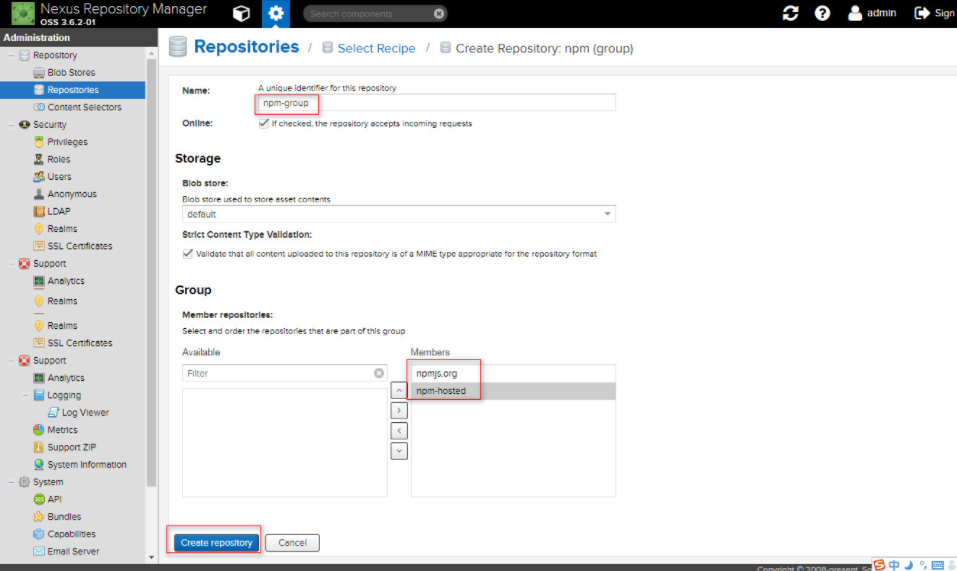
这里创建一个npm组、一个npm代理(代理到https://registry.npmjs.org/)、一个本地npm
- 创建npm代理

- 创建本地npm
- 创建npm组
配置node的仓库地址
1) 首先查看nodejs的默认仓库地址

2) 查看搭建好的npm私服地址
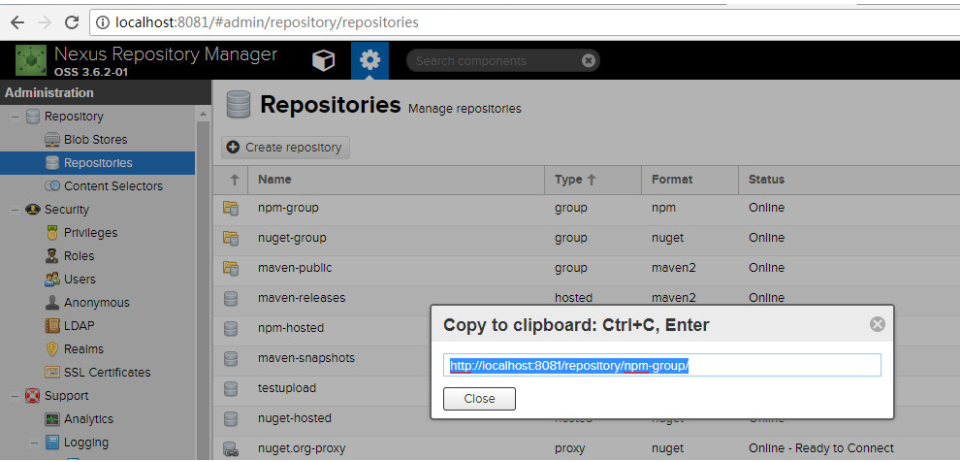
3) 设置npm私服地址:[http://localhost:8081/repository/npm-group/](http://localhost:8081/repository/npm-group/)

4) 查看设置好的地址:
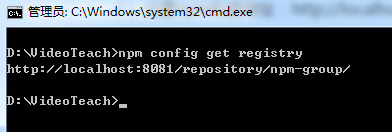
至此搭建完毕。
测试效果:
查看刚搭建的私服里的内容 为空: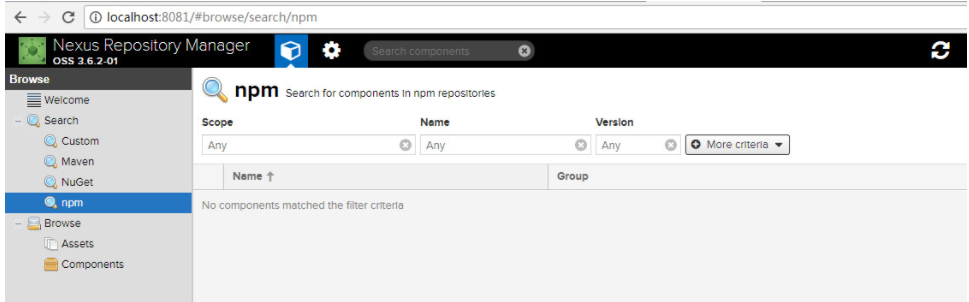
现在安装express: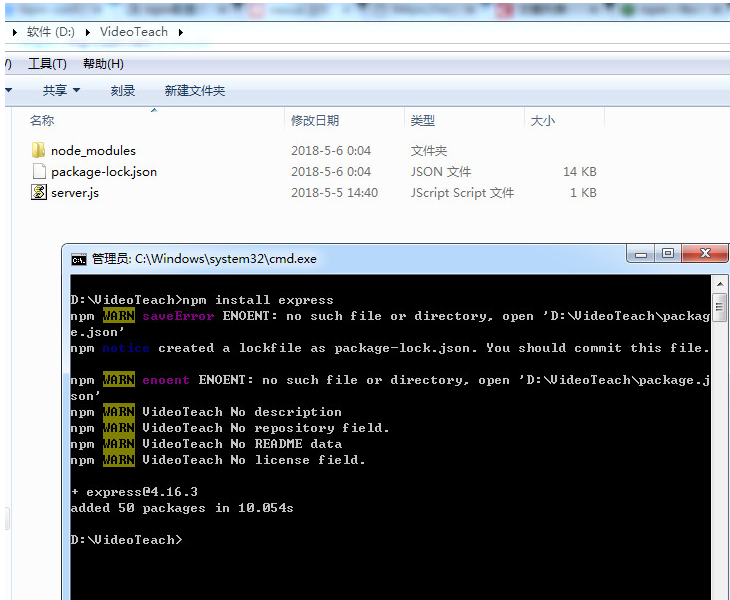
再查看npm私服内容:
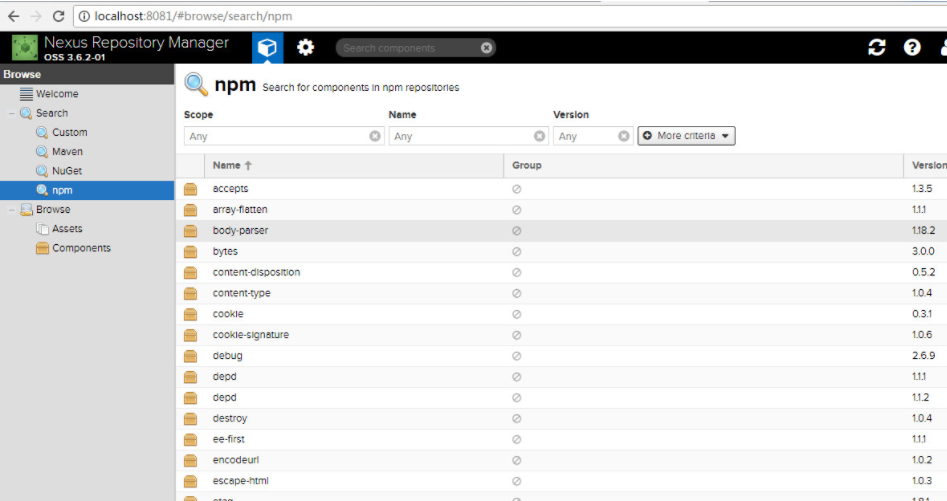
可以看到私服中已缓存了请求过的包,下次再访问时就可以直接从npm私服中取了。
配置权限
一定不能忘,不然在adduser和publish会一直报错401:Unable to authenticate, need: BASIC realm=“Sonatype Nexus Repository Manager”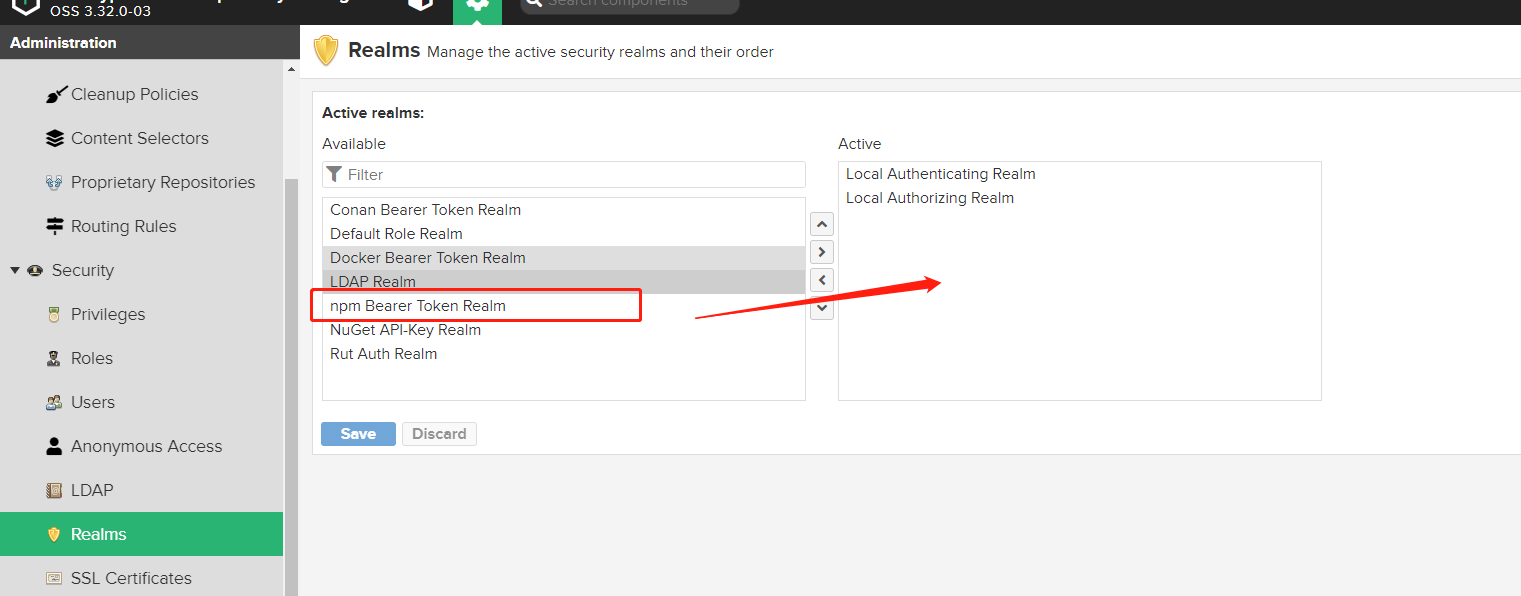
设置package.json中的发布源地址
“publishConfig”: { “registry”: “http://119.45.0.48:8081/repository/npm-jason/“ },
本地配置
本地除了设置
npm config set registry http://119.45.0.48:8081/repository/npm-jason-group/
还要执行
npm adduser -registry http://119.45.0.48:8081/repository/npm-jason/
否则同样会报 Unable to authenticate, need: BASIC realm=“Sonatype Nexus Repository Manager”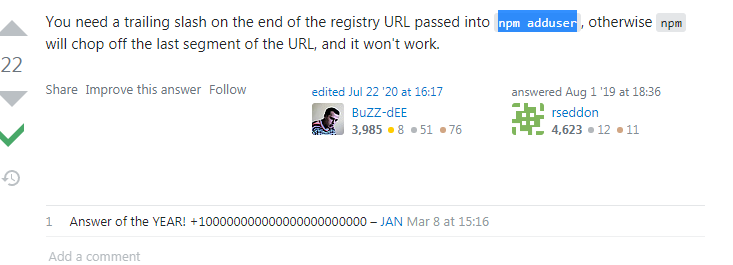
[
](https://blog.csdn.net/u010476739/article/details/80210893)

若有收获,就点个赞吧
0 人点赞


