第零步,在pom.xml中新增加generator插件,如图: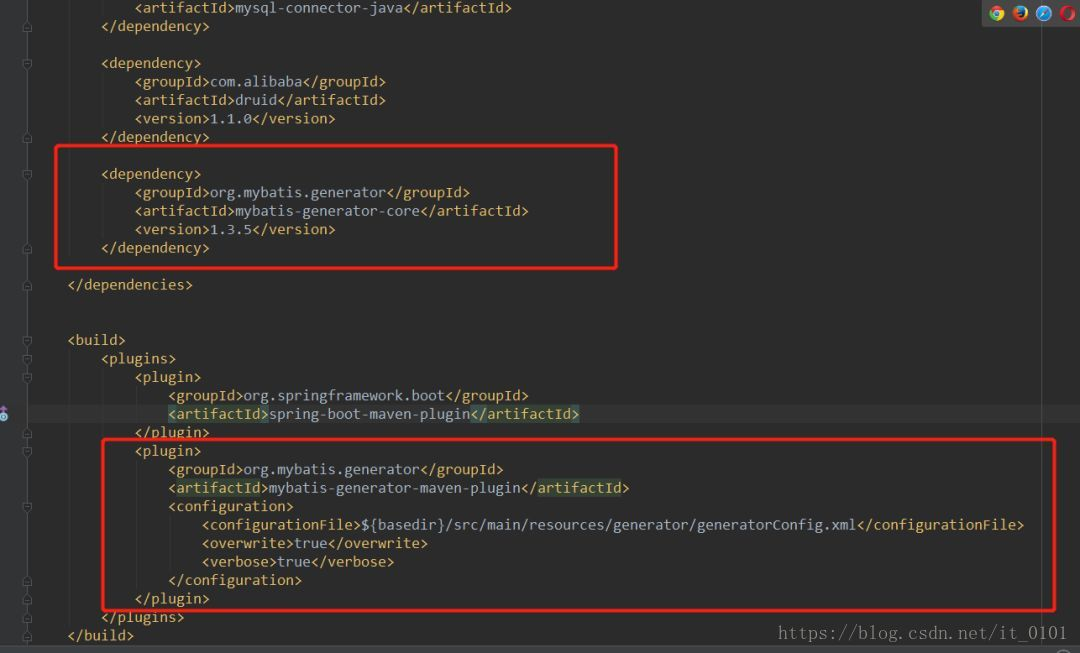
配置代码贴出来:UTF-8UTF-81.8
<dependencies><dependency><groupId>org.springframework.boot</groupId><artifactId>spring-boot-starter-web</artifactId></dependency><dependency><groupId>org.mybatis.spring.boot</groupId><artifactId>mybatis-spring-boot-starter</artifactId><version>1.3.2</version></dependency><dependency><groupId>org.springframework.boot</groupId><artifactId>spring-boot-starter-test</artifactId><scope>test</scope></dependency><dependency><groupId>mysql</groupId><artifactId>mysql-connector-java</artifactId></dependency><dependency><groupId>com.alibaba</groupId><artifactId>druid</artifactId><version>1.1.0</version></dependency><dependency><groupId>org.mybatis.generator</groupId><artifactId>mybatis-generator-core</artifactId><version>1.3.5</version></dependency></dependencies><build><plugins><plugin><groupId>org.springframework.boot</groupId><artifactId>spring-boot-maven-plugin</artifactId></plugin><plugin><groupId>org.mybatis.generator</groupId><artifactId>mybatis-generator-maven-plugin</artifactId><configuration><configurationFile>${basedir}/src/main/resources/generator/generatorConfig.xml</configurationFile><overwrite>true</overwrite><verbose>true</verbose></configuration></plugin></plugins></build>
第一步,编辑generator文件:
<?xml version="1.0" encoding="UTF-8"?><!DOCTYPE generatorConfigurationPUBLIC "-//mybatis.org//DTD MyBatis Generator Configuration 1.0//EN""http://mybatis.org/dtd/mybatis-generator-config_1_0.dtd"><generatorConfiguration><!-- 数据库驱动:换成你本地的驱动包位置--><classPathEntry location="E:\mysql-connector-java-5.1.46\mysql-connector-java-5.1.46.jar"/><context id="DB2Tables" targetRuntime="MyBatis3"><commentGenerator><property name="suppressDate" value="true"/><!-- 是否去除自动生成的注释 true:是 : false:否 --><property name="suppressAllComments" value="true"/></commentGenerator><!--数据库链接URL,用户名、密码 --><jdbcConnection driverClass="com.mysql.jdbc.Driver" connectionURL="jdbc:mysql://localhost:3306/springboot?useSSL=false" userId="root" password="1011"></jdbcConnection><javaTypeResolver><property name="forceBigDecimals" value="false"/></javaTypeResolver><!-- 生成模型的包名和位置--><javaModelGenerator targetPackage="com.javazhiyin.entity" targetProject="src/main/java"><property name="enableSubPackages" value="true"/><property name="trimStrings" value="true"/></javaModelGenerator><!-- 生成映射文件的包名和位置--><sqlMapGenerator targetPackage="resources.mapper" targetProject="src/main"><property name="enableSubPackages" value="true"/></sqlMapGenerator><!-- 生成DAO的包名和位置--><javaClientGenerator type="XMLMAPPER" targetPackage="com.javazhiyin.dao" targetProject="src/main/java"><property name="enableSubPackages" value="true"/></javaClientGenerator><!-- 要生成的表 tableName是数据库中的表名或视图名 domainObjectName是实体类名--><table tableName="user_t" domainObjectName="User" enableCountByExample="false" enableUpdateByExample="false" enableDeleteByExample="false" enableSelectByExample="false" selectByExampleQueryId="false"></table></context></generatorConfiguration>
此时的项目结构如图所示: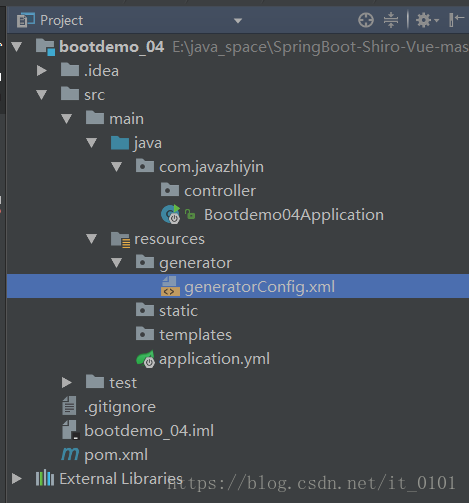
第二步,运行generator生成代码:
run-Edit Configurations-点击绿色的加号,选择maven: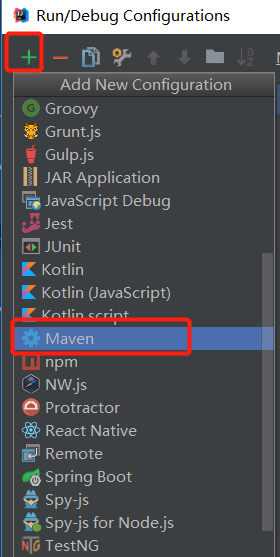
填写name及运行命令mybatis-generator:generate -e: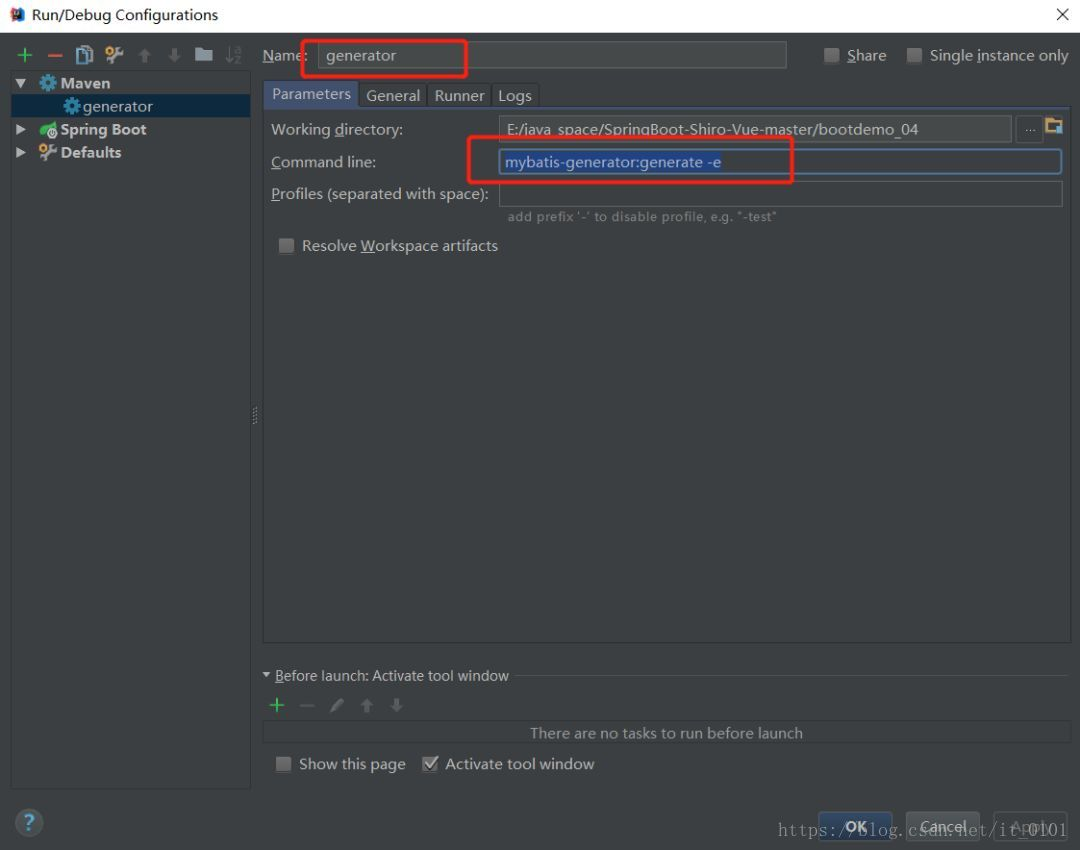
第三步,运行generator ,生成代码:
运行结束之后,如果成功,我们可以看到按照预想已经生成了entity、dao、及Mapper映射文件。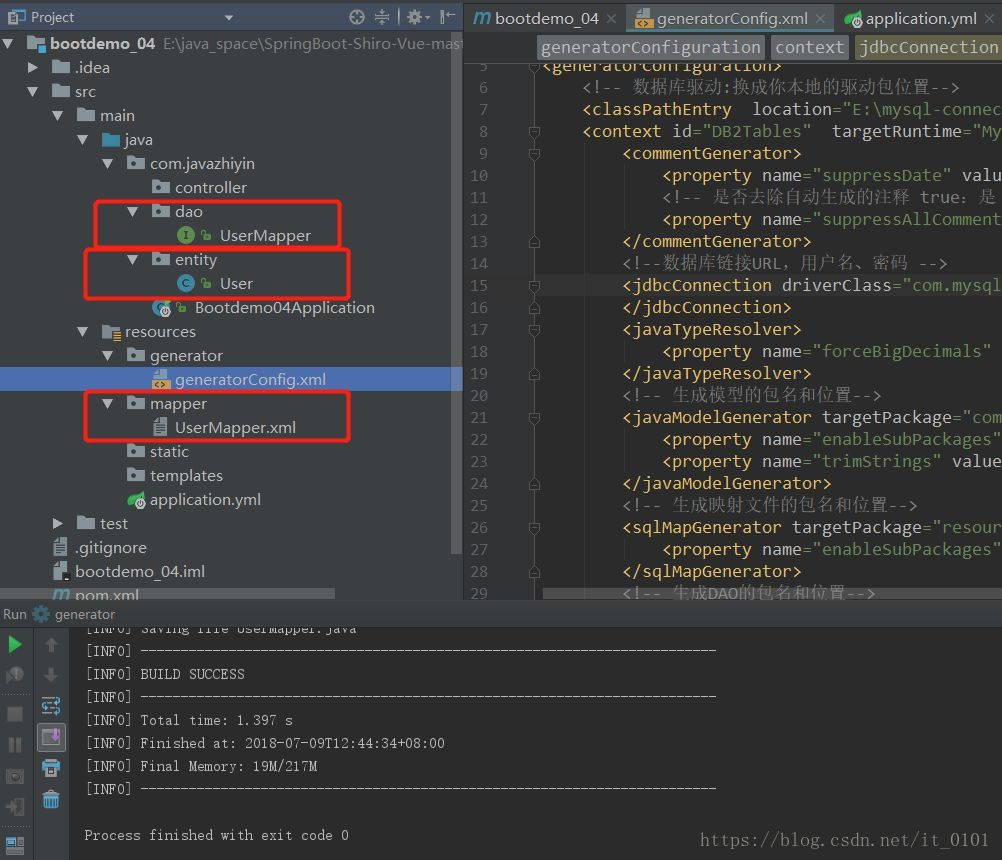
第四步,编写controller,实现我们所需的功能:
package com.javazhiyin.controller;import com.javazhiyin.dao.UserMapper;import com.javazhiyin.entity.User;import org.springframework.web.bind.annotation.*;import javax.annotation.Resource;/**Created by 57783 on 2018/7/6.*/@RestControllerpublic class UserController {@Resourceprivate UserMapper userMapper;@GetMapping("/showUser/{id}")public User getUser(@PathVariable("id") Integer id){User user = this.userMapper.selectByPrimaryKey(id);return user;}@PostMapping(value = "/addUser")public void addUser(@RequestParam("username") String username,@RequestParam("password") String password,@RequestParam("age") Integer age){User user = new User();user.setUserName(username);user.setPassword(password);user.setAge(age);userMapper.insert(user);}@PutMapping(value = "updUser/{id}")public void updUser(@PathVariable("id") Integer id,@RequestParam("username") String username,@RequestParam("password") String password,@RequestParam("age") Integer age){User user = new User();user.setId(id);user.setUserName(username);user.setPassword(password);user.setAge(age);userMapper.updateByPrimaryKey(user);}@DeleteMapping(value = "delUser/{id}")public void delUser(@PathVariable("id") Integer id){userMapper.deleteByPrimaryKey(id);}}
最后,我们修改Bootdemo04Application启动类,添加@MapperScan注解,使其可以扫描DAO层接口:
package com.javazhiyin;import org.mybatis.spring.annotation.MapperScan;import org.springframework.boot.SpringApplication;import org.springframework.boot.autoconfigure.SpringBootApplication;@SpringBootApplication@MapperScan("com.javazhiyin.dao")public class Bootdemo04Application {public static void main(String[] args) {SpringApplication.run(Bootdemo04Application.class, args);}}
只有这四个增删改查可能不会感觉多方便,如果有大量的表,省去我们编写基本的DAO、Entity及Mapper映射,回非常的nice.

若有收获,就点个赞吧
0 人点赞
