- 1.服务器环境(所有节点)
- 2.安装 Docker 软件(所有节点)
- 3.安装 kubeadm (所有节点)
- 4.集群操作(全部节点)
- 5.部署 K8s Master(主节点)
- 6.网络插件(主节点)
- 当然也可以用 先下载,后运行的方式,但是由于网络问题,大概率会下载异常,所以不推荐在线方式
- https://raw.githubusercontent.com/coreos/flannel/master/Documentation/kube-flannel.yml">wget https://raw.githubusercontent.com/coreos/flannel/master/Documentation/kube-flannel.yml
- https://raw.githubusercontent.com/coreos/flannel/master/Documentation/kube-flannel.yml">kubectl apply -f https://raw.githubusercontent.com/coreos/flannel/master/Documentation/kube-flannel.yml
[集群环境的搭建](https://www.yuque.com/fairy-era/yg511q/hg3u04)
集群类型
- Kubernetes集群大致分为两类:一主多从和多主多从。
- 一主多从:一个Master节点和多台Node节点,搭建简单,但是有单机故障风险,适合用于测试环境。
- 多主多从:多台Master和多台Node节点,搭建麻烦,安全性高,适合用于生产环境

为了测试方便,本次搭建的是一主多从类型的集群。
1.服务器环境(所有节点)
- ip信息 | 角色 | IP地址 | 组件 | | —- | —- | —- | | k8s-master01 | 192.168.13.128 | docker,kubectl,kubeadm,kubelet | | k8s-node01 | 192.168.13.129 | docker,kubectl,kubeadm,kubelet | | k8s-node02 | 192.168.13.130 | docker,kubectl,kubeadm,kubelet |
- 系统初始化
设置系统主机名以及 Host 文件的相互解析(所有节点)
cat <<EOF>> /etc/hosts192.168.13.128 k8s-master01192.168.13.129 k8s-node01192.168.13.130 k8s-node02EOF
安装依赖文件(所有节点)
yum install -y conntrack ntpdate ntp ipvsadm ipset jq iptables curl sysstat libseccomp wget vim net-tools git
设置防火墙为 Iptables 并设置空规则(所有节点)
systemctl stop firewalld && systemctl disable firewalldyum -y install iptables-services && systemctl start iptables && systemctl enable iptables && iptables -F && service iptables save
关闭 SELINUX (所有节点)
swapoff -a && sed -i '/ swap / s/^\(.*\)$/#\1/g' /etc/fstabsetenforce 0 && sed -i 's/^SELINUX=.*/SELINUX=disabled/' /etc/selinux/config
调整内核参数,对于 k8s (所有节点)
modprobe br_netfiltercat <<EOF> kubernetes.confnet.bridge.bridge-nf-call-iptables=1net.bridge.bridge-nf-call-ip6tables=1net.ipv4.ip_forward=1net.ipv4.tcp_tw_recycle=0vm.swappiness=0 # 禁止使用 swap 空间,只有当系统 OOM 时才允许使用它vm.overcommit_memory=1 # 不检查物理内存是否够用vm.panic_on_oom=0 # 开启 OOMfs.inotify.max_user_instances=8192fs.inotify.max_user_watches=1048576fs.file-max=52706963fs.nr_open=52706963net.ipv6.conf.all.disable_ipv6=1net.netfilter.nf_conntrack_max=2310720EOFcp kubernetes.conf /etc/sysctl.d/kubernetes.confsysctl -p /etc/sysctl.d/kubernetes.conf
调整系统时区(所有节点)
# 设置系统时区为 中国/上海
timedatectl set-timezone Asia/Shanghai
# 将当前的 UTC 时间写入硬件时钟
timedatectl set-local-rtc 0
# 重启依赖于系统时间的服务
systemctl restart rsyslog
systemctl restart crond
设置 reyslogd 和 system jornald (所有节点)
# 持久化保存日志的目录
mkdir /var/log/journal
mkdir /etc/systemd/journald.conf.d
cat > /etc/systemd/journald.conf.d/99-prophet.conf <<EOF
[Journal]
# 持久化保存到磁盘
Storage=persistent

# 压缩历史日志
Compress=yes

SyncIntervalSec=5m
RateLimitInterval=30s
RateLimitBurst=1000

# 最大占用空间 10G
SystemMaxUse=10G

# 单日志文件最大 200M
SystemMaxFileSize=200M

# 日志保存时间 2 周
MaxRetentionSec=2week

# 不将日志转发到 syslog
ForwardToSyslog=no
EOF

systemctl restart systemd-journald
kube-proxy 开启 ipvs 的前置条件(所有节点)
cat <<EOF> /etc/sysconfig/modules/ipvs.modules
#!/bin/bash
modprobe -- ip_vs
modprobe -- ip_vs_rr
modprobe -- ip_vs_wrr
modprobe -- ip_vs_sh
modprobe -- nf_conntrack_ipv4
EOF

chmod 755 /etc/sysconfig/modules/ipvs.modules && bash /etc/sysconfig/modules/ipvs.modules && lsmod | grep -e ip_vs -e nf_conntrack_ipv4
2.安装 Docker 软件(所有节点)
yum install -y yum-utils device-mapper-persistent-data lvm2

yum-config-manager --add-repo http://mirrors.aliyun.com/docker-ce/linux/centos/docker-ce.repo

yum install -y docker-ce

## 创建 /etc/docker 目录
mkdir /etc/docker

cat > /etc/docker/daemon.json <<EOF
{
"exec-opts": ["native.cgroupdriver=systemd"],
"log-driver": "json-file",
"log-opts": {
    "max-size": "100m"
 },
 "registry-mirrors": ["https://x4lyyl7d.mirror.aliyuncs.com"]
}
EOF
mkdir -p /etc/systemd/system/docker.service.d
# 重启docker服务
systemctl daemon-reload && systemctl restart docker && systemctl enable docker
3.安装 kubeadm (所有节点)
cat <<EOF > /etc/yum.repos.d/kubernetes.repo
[kubernetes]
name=Kubernetes
baseurl=http://mirrors.aliyun.com/kubernetes/yum/repos/kubernetes-el7-x86_64
enabled=1
gpgcheck=0
repo_gpgcheck=0
gpgkey=http://mirrors.aliyun.com/kubernetes/yum/doc/yum-key.gpg
http://mirrors.aliyun.com/kubernetes/yum/doc/rpm-package-key.gpg
EOF

    yum install -y kubelet kubeadm kubectl && systemctl enable kubelet
为了实现Docker使用的cgroup drvier和kubelet使用的cgroup drver一致,建议修改”/etc/sysconfig/kubelet”文件的内容(全部节点)
# 方法一: 直接删除原有文件 /etc/sysconfig/kubelet,重新创建文件,并追加内容(推荐)
rm -f  /etc/sysconfig/kubelet
cat <<EOF > /etc/sysconfig/kubelet
KUBELET_EXTRA_ARGS="--cgroup-driver=systemd"
KUBE_PROXY_MODE="ipvs"
EOF

# 方法二:修改替换(但是原文件可能只有KUBELET_EXTRA_ARGS=,所以此方法一般只能替换 KUBELET_EXTRA_ARGS,不能新增KUBE_PROXY_MODE)
sed -i "s/.*KUBELET_EXTRA_ARGS.*/KUBELET_EXTRA_ARGS=\""--cgroup-driver=systemd"\"/" /etc/sysconfig/kubelet
sed -i "s/.*KUBE_PROXY_MODE.*/KUBE_PROXY_MODE=\""ipvs"\"/" /etc/sysconfig/kubelet
设置为开机自启动即可,由于没有生成配置文件,集群初始化后自动启动
systemctl enable kubelet
4.集群操作(全部节点)
2.2.7.1 集群初始化
也可通过 kubeadm config images list 查看下最新 kubectl版本对应的相关组件
[root@k8s-master01 ~]# kubeadm config images list
k8s.gcr.io/kube-apiserver:v1.23.1
k8s.gcr.io/kube-controller-manager:v1.23.1
k8s.gcr.io/kube-scheduler:v1.23.1
k8s.gcr.io/kube-proxy:v1.23.1
k8s.gcr.io/pause:3.6
k8s.gcr.io/etcd:3.5.1-0
k8s.gcr.io/coredns/coredns:v1.8.6
默认情况下组件的下载是由外网官网中下载,下载时间较长,所以需要通过国内镜像,比如阿里
如果遇到超时报错
docker: Error response from daemon: Get "https://registry-1.docker.io/v2/": net/http: request canceled while waiting for connection (Client.Timeout exceeded while awaiting headers).
请根据 网络代理 -> docker 代理 中教程解决
限定 k8s 相关组件版本(全部执行)
# 统一版本由上 kubeadm config limages list 可得
IMAGES=(
kube-apiserver:v1.23.1
kube-controller-manager:v1.23.1
kube-scheduler:v1.23.1
kube-proxy:v1.23.1
pause:3.6
etcd:3.5.1-0
coredns:1.8.6
)

# 先从阿里拉镜像,再重新打标签,并删除原本镜像
for iname in ${IMAGES[@]} ;do
        docker pull registry.aliyuncs.com/google_containers/$iname
        docker tag registry.aliyuncs.com/google_containers/$iname k8s.gcr.io/$iname
        docker rmi registry.aliyuncs.com/google_containers/$iname
done
可通过 docker images 查看组件下载情况
[root@k8s-node01 ~]# docker images
REPOSITORY                           TAG       IMAGE ID       CREATED        SIZE
k8s.gcr.io/kube-apiserver            v1.23.1   b6d7abedde39   6 days ago     135MB
k8s.gcr.io/kube-proxy                v1.23.1   b46c42588d51   6 days ago     112MB
k8s.gcr.io/kube-scheduler            v1.23.1   71d575efe628   6 days ago     53.5MB
k8s.gcr.io/kube-controller-manager   v1.23.1   f51846a4fd28   6 days ago     125MB
k8s.gcr.io/coredns                   1.8.6     a4ca41631cc7   2 months ago   46.8MB
k8s.gcr.io/pause                     3.6       6270bb605e12   3 months ago   683kB
至此,多个节点中的所有相同部分都已结束,此时需要重启 reboot 全部 节点,使 k8s 相关配置生效。
reboot
5.部署 K8s Master(主节点)
2.7.1. 初始化主节点
# 配置下载镜像

#在主节点初始化
# apiserver-advertise-address 后跟的是主节点的ip
# kubernetes-version 后跟着的是 需要的 k8s 版本,具体版本可由 kubeadmin config limages list 可得

kubeadm init \
--apiserver-advertise-address=192.168.13.128 \
--image-repository registry.aliyuncs.com/google_containers \
--kubernetes-version=v1.23.1 \
--pod-network-cidr=10.244.0.0/16 \
--service-cidr=10.96.0.0/12


>>>>>>
# 你的 k8s 控制面板成功初始化
Your Kubernetes control-plane has initialized successfully!

# 如果想开始一个集群,则需要执行以下命令,.kube 里面是 kube的配置文件
To start using your cluster, you need to run the following as a regular user:

  # 创建 .kube 文件夹
  mkdir -p $HOME/.kube
  # 将k8s 默认文件夹下的 admin.conf 拷贝到 .kube下,并命令为 config
  sudo cp -i /etc/kubernetes/admin.conf $HOME/.kube/config
  # 给 .kube/config 赋权限
  sudo chown $(id -u):$(id -g) $HOME/.kube/config

# 另外,如果是 root 用可以直接用运行以下命令(非必须)
Alternatively, if you are the root user, you can run:

  export KUBECONFIG=/etc/kubernetes/admin.conf

# 如果现在想在集群中开启一个 pod 网络,则需要运行以下命令 去执行 [podnetwork].yaml 设置网络,不然加入的 pod 状态(status)# 是NotReady
You should now deploy a pod network to the cluster.
Run "kubectl apply -f [podnetwork].yaml" with one of the options listed at:
  https://kubernetes.io/docs/concepts/cluster-administration/addons/

# 如果想让其他节点加入,作为 worker Node ,则可以在对应的 Node 节点中运行以下节点
Then you can join any number of worker nodes by running the following on each as root:

kubeadm join 192.168.13.128:6443 --token j25cmk.ycgp21fxjwp814fv \
        --discovery-token-ca-cert-hash sha256:dbfc4710831926da4666f12301cbeae5fcebbdc7ef3871eb76ad97973346bf64
根据提示消息,在Master节点上使用kubectl工具
mkdir -p $HOME/.kube
sudo cp -i /etc/kubernetes/admin.conf $HOME/.kube/config
sudo chown $(id -u):$(id -g) $HOME/.kube/config
以上操作只需要在 master 执行即可,后续如果想在 Worker Node 执行 诸如 kubectl get nodes 的命令,就需要将 master 节点的/etc/kubernetes/admin.conf 内容复制到 Worker 节点中,不然会提示
The connection to the server localhost:8080 was refused - did you specify the right host or port
PS 默认的token有效期为24小时,当过期之后,该token就不能用了,这时可以使用如下的命令创建token
kubeadm token create --print-join-command
或者生成一个永不过期的 token
kubeadm token create --ttl 0 --print-join-command
以上其中一个操作执行完后,就会生成 kubeadm join xxxxx 的命令,在 子节点 中运行即可加入主节点中
6.网络插件(主节点)
- 根据提示,在Master节点上使用kubectl工具查看节点状态
执行效果(这是已经加入2个子节点的效果,默认是只有个一个 master 节点)
此时 STATUS 是 NotReady 状态,是因为缺少网络环境,需要安装网络插件
可以使用kube-flannel.yml或者calico.yaml因为在编写时多次使用kube-flannel.yml
- 出现问题,本次示例使用
calico.yaml做记录。kubectl get nodes
```shell kubectl apply -f calico.yaml[root@k8s-master01 ~]# kubectl get nodes NAME STATUS ROLES AGE VERSION k8s-master01 NotReady control-plane,master 15h v1.23.1 k8s-node01 NotReady <none> 15h v1.23.1 k8s-node02 NotReady <none> 20m v1.23.1
当然也可以用 先下载,后运行的方式,但是由于网络问题,大概率会下载异常,所以不推荐在线方式
wget https://raw.githubusercontent.com/coreos/flannel/master/Documentation/kube-flannel.yml
kubectl apply -f https://raw.githubusercontent.com/coreos/flannel/master/Documentation/kube-flannel.yml
此时再次查看下节点状态(STATUS 为 Ready 为正常状态)

```shell
[root@k8s-master01 ~]# kubectl get nodes
NAME           STATUS   ROLES                  AGE   VERSION
k8s-master01   Ready    control-plane,master   16h   v1.23.1
k8s-node01     Ready    <none>                 16h   v1.23.1
k8s-node02     Ready    <none>                 57m   v1.23.1
查看集群健康状态:
kubectl get cs
[root@k8s-master01 ~]# kubectl get cs
Warning: v1 ComponentStatus is deprecated in v1.19+
NAME                 STATUS    MESSAGE                         ERROR
scheduler            Healthy   ok
controller-manager   Healthy   ok
etcd-0               Healthy   {"health":"true","reason":""}
7.示例
示例中以部署创建一个 nginx 为例
部署Nginx
kubectl create deployment nginx --image=nginx:1.14-alpine暴露端口
# 将暴露集群中的80 端口,服务后续会自动执行一个对外端口
kubectl expose deployment nginx --port=80 --type=NodePort
查看服务状态
```shell [root@k8s-master01 ~]# kubectl get pods,svc NAME READY STATUS RESTARTS AGE pod/nginx-7cbb8cd5d8-9pp98 1/1 Running 0 29m
NAME TYPE CLUSTER-IP EXTERNAL-IP PORT(S) AGE
service/kubernetes ClusterIP 10.96.0.1
- 测试访问<br />从上一步可知 nginx 服务将内部的 80 端口对外暴露成 30471,通过外部浏览器访问
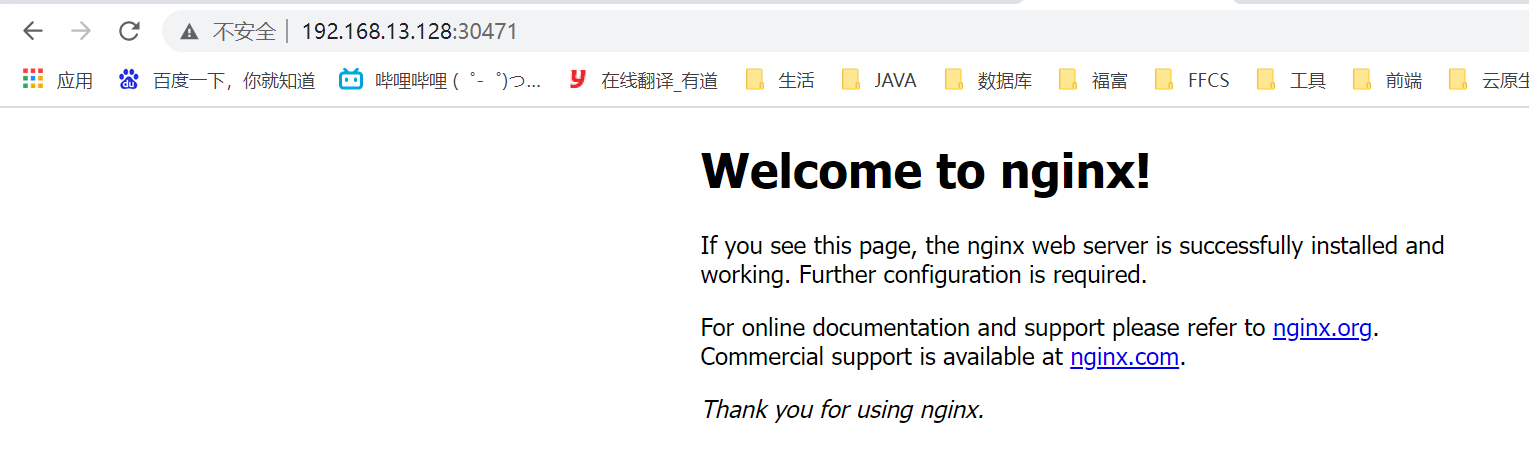
> 访问地址:[http://192.168.13.128:30471/](http://192.168.13.128:30471/)
<a name="24a37517"></a>
# 安装问题
- **timed out waiting for the condition**
```shell
[root@k8s-master01 docker.service.d]# kubeadm init --apiserver-advertise-address=192.168.13.128 --image-repository registry.aliyuncs.com/google_containers --kubernetes-version v1.23.1 --service-cidr=10.96.0.0/12 --pod-network-cidr=10.244.0.0/16
[init] Using Kubernetes version: v1.23.1
[preflight] Running pre-flight checks
[WARNING HTTPProxy]: Connection to "https://192.168.13.128" uses proxy "http://192.168.25.25:6666". If that is not intended, adjust your proxy settings
[WARNING HTTPProxyCIDR]: connection to "10.96.0.0/12" uses proxy "http://192.168.25.25:6666". This may lead to malfunctional cluster setup. Make sure that Pod and Services IP ranges specified correctly as exceptions in proxy configuration
[WARNING HTTPProxyCIDR]: connection to "10.244.0.0/16" uses proxy "http://192.168.25.25:6666". This may lead to malfunctional cluster setup. Make sure that Pod and Services IP ranges specified correctly as exceptions in proxy configuration
[preflight] Pulling images required for setting up a Kubernetes cluster
[preflight] This might take a minute or two, depending on the speed of your internet connection
[preflight] You can also perform this action in beforehand using 'kubeadm config images pull'
[certs] Using certificateDir folder "/etc/kubernetes/pki"
[certs] Generating "ca" certificate and key
[certs] Generating "apiserver" certificate and key
[certs] apiserver serving cert is signed for DNS names [k8s-master01 kubernetes kubernetes.default kubernetes.default.svc kubernetes.default.svc.cluster.local] and IPs [10.96.0.1 192.168.13.128]
[certs] Generating "apiserver-kubelet-client" certificate and key
[certs] Generating "front-proxy-ca" certificate and key
[certs] Generating "front-proxy-client" certificate and key
[certs] Generating "etcd/ca" certificate and key
[certs] Generating "etcd/server" certificate and key
[certs] etcd/server serving cert is signed for DNS names [k8s-master01 localhost] and IPs [192.168.13.128 127.0.0.1 ::1]
[certs] Generating "etcd/peer" certificate and key
[certs] etcd/peer serving cert is signed for DNS names [k8s-master01 localhost] and IPs [192.168.13.128 127.0.0.1 ::1]
[certs] Generating "etcd/healthcheck-client" certificate and key
[certs] Generating "apiserver-etcd-client" certificate and key
[certs] Generating "sa" key and public key
[kubeconfig] Using kubeconfig folder "/etc/kubernetes"
[kubeconfig] Writing "admin.conf" kubeconfig file
[kubeconfig] Writing "kubelet.conf" kubeconfig file
[kubeconfig] Writing "controller-manager.conf" kubeconfig file
[kubeconfig] Writing "scheduler.conf" kubeconfig file
[kubelet-start] Writing kubelet environment file with flags to file "/var/lib/kubelet/kubeadm-flags.env"
[kubelet-start] Writing kubelet configuration to file "/var/lib/kubelet/config.yaml"
[kubelet-start] Starting the kubelet
[control-plane] Using manifest folder "/etc/kubernetes/manifests"
[control-plane] Creating static Pod manifest for "kube-apiserver"
[control-plane] Creating static Pod manifest for "kube-controller-manager"
[control-plane] Creating static Pod manifest for "kube-scheduler"
[etcd] Creating static Pod manifest for local etcd in "/etc/kubernetes/manifests"
[wait-control-plane] Waiting for the kubelet to boot up the control plane as static Pods from directory "/etc/kubernetes/manifests". This can take up to 4m0s
[kubelet-check] Initial timeout of 40s passed.
Unfortunately, an error has occurred:
timed out waiting for the condition
This error is likely caused by:
- The kubelet is not running
- The kubelet is unhealthy due to a misconfiguration of the node in some way (required cgroups disabled)
If you are on a systemd-powered system, you can try to troubleshoot the error with the following commands:
- 'systemctl status kubelet'
- 'journalctl -xeu kubelet'
Additionally, a control plane component may have crashed or exited when started by the container runtime.
To troubleshoot, list all containers using your preferred container runtimes CLI.
Here is one example how you may list all Kubernetes containers running in docker:
- 'docker ps -a | grep kube | grep -v pause'
Once you have found the failing container, you can inspect its logs with:
- 'docker logs CONTAINERID'
error execution phase wait-control-plane: couldn't initialize a Kubernetes cluster
To see the stack trace of this error execute with --v=5 or higher
解决方法:参考链接:[k8s Initial timeout of 40s passed](https://blog.csdn.net/weixin_40161254/article/details/112232302)
k8s重新初始化master节点(初始化master节点报错:Port 6443 is in use)
  上次操作异常,导致 k8s 相关服务端口被占用

  解决方式:[Port 6443 is in use](https://blog.csdn.net/sun_luming/article/details/116497885)
swap 少删除
查看方式
报错提示:
问题原因:k8s 搭建集群需要 删除交换空间 swap
解决方式:参数文档:初始化kubeadm init报curl -sSL http://localhost:10248/healthz‘ failed with error: Get http://localhost[root@localhost ~]# free -m total used free shared buff/cache available Mem: 1819 312 101 1 1404 1338 Swap: 0 0 0 # 如果有 swap 则少删除了 swap[kubelet-check] It seems like the kubelet isn't running or healthy. [kubelet-check] The HTTP call equal to 'curl -sSL http://localhost:10248/healthz' failed with error: Get "http://localhost:10248/healthz": dial tcp 127.0.0.1:10248: connect: connection refused.The connection to the server localhost:8080 was refused
[root@k8s-node02 ~]# kubectl get nodes
The connection to the server localhost:8080 was refused - did you specify the right host or port?
参考链接:[The connection to the server localhost:8080 was refused](https://www.cnblogs.com/wind-zhou/p/12829079.html)

若有收获,就点个赞吧
0 人点赞
