React系列 —- virtualdom diff算法实现分析
React系列
React系列 —- 简单模拟语法(一)
React系列 —- Jsx, 合成事件与Refs(二)
React系列 —- virtualdom diff算法实现分析(三)
React系列 —- 从Mixin到HOC再到HOOKS(四)
React系列 —- createElement, ReactElement与Component部分源码解析(五)
React系列 —- 从使用React了解Css的各种使用方案(六)
React系列 —- 从零构建状态管理及Redux源码解析(七)
React系列 —- 扩展状态管理功能及Redux源码解析(八)
完整代码可查看virtualdom-diff
渲染DOM
经历过PHP模板开发或者JQuery的洗礼的人都知道,它们实现重新渲染采用最简单粗暴的办法就是重新构建DOM替换旧DOM,问题也很明显
- 性能消耗高
- 无法保存状态(聚焦,滚动等)
我们先看看创建一个元素所包含的实例属性有多少个
const div = document.createElement('div');let num = 0;for (let k in div) {num++;}console.log(num); // 241
然后浏览器根据CSS规则查找匹配节点,计算合并样式布局,为了避免重新计算一般浏览器会保存这些数据.但这是整个过程下来依然会耗费大量的内存和 CPU 资源.
Virtual DOM
实际也是操作Dom树进行渲染更新,但是它只是针对修改部分进行局部渲染,将影响降到最低,虽然实现方式各有不同,但是大体步骤如下:
- 用Javascript对象结构描述Dom树结构,然后用它来构建真正的Dom树插入文档
- 当状态发生改变之后,重新构造新的Javascript对象结构和旧的作对比得出差异
- 针对差异之处进行重新构建更新视图
无非就是利用Js做一层映射比较,操作简单并且速度远远高于直接比较Dom树
基础工具函数
无非就是一些类型判断,循环遍历的简化函数
function type(obj) {return Object.prototype.toString.call(obj).replace(/\[object\s|\]/g, "");}function isArray(list) {return type(list) === "Array";}function isObject(obj) {return type(obj) === "Object";}function isString(str) {return type(str) === "String";}function isNotEmptyObj(obj) {return isObject(obj) && JSON.stringify(obj) != "{}";}function objForEach(obj, fn) {isNotEmptyObj(obj) && Object.keys(obj).forEach(fn);}function aryForEach(ary, fn) {ary.length && ary.forEach(fn);}function setAttr(node, key, value) {switch (key) {case "style":node.style.cssText = value;break;case "value":var tagName = node.tagName || "";tagName = tagName.toLowerCase();if (tagName === "input" || tagName === "textarea") {node.value = value;} else {// if it is not a input or textarea, use `setAttribute` to setnode.setAttribute(key, value);}break;default:node.setAttribute(key, value);break;}}function toArray(data) {if (!data) {return [];}const ary = [];aryForEach(data, item => {ary.push(item);});return ary;}export {isArray,isObject,isString,isNotEmptyObj,objForEach,aryForEach,setAttr,toArray};
相关代码可以查看util.js
Javascript对象结构描述
我之前讲JSX的时候举过这么个例子,然后我们就以这个来实现效果吧
<div className="num" index={1}><span>123456</span></div>"use strict";React.createElement("div", {className: "num",index: 1}, React.createElement("span", null, "123456"));
创建一个Element类负责将Javascript对象结构转换为Dom树结构
import {isObject,isString,isArray,isNotEmptyObj,objForEach,aryForEach} from "./util";import { NOKEY } from "./common";class Element {constructor(tagName, props, children) {// 解析参数this.tagName = tagName;// 字段处理,可省略参数this.props = isObject(props) ? props : {};this.children =children ||(!isNotEmptyObj(this.props) &&((isString(props) && [props]) || (isArray(props) && props))) ||[];// 无论void后的表达式是什么,void操作符都会返回undefinedthis.key = props ? props.key : void NOKEY;// 计算节点数let count = 0;aryForEach(this.children, (item, index) => {if (item instanceof Element) {count += item.count;} else {this.children[index] = "" + item;}count++;});this.count = count;}render() {// 根据tagName构建const dom = document.createElement(this.tagName);// 设置propsobjForEach(this.props, propName =>dom.setAttribute(propName, this.props[propName]));// 渲染childrenaryForEach(this.children, child => {const childDom =child instanceof Element? child.render() // 如果子节点也是虚拟DOM,递归构建DOM节点: document.createTextNode(child); // 如果字符串,只构建文本节点dom.appendChild(childDom);});return dom;}}// 改变传参方式,免去手动实例化export default function CreateElement(tagName, props, children) {return new Element( tagName, props, children );}
新建示例,调用方式如下
// 1. 构建虚拟DOMconst tree = createElement("div", { id: "root" }, [createElement("h1", { style: "color: blue" }, ["Tittle1"]),createElement("p", ["Hello, virtual-dom"]),createElement("ul", [createElement("li", { key: 1 }, ["li1"]),createElement("li", { key: 2 }, ["li2"]),createElement("li", { key: 3 }, ["li3"]),createElement("li", { key: 4 }, ["li4"])])]);// 2. 通过虚拟DOM构建真正的DOMconst root = tree.render();document.body.appendChild(root);
运行之后能正常得出结果了,那么第一步骤算是完成了,具体还有更多不同类型标签,对应事件状态先略过.
界面如图
Javascript结构如图
结构原型如下
相关代码可以查看element.js
diff算法
这是整个实现里面最关键的一步,因为这决定了计算的速度和操作Dom的数量
我们创建新的Dom树作对比
// 3. 生成新的虚拟DOMconst newTree = createElement("div", { id: "container" }, [createElement("h1", { style: "color: red" }, ["Title2"]),createElement("h3", ["Hello, virtual-dom"]),createElement("ul", [createElement("li", { key: 3 }, ["li3"]),createElement("li", { key: 1 }, ["li1"]),createElement("li", { key: 2 }, ["li2"]),createElement("li", { key: 5 }, ["li5"])])]);
Javascript结构如图
tree diff
传统 diff 算法的复杂度为 O(n^3),但是一般Dom跨层级的情况是非常少见的。所以React 只针对同层级Dom节点做比较,将 O(n^3) 复杂度的问题转换成 O(n) 复杂度的问题。
比较大的问题就是当节点跨层级移动并不会进行移动而是直接替换整个节点,所以切记这点性能问题
component diff
- 某个组件发生变化,会导致自其从上往下整体替换
- 同一类型组件会进行Virtual DOM进行比较
- React提供了一个
shouldComponentUpdate决定是否更新
尽可能将动态组件往底层节点迁移,有利于提高性能
element diff
元素操作无非就是几种,我们定义几个类型做状态标记
const REPLACE = "replace";const REORDER = "reorder";const PROPS = "props";const TEXT = "text";const NOKEY = "no_key"export {REPLACE,REORDER,PROPS,TEXT,NOKEY}
其中NOKEY就是专门给那些没有定义key的组件做默认,React对同一层级的同组子节点,添加唯一 key 进行区分进行位移而不是直接替换,这点对于整体性能尤为关键
我们首先针对不同类型做些区分处理
import { isString, objForEach, aryForEach, isNotEmptyObj } from "./util";import { REPLACE, REORDER, PROPS, TEXT } from "./common";import listDiff from "list-diff2";/**** @param {旧Dom树} oTree* @param {新Dom树} nTree* 返回差异记录*/function diff(oTree, nTree) {// 节点位置let index = 0;// 差异记录const patches = {};dfsWalk(oTree, nTree, index, patches);return patches;}function dfsWalk(oNode, nNode, index, patches) {const currentPatch = [];// 首次渲染if (nNode === null) return;// 都是字符串形式并且不相同直接替换文字if (isString(oNode) && isString(nNode)) {oNode !== nNode &¤tPatch.push({type: TEXT,content: nNode});// 同种标签并且key相同} else if (oNode.tagName === nNode.tagName && oNode.key === nNode.key) {// 至少一方有值if (isNotEmptyObj(oNode.props) || isNotEmptyObj(nNode.props)) {// 计算props结果const propsPatches = diffProps(oNode, nNode);// 有差异则重新排序propsPatches &¤tPatch.push({type: PROPS,props: propsPatches});}// children对比if (!(!isNotEmptyObj(nNode.props) && nNode.props.hasOwnProperty("ignore"))) {(oNode.children.length || nNode.children.length) &&diffChildren(oNode.children,nNode.children,index,patches,currentPatch);}} else {// 都不符合上面情况就直接替换currentPatch.push({ type: REPLACE, node: nNode });}// 最终对比结果currentPatch.length && (patches[index] = currentPatch);}
新旧节点的props属性比较
/**** @param {旧节点} oNode* @param {新节点} nNode*/function diffProps(oNode, nNode) {let isChange = false;const oProps = oNode.props;const nProps = nNode.props;// 节点属性记录const propsPatched = {};// 替换/新增属性objForEach(oProps, key => {if (nProps[key] !== oProps[key] || !oProps.hasOwnProperty(key)) {!isChange && (isChange = true);propsPatched[key] = nProps[key];}});return !isChange ? null : propsPatched;}
新旧节点的子元素对比
/*** 同级对比* @param {*} oChildren* @param {*} nChildren* @param {*} index* @param {*} patches* @param {*} currentPatch*/function diffChildren(oChildren, nChildren, index, patches, currentPatch) {// 得出相对简化移动路径const diffs = listDiff(oChildren, nChildren, "key");// 保留元素nChildren = diffs.children;// 记录排序位移diffs.moves.length &¤tPatch.push({ type: REORDER, moves: diffs.moves });// 深度遍历let leftNode = null;let currentNodeIndex = index;aryForEach(oChildren, (_item, _index) => {const nChild = nChildren[_index];currentNodeIndex =leftNode && leftNode.count? currentNodeIndex + leftNode.count + 1: currentNodeIndex + 1;_item !== nChild && dfsWalk(_item, nChild, currentNodeIndex, patches);leftNode = _item;});}
深度遍历的原型图如下
其中的listDiff来自于list-diff,能通过关键属性获得最小移动量,moves就是给第三步更新视图做铺垫指示,官方介绍如下
Diff two lists in time O(n). I The algorithm finding the minimal amount of moves is Levenshtein distance which is O(n*m). This algorithm is not the best but is enougth for front-end DOM list manipulation.
This project is mostly influenced by virtual-dom algorithm.
调用对比方式
// 4. 比较两棵虚拟DOM树的不同const patches = diff(tree, newTree);
得出差异如下
相关代码可以查看diff.js
更新视图
进行深度遍历
import {isString,isObject,objForEach,aryForEach,setAttr,toArray} from "./util";import { REPLACE, REORDER, PROPS, TEXT, NOKEY } from "./common";function patch(node, patches) {const walker = { index: 0 };dfsWalk(node, walker, patches);}// 深度遍历更新function dfsWalk(node, walker, patches) {const currentPatches = patches[walker.index];node.childNodes &&aryForEach(node.childNodes, item => {walker.index++;dfsWalk(item, walker, patches);});currentPatches && applyPatches(node, currentPatches);}
针对不同标志做对应处理
// 更新类型function applyPatches(node, currentPatches) {aryForEach(currentPatches, item => {switch (item.type) {case REPLACE:const nNode = isString(item.node)? document.createTextNode(item.node): item.node.render();node.parentNode.replaceChild(nNode, node);break;case REORDER:reorderChildren(node, item.moves);break;case PROPS:setProps(node, item.props);break;case TEXT:if (node.textContent) {// 使用纯文本node.textContent = item.content;} else {// 仅仅对CDATA片段,注释comment,Processing Instruction节点或text节点有效node.nodeValue = item.content;}break;default:throw new Error("Unknown patch type " + item.type);}});}
先说简单的属性替换
// 修改属性function setProps(node, props) {objForEach(props, key => {if (props[key] === void NOKEY) {node.removeAttribute(key);} else {setAttr(node, key, props[key]);}});}
最后就是列表渲染
// 列表排序渲染function reorderChildren(node, moves) {const staticNodeList = toArray(node.childNodes);const maps = {};aryForEach(staticNodeList, node => {// Elementif (node.nodeType === 1) {const key = node.getAttribute("key");key && (maps[key] = node);}});aryForEach(moves, move => {const index = move.index;// 0:删除 1:替换if (move.type === 0) {// 找到对应节点删除staticNodeList[index] === node.childNodes[index] &&node.removeChild(node.childNodes[index]);staticNodeList.splice(index, 1);} else if (move.type === 1) {let insertNode;if (maps[move.item.key]) {// 删除并返回节点insertNode = node.removeChild(maps[move.item.key]);// 获取删除节点位置staticNodeList.splice(Array.prototype.indexOf.call(node.childNodes, maps[move.item.key]), 1);} else {// 创建节点insertNode = isObject(move.item)? move.item.render(): document.createTextNode(move.item);}// 同步staticNodeList信息staticNodeList.splice(index, 0, insertNode);// 操作Domnode.insertBefore(insertNode, node.childNodes[index] || null);}});}export default patch;
当这一步完成以后我们可以直接应用查看效果
// 4. 比较两棵虚拟DOM树的不同const patches = diff(tree, newTree);// 5. 在真正的DOM元素上应用变更patch(root, patches);
结果如图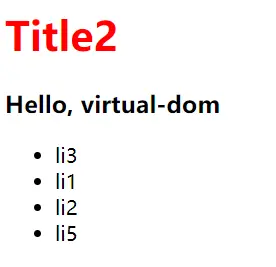
相关代码可以查看patch.js

若有收获,就点个赞吧
0 人点赞
