case 1:一条不带where的update语句导致 误写SQL导致某一列记录变为0/1
update order_info set pay_status = 200 and id=24279840 and user_id=150626006 and order_no=191111919138822884;
排查原因: 同样是等号 要看是赋值运算还是等值运算,赋值运算优先级最低;
具体解析:上面sql中在set后面的第一个等号会被解释为赋值运算,所以sql被改写为:
update order_info_22 set pay_status = (200 and id=24279840 and user_id=150626006 and order_no=191111919138822884);
括号内部是等值运算符,and逻辑运算符又比等值运算符优先级要低,所以括号内sql部分执行逻辑改为:
逐行扫描 判定 id=24279840 、user_id=150626006 、 order_no=191111919138822884 等式是否成立,然后再执行 and与 操作。如果都成立,则 等同于 200 and 1 and 1 and 1 则结果为1;
如果有一项不成立,则整体结果为0。所以sql最终效果 会将 满足条件那行改为1,其他记录全部改为0.
**
case 2:魔幻的c1=’a’=’b’
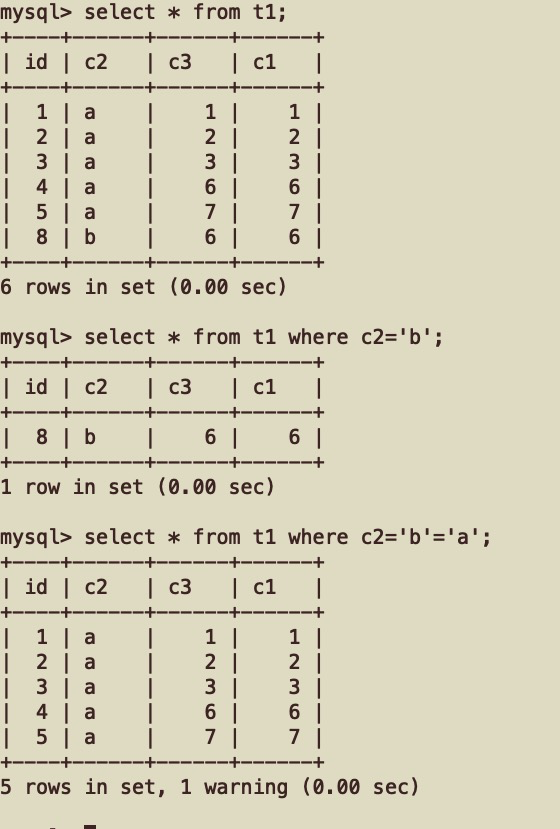
未有一个有说服性的答复。
case3 :单条update引起的数据库死锁
基础信息:
- mysql版本:5.6.23-baidu-tokudb-2.2.4.13-log
- tx_isolation:REPEATABLE-READ
- table_schema:
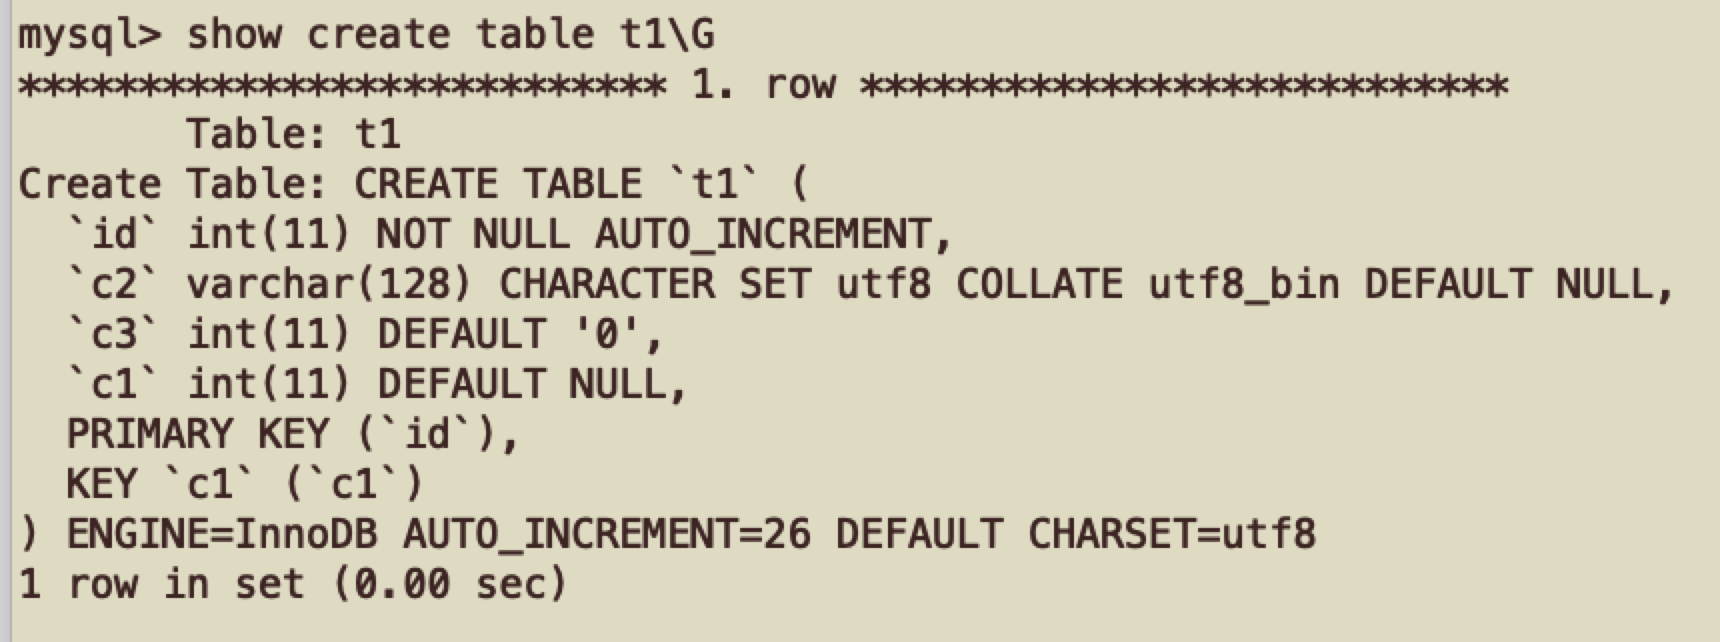
表内数据CREATE TABLE `t2` (`id` int(11) NOT NULL AUTO_INCREMENT,`c1` int(11) DEFAULT NULL,`c2` varchar(128) CHARACTER SET utf8 COLLATE utf8_bin DEFAULT NULL,`c3` int(11) DEFAULT '0',`user_type` varchar(10) DEFAULT NULL,`last_active_time` int(10) unsigned DEFAULT NULL,`server_atime` int(10) unsigned NOT NULL DEFAULT '0',PRIMARY KEY (`id`),KEY `c1` (`c1`,`c3`)) ENGINE=InnoDB AUTO_INCREMENT=23 DEFAULT CHARSET=utf8
mysql> select *from t2;+----+------+------+------+-----------+------------------+--------------+| id | c1 | c2 | c3 | user_type | last_active_time | server_atime |+----+------+------+------+-----------+------------------+--------------+| 1 | 1 | NULL | 10 | NULL | NULL | 0 || 2 | 5 | aa | 50 | NULL | NULL | 0 || 10 | 10 | NULL | 100 | NULL | NULL | 0 |+----+------+------+------+-----------+------------------+--------------+3 rows in set (0.00 sec)
线上死锁场景:
当2个session并发执行如下sql时候,有较高概率出现死锁。
update t2 set c3=’40’ where c1=5 and c3=50;复现测试:
按照上述库表结构、导入数据。准备脚本文件如下: ```python!/bin/python
from multiprocessing import Process import MySQLdb import time
def conndb(): try: dbcon = MySQLdb.connect(host=’127.0.0.1’, port=3306, user=’xxxxxx’, passwd=’xxxxxx’, db=’zhouqi03’) except Exception as e: print ‘conndb eror’,e return dbcon
def write2db(para): dbcon = conndb() dbcur = dbcon.cursor() sql = “update t2 set c3=’40’ where c1=5 and c3=50;” print para, sql try: dbcur.execute(sql) except Exception as e: print ‘db’,e time.sleep(0.1) dbcon.rollback()
p1 = Process(target=write2db, args=(‘1’,)) p2 = Process(target=write2db, args=(‘2’,)) p1.start() p2.start() p1.join() p2.join()
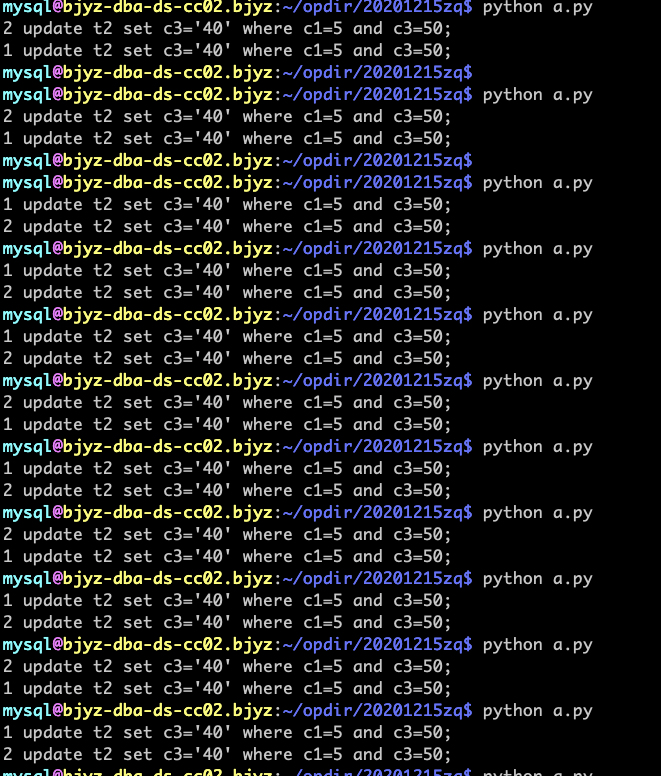
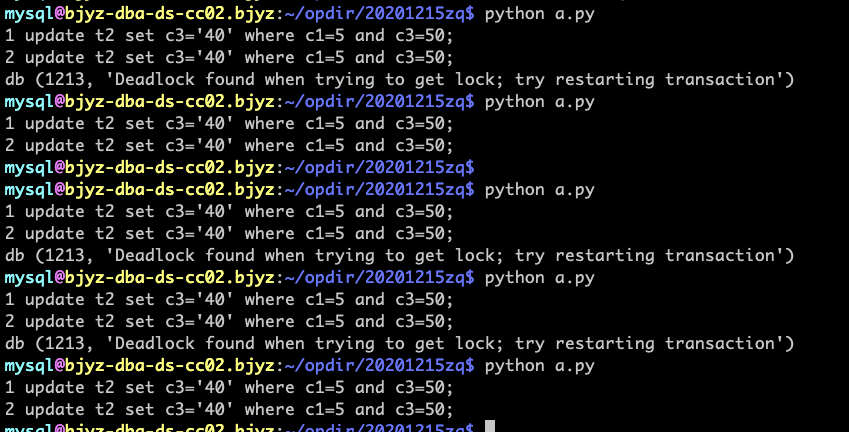<br />可以看到 有较高概率复现。<a name="c348a5fe"></a>### 死锁分析:update t2 set c3='40' where c1=5 and c3=50;<br />因 c1,c3联合索引,且非唯一键。执行上述sql 会在 c1=5,c3=50记录上 Xlock排它锁,因为是非唯一键且是RR模式,会在该条件的前后记录区间内((1,10),(10,100))添加 插入意向锁(insert intention lock)。<br />另外需要注意的是 这里update set条件中,是变更了 c3=40,变更后的记录 c1=5,c3=40;该记录(5,40)的插入,也需要在((1,10),(10,100))区间内 添加插入意向锁。<br />故这条sql申请锁顺序是: 第一步:申请((1,10),(10,100))区间插入意向锁IIL ==> 第二步:申请c1=5,c3=50记录上 Xlock ==> 第三步:申请((1,10),(10,100))区间插入意向锁IIL<br />当并发执行时候,可能出现 某一线程 持有IIL、持有Xlock锁,申请IIL锁;而另一个线程,持有IIL步锁,等待Xlock锁。从而出现死锁。从上面分析可以看出,死锁核心发生在二级索引上,如果能调整二级索引,去掉c3字段,则update set后面的条件,将只会更改聚簇索引,不需要调整二级索引,也就不会引入 第三步再次申请插入意向锁。<br />我们调整表结构为如下后,再次测试:```sqlCreate Table: CREATE TABLE `t2` (`id` int(11) NOT NULL AUTO_INCREMENT,`c1` int(11) DEFAULT NULL,`c2` varchar(128) CHARACTER SET utf8 COLLATE utf8_bin DEFAULT NULL,`c3` int(11) DEFAULT '0',`user_type` varchar(10) DEFAULT NULL,`last_active_time` int(10) unsigned DEFAULT NULL,`server_atime` int(10) unsigned NOT NULL DEFAULT '0',PRIMARY KEY (`id`),KEY `c1` (`c1`)) ENGINE=InnoDB AUTO_INCREMENT=23 DEFAULT CHARSET=utf8mysql> select *from zhouqi03.t2;+----+------+------+------+-----------+------------------+--------------+| id | c1 | c2 | c3 | user_type | last_active_time | server_atime |+----+------+------+------+-----------+------------------+--------------+| 1 | 1 | NULL | 10 | NULL | NULL | 0 || 2 | 5 | aa | 50 | NULL | NULL | 0 || 10 | 10 | NULL | 0 | NULL | NULL | 0 |+----+------+------+------+-----------+------------------+--------------+3 rows in set (0.00 sec)
解决方案:
- 避免update同一行记录;
- 将c3字段从联合索引中去掉;(线上需结合业务场景 取舍)
- 先select查出主键id,然后基于主键id进行update
附 死锁时序图:
基于上述原理分析,我们也可以用死锁时序图方法,人为构造并发sql,详细如下:
这次采用更简单的表结构:
mysql> show create table t3\G*************************** ``1``. row ***************************``Table: t3Create Table: CREATE TABLEt3(```id int(11) NOT NULL AUTO_INCREMENT,<br /> info` text NOT NULL,`<br />` opid``int``(``11``) DEFAULT NULL,``KEYid(id),``KEYopid(opid)) ENGINE=InnoDB AUTO_INCREMENT=``3 DEFAULT CHARSET=utf8mysql> select *from t3;+----+------+-------+` |
id | info | opid | <br />+——+———+———-+<br /> |
`1 ` |
a | `10 ` |
<br /> |
`2 ` |
z | `100 ` |
<br />+——+———+———-+<br />2`rows in set (``0.00 sec) |
|---|---|---|---|---|---|---|---|---|---|---|---|---|
按照如下时序图操作即可复现:
| SessionA | SessionB | SessionC | 解释 | |
|---|---|---|---|---|
| T1 | begin; update t3 set info=’xx’ where opid=100; |
针对 opid索引 在opid=100上添加X lock 在(10,max)区间内添加 插入意向锁 |
||
| T2 | begin; update t3 opid =60 where opid=100; 阻塞中 |
针对 opid索引 在opid=100上添加X lock 在(10,max)区间内添加 插入意向锁 但是被SessionA阻塞 |
||
| T3 | begin; update t3 set opid=60 where opid=100; 阻塞中 |
针对 opid索引 在opid=100上添加X lock 在(10,max)区间内添加 插入意向锁 但是被SessionA阻塞 |
||
| T4 | rollback or commit; | |||
| B和C同时获取 opid (10,max)区间的插入意向锁成功 其中一个获得X lock。另一个阻塞X lock中。假定B获取成功X lock。 则B 需再次申请 opid(10,100)区间的 插入意向锁。 此时: B持有 opid (10,max)插入意向锁 、X lock,申请opid(10, 100)区间插入意向锁 C持有 opid(10, max)插入意向锁,等待B的X lock |
加锁成功后,为了将opid修改为60,需要再次在opid(10,100)区间内加插入意向锁。 |

若有收获,就点个赞吧
0 人点赞
